Localization

Translate all text in your No-Code screens into multiple languages, manually or with AI.

You can localize all text used in your No-Code screens directly in the Builder.

Localization supports manual translation, AI-assisted translation, variables, and live preview, allowing you to create consistent experiences across all languages your app supports.

Once localized, screens automatically display the correct language based on the user’s device locale. If a translation is missing, the default language is used as a fallback.

🚧

Beta Notice:
AI Localization is currently in beta. While it provides fast, high-quality translations for many languages, some results may require manual review β€” especially for right-to-left (RTL) languages or languages with more complex grammatical structures. We recommend checking all AI-generated translations in the Preview Panel before publishing your screen


Opening the Localization Panel

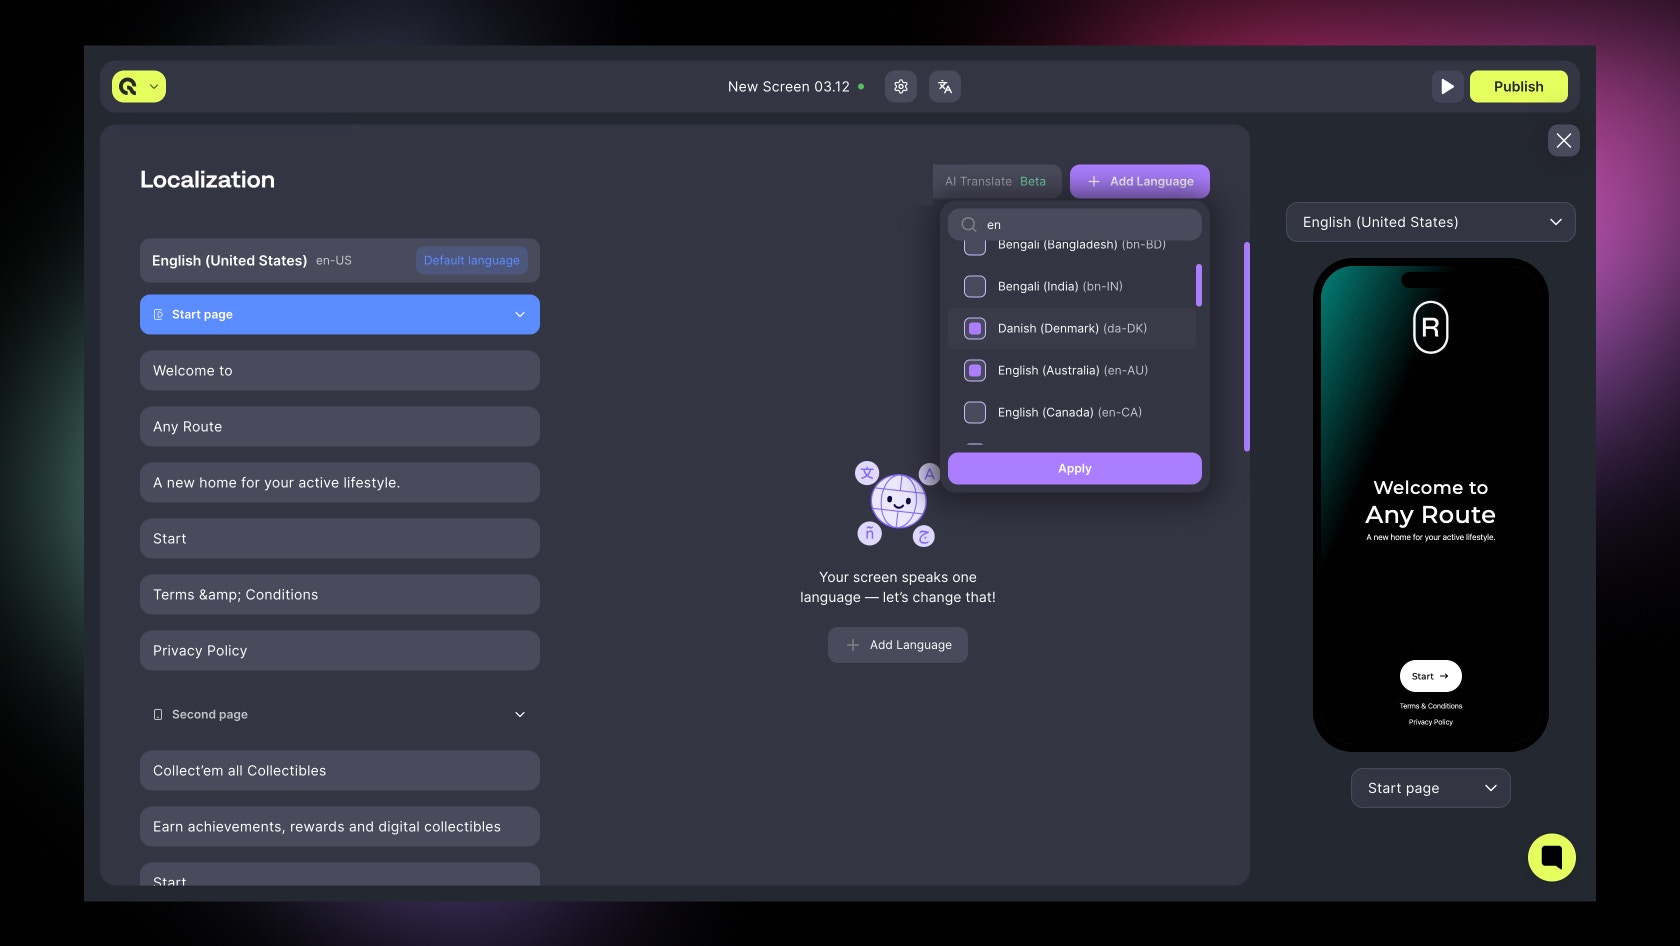
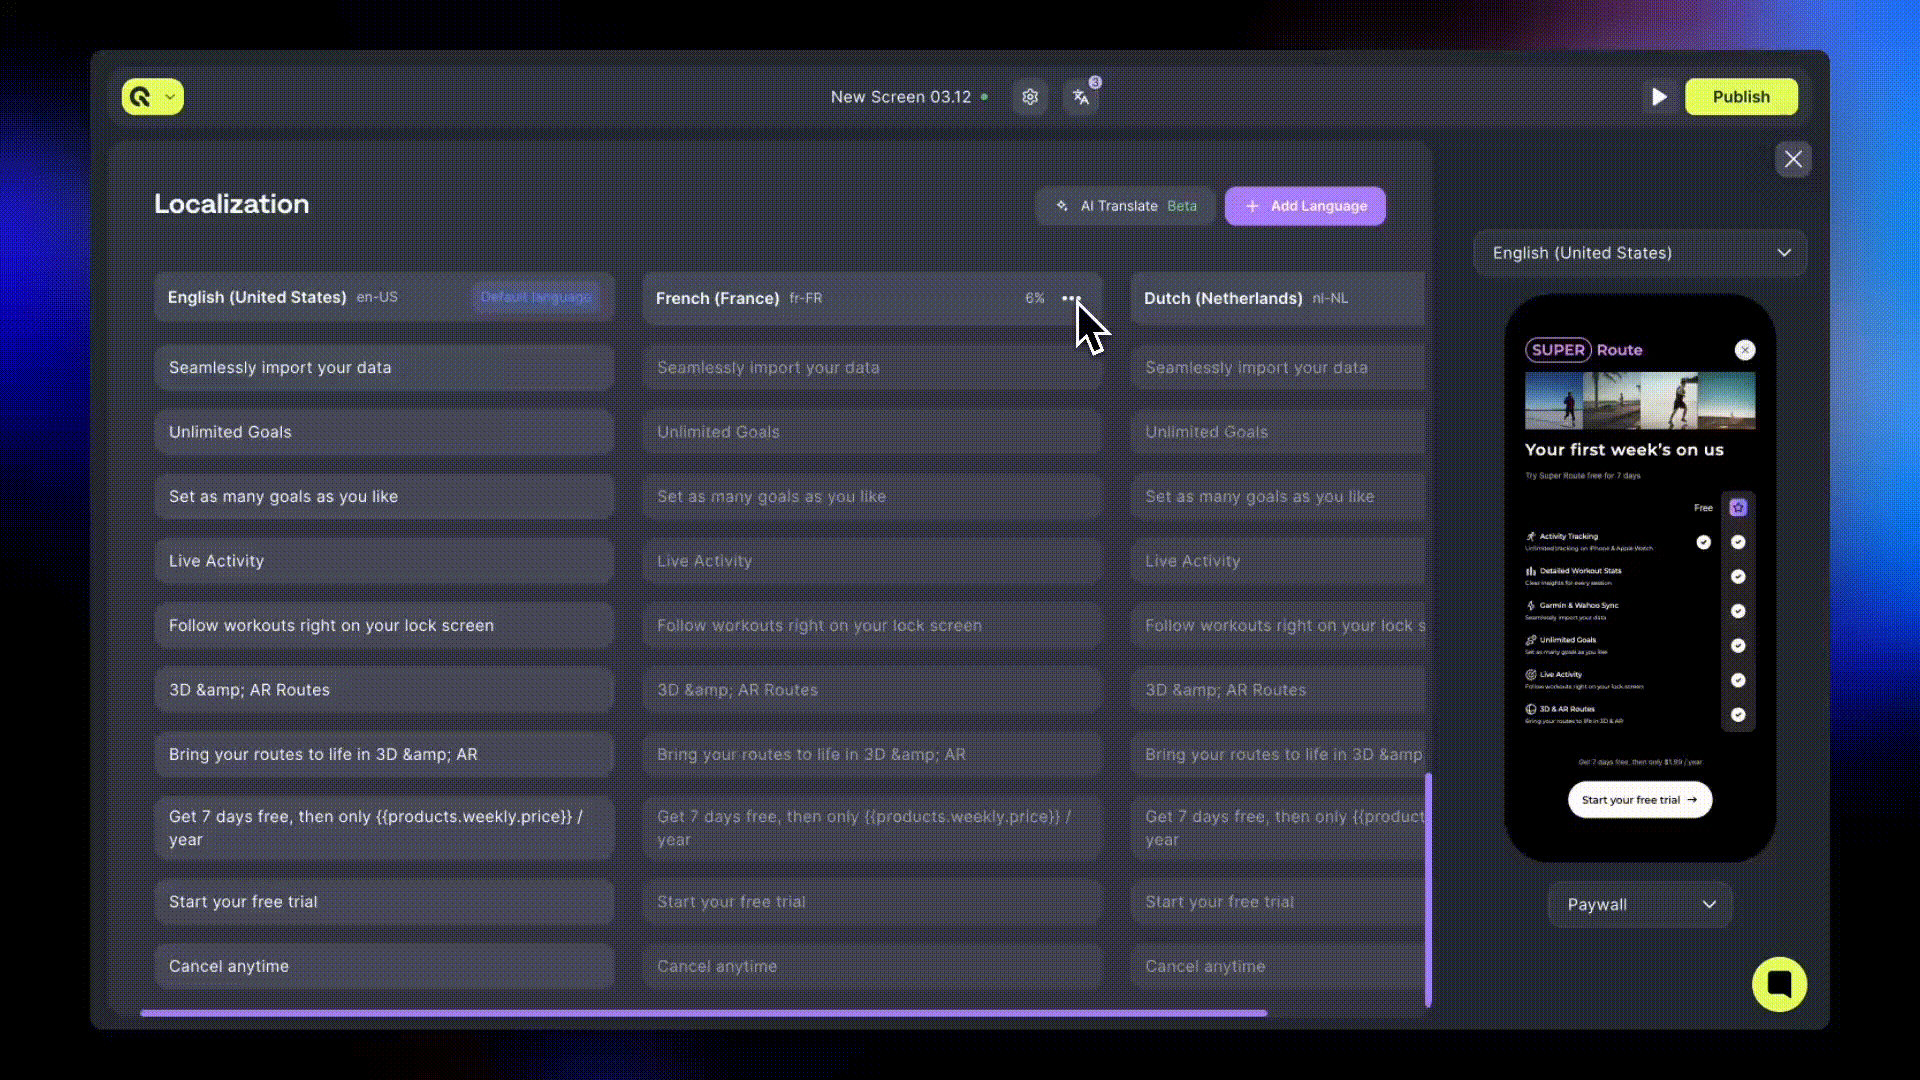
Open localization by selecting the Localization button in the Builder toolbar.

This opens the Localization Panel, where you can view all languages, add new ones, translate content, and preview the results in real time.

Your default language appears first and cannot be removed. This is the fallback language for any untranslated content.


Adding & Removing Languages

To add additional languages:

  1. Open the Localization Panel.
  2. Select Add Language.
  3. Choose one or more languages from the list.
    Languages appear using both their display name and ISO code, for example: French (Belgium) β€” fr-BE.

To remove a language, click the ellipsis menu (β‹―).

❗️

Removing a language deletes all translations associated with that language.


Editing Translations

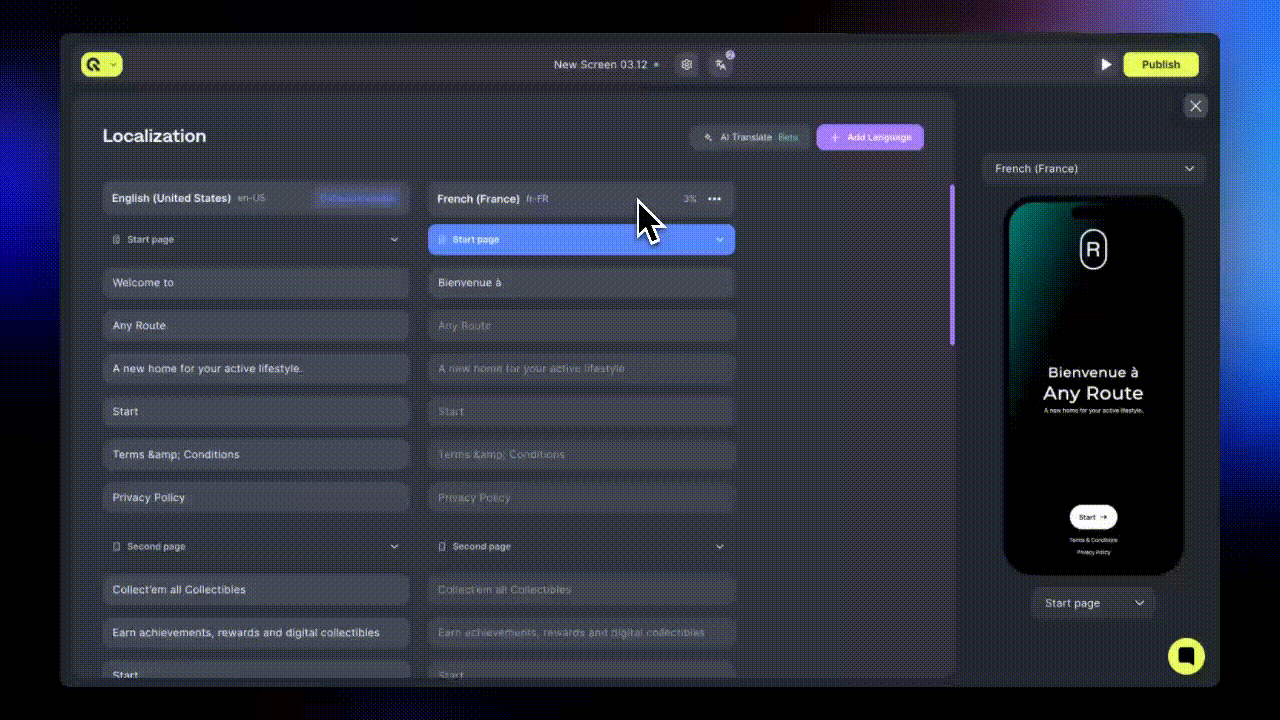
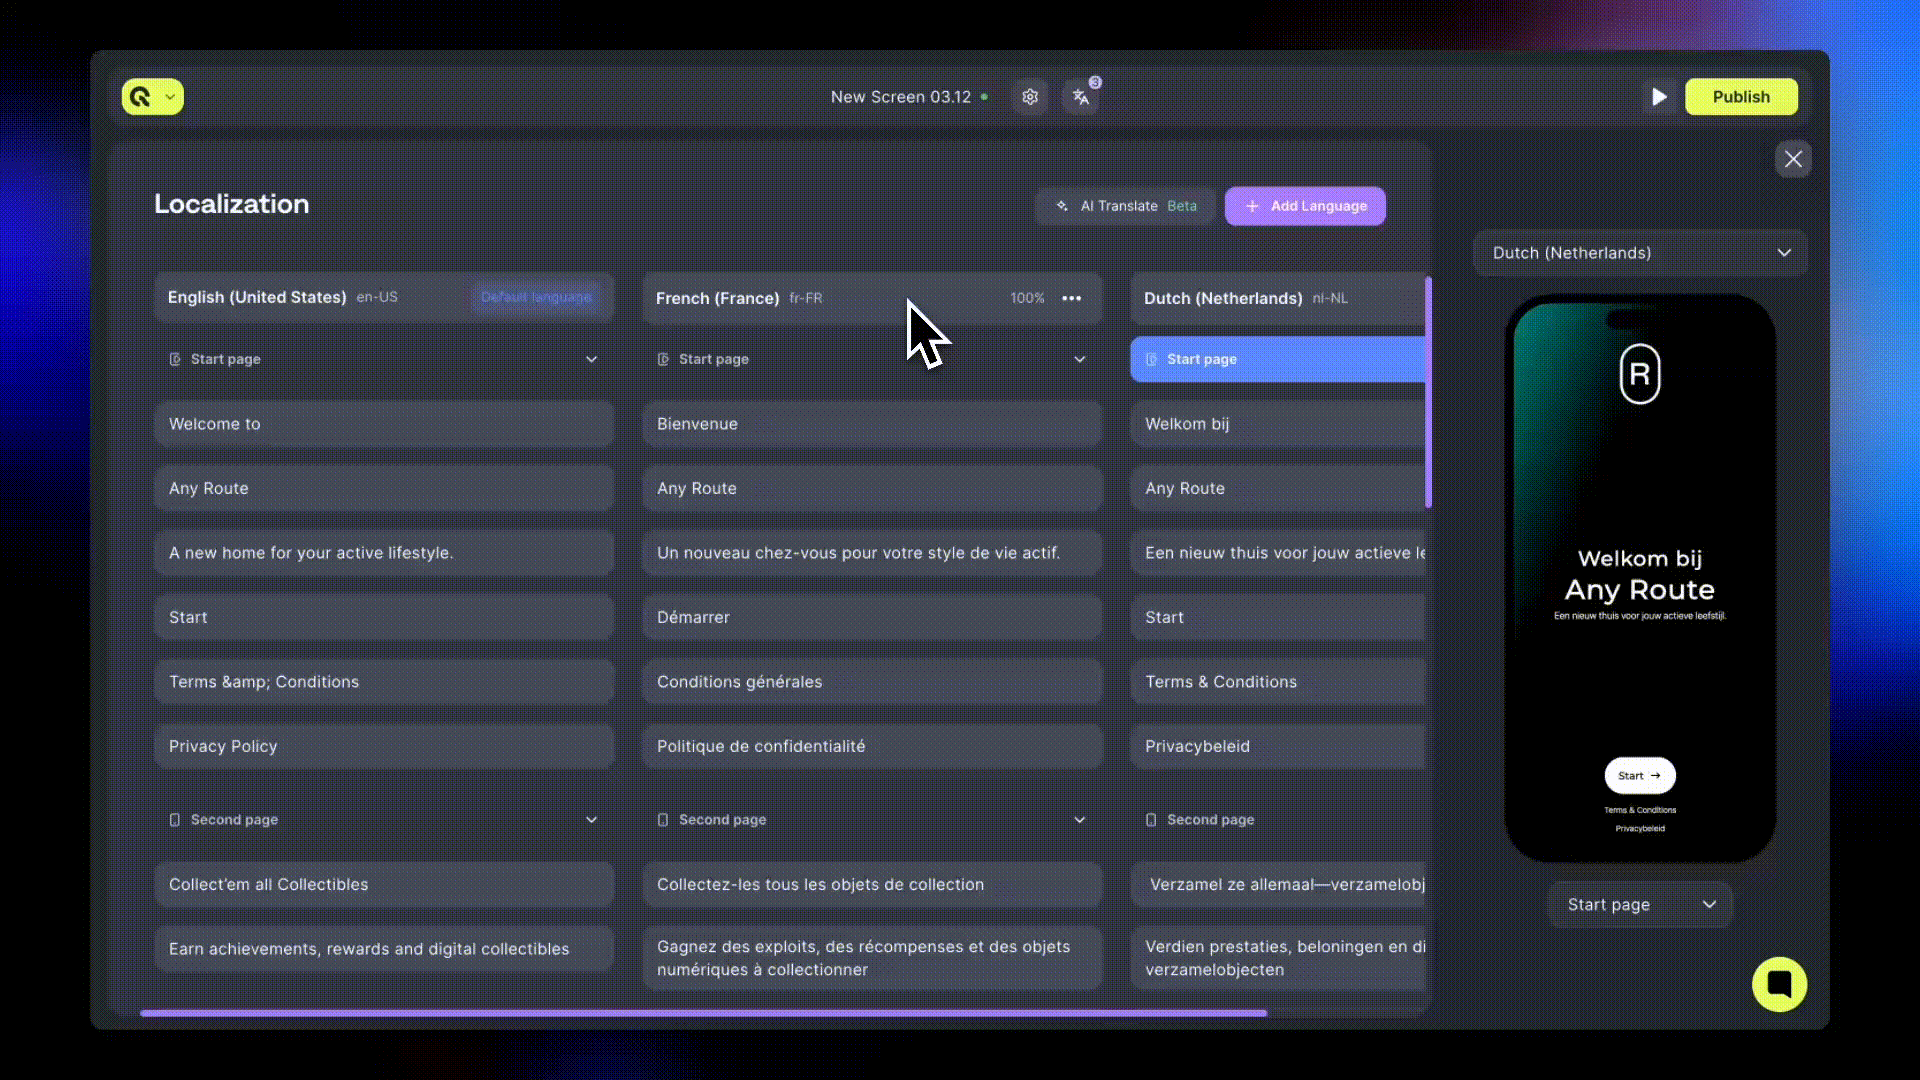
The Localization Panel displays a table of every text element used in your screen.

  • Each row represents a text key, and each column represents a language.
  • Select any cell to enter a translation. Changes are saved automatically.

Variables

Text fields that include variables such as {{price}}, {{trial_days}}, or product attributes can be translated normally.

A variable picker is available when editing, allowing you to insert supported variables directly into the translation. Variables cannot be edited or renamed, but they can appear anywhere in your translated text.


Using AI Translation

AI Translation helps translate content quickly without requiring custom prompts.

AI Translation becomes available when your project includes at least two languages.

You can translate:

  • A single language
  • Multiple selected languages
  • All languages at once
πŸ“˜

If a translation already exists, the system will ask you whether AI should overwrite it.

During translation, progress indicators appear in the panel. If an error occurs, you can retry the translation.

AI-generated translations can be edited manually at any time.


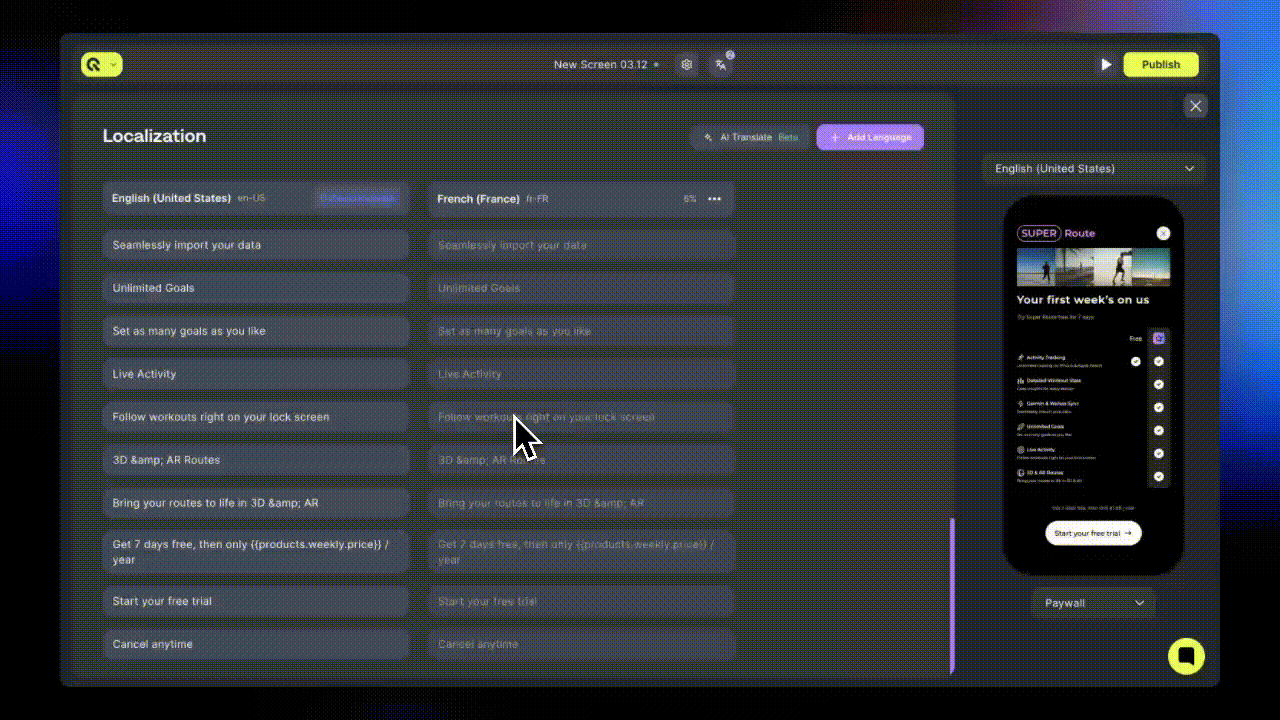
Previewing Localized Screens

The Preview Panel shows your screen rendered in the currently selected language.

This helps you verify:

  • Line breaks
  • Layout shifts
  • Text length differences
  • Variable placement

You can switch between languages and pages using dropdown selectors.

Variables appear with sample values (e.g., {{price}} β†’ $9.99) so you can check formatting.

The preview updates automatically whenever you change your translations.


Fallback Behavior

If a translation is missing, the screen uses the default language for that text.

This ensures your screens always render fully, even if some translations are incomplete.


Autosave

All translations are saved automatically every five seconds. You can exit the localization view at any time, and your changes will persist.


Import & Export

You can import and export all localization data as a JSON file. This is useful for:

  • Bulk editing translations in external tools (spreadsheets, translation management systems)
  • Backing up localization before major changes
  • Sharing translations between team members

Exporting Translations

  1. Open the Localization Panel.
  2. Click the Import/Export button in the header.
  3. Select Export.
  4. A JSON file will download with all your translations.

The exported file includes:

  • Screen metadata (ID, name, export date)
  • All configured languages
  • All texts grouped by pages

Importing Translations

  1. Open the Localization Panel.
  2. Click the Import/Export button.
  3. Select Import.
  4. Choose a JSON file from your device.

Import behavior:

  • Screen validation: The file's screenId must match the current screen.
  • Language handling: New languages in the file are automatically added. Existing translations are overwritten.
  • Default language: If the file specifies a different default language, it becomes the new default for the screen.
❗️

Import will fail if the file contains language codes not supported by the system, or if the screenId doesn't match the current screen.

JSON Format

The export file uses the following structure:

{
  "screenId": "abc123",
  "screenName": "My Paywall",
  "exportedAt": "2026-01-30T12:00:00.000Z",
  "defaultLanguage": "en-US",
  "languages": ["en-US", "de-DE", "fr-FR"],
  "pages": [
    {
      "id": "page-1",
      "name": "Main Page",
      "texts": [
        {
          "id": "text-1",
          "en-US": "Subscribe Now",
          "de-DE": "Jetzt abonnieren",
          "fr-FR": "S'abonner maintenant"
        }
      ]
    }
  ]
}
FieldDescription
screenIdUnique identifier of the screen. Must match when importing.
screenNameDisplay name of the screen (informational only).
exportedAtISO 8601 timestamp of the export.
defaultLanguageLanguage code for the default/fallback language.
languagesArray of all language codes in the file.
pagesArray of pages, each containing an array of texts.

Passing custom locale to the SDKs

By default, No-Code screens automatically detect the device's system language and display the appropriate localization if available. You can override this behavior by setting a custom locale, which takes priority over the automatic system language detection.

The locale should be in standard format (e.g., "en", "en-US", "de", "de-DE"). Pass nil/null to reset to the system default locale.

Setting locale during initialization:

var config = NoCodesConfiguration(
    projectKey: "projectKey",
    locale: "de-DE"
)
NoCodes.initialize(with: config)
val config = NoCodesConfig.Builder(context, "projectKey")
    .setLocale("de-DE")
    .build()
NoCodes.initialize(config)
NoCodesConfig config = new NoCodesConfig.Builder(context, "projectKey")
    .setLocale("de-DE")
    .build();
NoCodes.initialize(config);
const noCodesConfig = new NoCodesConfigBuilder("projectKey")
    .setLocale("de-DE")
    .build();
NoCodes.initialize(noCodesConfig);
final noCodesConfig = NoCodesConfigBuilder("projectKey")
    .setLocale("de-DE")
    .build();
NoCodes.initialize(noCodesConfig);
var noCodesConfig = new NoCodesConfigBuilder("projectKey")
    .SetLocale("de-DE")
    .Build();
NoCodes.Initialize(noCodesConfig);
const noCodesConfig = new Qonversion.NoCodesConfigBuilder("projectKey")
    .setLocale("de-DE")
    .build();
Qonversion.NoCodes.initialize(noCodesConfig);
const noCodesConfig = new NoCodesConfigBuilder("projectKey")
    .setLocale("de-DE")
    .build();
NoCodes.initialize(noCodesConfig);

Setting locale after initialization:

NoCodes.shared.setLocale("fr-FR")
NoCodes.shared.showScreen(withContextKey: "yourContextKey")

// Reset to system default
NoCodes.shared.setLocale(nil)
NoCodes.shared.setLocale("fr-FR")
NoCodes.shared.showScreen("yourContextKey")

// Reset to system default
NoCodes.shared.setLocale(null)
NoCodes.getSharedInstance().setLocale("fr-FR");
NoCodes.getSharedInstance().showScreen("yourContextKey");

// Reset to system default
NoCodes.getSharedInstance().setLocale(null);
NoCodes.getSharedInstance().setLocale("fr-FR");
NoCodes.getSharedInstance().showScreen("yourContextKey");

// Reset to system default
NoCodes.getSharedInstance().setLocale(null);
NoCodes.getSharedInstance().setLocale("fr-FR");
NoCodes.getSharedInstance().showScreen("yourContextKey");

// Reset to system default
NoCodes.getSharedInstance().setLocale(null);
NoCodes.GetSharedInstance().SetLocale("fr-FR");
NoCodes.GetSharedInstance().ShowScreen("yourContextKey");

// Reset to system default
NoCodes.GetSharedInstance().SetLocale(null);
Qonversion.NoCodes.getSharedInstance().setLocale("fr-FR");
Qonversion.NoCodes.getSharedInstance().showScreen("yourContextKey");

// Reset to system default
Qonversion.NoCodes.getSharedInstance().setLocale(null);
NoCodes.getSharedInstance().setLocale("fr-FR");
NoCodes.getSharedInstance().showScreen("yourContextKey");

// Reset to system default
NoCodes.getSharedInstance().setLocale(null);

Best Practices

Finalize your default-language copy before adding translations.

  • Use variables for prices and durations to keep translations accurate as product metadata changes.
  • Use AI Translation for an initial pass, then refine manually.
  • Verify every language in the Preview Panel to ensure text fits your layout.
  • Keep all languages close to 100% completion before publishing screens.