Configure dashboard
First and foremost, register at Qonversion. Registration will take you through an onboarding process, where you’ll have to fill out information about your project and insert links — all to help you add your project to Qonversion. We highly recommend following this flow and not skipping any settings during registration. We’ll also cover the scenario if you don’t fill these out.Store Settings
First, let’s set up your Stores in the Qonversion dashboard. To do this, gather the necessary data from RevenueCat.Apple App Store settings
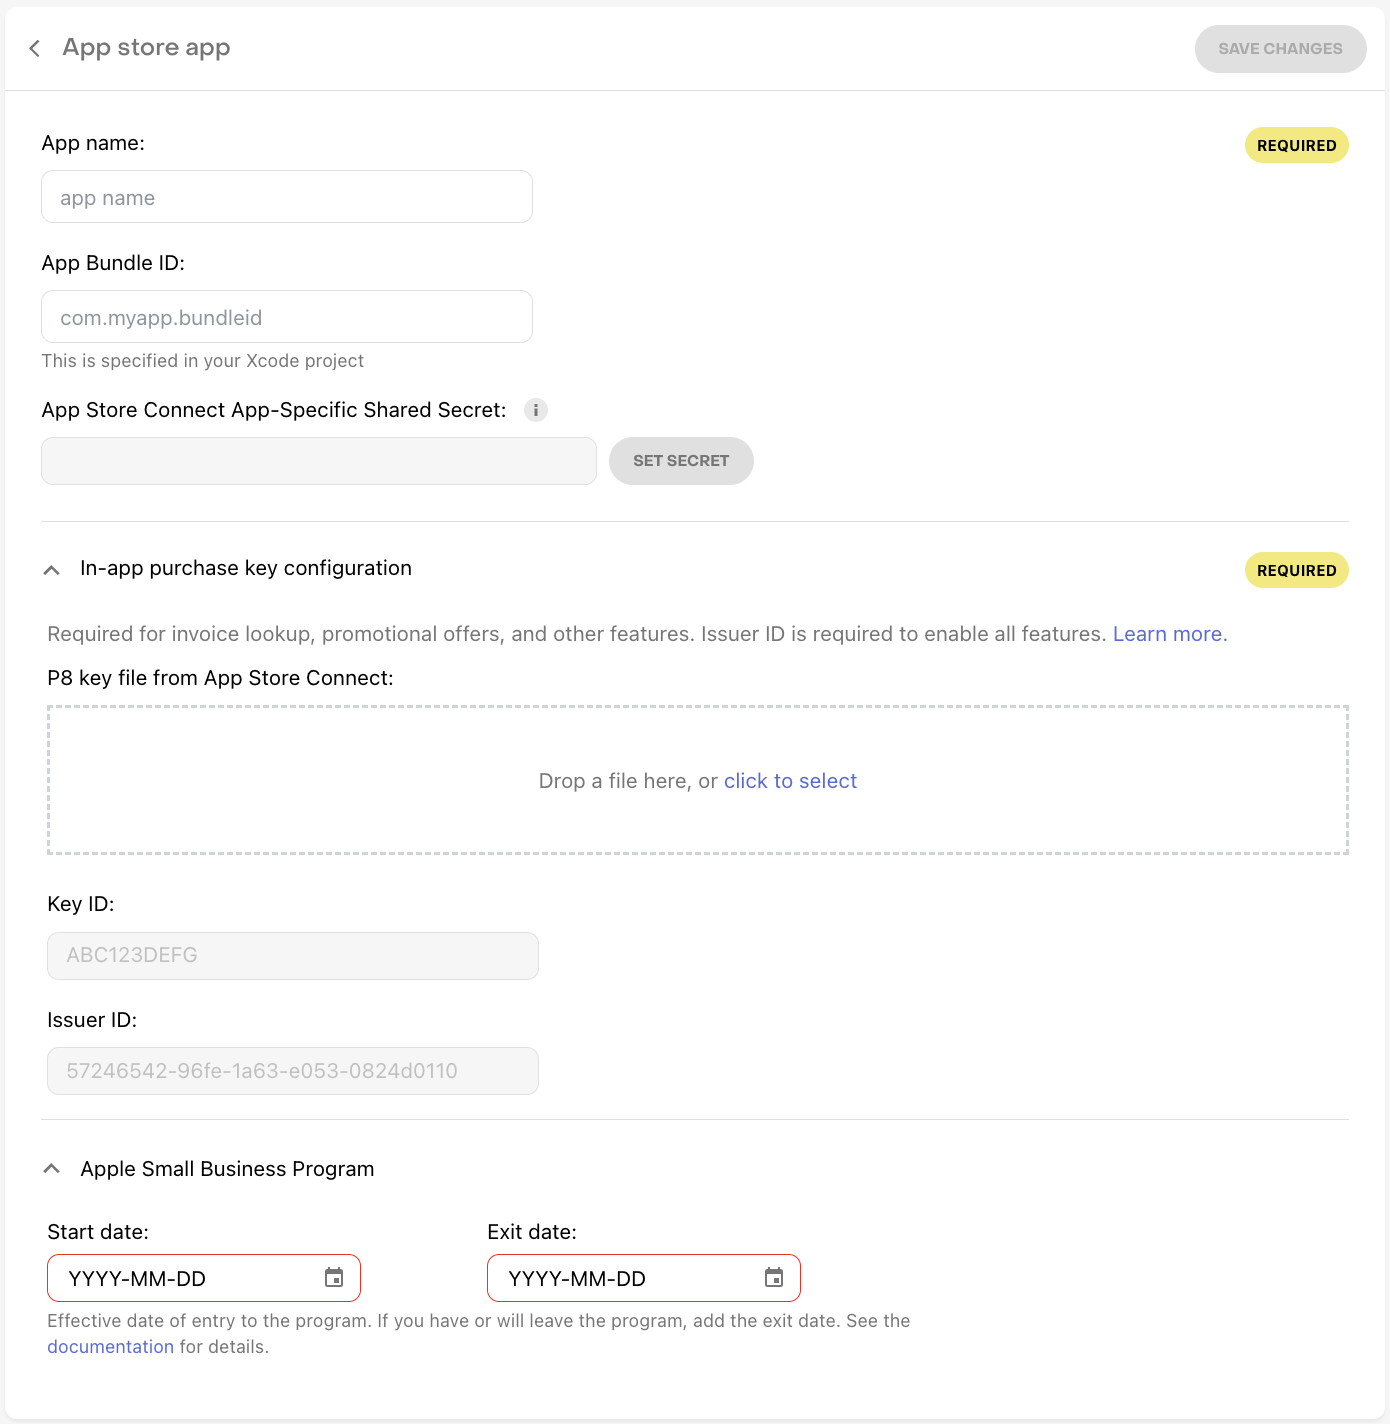
To configure the Apple App Store in Qonversion, you will need the following fields:- App-Specific Shared Secret: Copy this value from the App Store Connect App-specific Shared Secret field in the App Settings app settings in the RevenueCat dashboard. See the screen below. Here’s a more detailed guide on how to obtain this.
- App Store ID: You’ll find your App Store ID in the URL of your App Store Connect account. For example, if your URL is something like
https://apps.apple.com/us/app/example-app/id123456789, then 123456789 is your app’s Apple ID.
Google Play Console Settings
Here’s what you have in RevenueCat:
- Android Package Name: This is the applicationID found in your app-level build.gradle file. You can either copy it from there or use the Google play package from your RevenueCat settings.
- Service Account Credentials JSON: attach the same file you used for Service Account Credentials JSON at RevenueCat. Here’s more on how you can get Google Play Service Account Key.
Configure Stores in Qonversion
Once you have all the necessary data from RevenueCat, follow the steps to set up Stores in QonversionProducts, Entitlements and Remote Configs
After you’ve filled the store data, it’s time to set up Offerings, Products, and Entitlements. Here’s another way to describe these elements:Entitlements
Let’s start with Entitlements. Similar to how you set up Entitlements in RevenueCat, you need to set up Entitlements in Qonversion. Here’s how it was done in RevenueCat: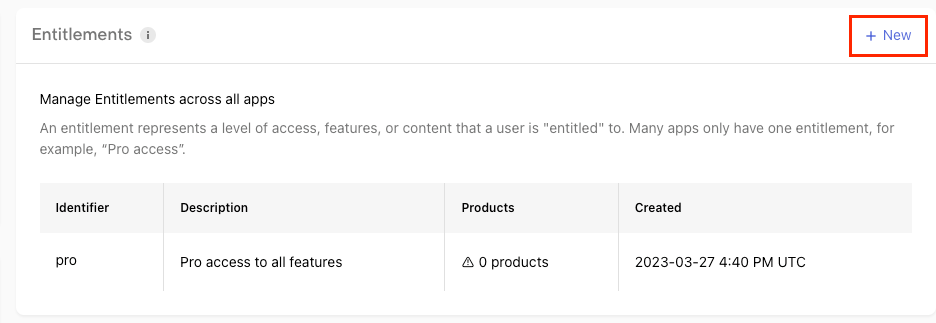
Products
Next, you need to create Products similar to how you created in RevenueCat: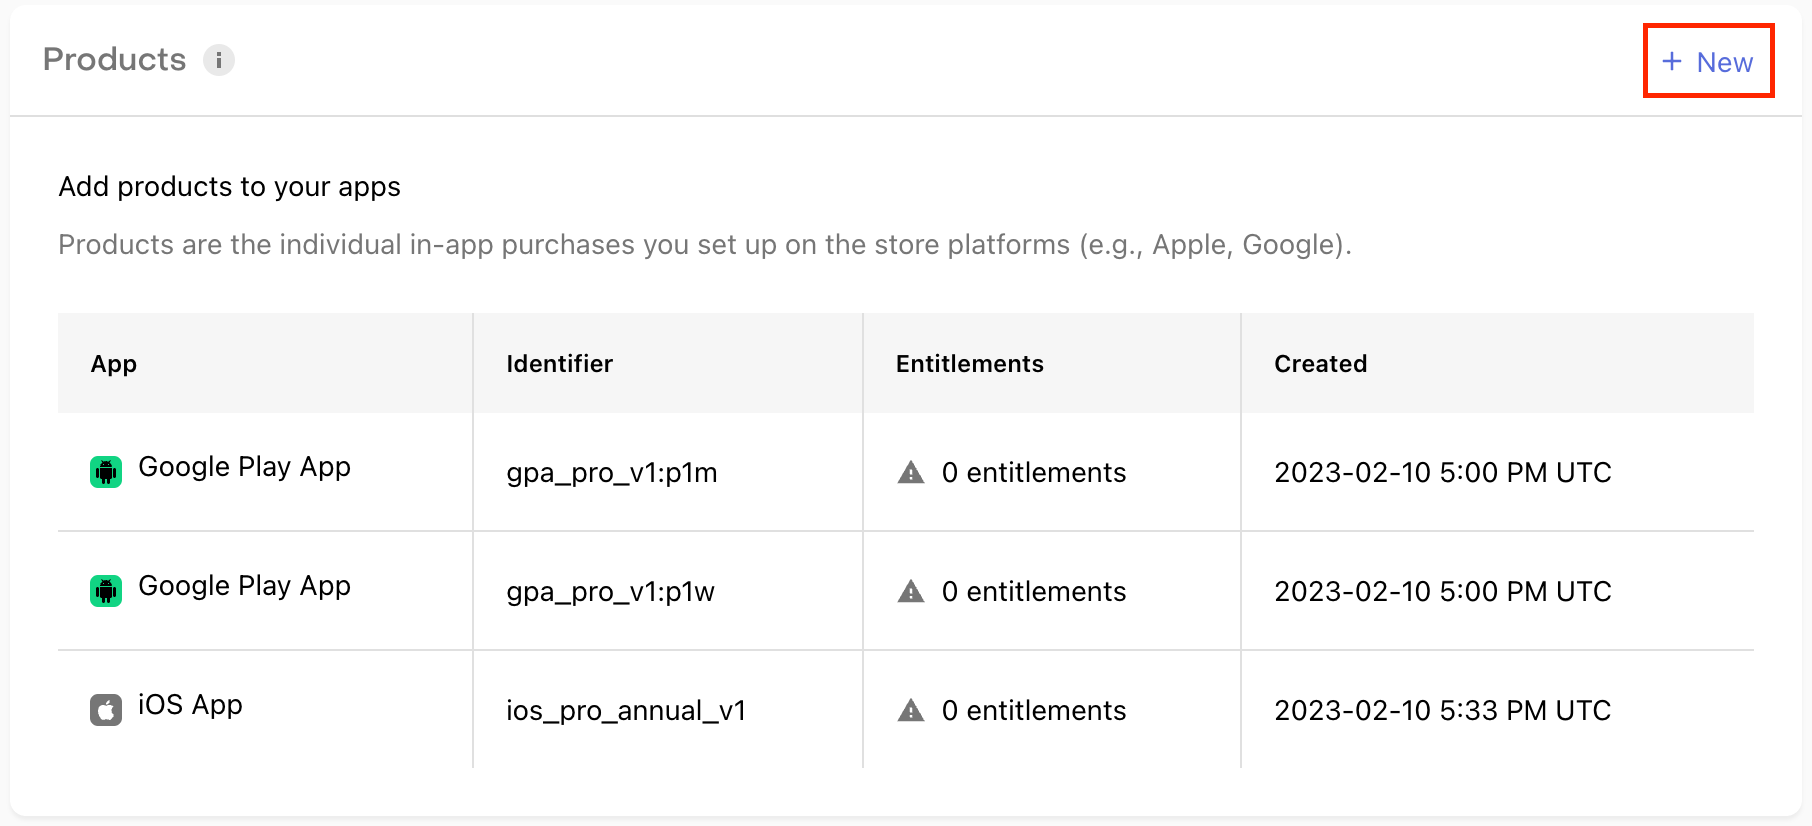
- Qonversion Product ID is your unique product identifier in Qonversion that corresponds to a unique product on the Apple App Store and Google Play Store. Qonversion SDK will use it to make purchases.
- AppStore Product ID – product identifier on Apple App Store. Learn more on how to create subscriptions on iOS.
- Google Play Product ID – product identifier on Google Play Console. Learn more on how to set up Android in-app products .
- Google Play Base Plan ID - identifier of the base plan for Google Play Product. This is used for subscription products. If you’re creating an in-app, leave this field empty for in-apps. In Qonversion, you will set up different products for the different base plans of the same product.
- Associated Entitlements - choose the entitlements that should be granted once this product is purchased.
Offerings
Offerings are designed as a remote configuration to present particular products on specific paywalls. Moreover, you can change the products without additional app releases. For example, you can offer one set of products on a paywall immediately after an onboarding flow is completed and another with discounts if a user has not converted later. Here’s how it was done in RevenueCat: To create Offerings in Qonversion, go to Remote Config → Offerings and click Create Offering. Create OfferingsServer-to-server notifications
To seamlessly implement server-to-server notifications, use RevenueCat S2S URLs as a temporary proxy in our system. This allows Qonversion to process new requests while still sending notifications to your existing users.Configure Apple App Store
- Navigate to your Qonversion project settings. Copy the server-to-server notification URL for Apple App Store.
- Sign in to App Store Connect and select your app.
- Navigate to the App Information section.
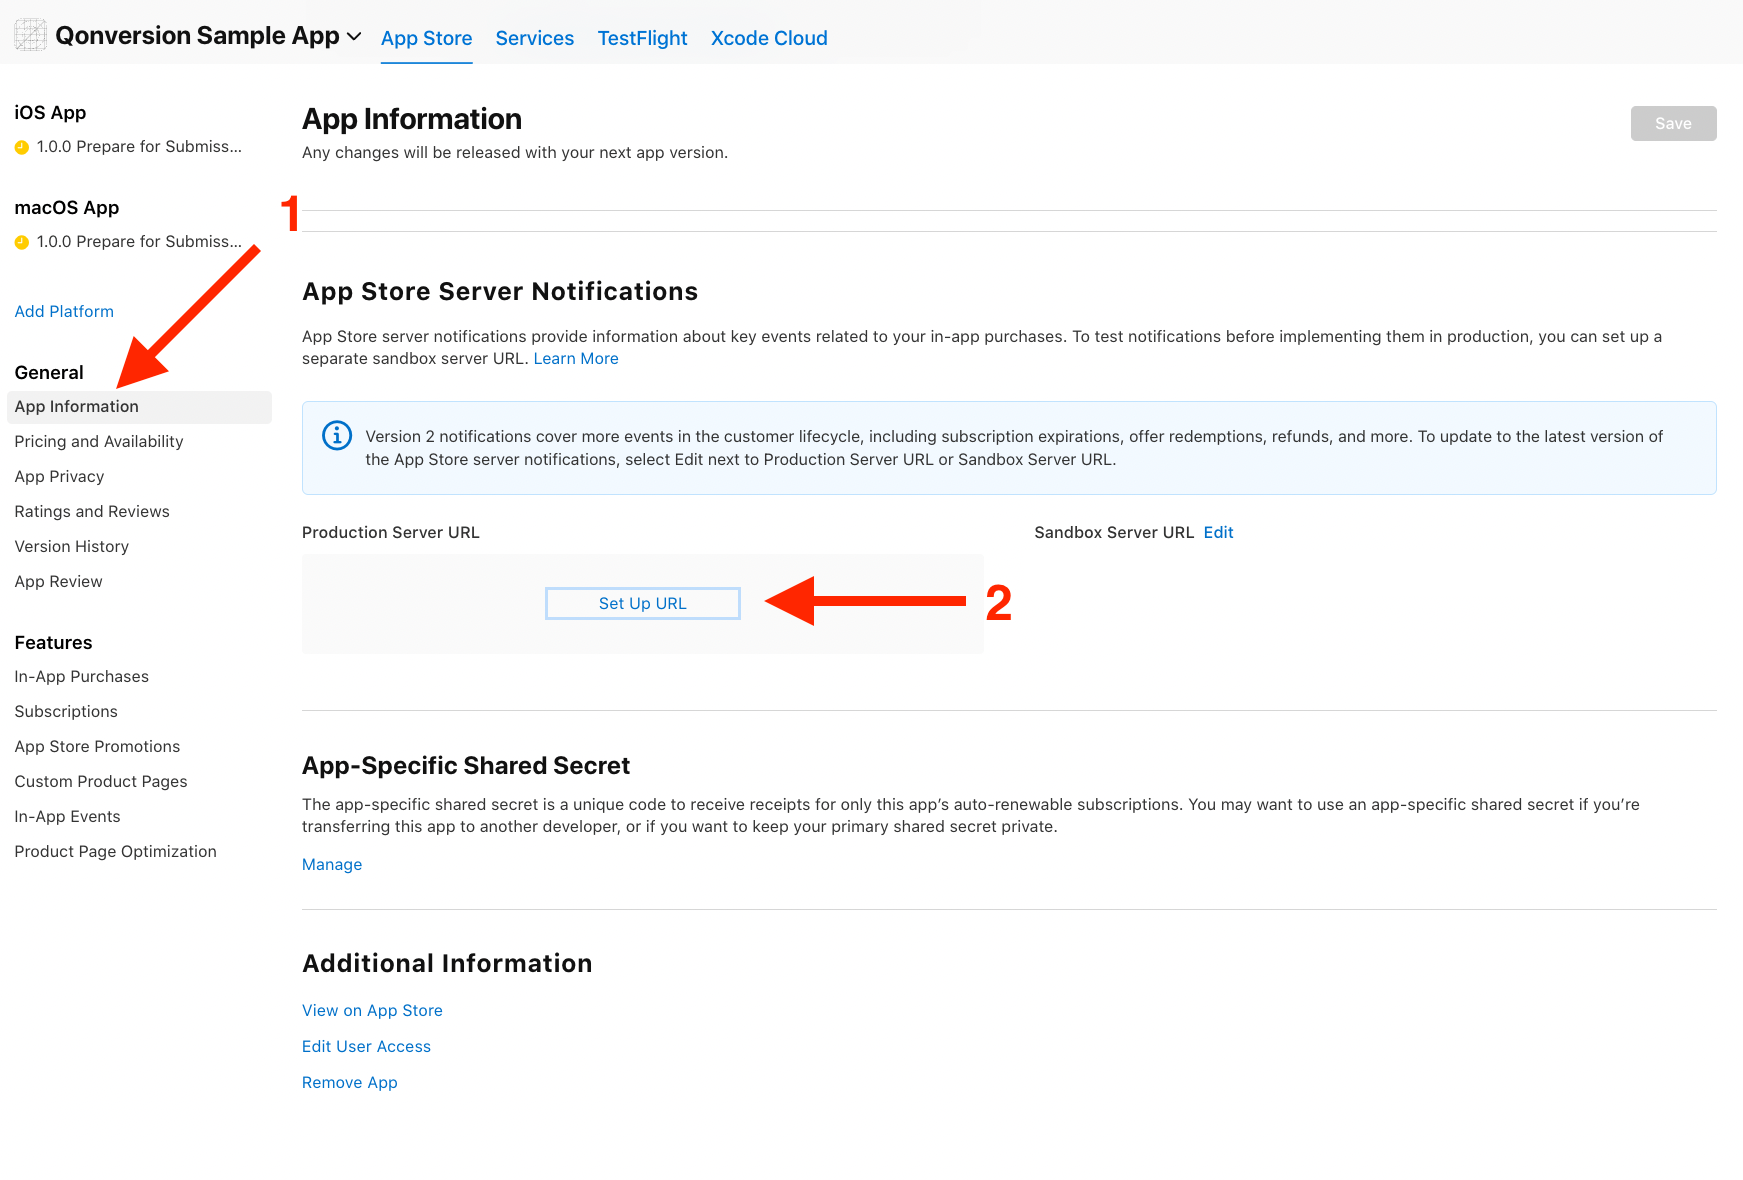
- Copy the RevenueCat URL you used for server-to-server notifications and replace it with the URL from step 1.
- Set up the RevenueCat URL as a Proxy URL in Qonversion in project settings.
Google Developer Notifications
-
Enable access to API here.

- Navigate to project settings, then click the “Connect to Google” button.
- You need to copy generated Google Developer Notifications Topic ID.
- Open the Google Play Console for your application, then navigate to Monetization setup.
- In the Real-time developer notifications tab, insert your topic ID, click on Save changes, and then the Send Test Notification button.
Install SDKs
Check out the links below for the SDK you need and follow the steps provided: → iOS SDK → Android SDK → Flutter SDK → React Native SDK → Unity SDK → Cordova Plugin → Capacitor Plugin → Web → Kids Mode Qonversion SDKs Read more about Installing the SDKs. When you’re done with the setup, it’s time to get into the code!Launch SDK
Firstly, you need to initialize the SDK. Here’s how you did it in RevenueCat:Displaying products
In RevenueCat you did it this way:Making purchases
RevenueCat:Restore purchases
If your app has a restore purchases feature on paywalls, just use the Qonversionrestore() function when users want to restore their purchases.
User status
To check the customer status in Qonversion, you need to use Entitlements. In RevenueCat, you used Customer info and entitlements. RevenueCat:Authorization system
Cross-device and cross-platform access
Set up this section only if you need cross-device and cross-platform access and your project includes an authorization system.identify() method to link a user to your signed-in subscriber. Call this method every time you want to use User Identity. For example, when a user logs in. User Identity provides a convenient way of managing premium access of your existing subscribers, including the following cases:
- A user reinstalls your app for any reason. Using the same User ID allows you to provide premium access linked to previously purchased products.
- A user logs in on several devices. You can provide premium access based on a subscription purchased on one of his devices.
- A user logs in on iOS and Android versions of your app. You can provide premium access based on a subscription purchased on one of the platforms.
Logging in
When a user logs into his account, callidentify().
checkEntitlements function, which we discussed above.
Logging out
You need to call thelogout() method to handle entitlements for an unauthorized user. Call this method when a user logs out within your app:
identify() method again.
User-base migration
Those steps have to be done to keep the system working smoothly for your current user base. The necessity of steps depends on the complexity of your system. The simplest system is represented by a single platform infrastructure (Apple, Google, or Stripe). The complex one includes a few platforms with authorization system, your backend infrastructure, and WebHooks handler.Client-side migration
Follow these steps to sync user status and retrieve the latest data from Google and Apple on your current device. Call thesyncHistoricalData() method right after Qonversion SDK initialization to synchronize all the device-related data and ensure that none of the entitlements has been missed.
User-database migration
Once you have the app version with Qonversion SDK up and running, it’s time to proceed to the server-side migration.- Prepare files with AppStore with Base64 encoded receipt data or Google Play with purchase tokens. If you do not have receipt data or purchase tokens on your side but are already running your subscription management with a third-party vendor, you should ask the vendor’s support team for the required data file.
- Then simply share the files with us using our support chat and provide CSV files.
Release
Once you’re done with these steps go ahead and release your app. For complex systems with cross-platform access and authorization setups, make sure you’re in touch with us and our team has verified your user database migration.You’re good to go
Check out the detailed RevenueCat and Qonversion feature comparison and don’t hesitate to contact us if you have questions.Migrating In-App Subscriptions Migrating from Adapty to Qonversion