- Plan your experiment
- Configure and test variants
- Adjust traffic level
- Launch the experiment
1. Plan your experiment
Leveraging existing Remote Config
If you already use our Remote Config feature and have paywalls or onboarding flows configured, you can launch the experiment right from existing configurations. Learn more here.Start with your idea
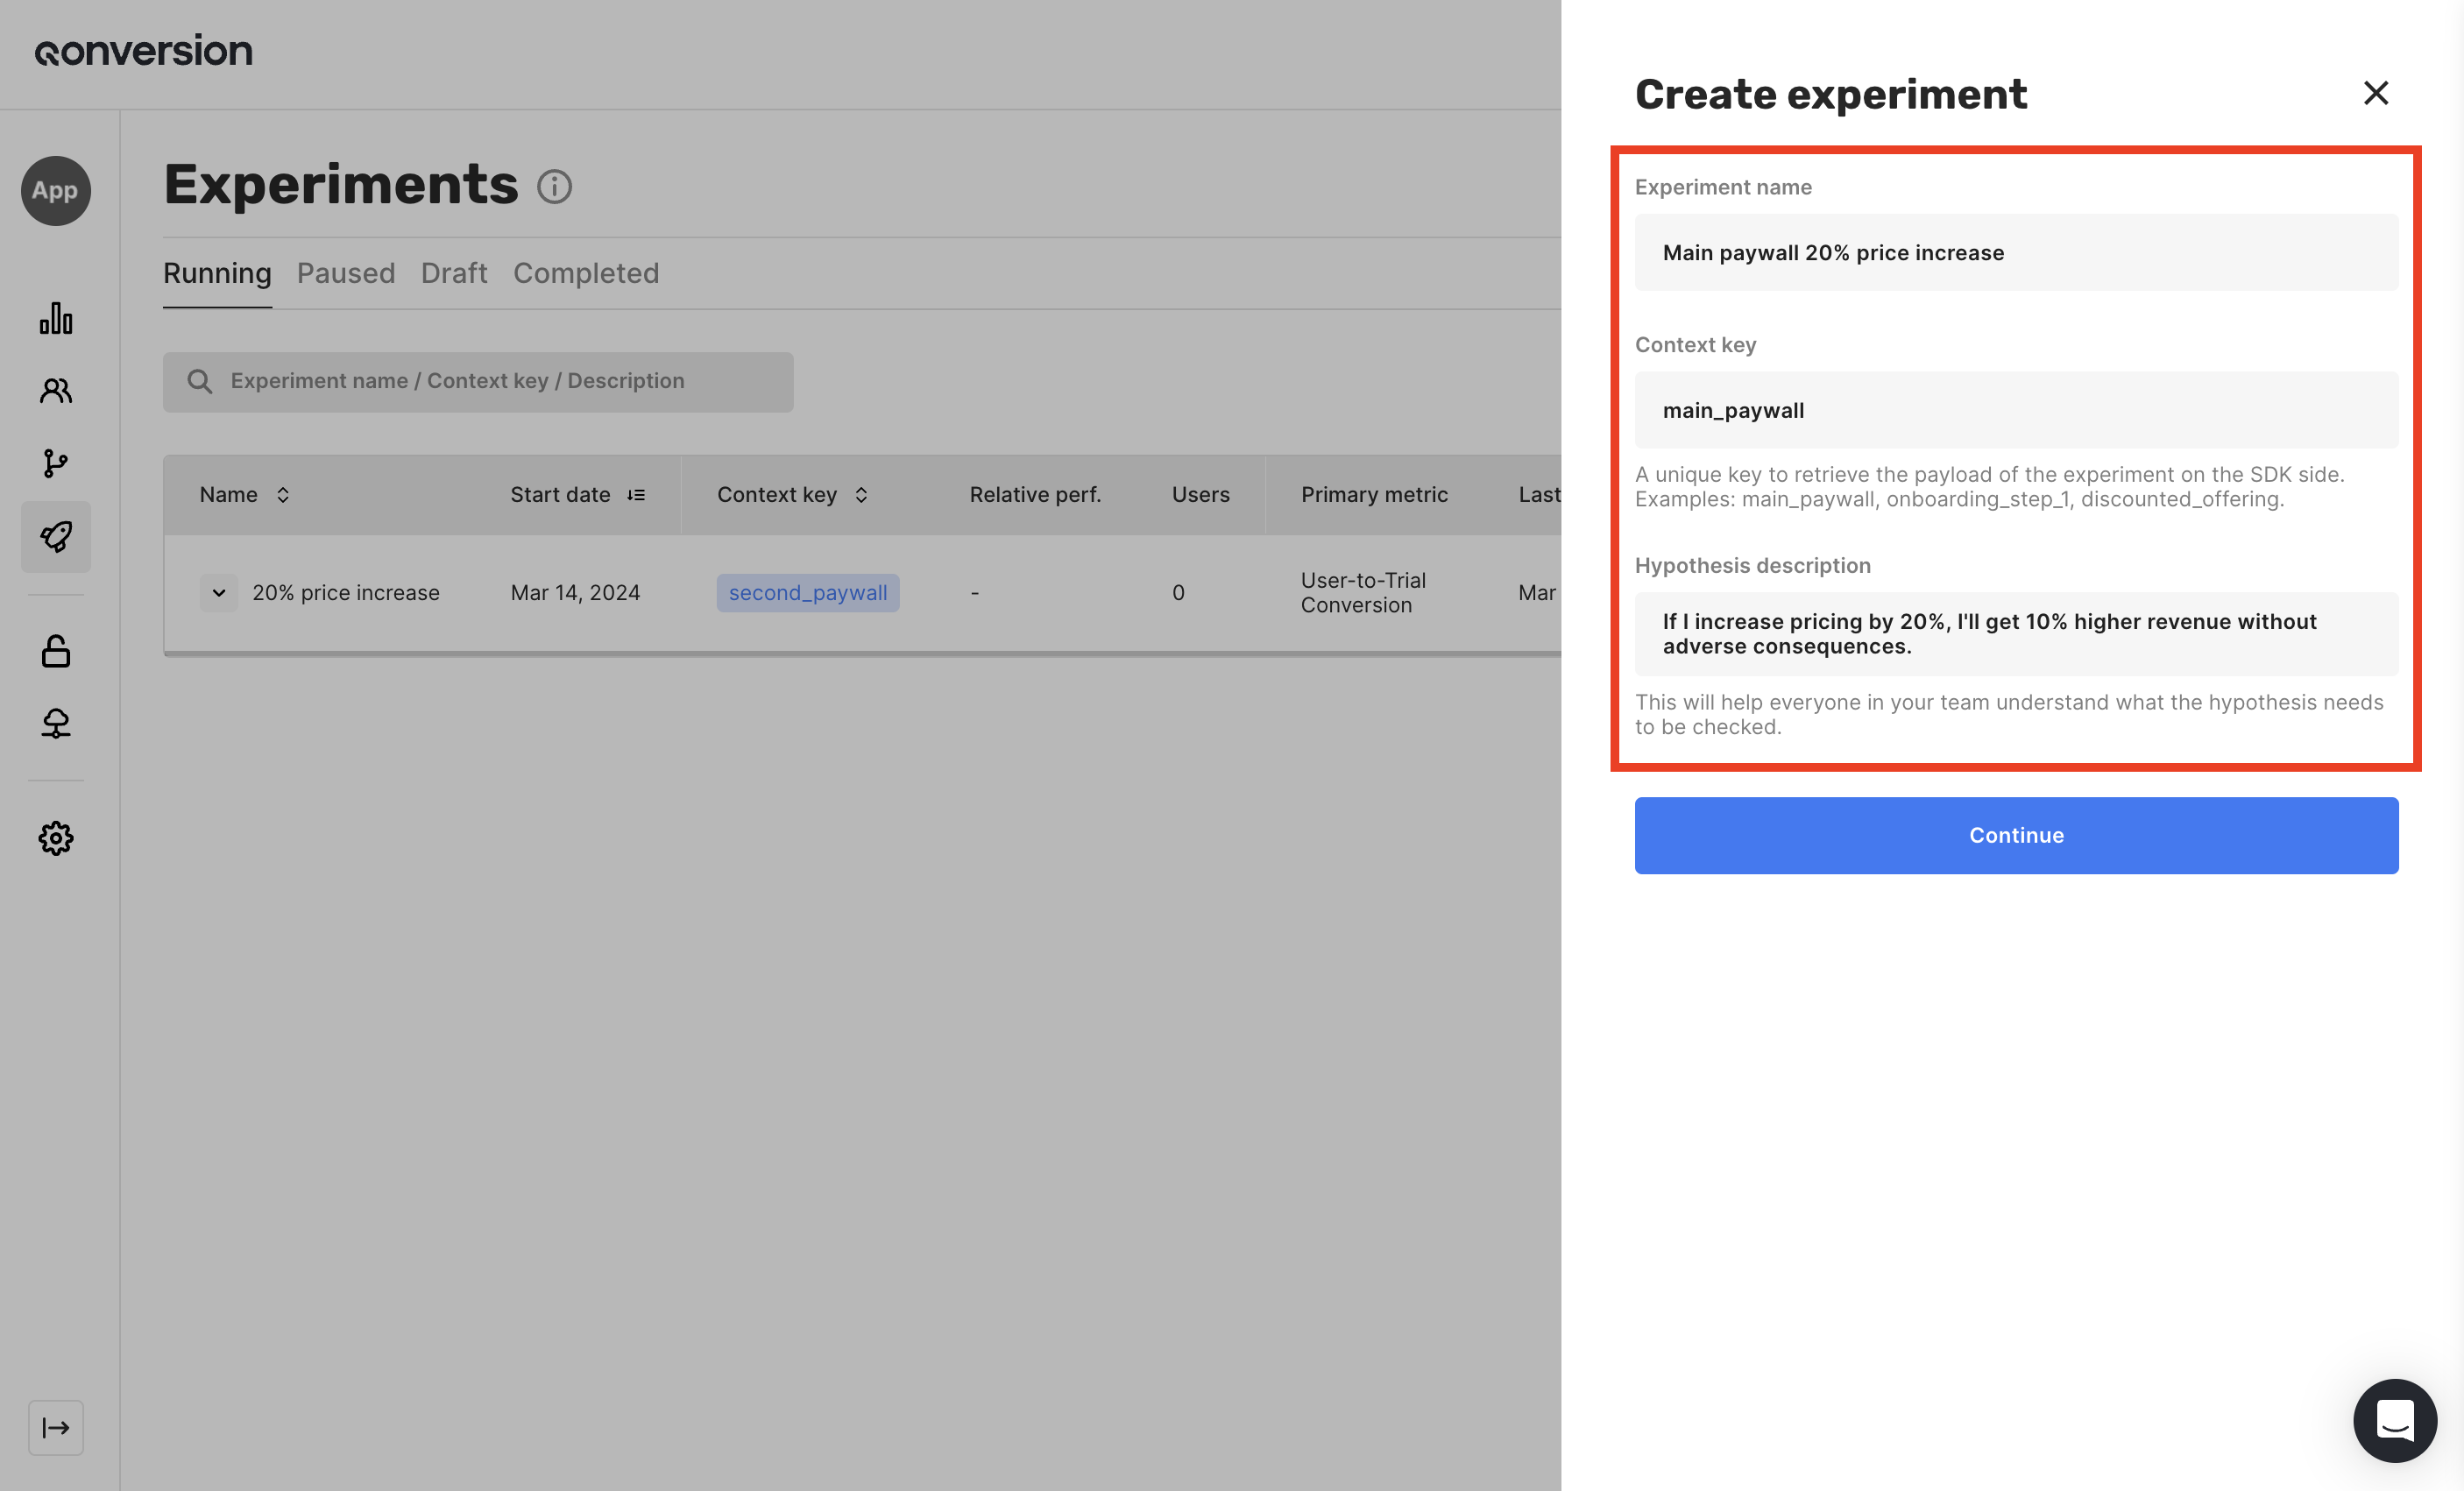
Writing down your idea beforehand helps to avoid several biases (for instance, confirmation bias) during experiment analyses. At the start, we recommend you focus on the following sections:- Experiment name, as the title of your experiment, helps you understand your main idea at a glance.
-
Context key, as an identification of your application context on the SDK side, helps you target experiments for specific parts of your user journey. Examples of app contexts you may experiment with:
- main_paywall: to validate ideas for the content different user segments see on your main paywall.
- main_paywall_products: to run experiments only for the products section.
- onboarding: to check how changes related to the entire user onboarding journey affect your revenue.
- onboarding_step_2: to validate changes for some specific steps of your onboarding flow.
- [your_key]: to run experiments for any other part of your user’s monetization experience.
- Hypothesis description, as a short idea representation, helps you stay focused on what you intended to validate initially.
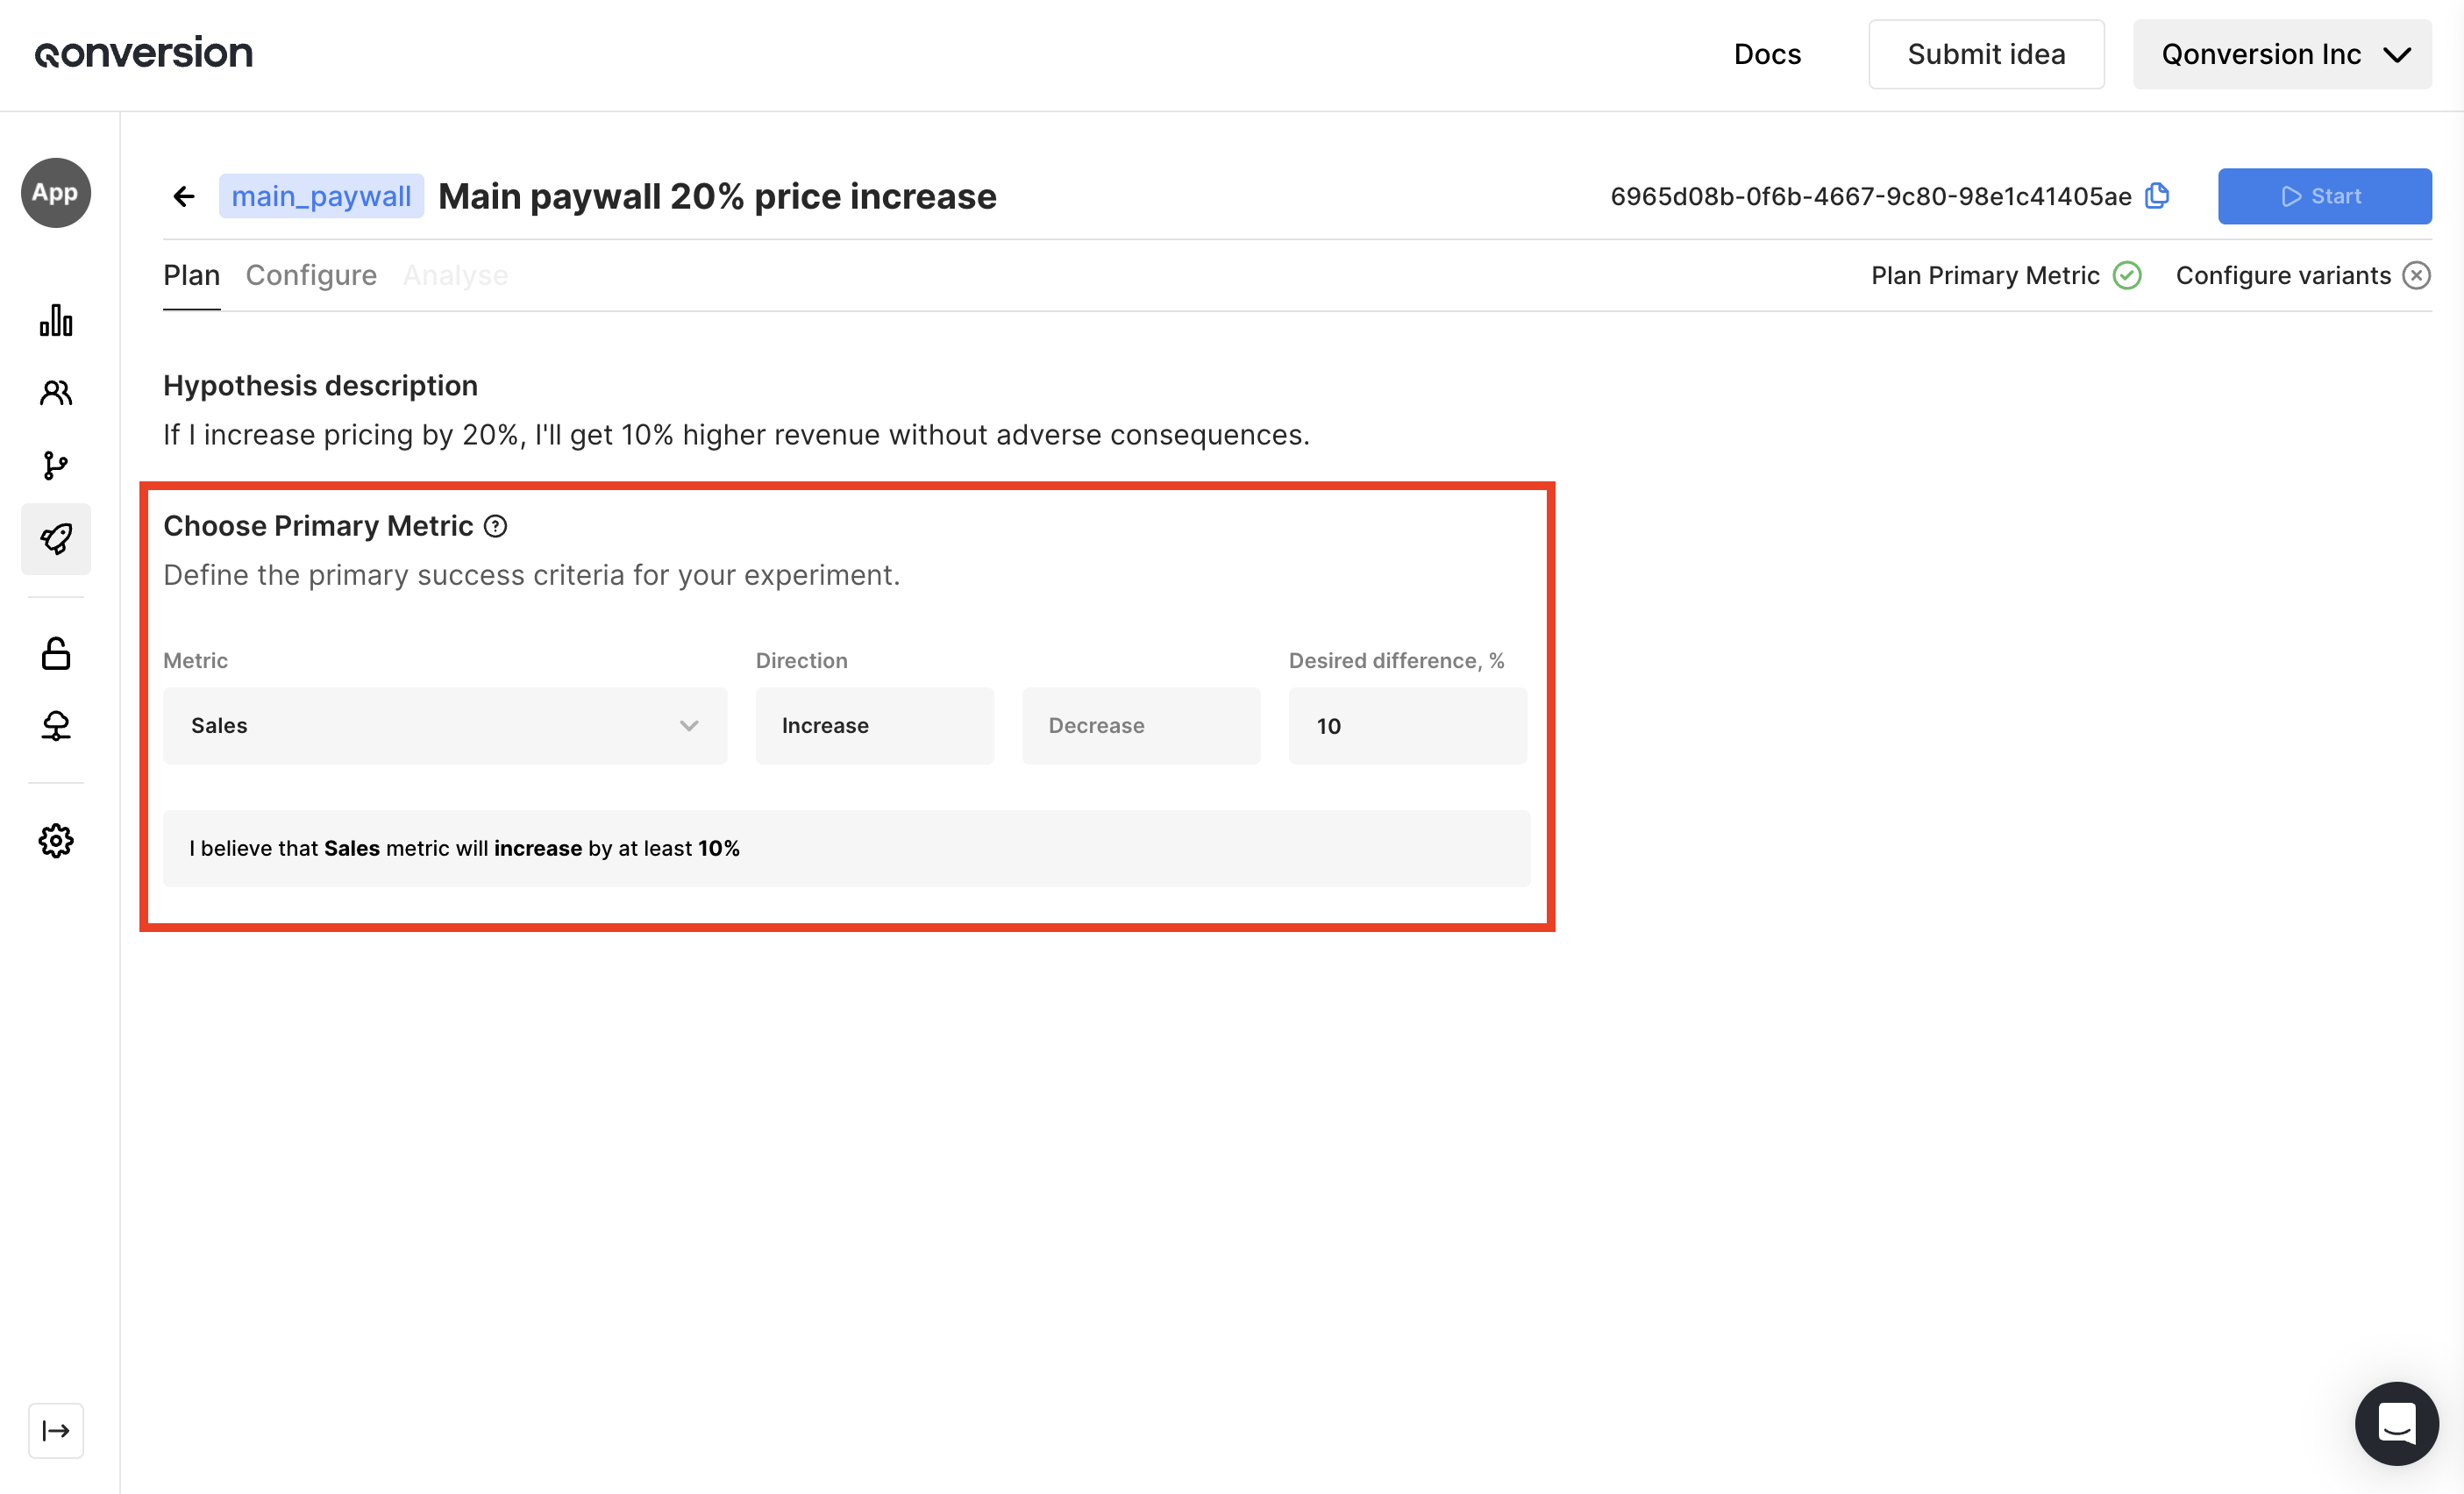
Choose your Primary Metric
After filling in the main information, you can select the Primary Metric for the experiment. Setting primary metrics in this step helps you get information about statistical significance and recommended sample size during the experiment analysis phase. Qonversion metrics you can choose from:- User-to-Trial Conversion
- User-to-Paid Conversion
- New Trials
- Trial-to-Paid Conversion
- Trials Cancellation Rate
- New Subscriptions
- Subscriptions Cancellation Rate
- Sales
- Proceeds
- Refunds
2. Configure and test variants
Prerequisites
To enable Qonversion to run and calculate A/B testing results, you need to have Qonversion SDK installed in your app.Use various data types
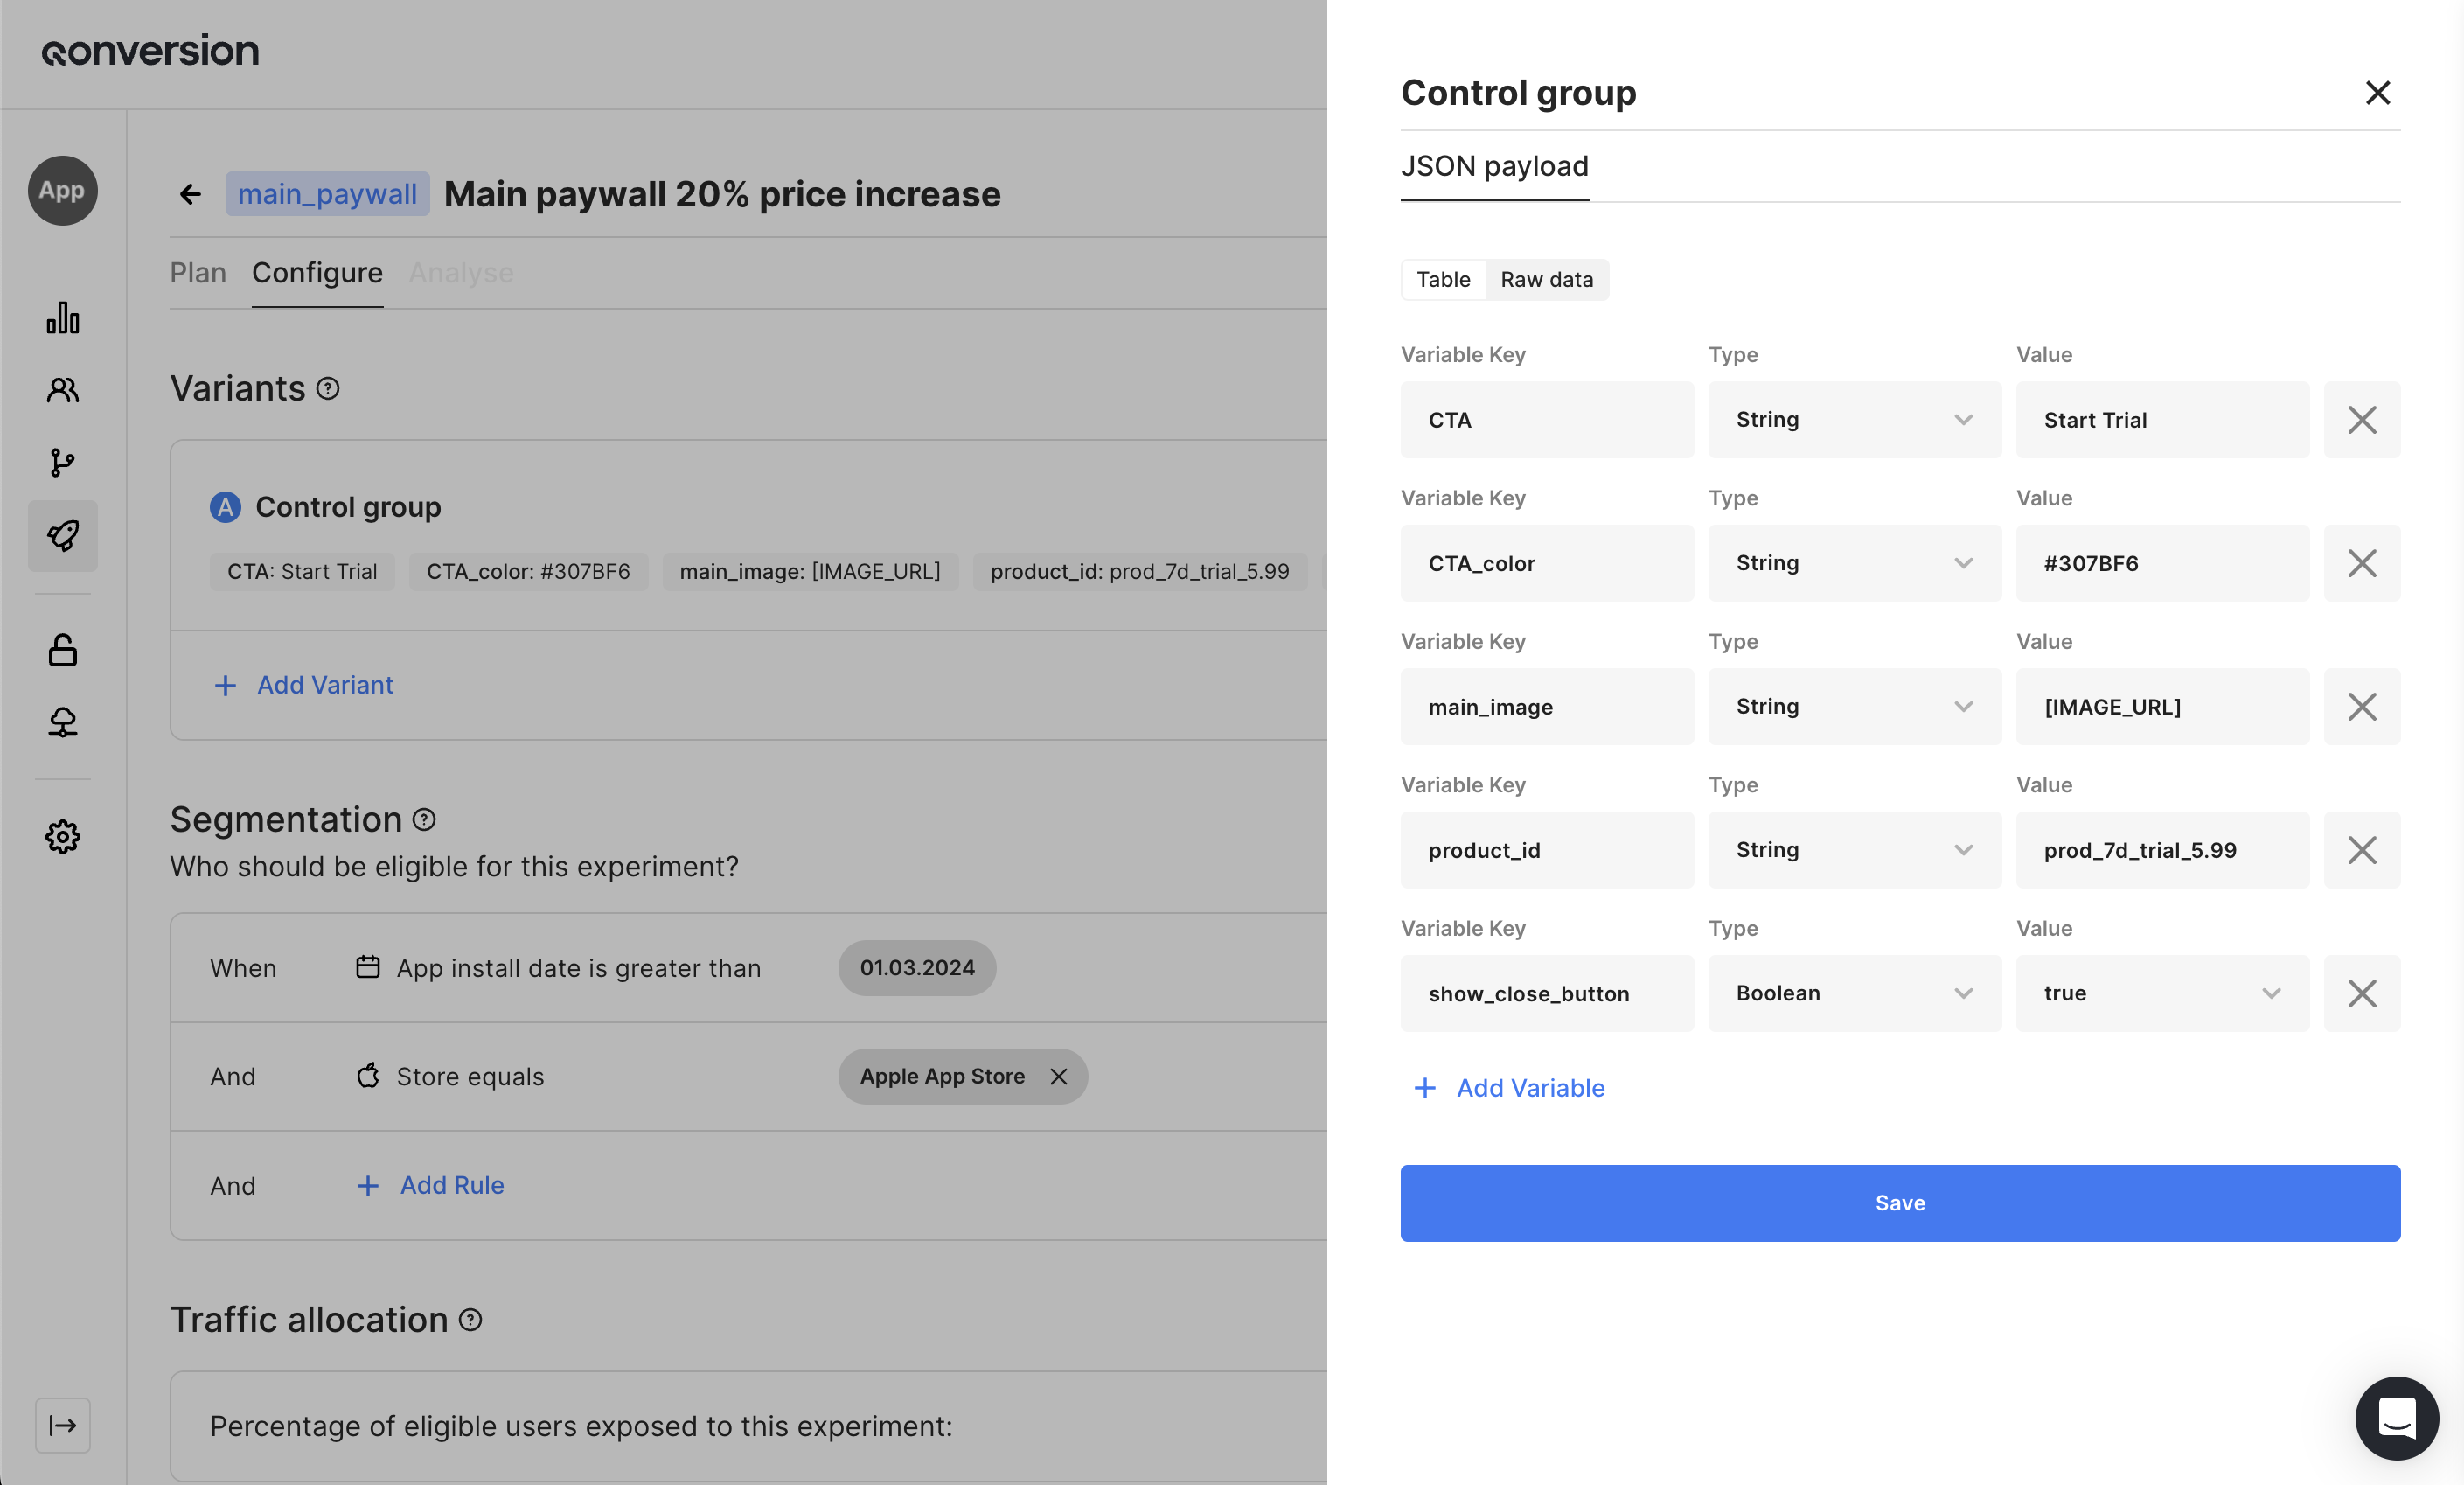
Qonversion Experiments work with the same in-app values as Remote Config. The core of these attributes is a plain JSON file consisting of key-value data. We support the following data types:-
String.
- Use this option to validate pricing, communication, or visual hypothesis.
- Examples: native.subs.full.v4.w.8.99.trial.7d, Unlock Fast and Secure Browsing, #3076FF, etc.
-
Number.
- Use this option, for example, to show only a subset of your onboarding screens.
- Examples: 2, 5, 23, etc.
-
Boolean.
- Use this option to turn some features on or off.
- Examples: true, false
-
Json.
- Use this option to validate advanced changes in your app’s behavior.
- Examples:
{"banner_text": "Choose your plan", "product_top": "native.subs.full.v4.w.8.99.trial.7d", "product_bottom": "subs.month.17.99", "skip_onboarding": true}.
Get your configuration
Configuration source
Qonversion Remote Configs and Experiments share single methods to get configurations. You can distinguish the source of the result received by looking at the source field. Learn more about fields available.remoteConfig method.
RemoteConfigList fields description
RemoteConfig fields description
Experiment description
ExperimentGroup description
RemoteConfigurationSource description
Test experimental changes before launch
Please, note, the guide below allows you to test only configurations created through the Experiments dashboard section. To test configurations from the Remote Config section, please, follow the test changes before launch guide.
- Copy the ID for your experiment and the variant you want to test.
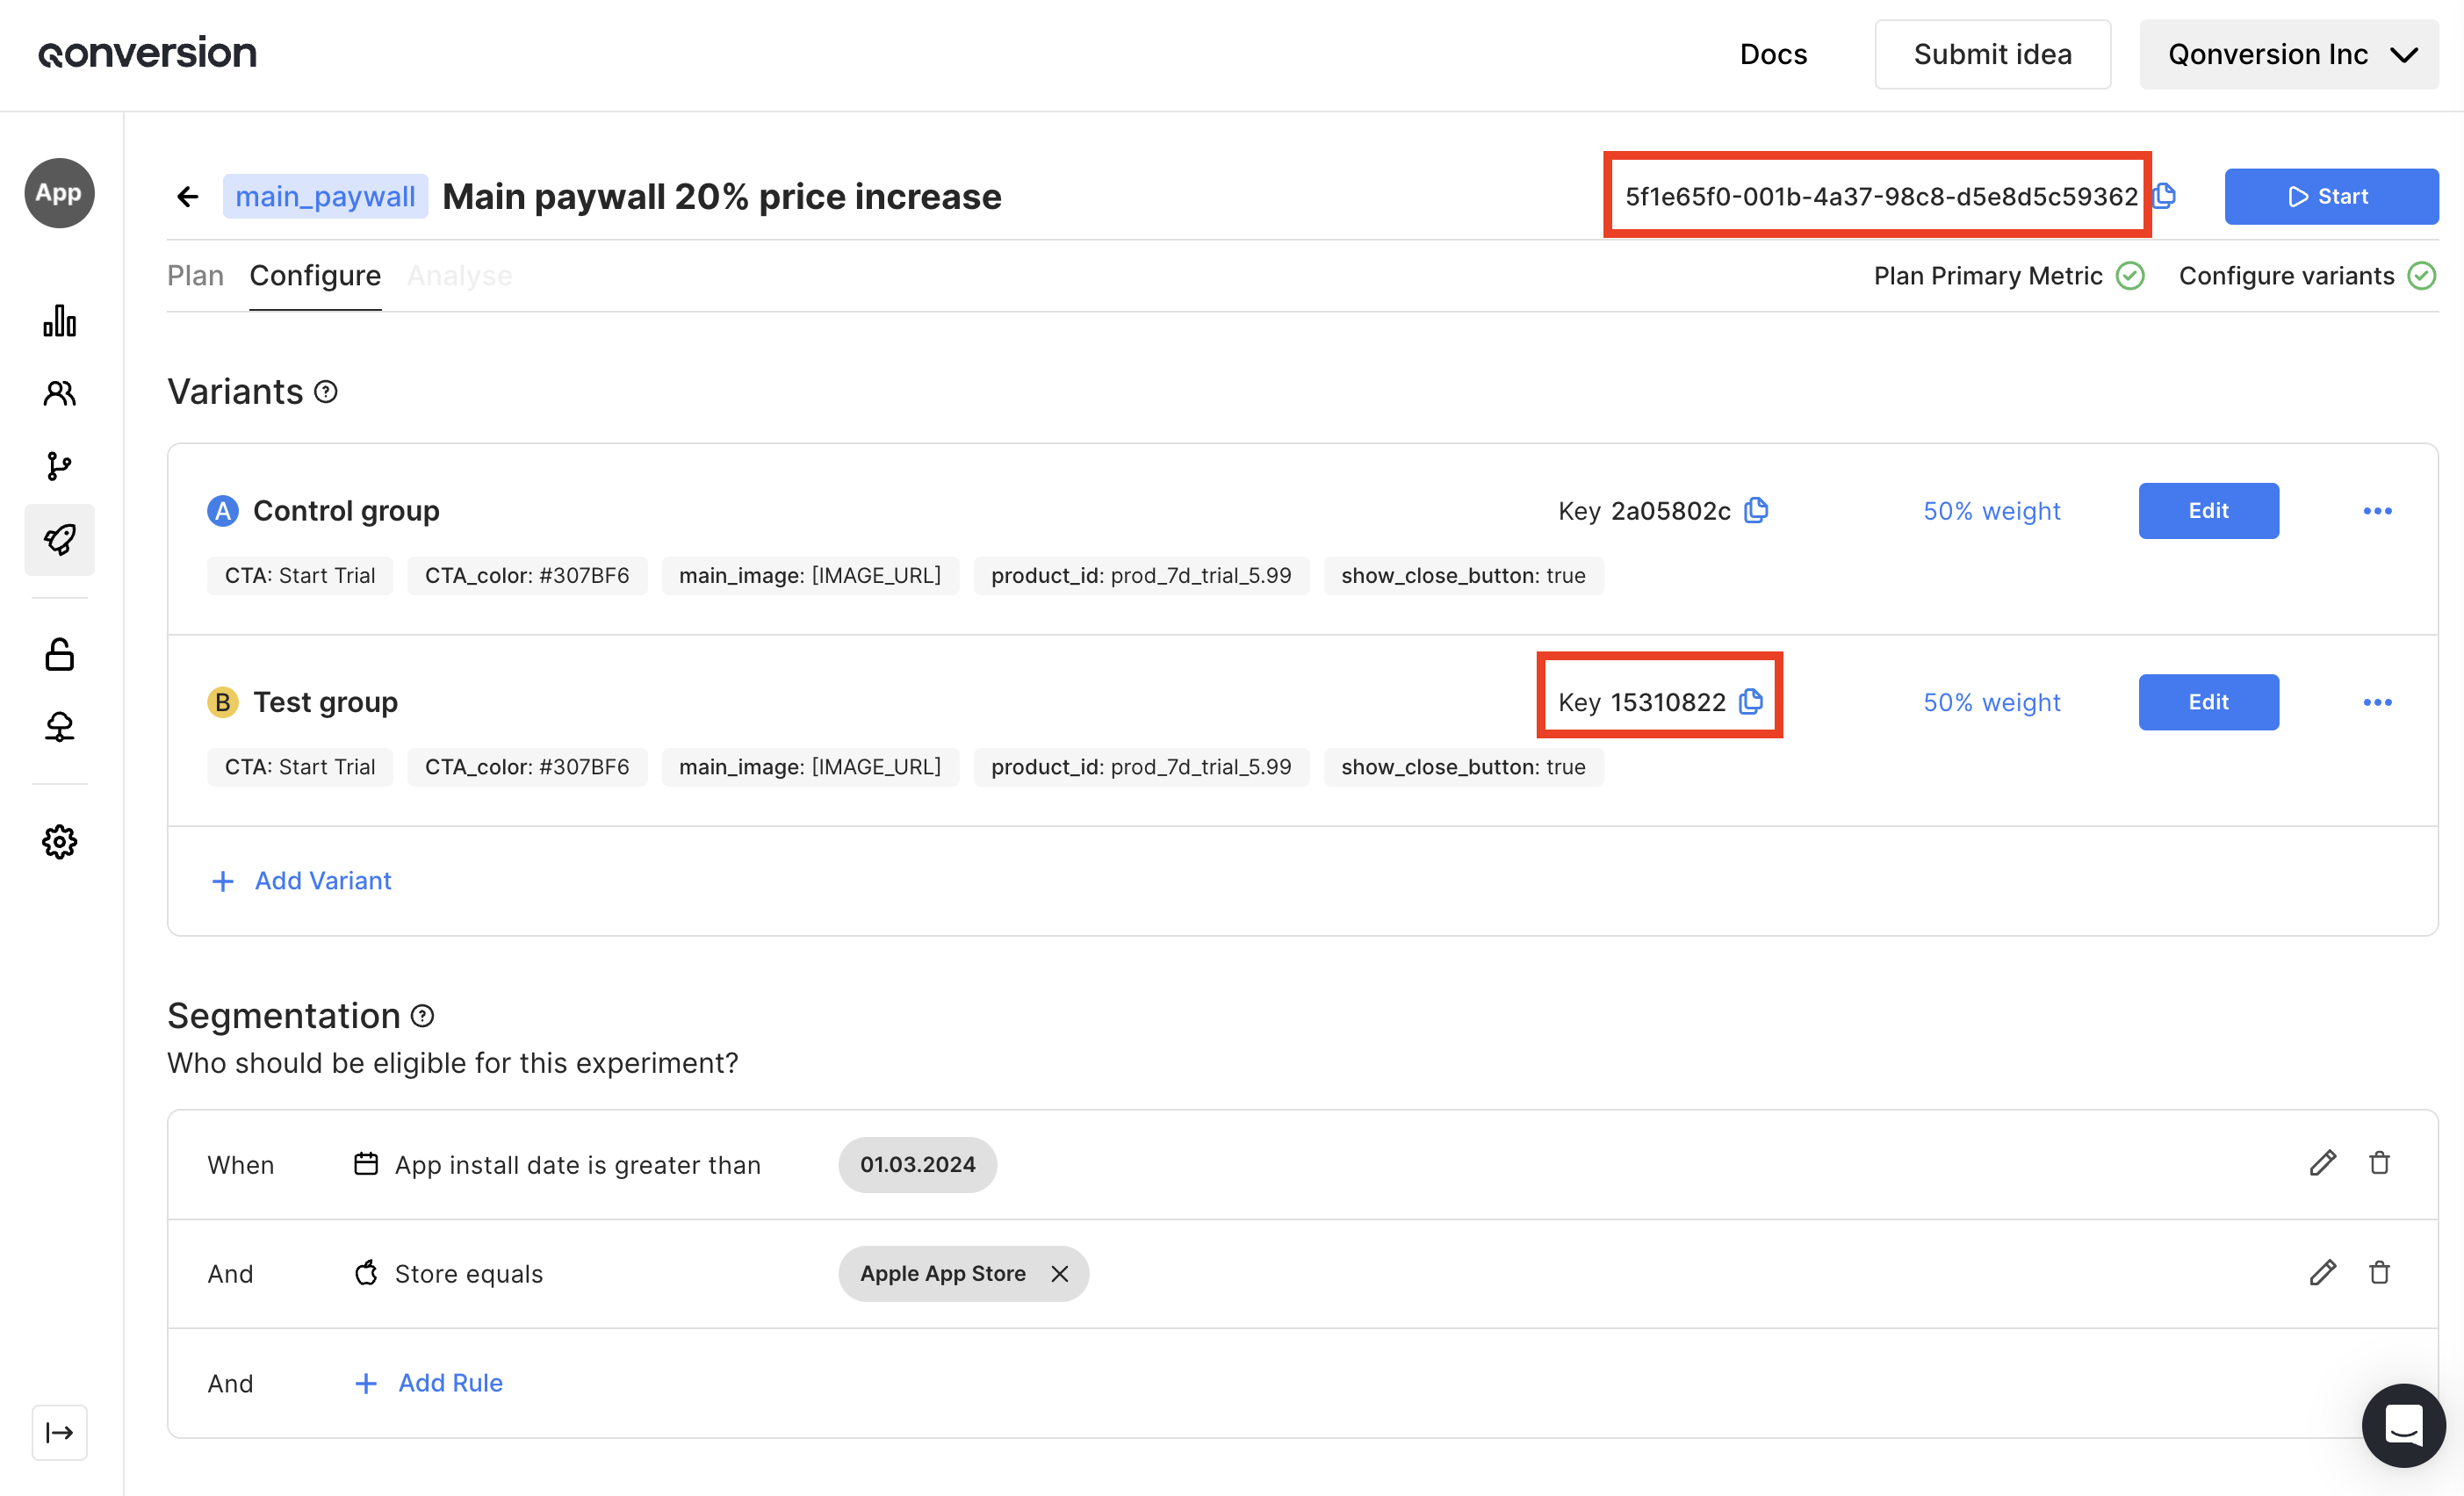
- Pass the values to Qonversion SDK by using the
attachUserToExperimentmethod
- In case your user has already been attached to another experiment, use the
detachUserFromExperimentmethod.
- Call the Qonversion
remoteConfigmethod. Now Qonversion SDK returns data associated with previously set experiment and variant. - Validate your app logic without starting the experiment.
Segment your users
You have the following segmentation opportunities at your disposal:- App install date
- Use this option to assign the configuration only to new app installs.
- App version
- Use this option to assign the configuration only for users with the app version with the new features implemented.
- Attached active experiment
- Use this option to include or exclude users already exposed to other active experiments. Learn more about experiment assigning rules.
- Attached experiment context key
- Use this option to include or exclude users already exposed to other active experiments with specific context keys. Learn more about experiment assigning rules.
- Country
- Use this option to run new behavior only in selected countries.
- Store
- Use this option to target only a specific store (Apple App Store or Google Play).
- User’s active subscription
- Use this option to target only users with/without any active subscriptions or having a specific one.
- Purchased product
- Use this option to target users based on their purchase history. You can select specific products or use
(any)to match users who made at least one purchase, or(none)for users with no purchase history. Unlike “Active subscription”, this filter checks all purchases regardless of their current status (active, expired, or cancelled).
- Use this option to target users based on their purchase history. You can select specific products or use
- Last purchase date
- Use this option to target users based on when they made their most recent purchase. For example, you can target users whose last purchase was more than 60 days ago to identify churned users.
- User properties
- Use this option to target users with specific custom user properties set via the SDK. Useful for behavior-based or attribute-based experiments.
3. Adjust traffic level
We do not recommend starting your experiments with 100% of all eligible users. It might be enough to start with 10% to ensure everything works fine and gradually increase your traffic level later.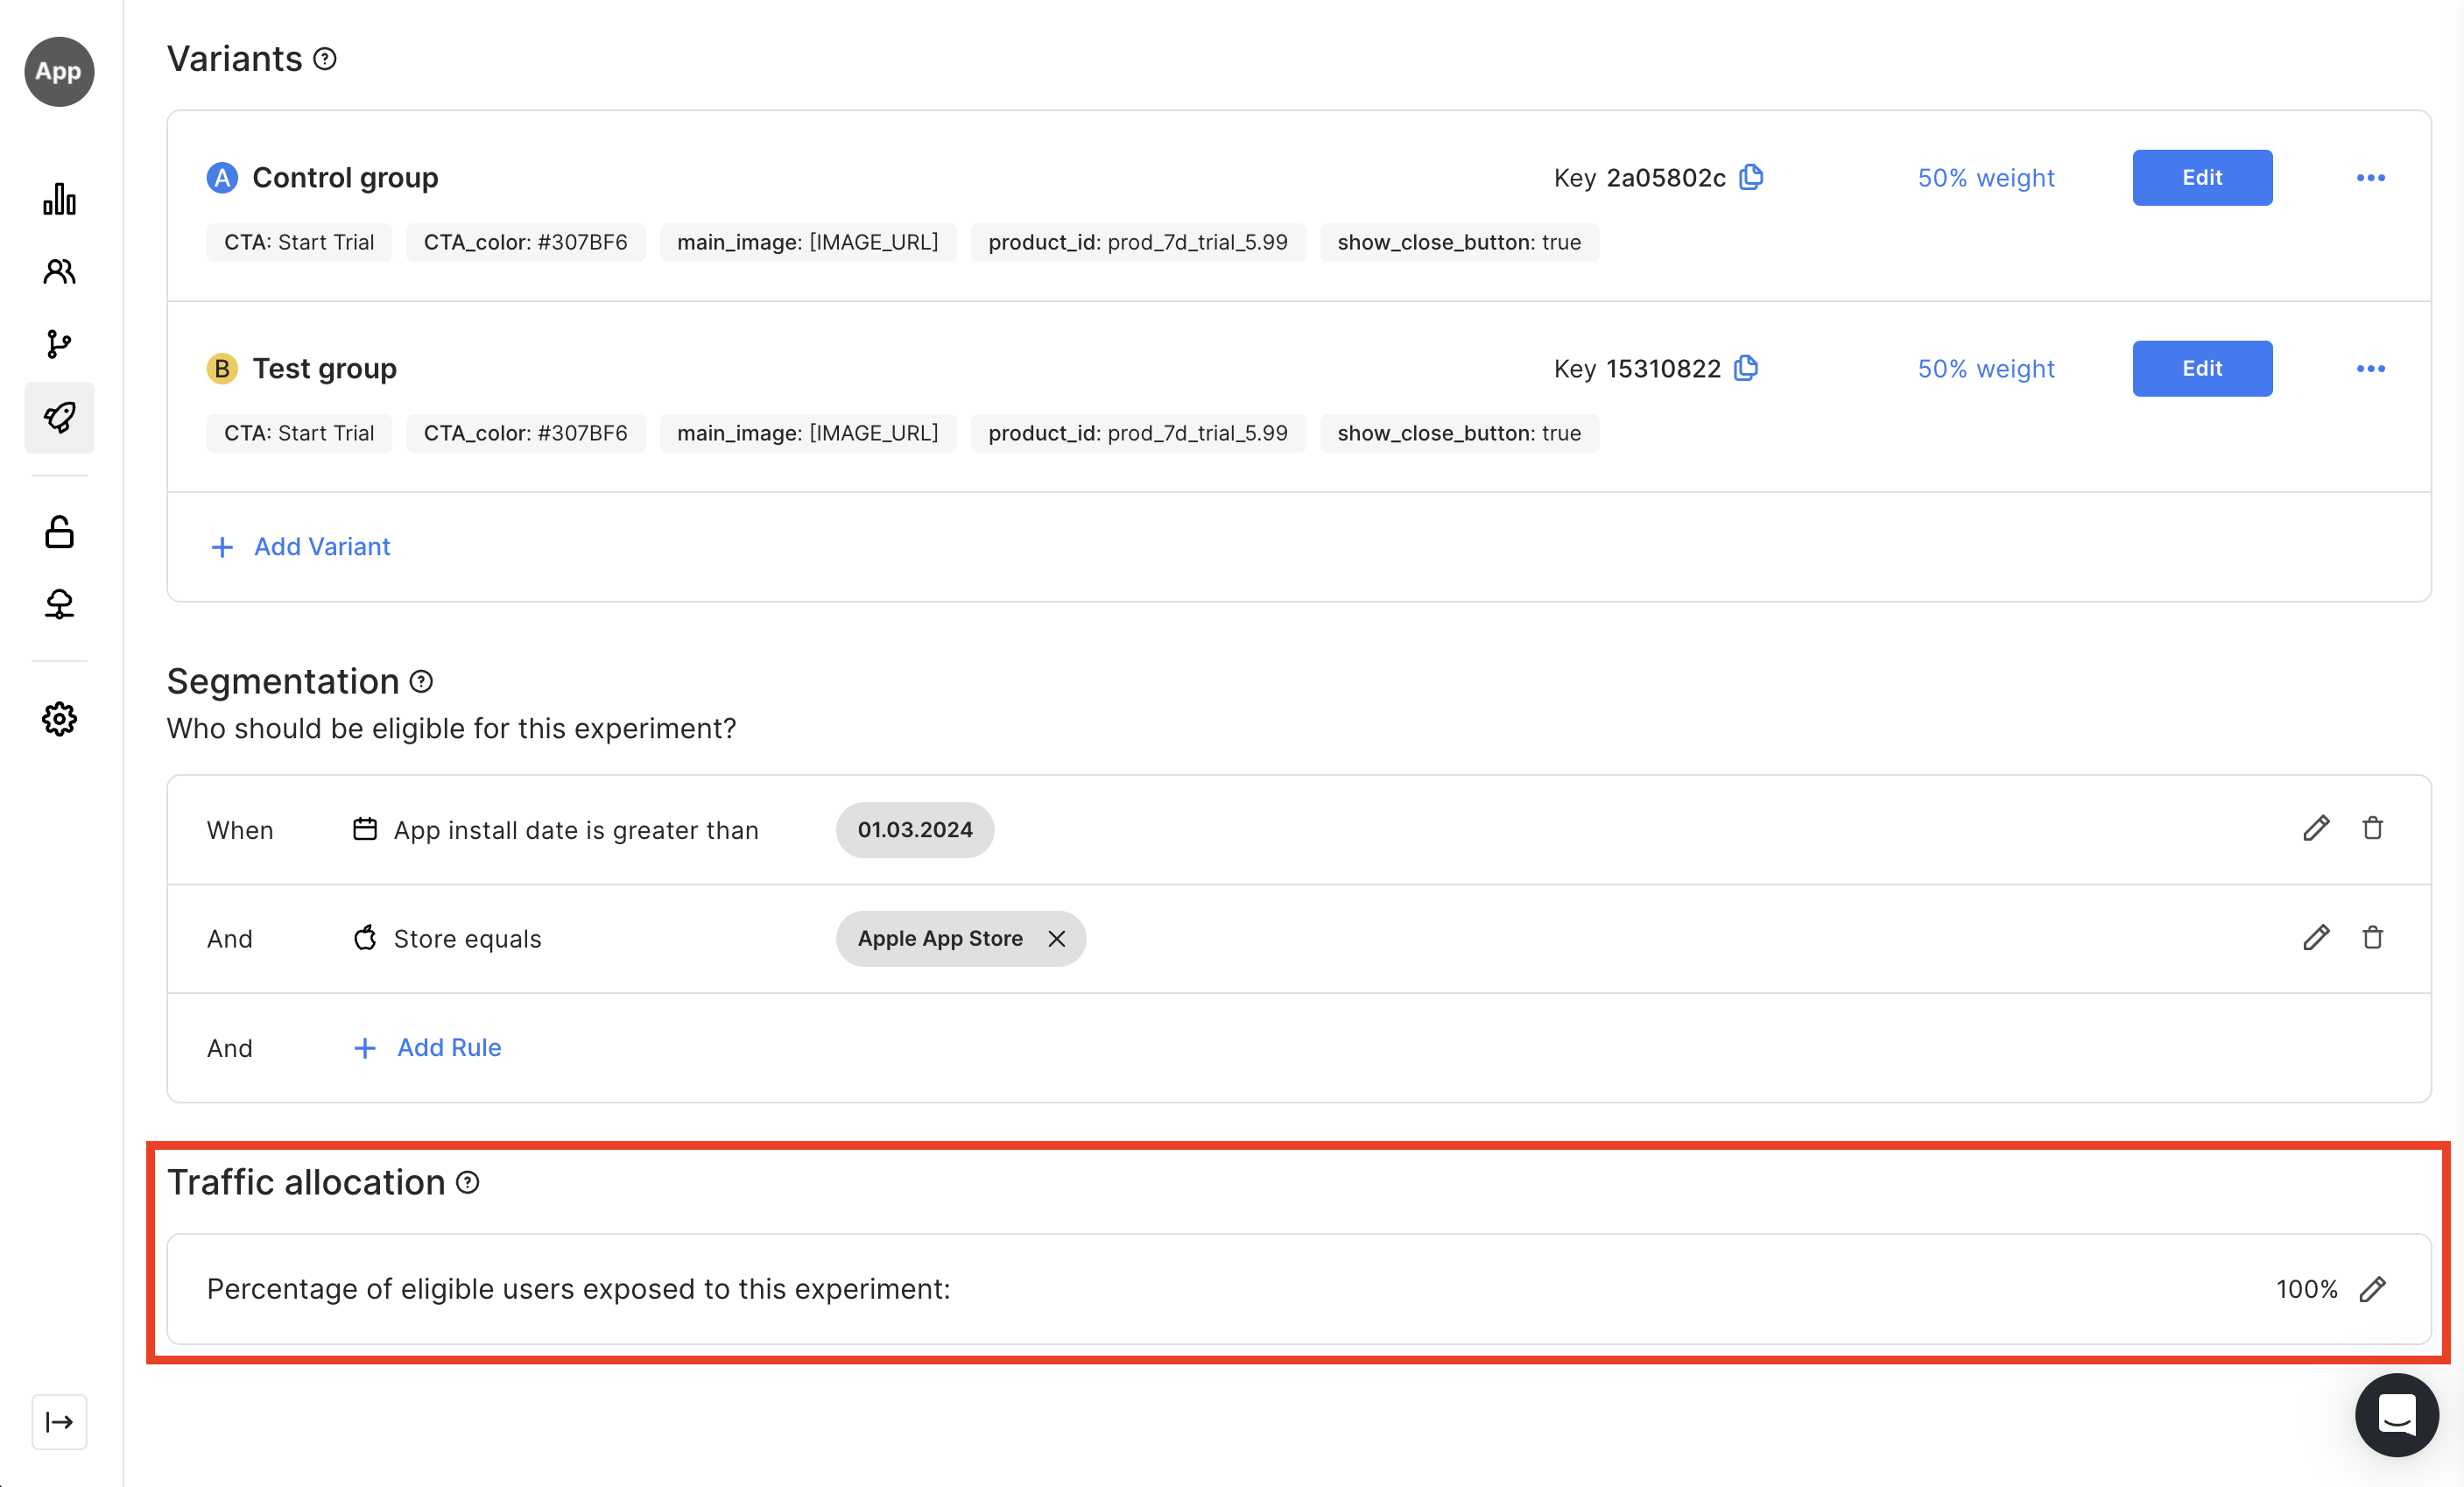
4. Launch the setup
Once you have configured your experiment, segmentation, and traffic level, it’s time to start your experiment and proceed to the section with real-time analytics.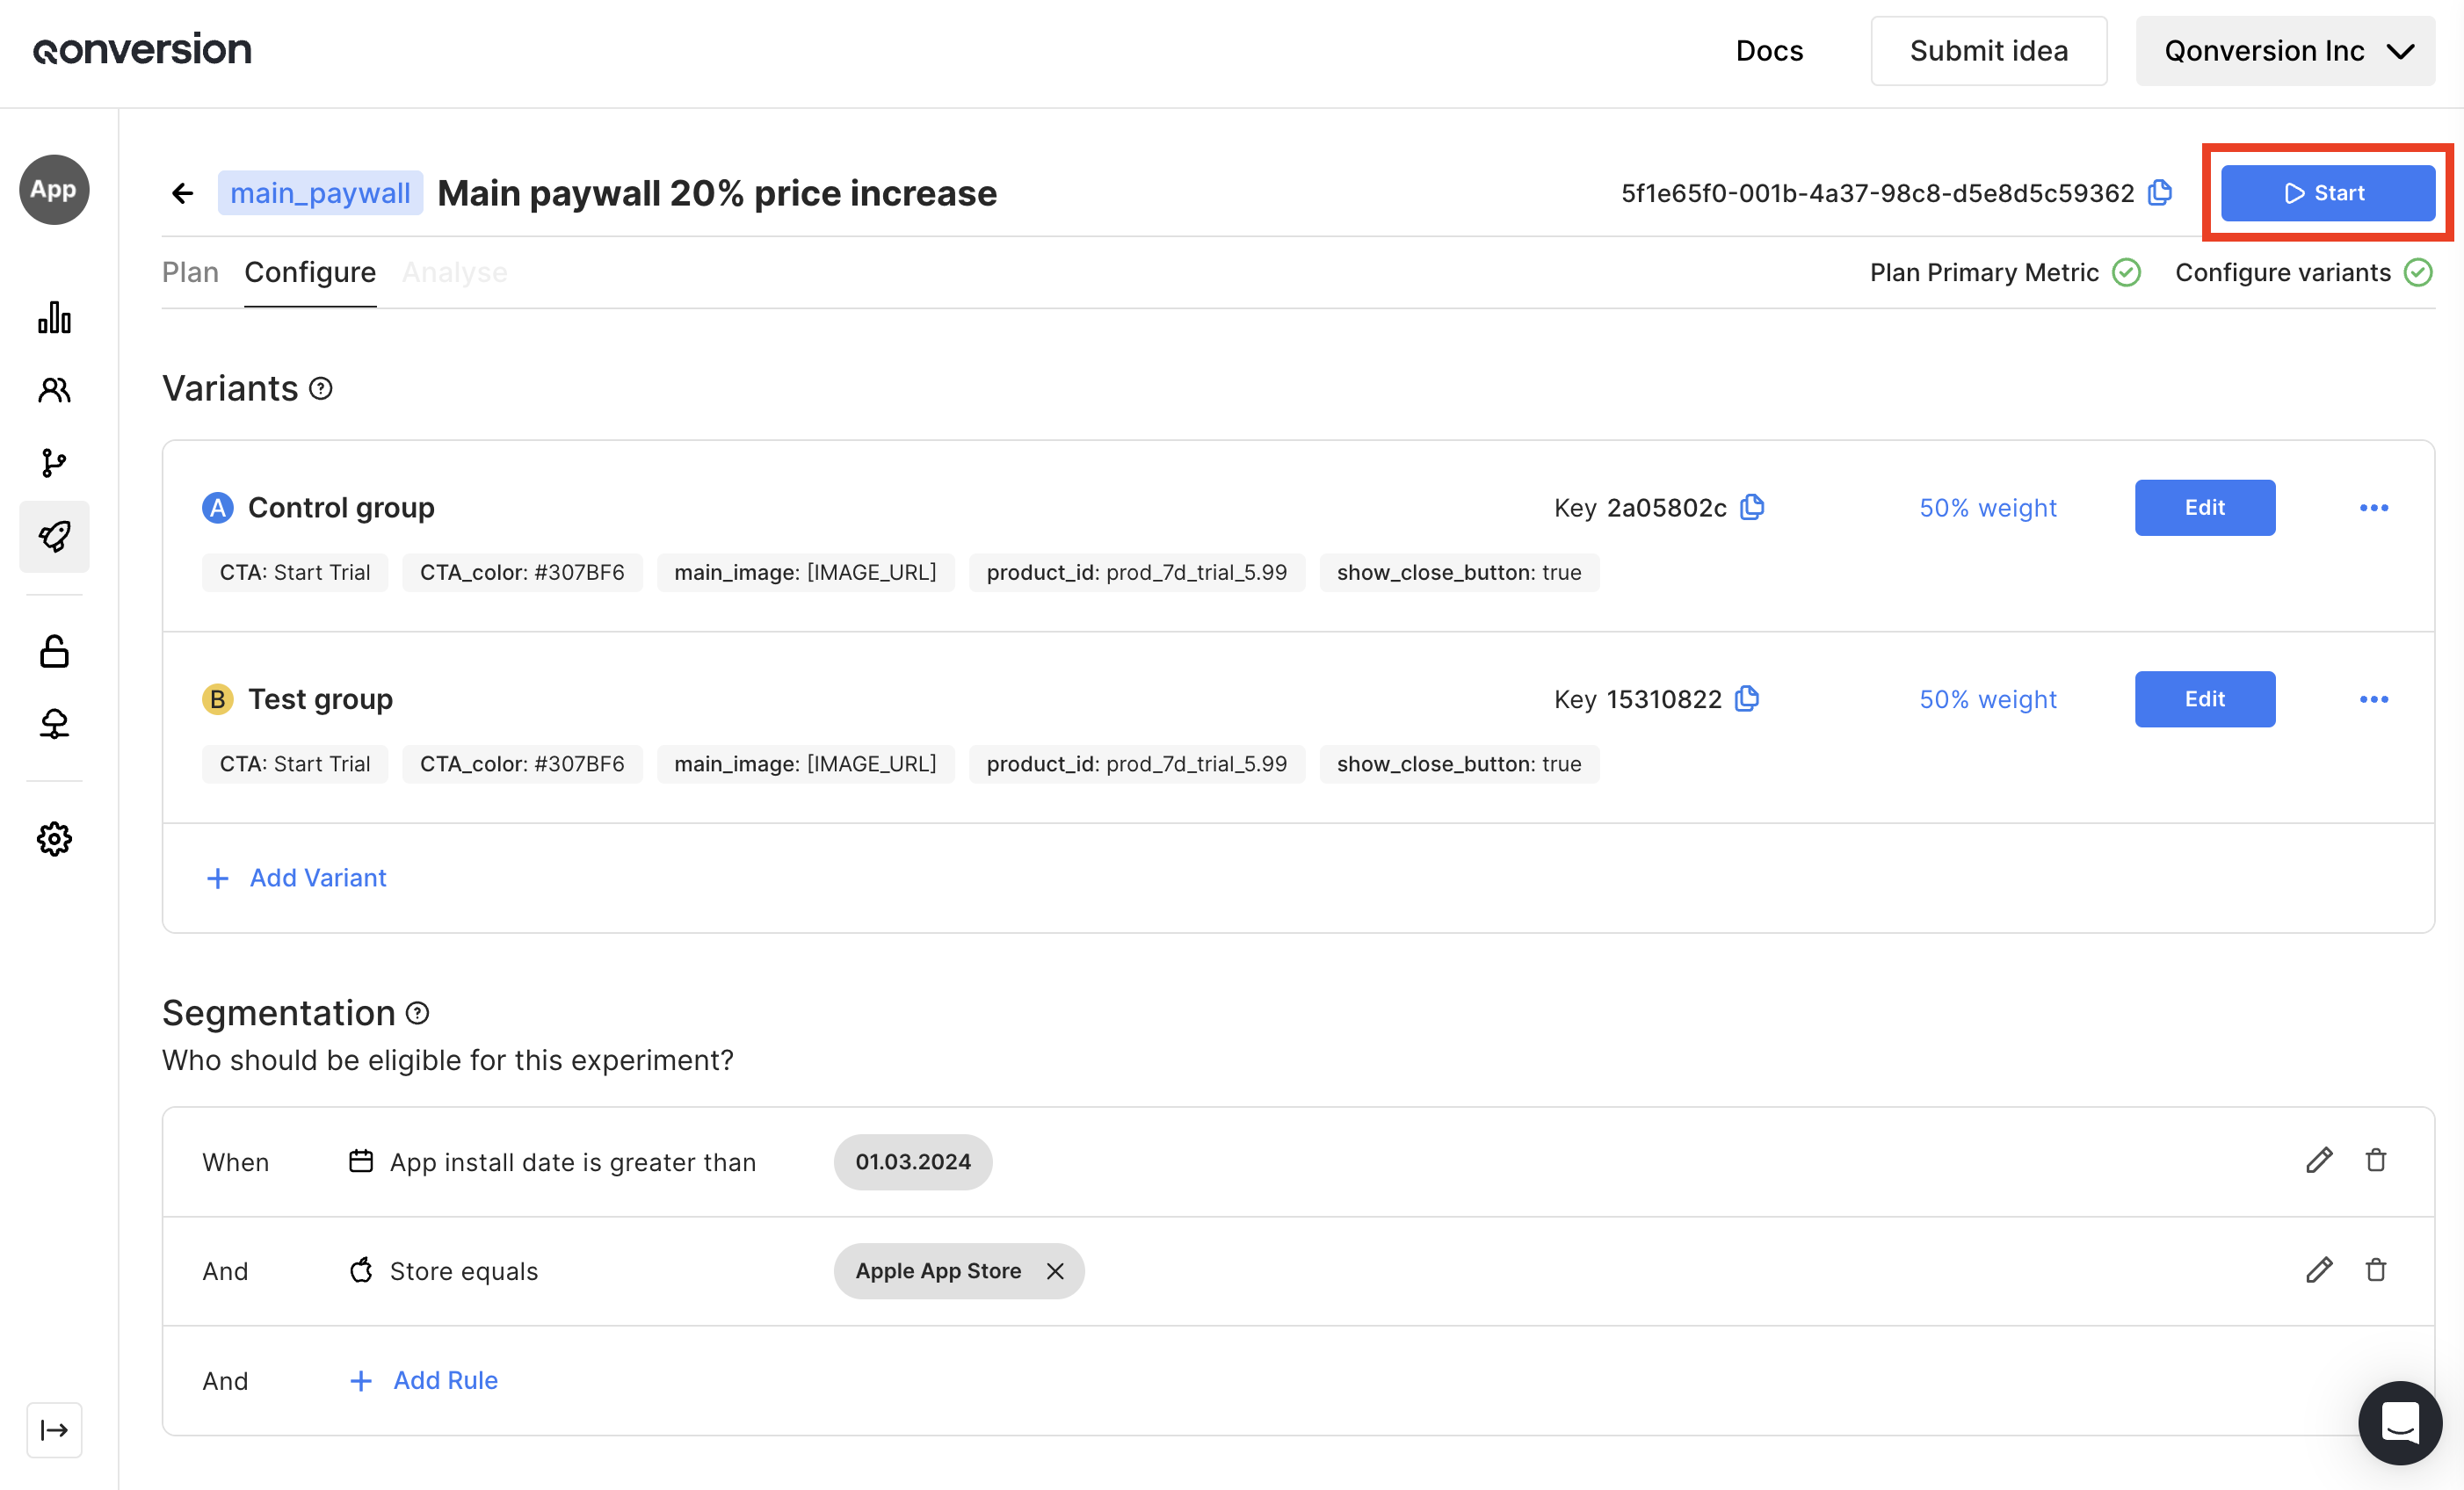
What’s Next