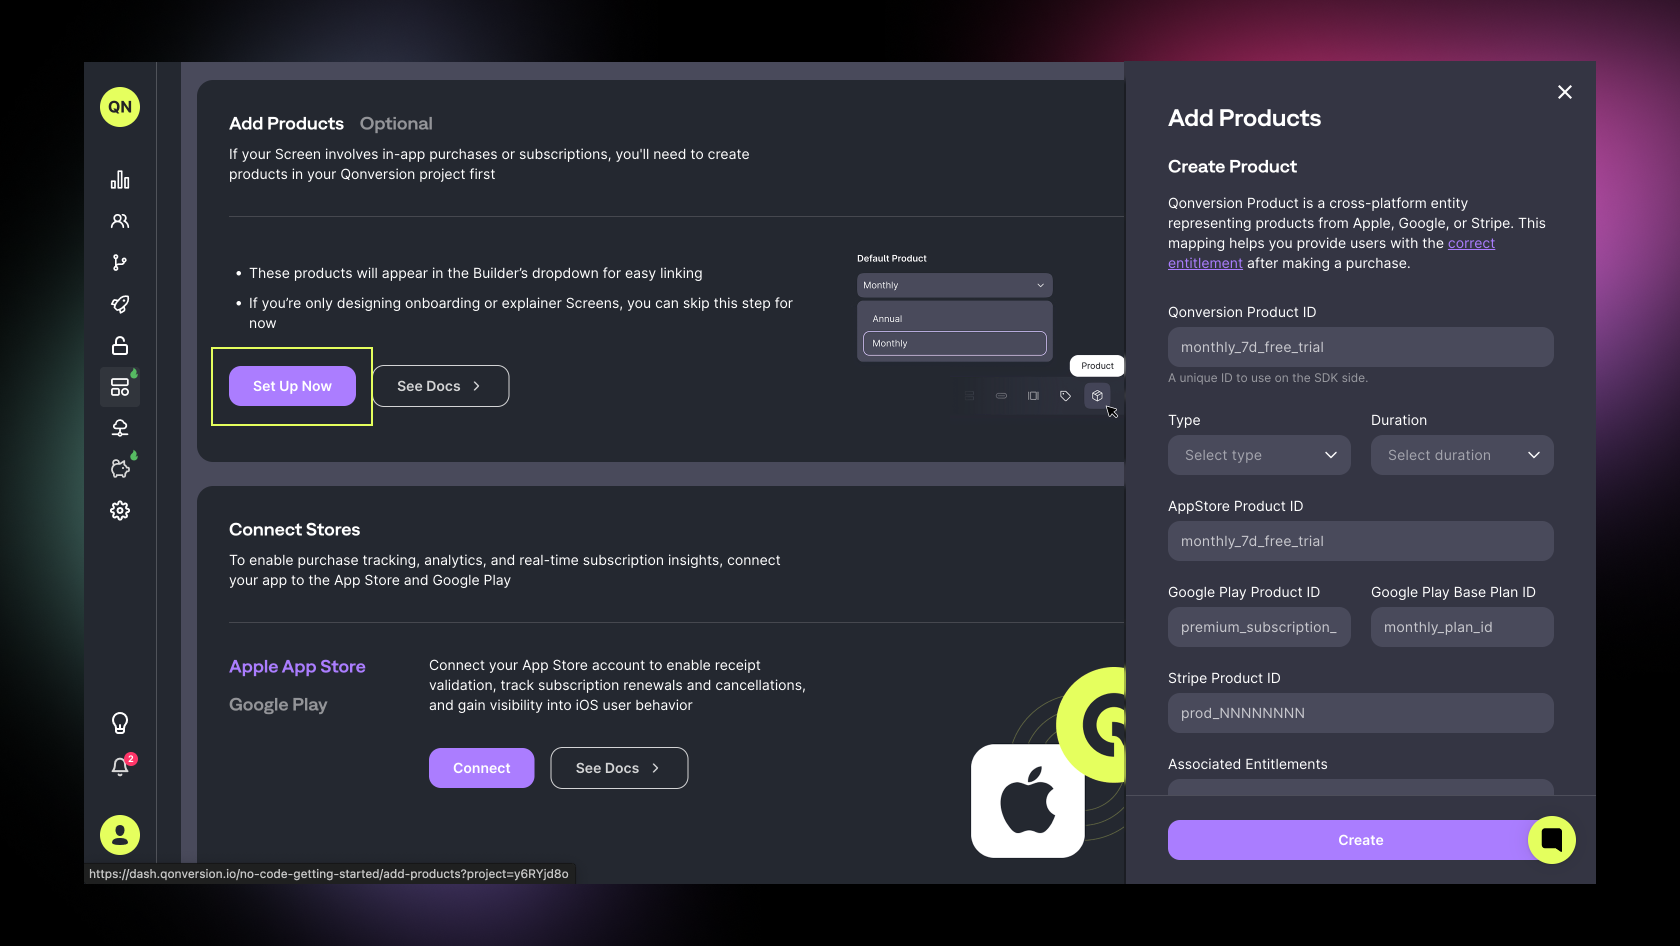
1. Add Products
(Optional, but recommended for paywalls) If your screen involves in-app purchases or subscriptions, you’ll need to create products in your Qonversion project first.- These products will appear in the Builder’s dropdown for easy linking.
- If you’re only designing onboarding or feature-explainer screens, you can skip this step for now.
- Go to Dashboard → No-Codes → Getting Started
- Scroll to the Add Products section
- Click Add Product and fill in the details (Product ID, Store, Type, Duration, Price)
Learn more about Entitlements
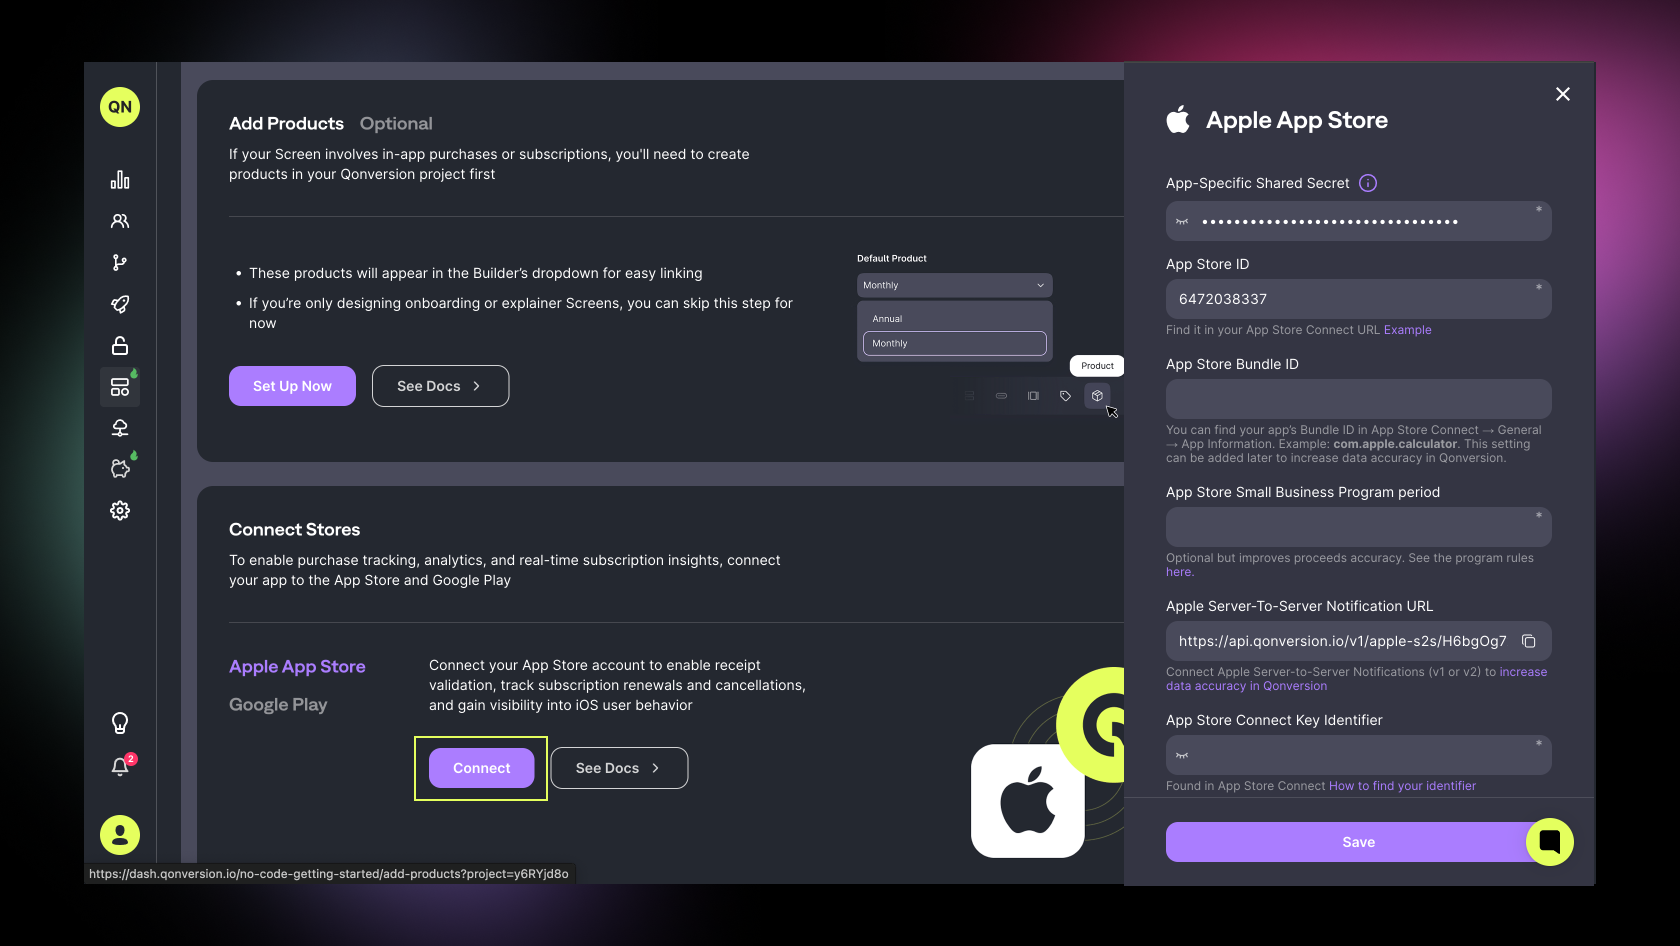
2. Connect Stores
Connecting your Apple App Store and Google Play accounts enables:- Real-time subscription status tracking
- Purchase validation and fraud protection
- In-depth analytics on conversion, revenue, and retention
- Go to Dashboard → No-Codes → Getting Started
- Scroll to Store Connection
- Choose your store (App Store or Google Play)
- Follow the setup prompts to authorize the connection
3. Using Products in the Builder
In the No-Code Builder, you can use products in several ways:- Canvas Settings – Set a Default Product that’s automatically selected when the screen is displayed.
- Actions – Components like Containers and Buttons include action settings such as Make a Purchase or Select Product.
- Text Variables – Dynamically insert product names, prices, or other attributes.
- Display name
- Price products.weekly.price
- Trial duration or period
- Currency
Learn more about Variables
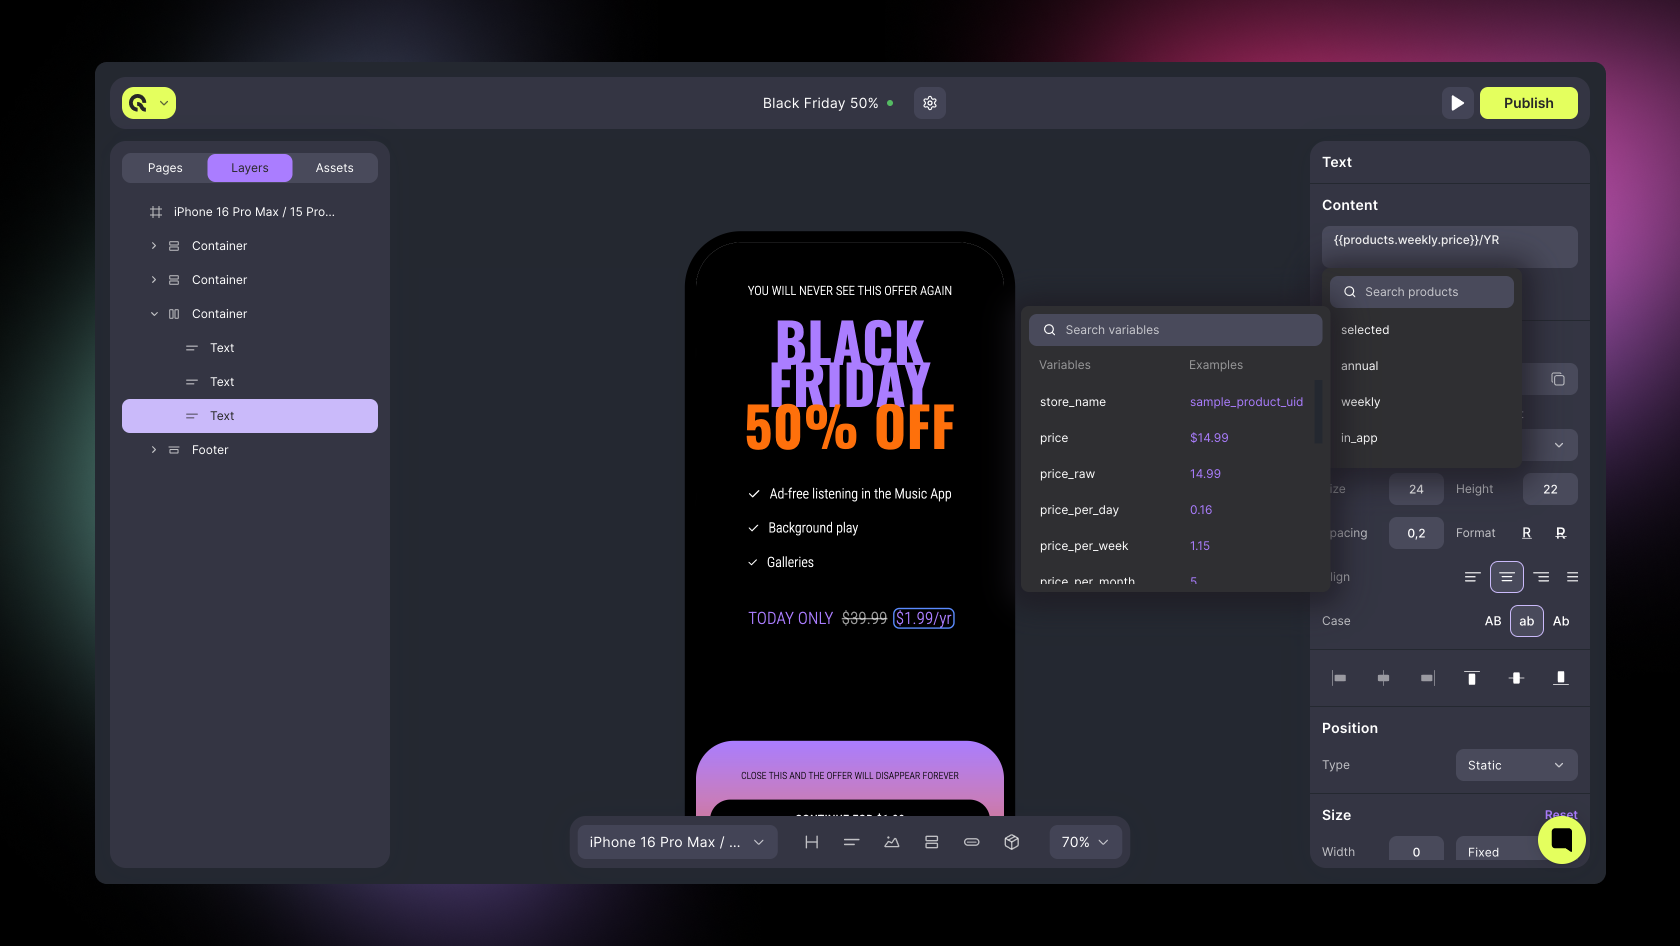
Sync Updates
Whenever you change product prices or configurations in your store, Qonversion automatically syncs them. No need to republish screens — product data updates dynamically.Installation Creating Screens