Android In-App Products Setup
Creating in-app products before granting users access or linking Google Cloud Project to the service account may cause problems with the receipt validation using Google Play Developer API. Google Play Developer API can return the following error "The current user has insufficient permissions to perform the requested operation."
When encountering this issue, open the In-app products or Subscription tab respectively on the Google Play Console and make any updates. For example, edit the product description and save it.
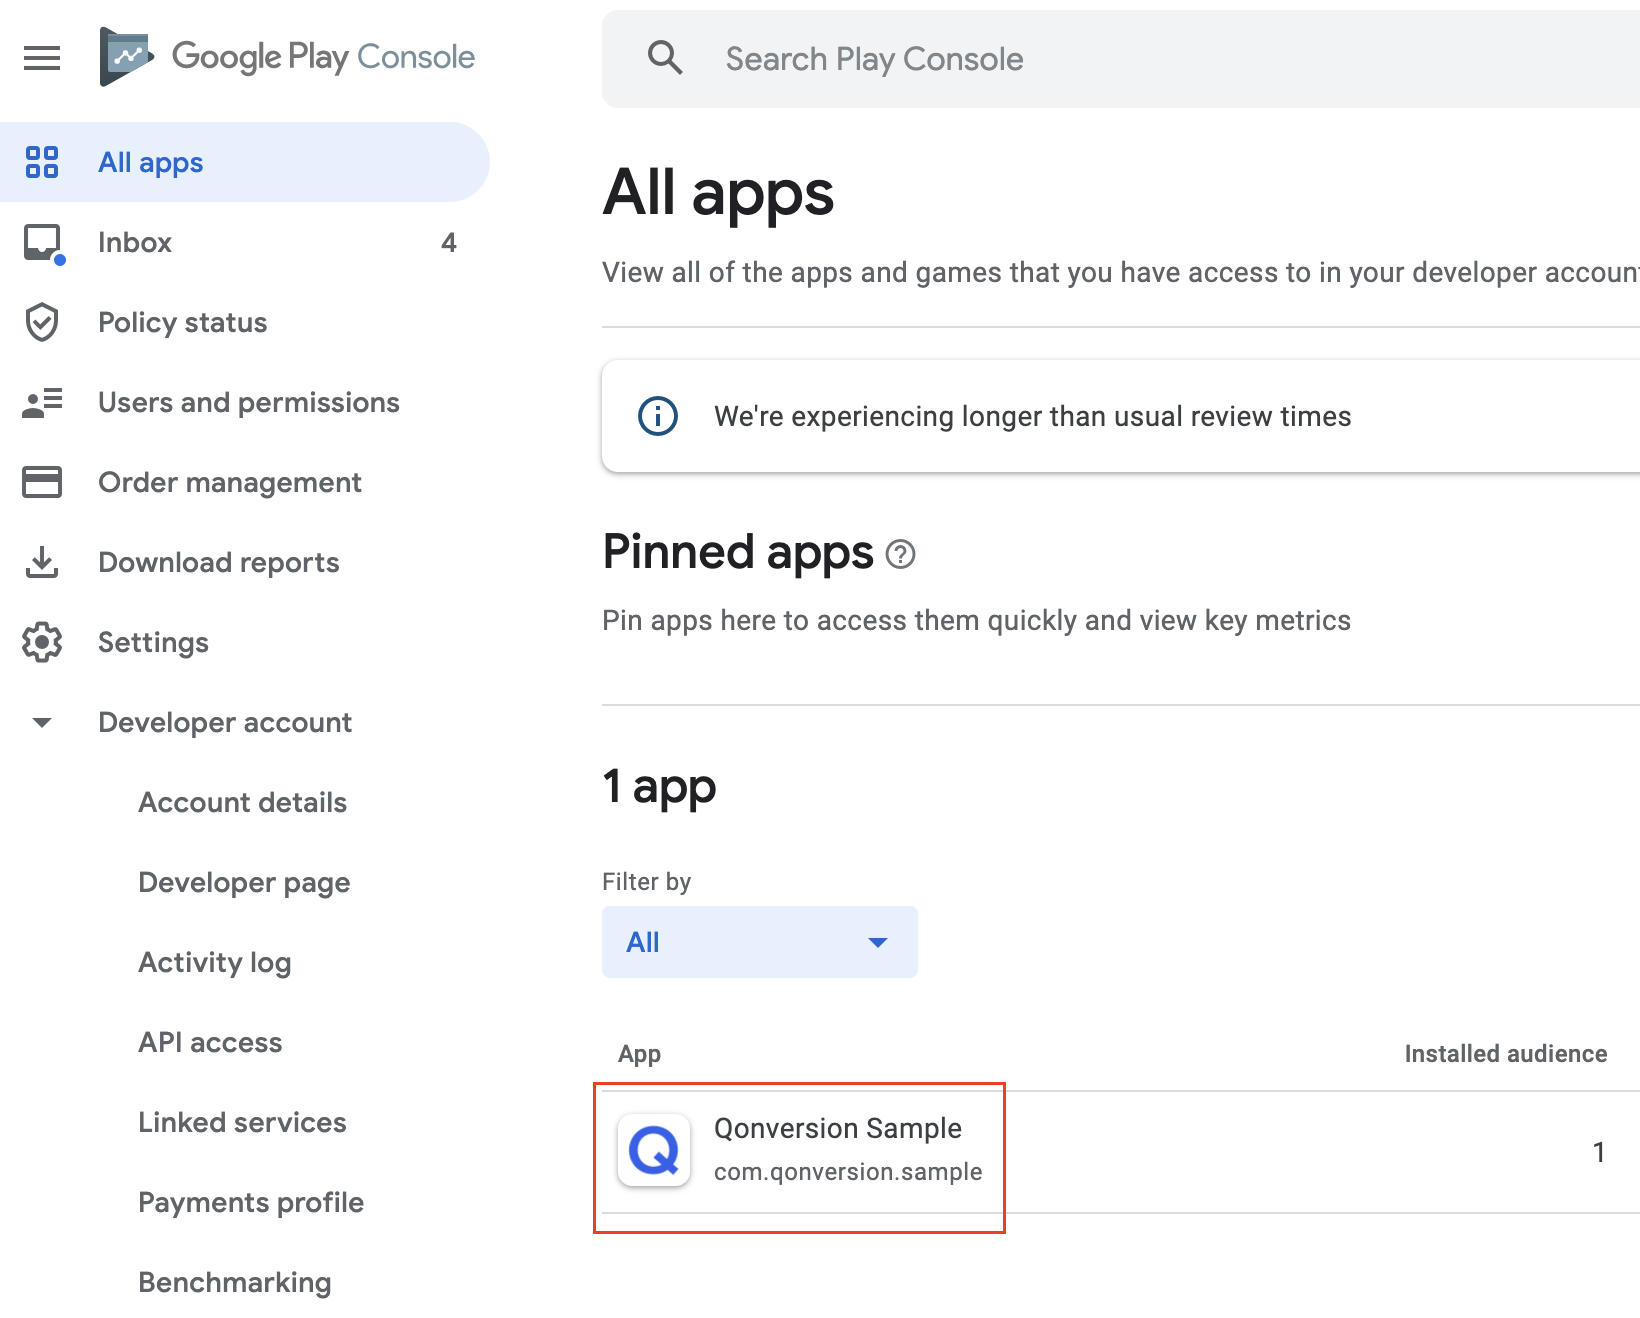
In order to create an in-app purchase navigate to Google Play Developer Console and select the 'All apps' tab. Then select your app from the list.
Select Products. You can select either In-app products or Subscriptions.
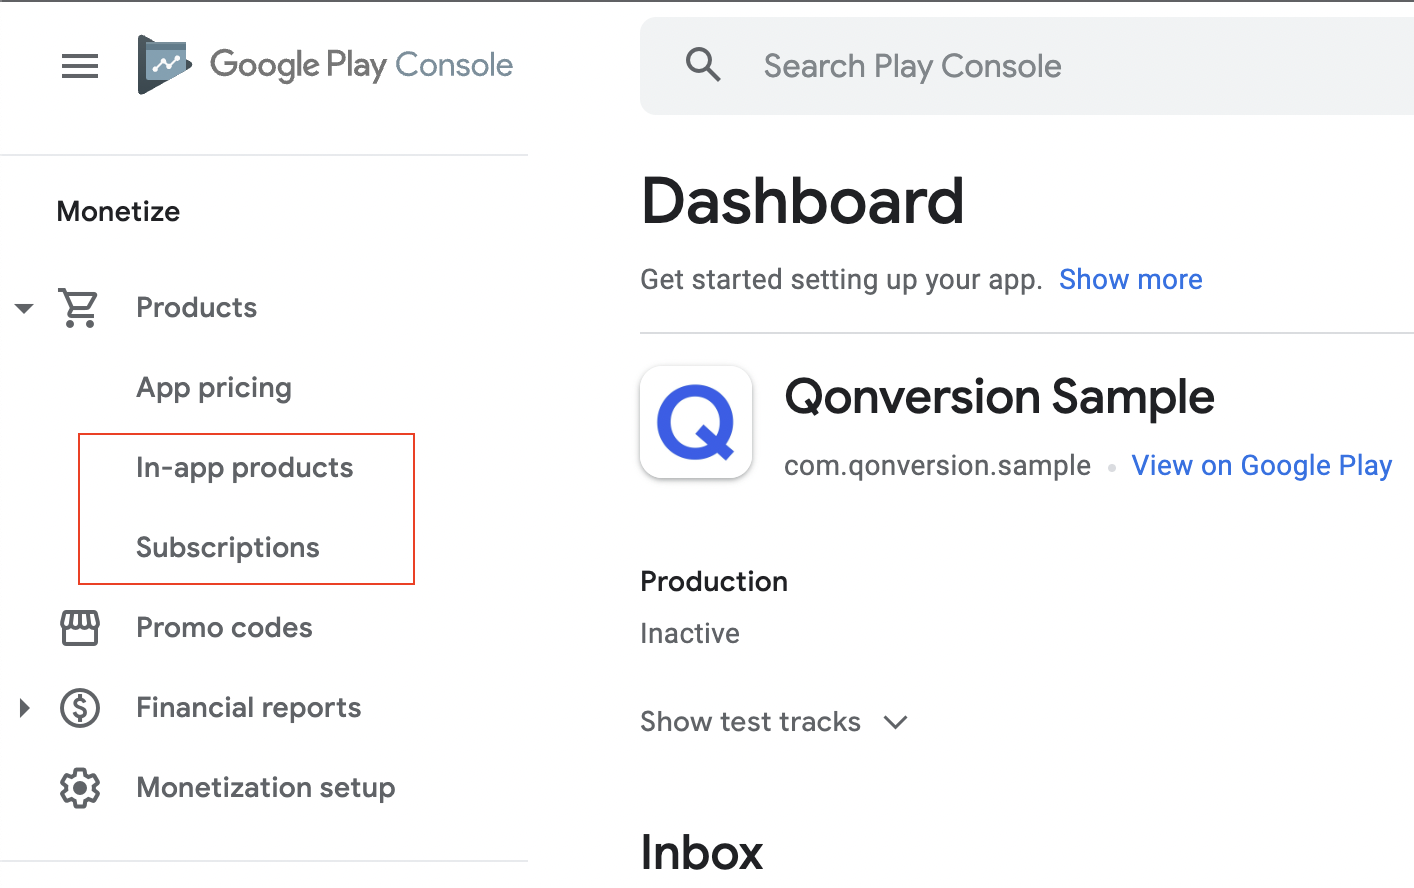
1. In-app products
Let's choose the In-app products tab. Click the Create product button. You have to provide Product ID, Name, and Description.
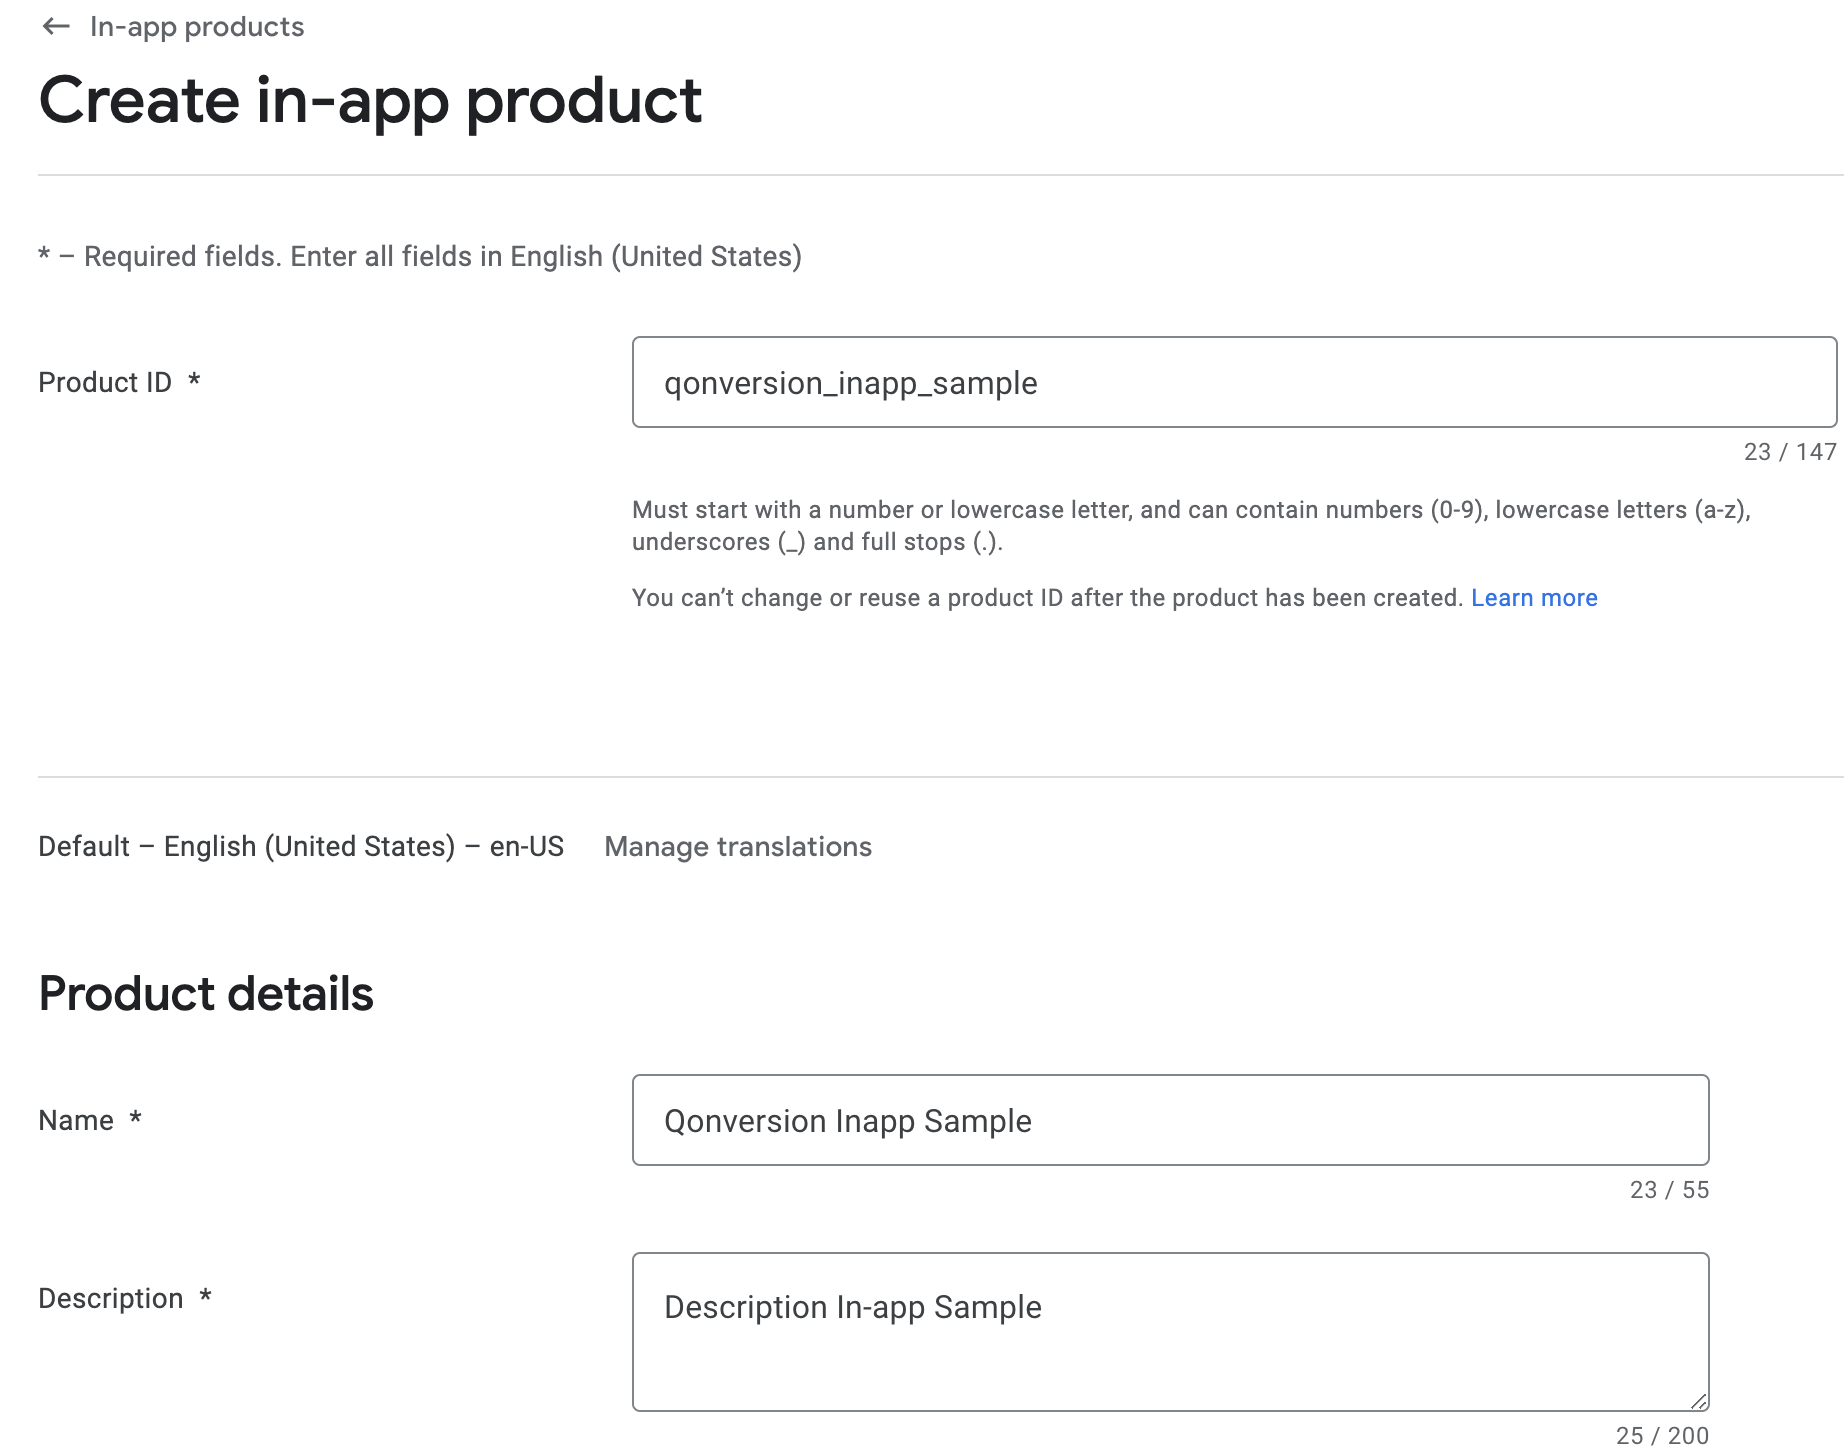
NoteYou can’t change the product ID after the product has been created.
Set the price at the bottom of the page and apply changes.
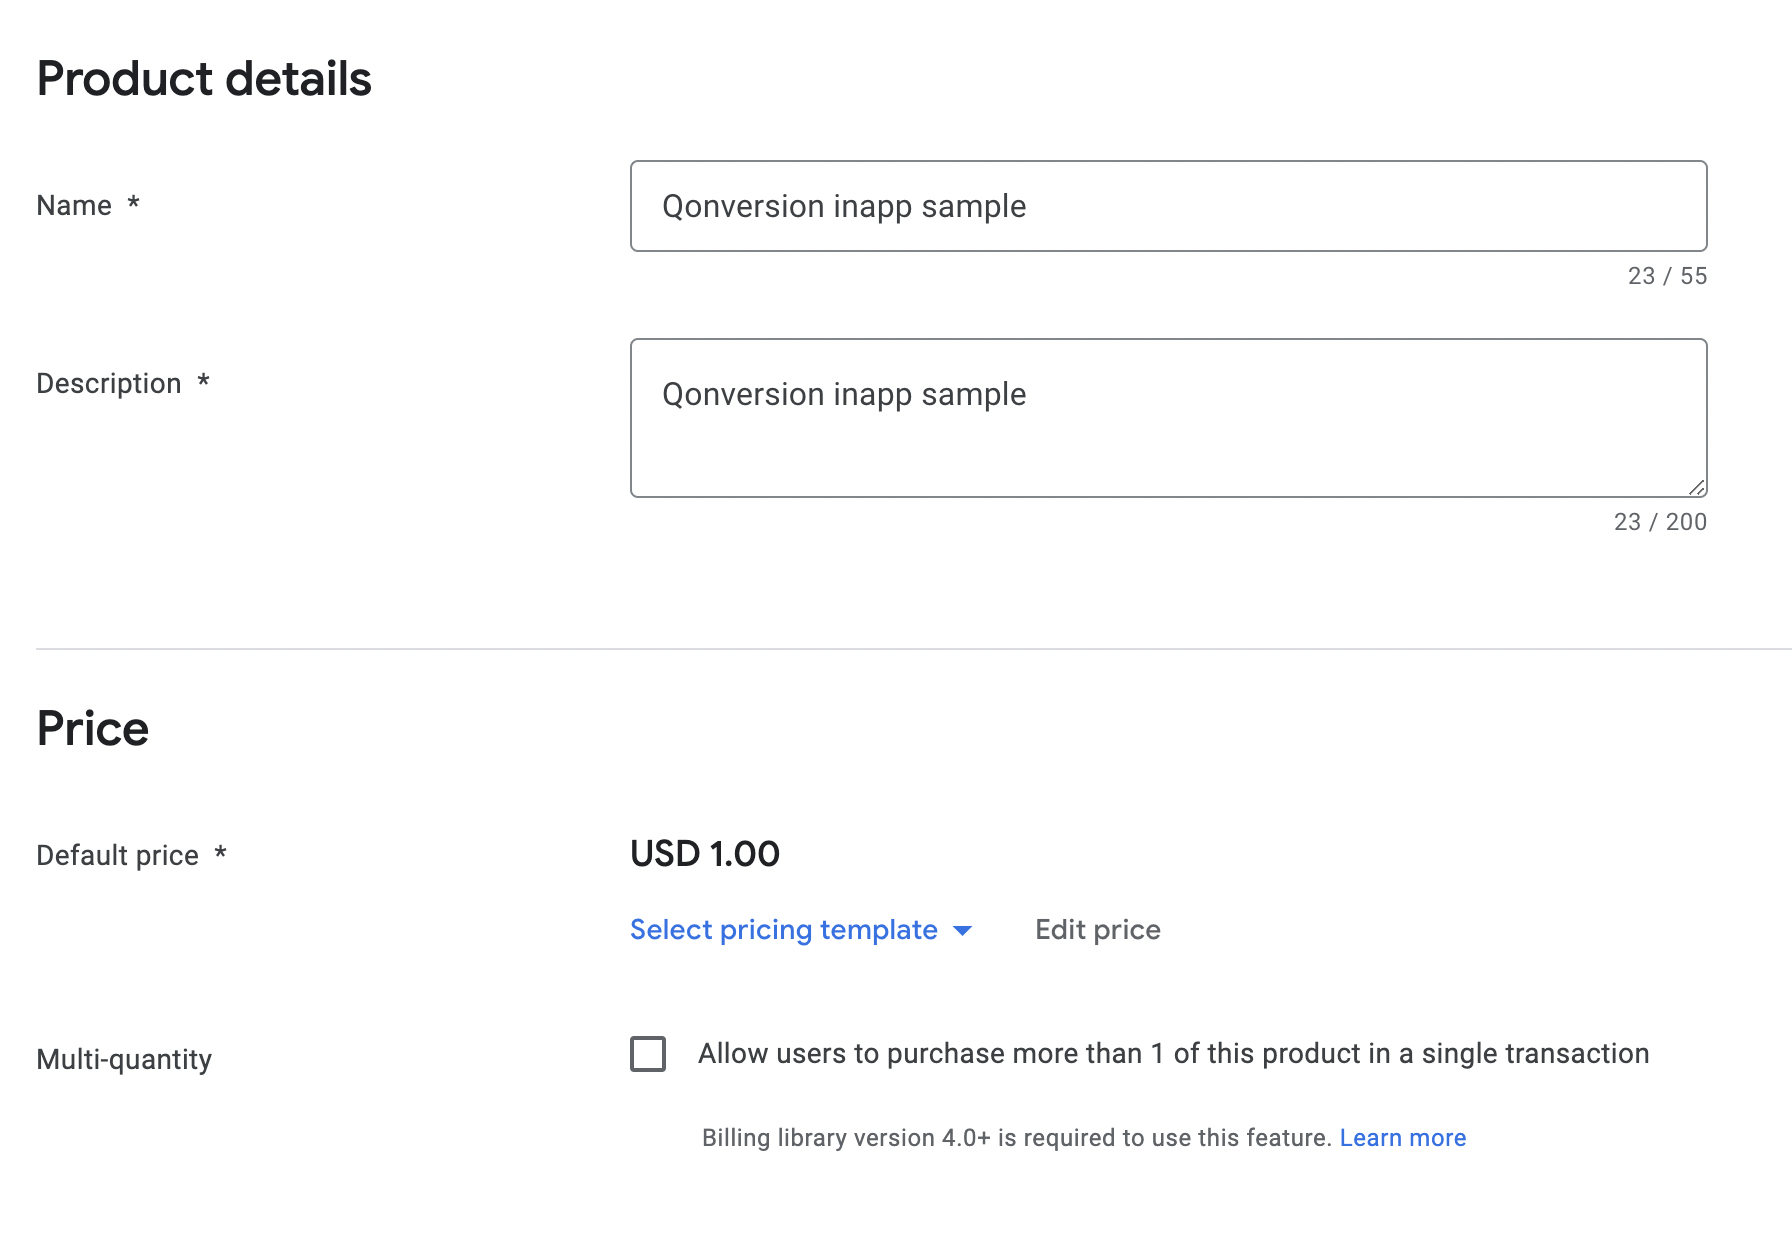
NoteQonversion doesn't yet support multi-quantity purchases, so leave that option unselected.
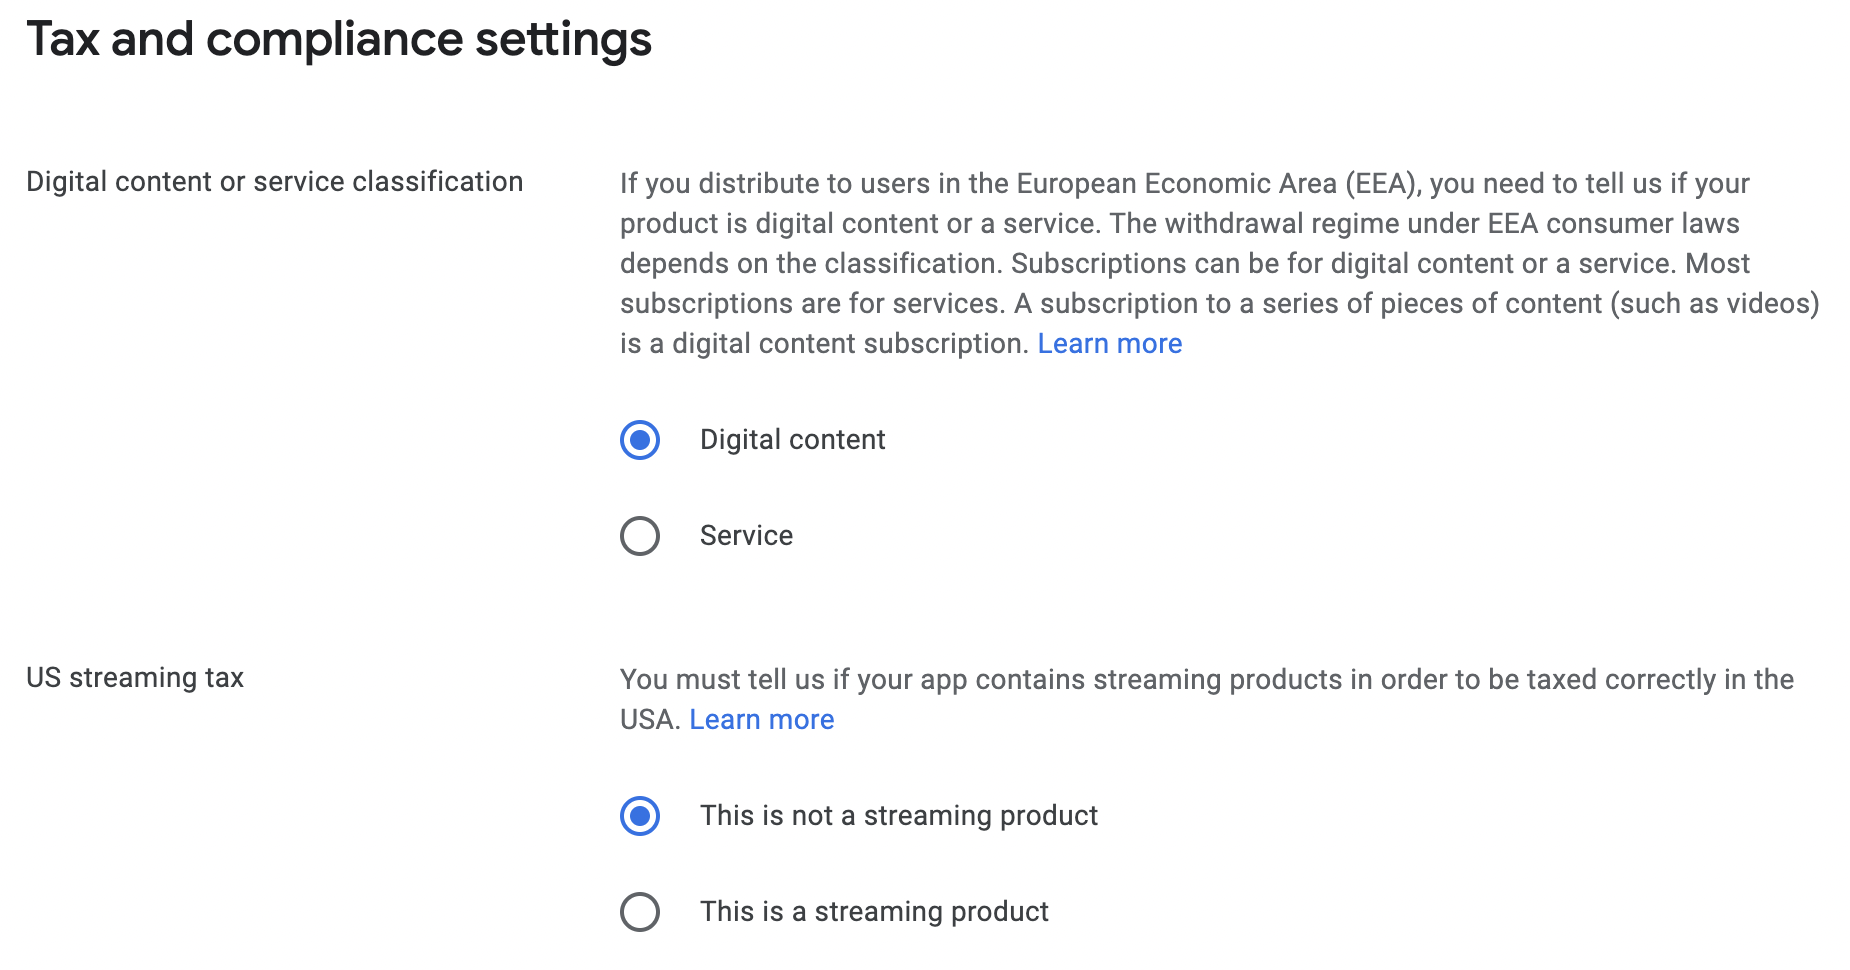
Finally, check the tax and compliance settings and then click Save.
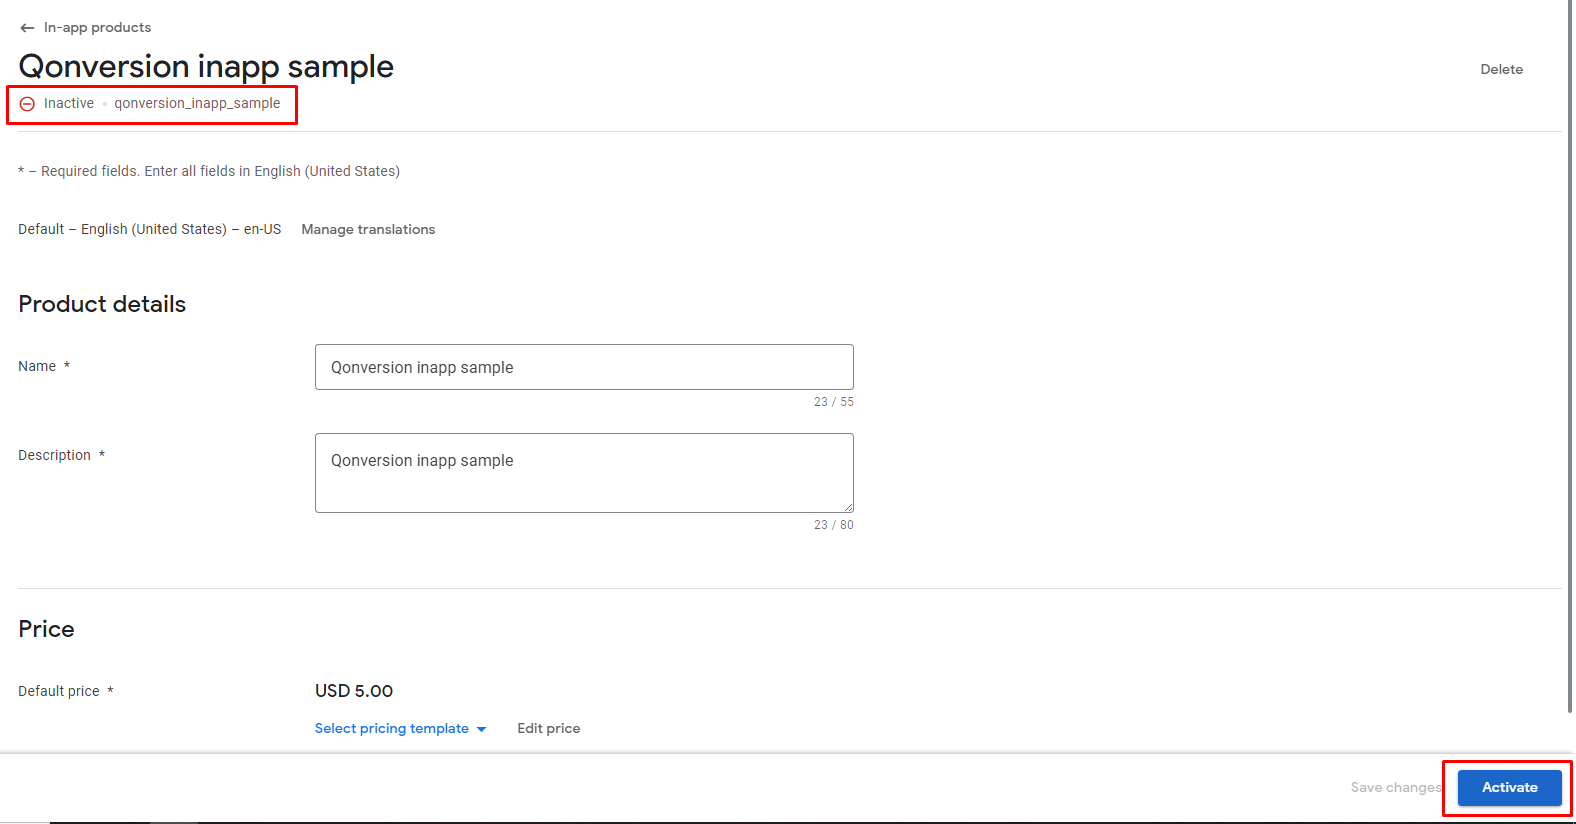
Once you have created a product, it has an Inactive status. Click the Activate button.

2. Subscriptions
Let's choose the Subscriptions tab. Click the Create subscription button. Provide Product ID and Name.
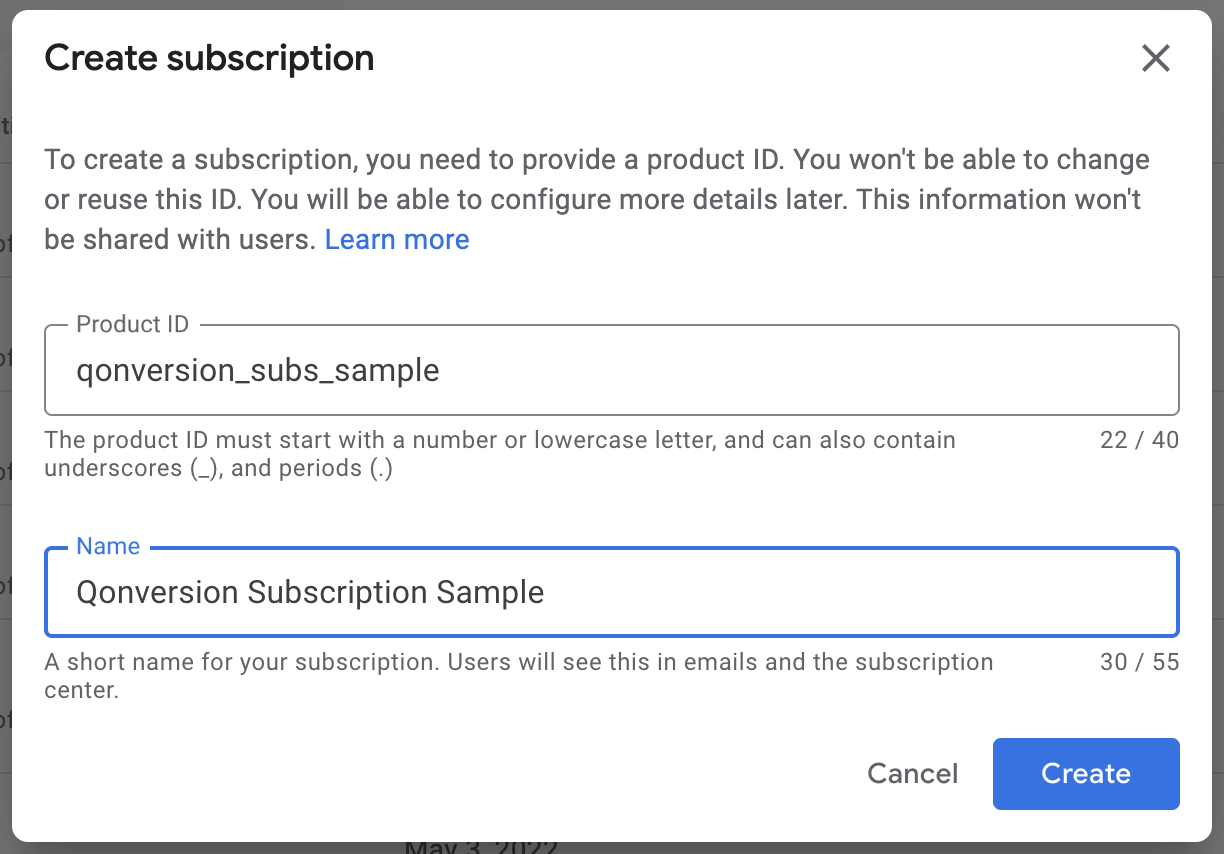
Now the subscription is created but it is not configured yet. There are four steps to configure it. Two of them are optional.
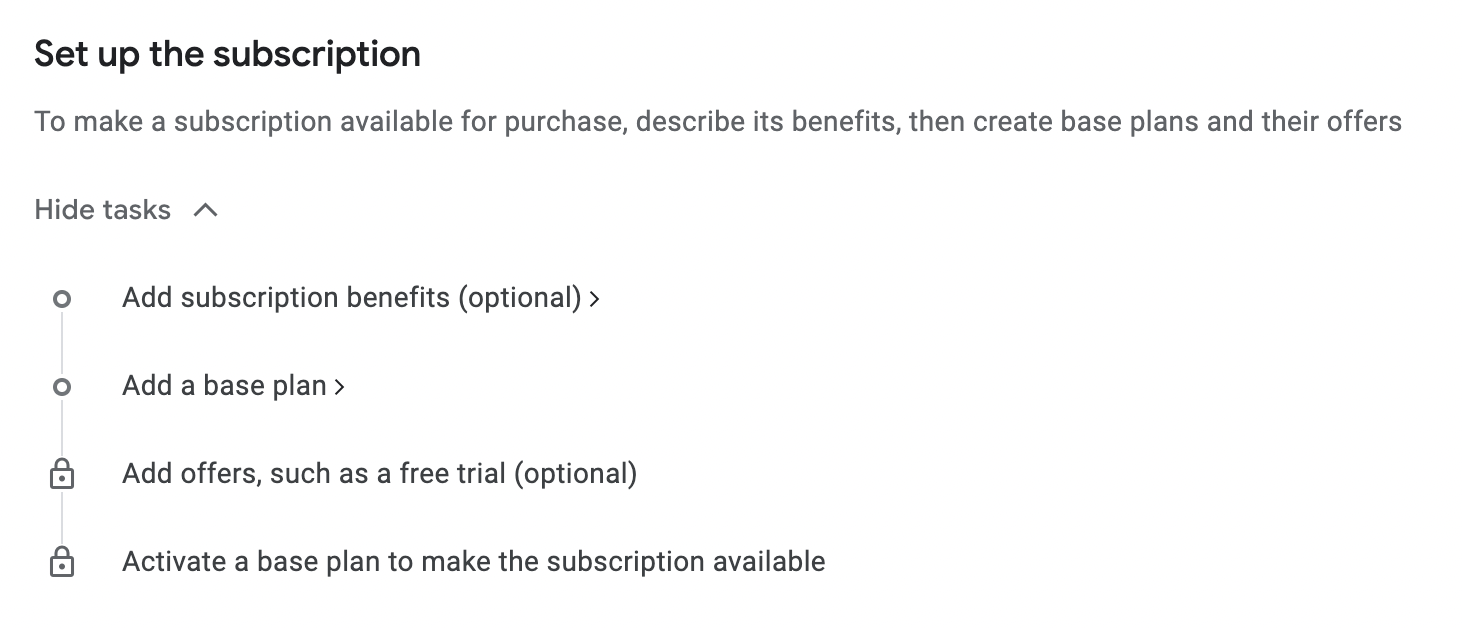
The first step is optional. You can add up to four custom strings explaining what users get when they subscribe.

For the next two steps, you should create base plans and offers, if necessary. The base plan contains basic information about the subscription such as duration, price, renewal type, grace period, etc.
You can check our blog post for the details of the new subscription model of Google Play.
To create a base plan click Add a base plan either from the task list or from the base plans and offers section.

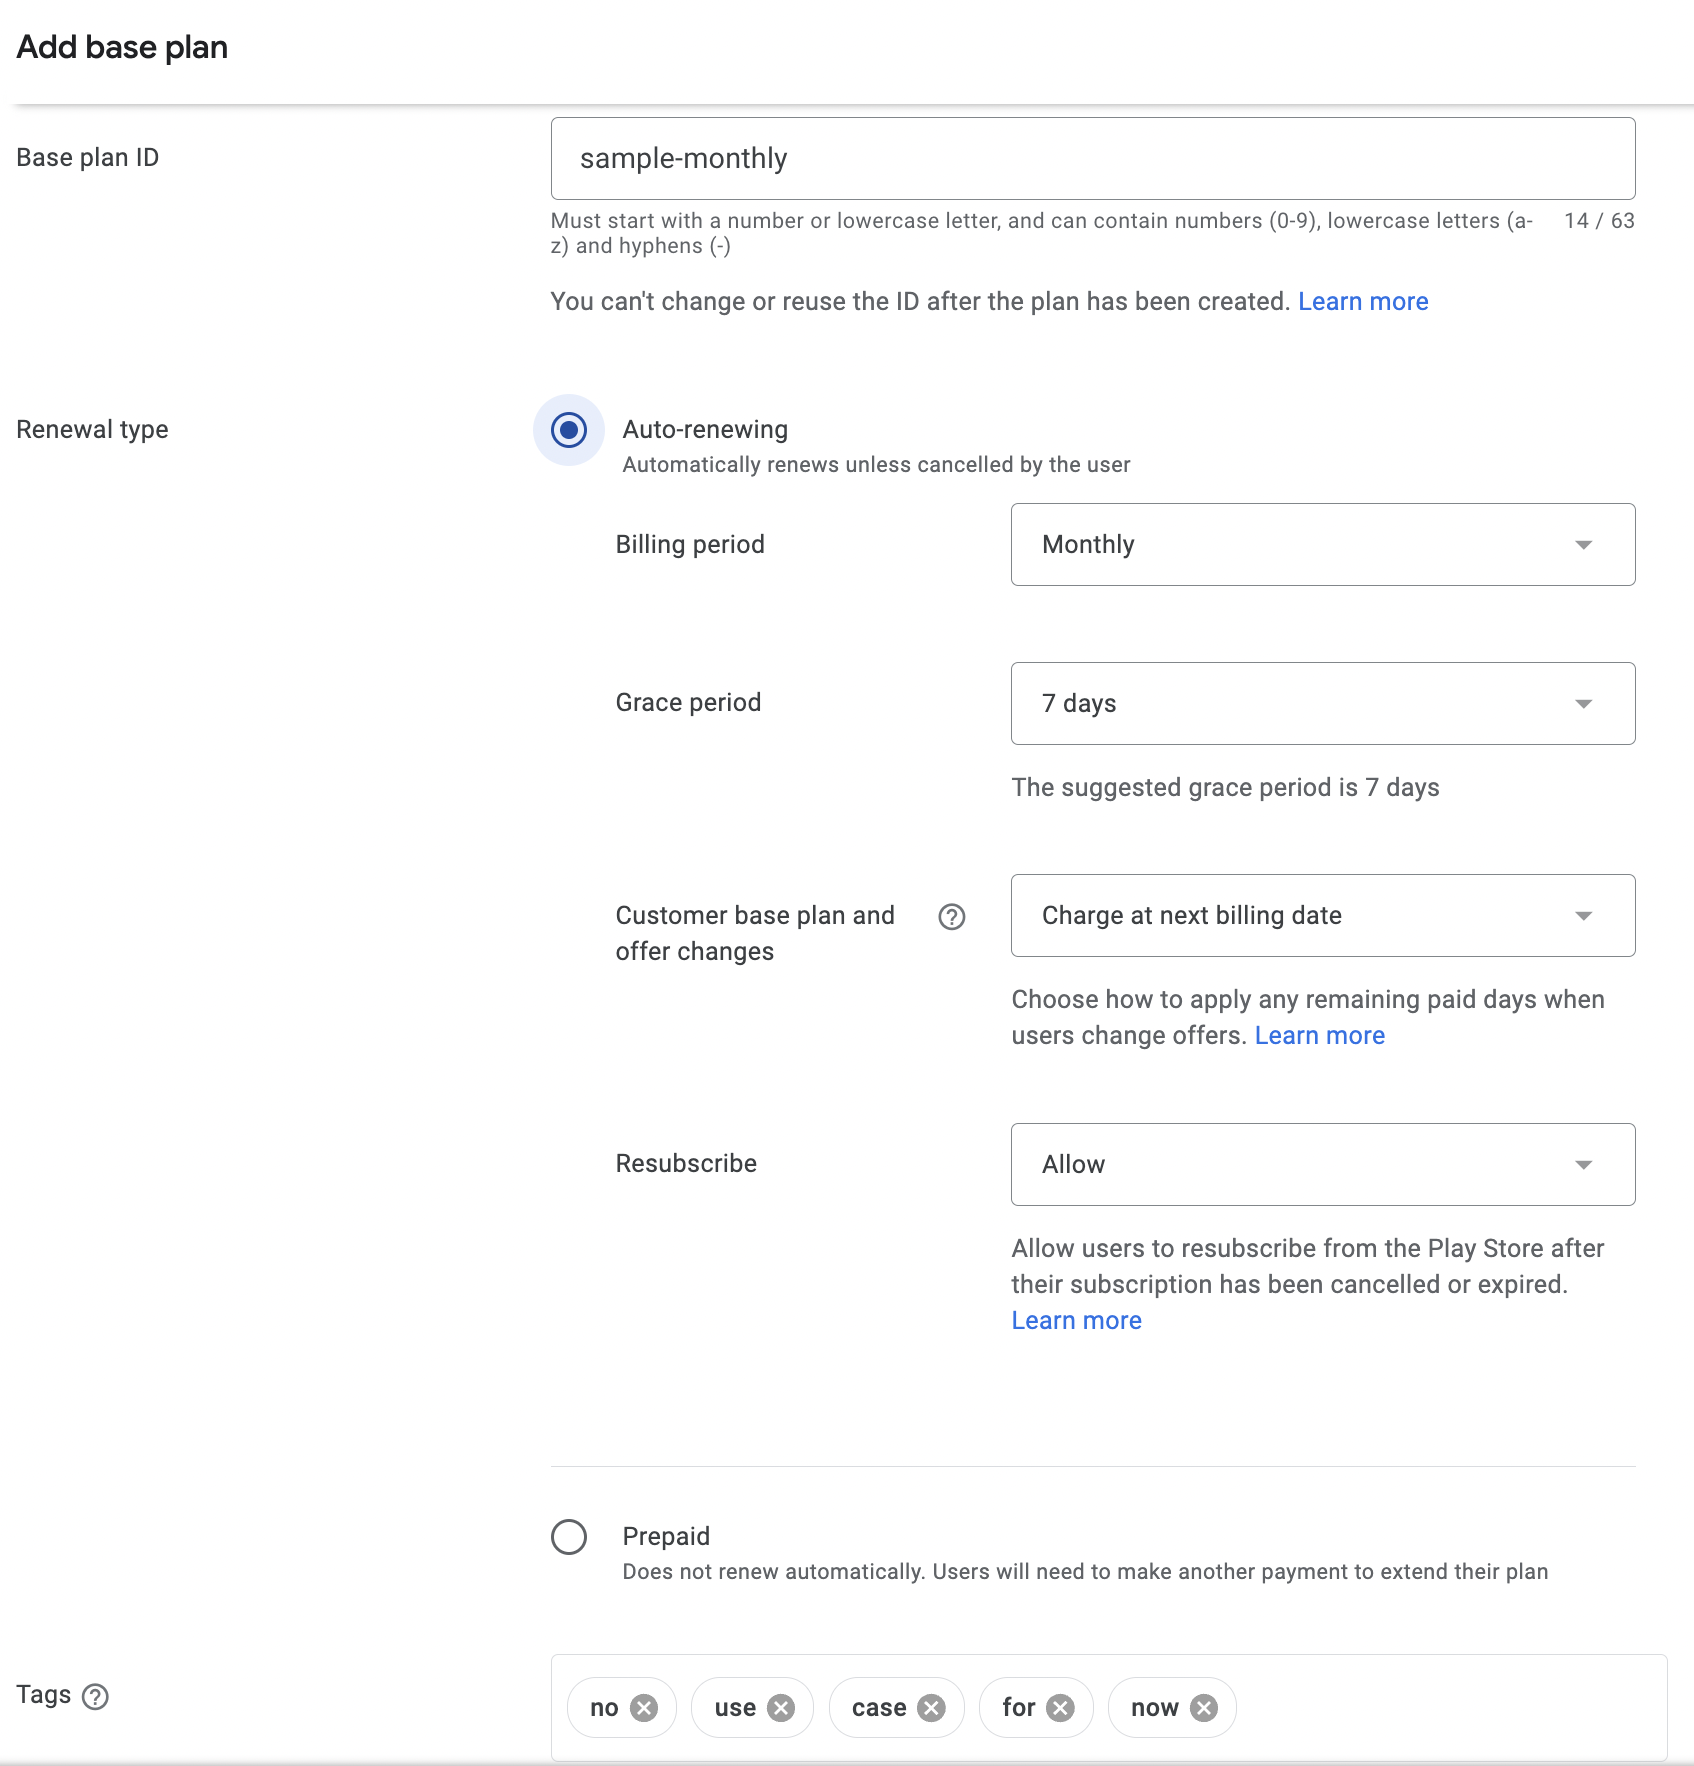
Enter the base plan identifier and configure its renewal type with billing and grace periods. You may also add tags that are used to distinguish base plans from the API side. This is not required with one base plan per subscription.
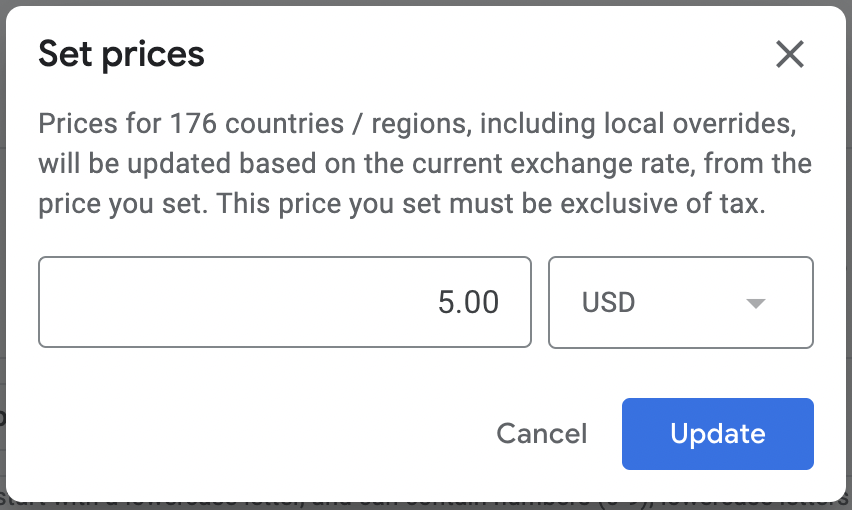
The last step is to set the price. Navigate to "Prices and availability" section and click Set prices, select regions the subscription will be available in and press Set price.

Enter the price and click Update. Save changes.
Once you have created a base plan, it has a draft status. Click the Activate button to make it available to users.
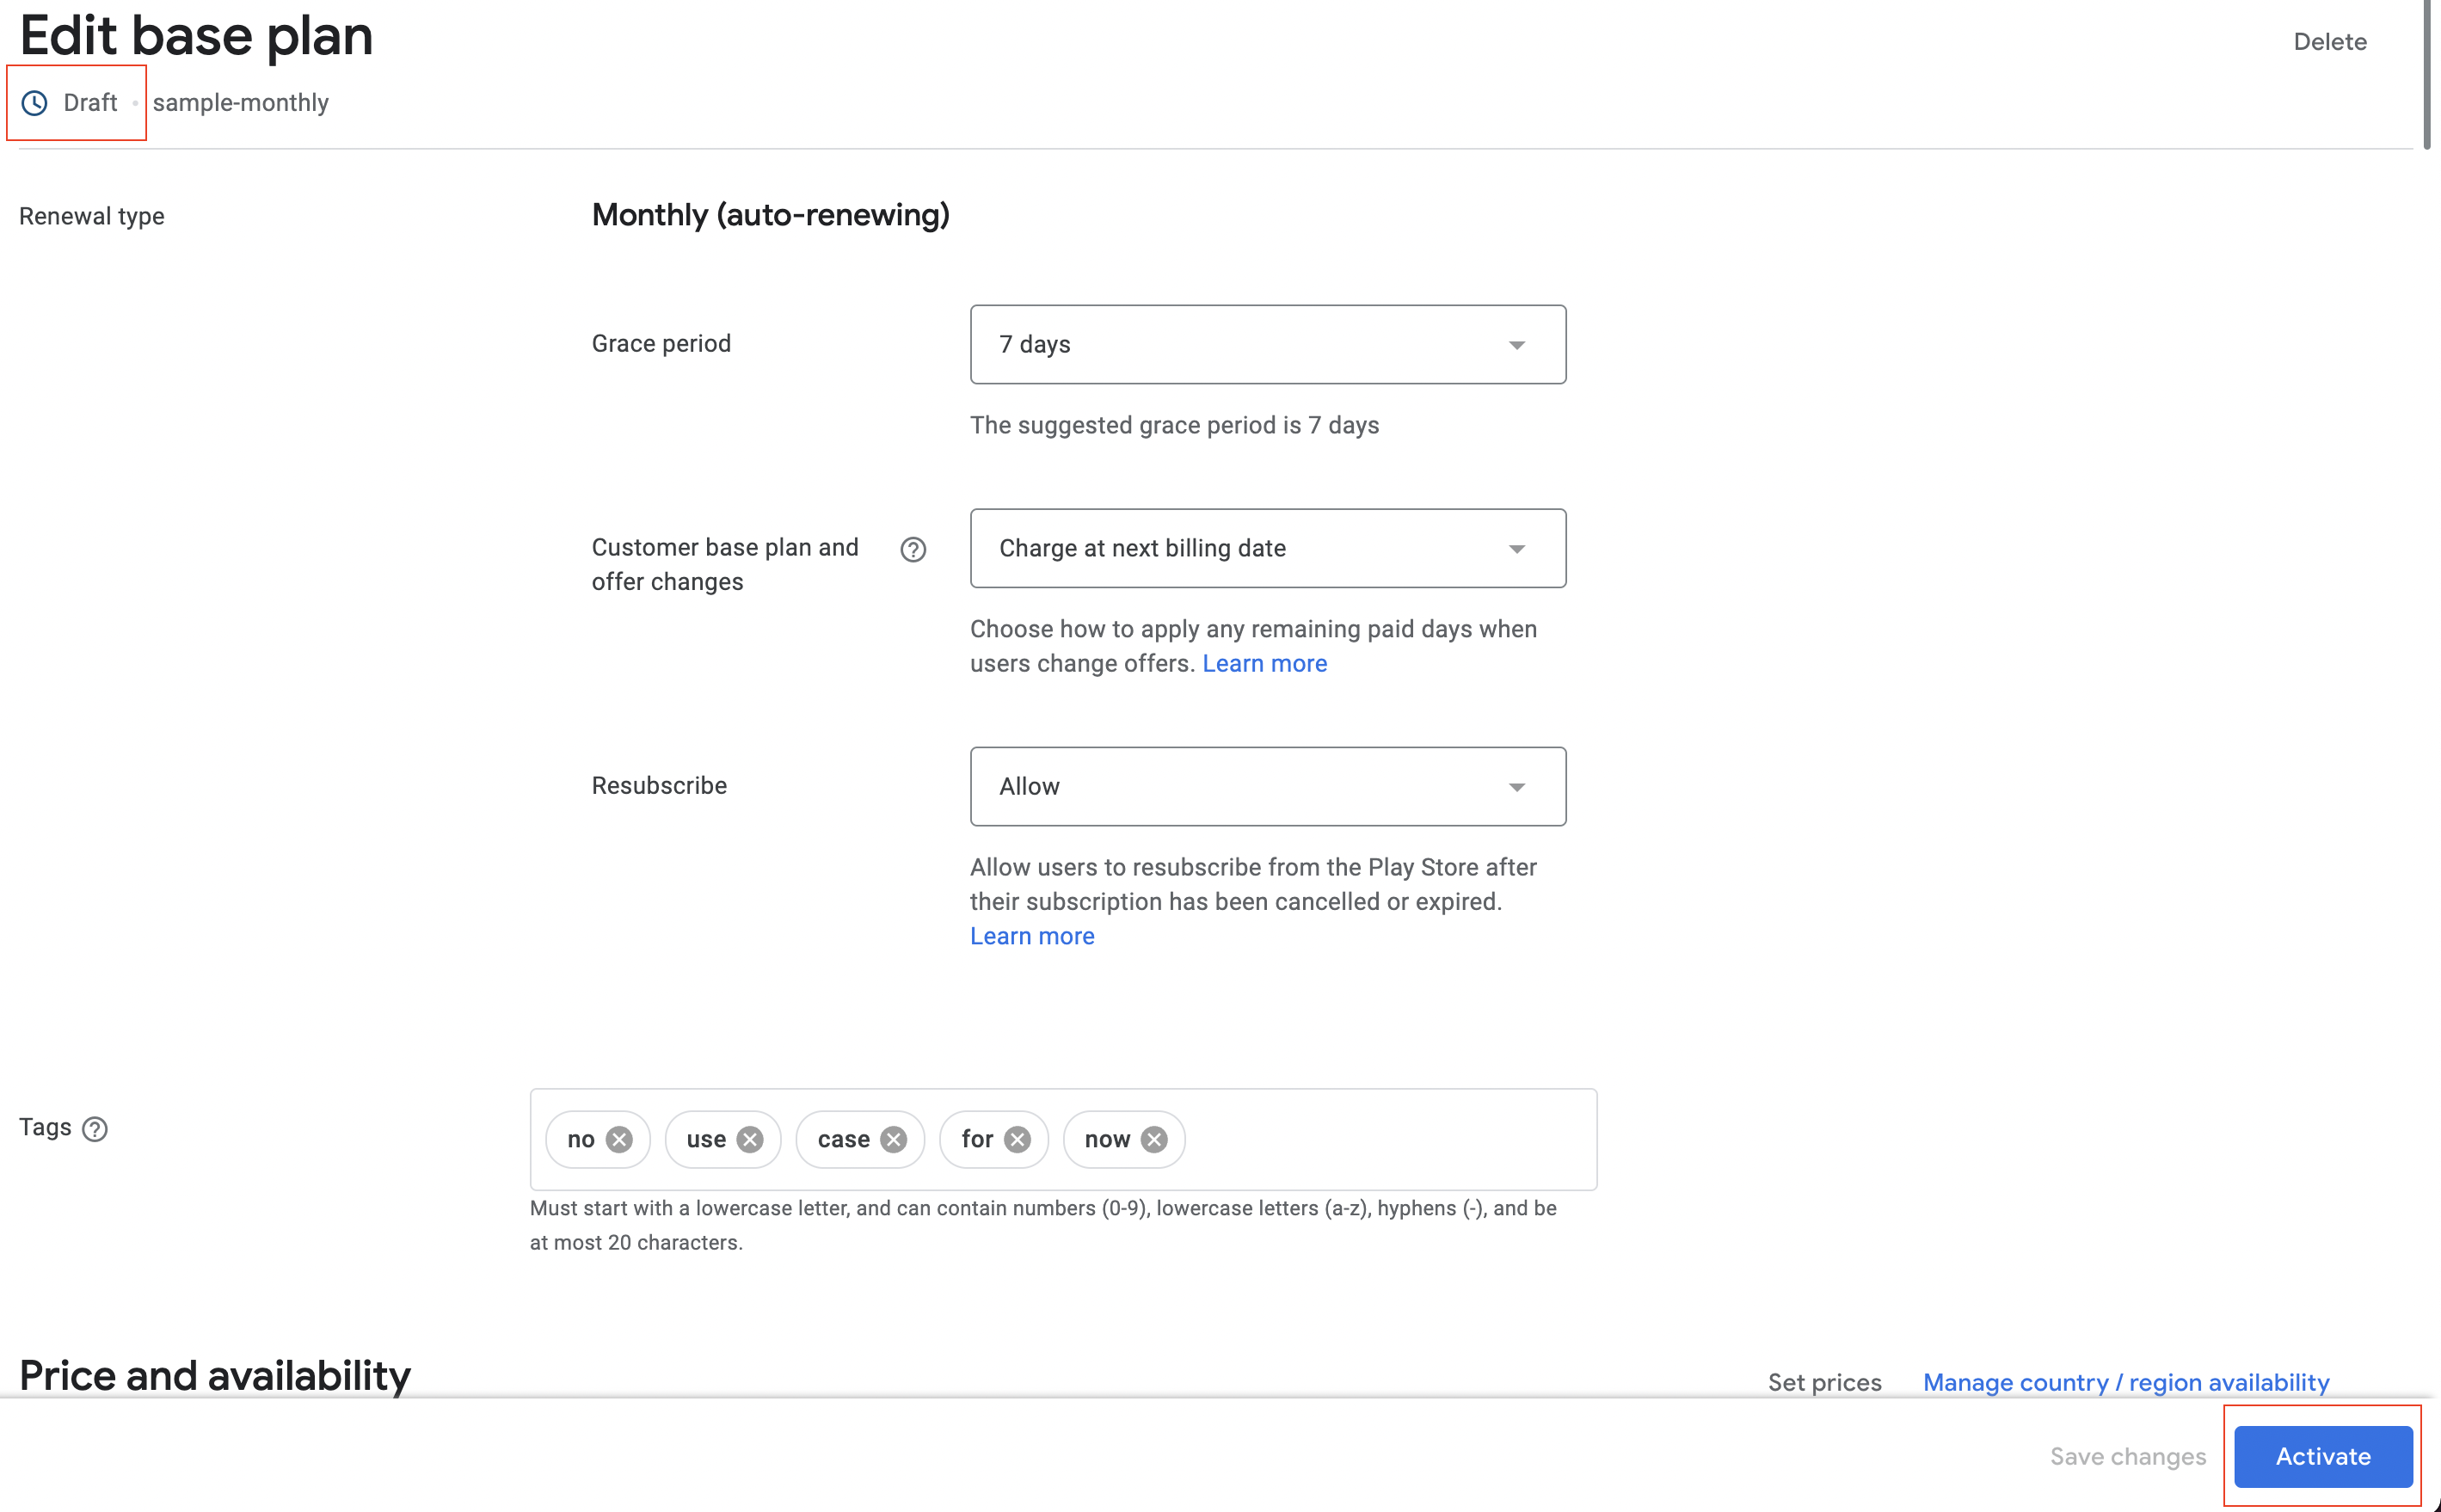
Your base plan is ready to use.

You can use the created subscription. You can also add options like a trial period or discounts to your subscriptions. This is where offers come in. Offers belong to base plans.
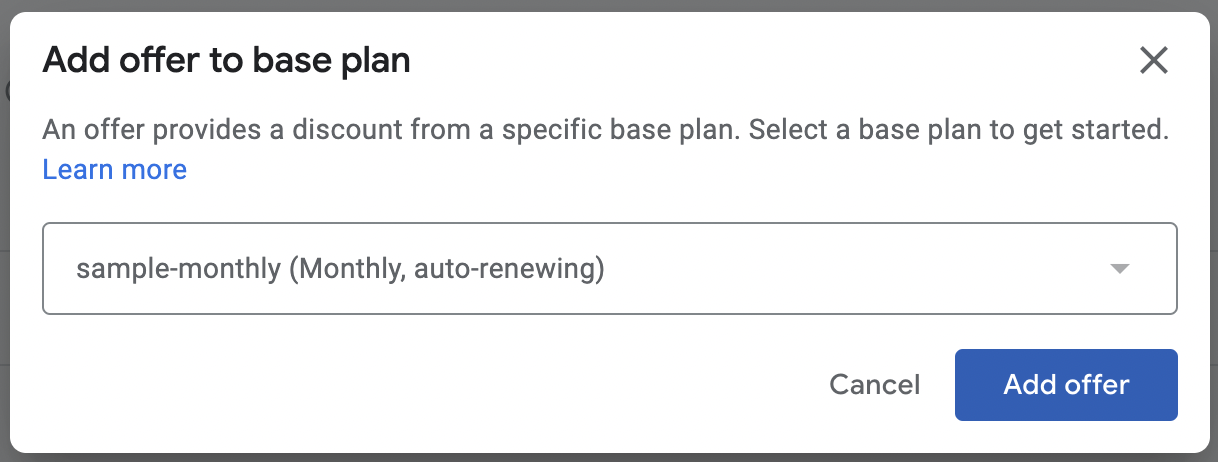
Click Add offer to create an offer.

Select the base plan to which the new offer will belong and click Add offer.
Specify offer identifier and select eligibility criteria. There are several options available: users who never bought this or any other subscriptions; those, who upgraded from other subscriptions; developer-determined.
You may also add tags as for the base plan.
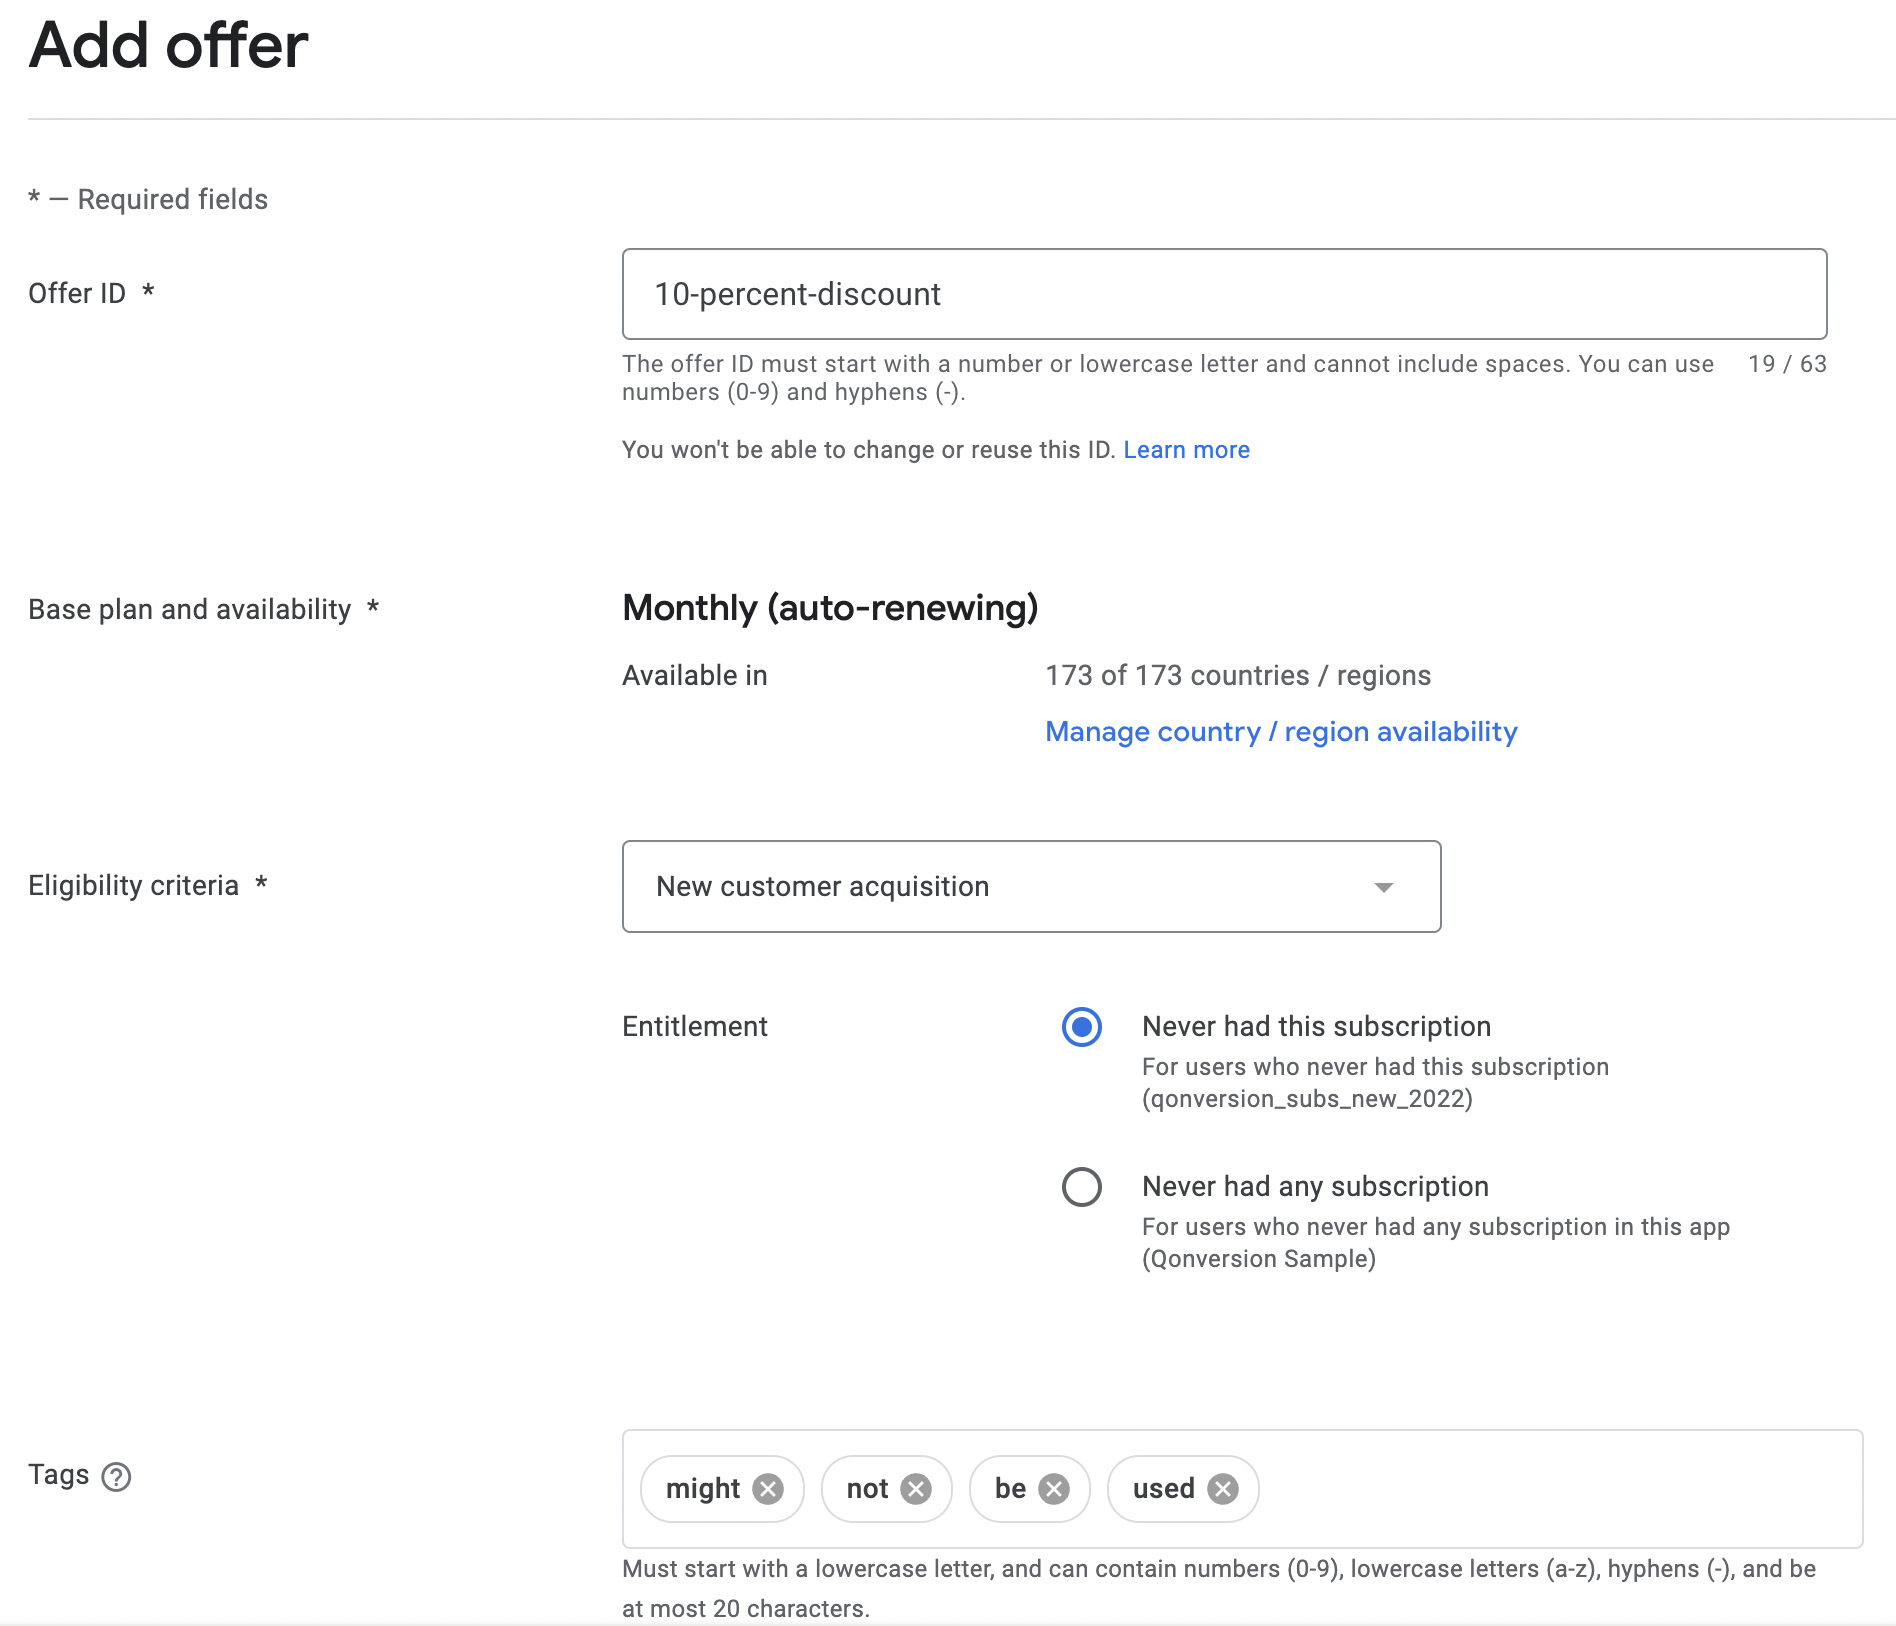
The final step is phases. You can configure up to two phases which will be used before the base plan purchasing. For example, you can add a free trial for a week and a 10% discount for the next week before the user will buy the original subscription.
To create a phase click the Add phase button in the Phases section.

Choose the phase type, duration, and, if you chose discount type, prices. In the example below we create a 10% discount price for a week.
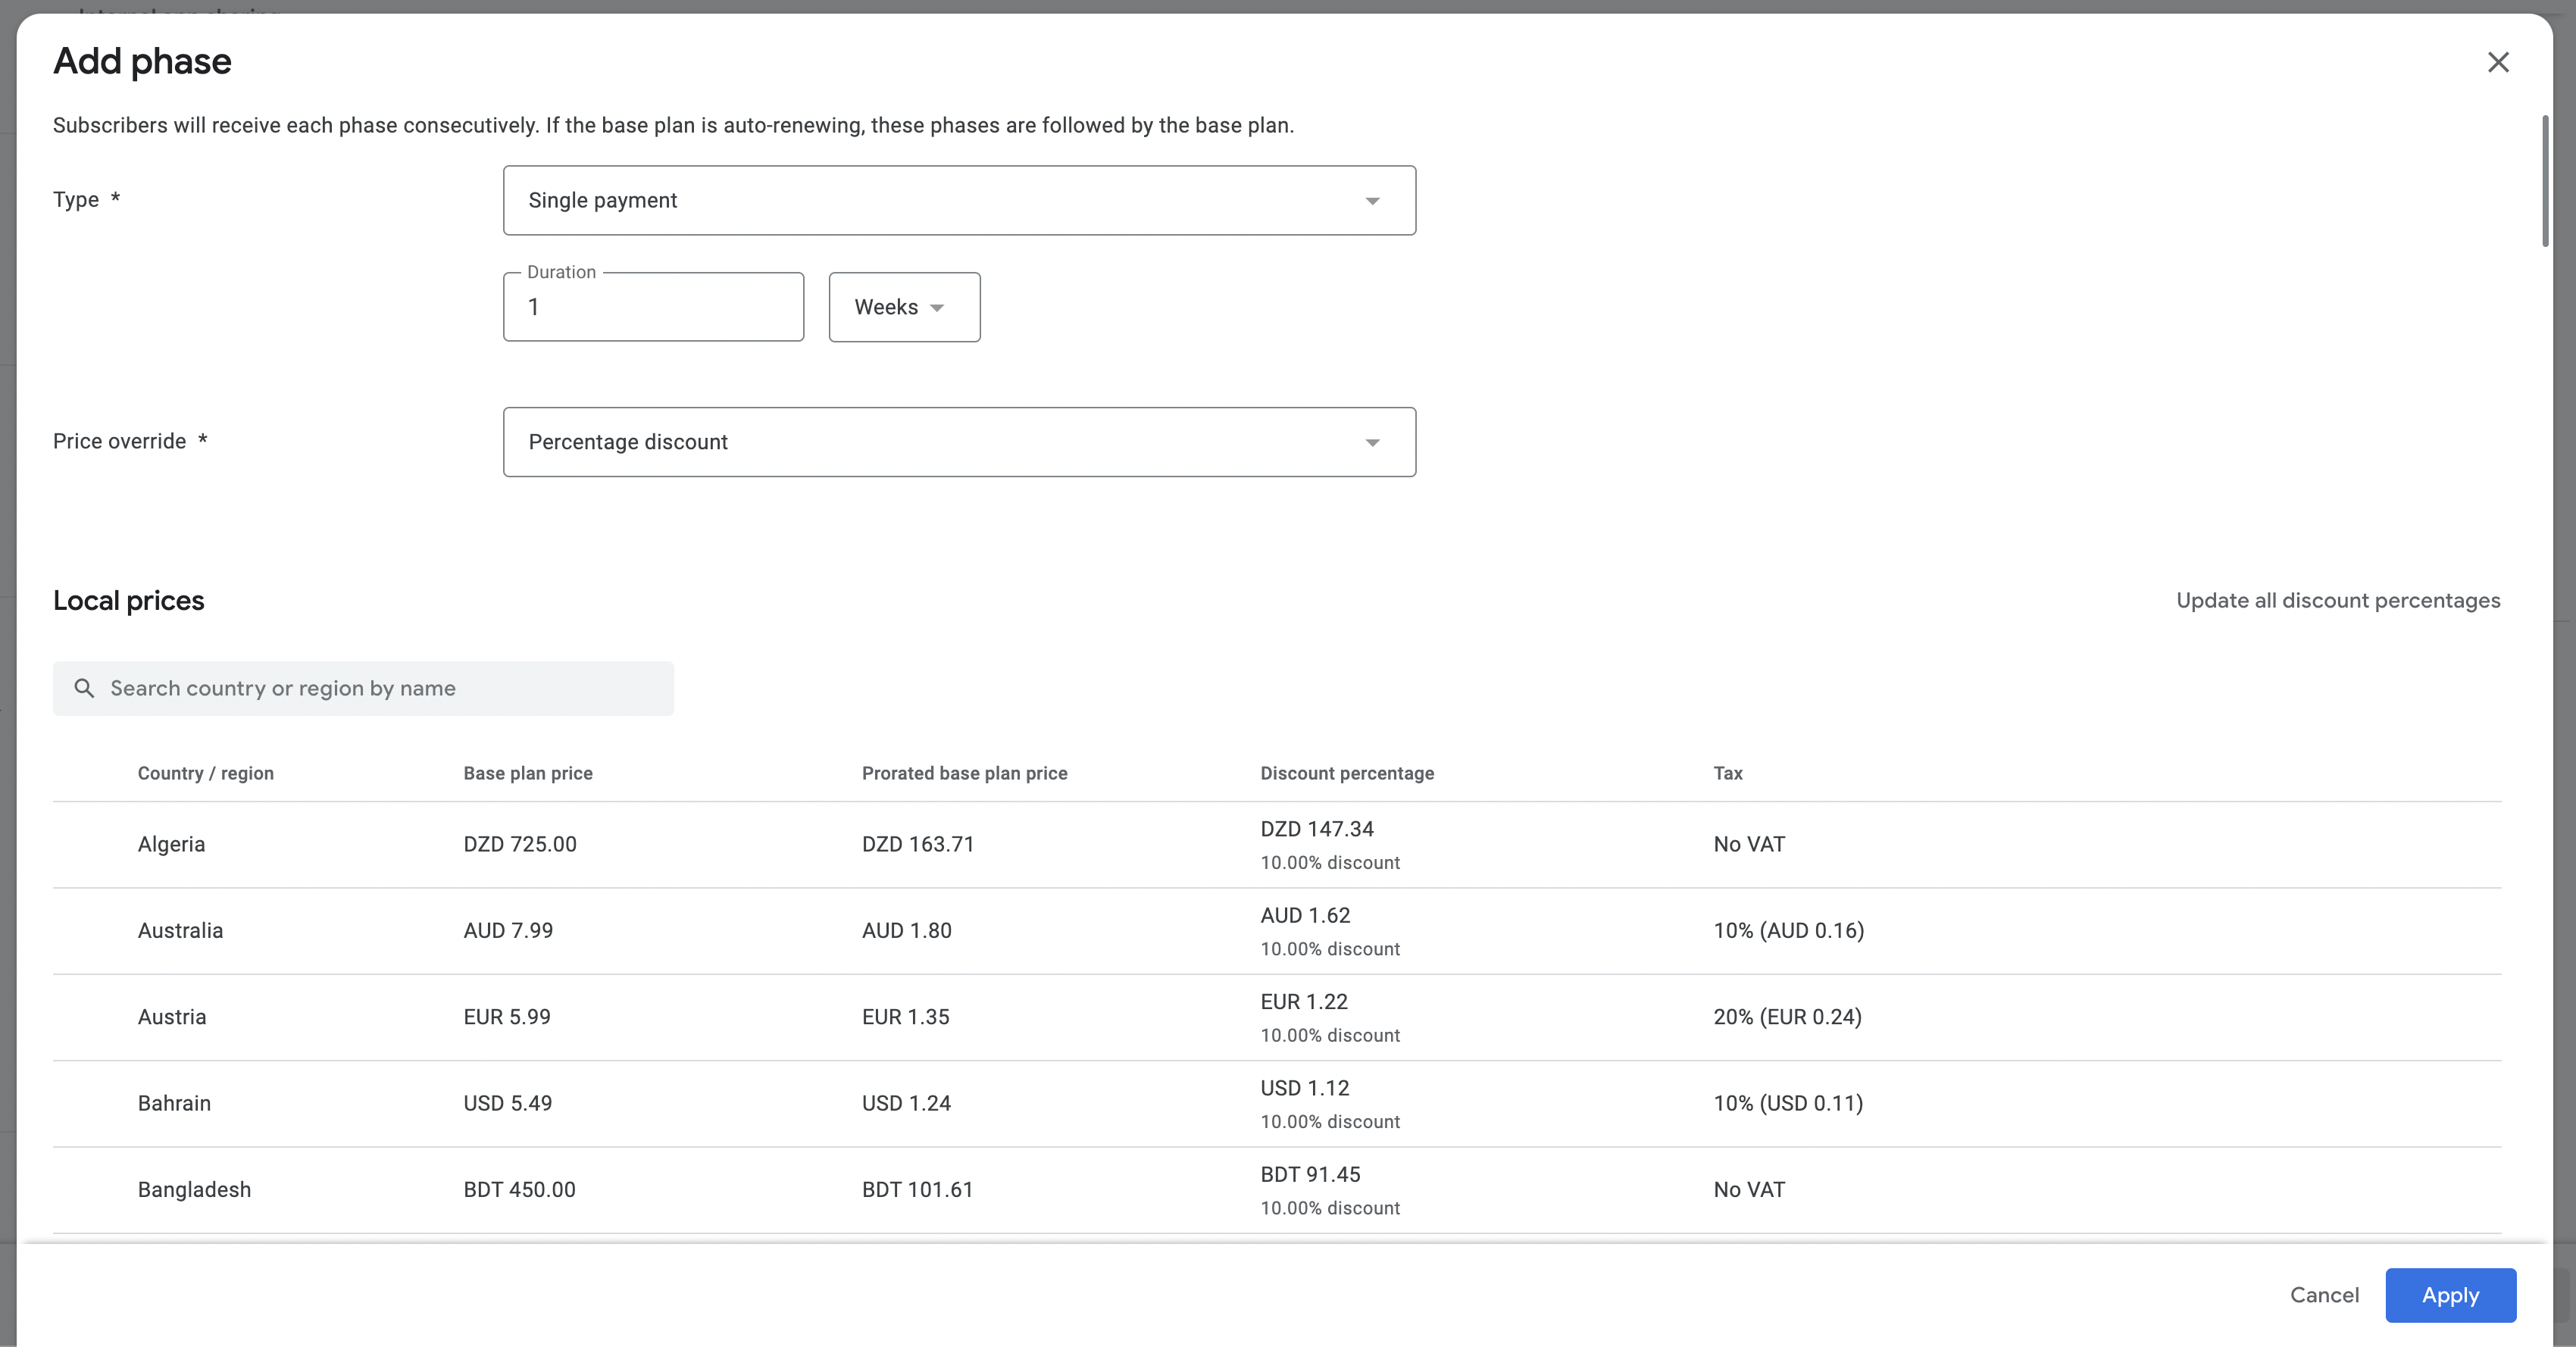
Press Apply and Save to create an offer. The offer has a draft status. Press Activate.
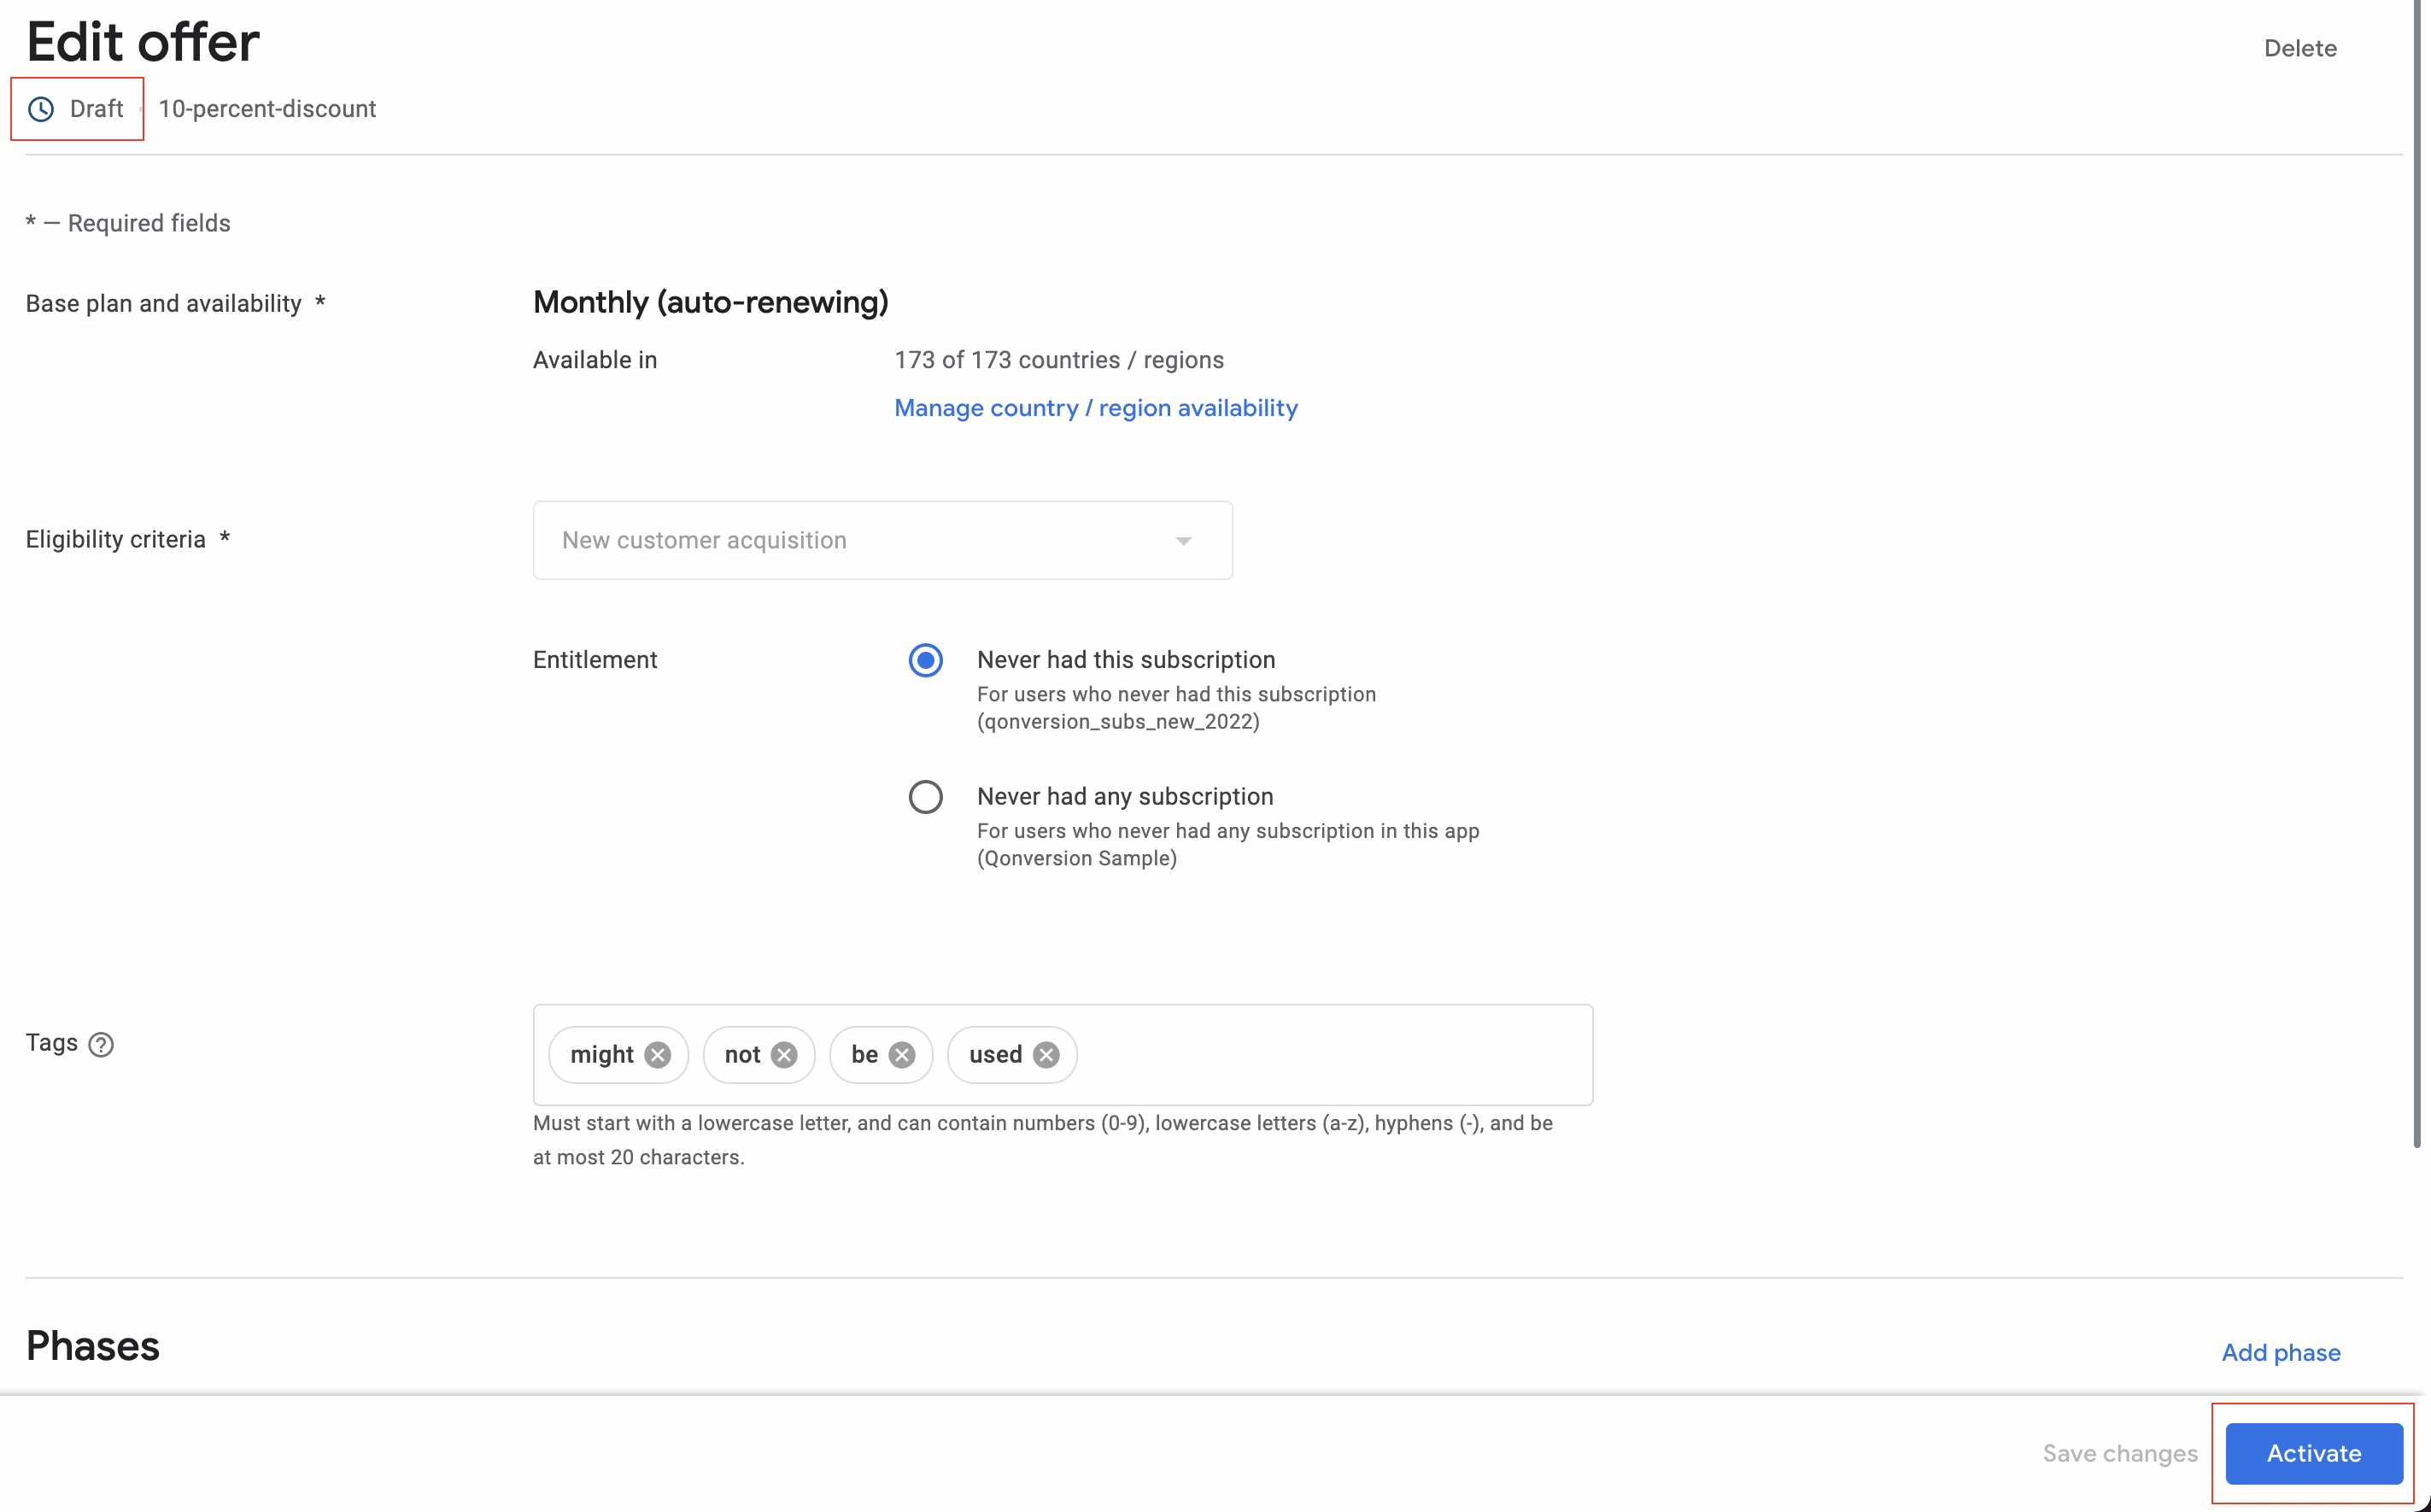
After you have done all the above steps your subscription is ready to use.
Updated 11 months ago
