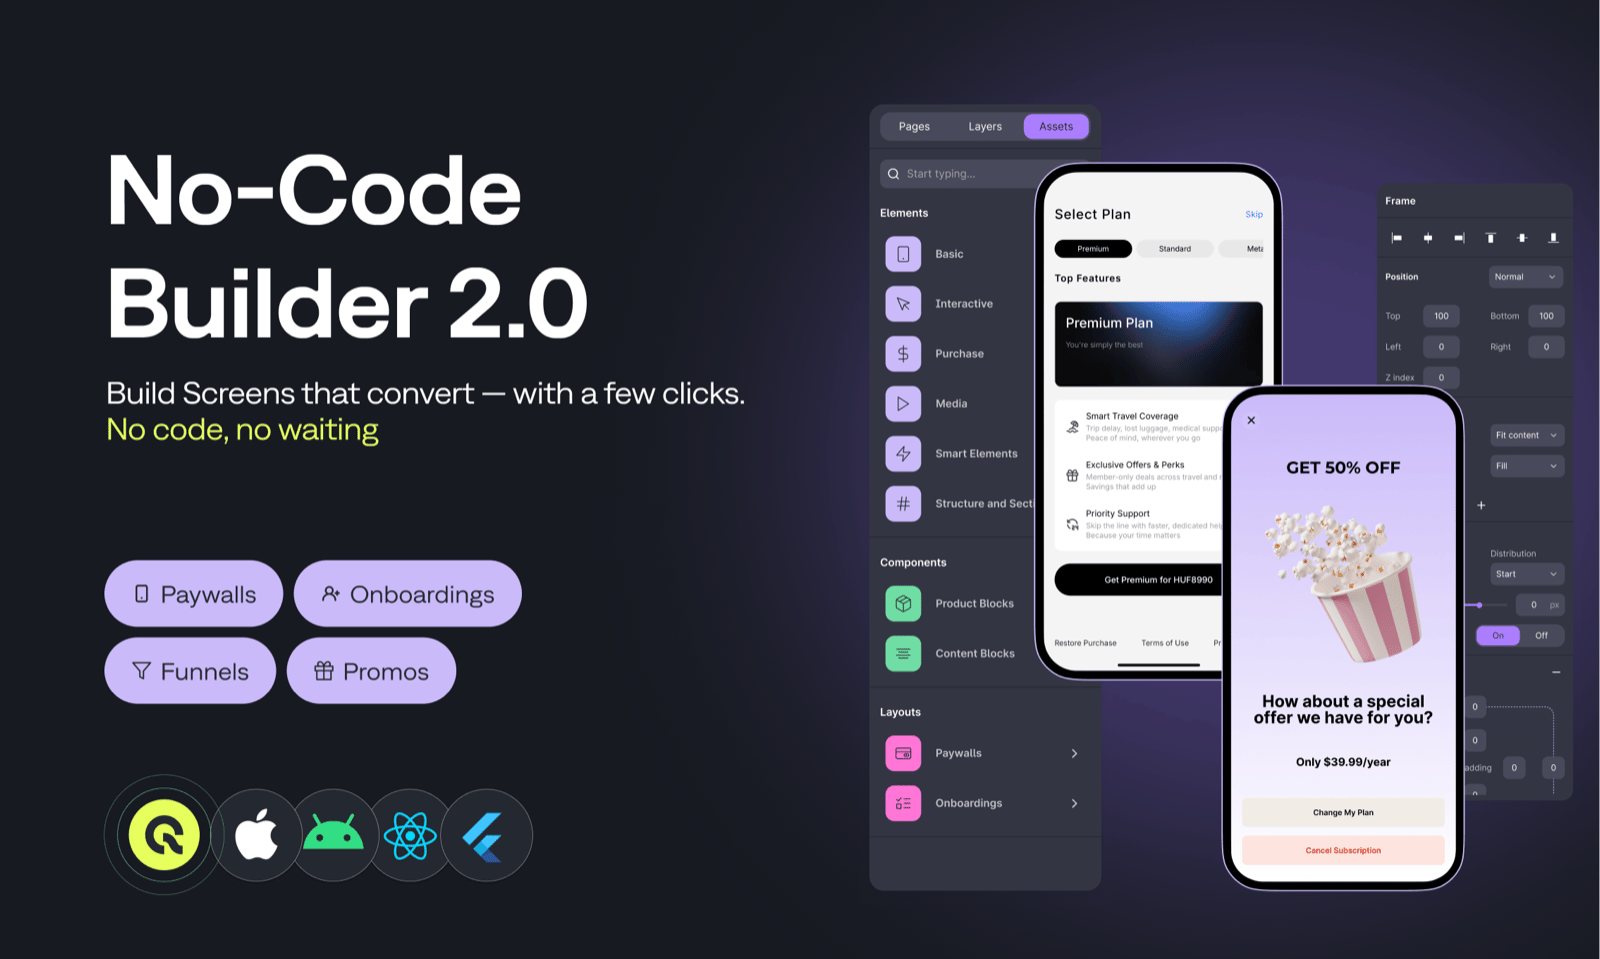
- Paywalls – for subscriptions or one-time offers
- Onboarding flows – single- or multi-page user journeys
- Promotional screens – for seasonal offers, upsells, or experiments
Getting Started
Access the Builder from the left sidebar of your Qonversion dashboard. When creating a new screen, first choose what type of screen you’re building:- Mobile Paywall — a single-page layout for offers or subscriptions.
- Mobile Onboarding — a multi-page screen for onboarding or other flows.
- Start from a Template – pick a ready-made layout from the gallery.
- Design from Scratch – create your own layout using flexible components.
Templates
Templates in Qonversion help you build screens faster by starting from ready-made layouts designed for paywalls, onboarding, and other in-app experiences. You can choose from single-page or multi-page templates, preview them, and customize every element directly in the Builder.- Save time by starting from pre-designed, tested layouts.
- Get inspiration from real-world paywall and onboarding patterns.
- Maintain design consistency across different screens.
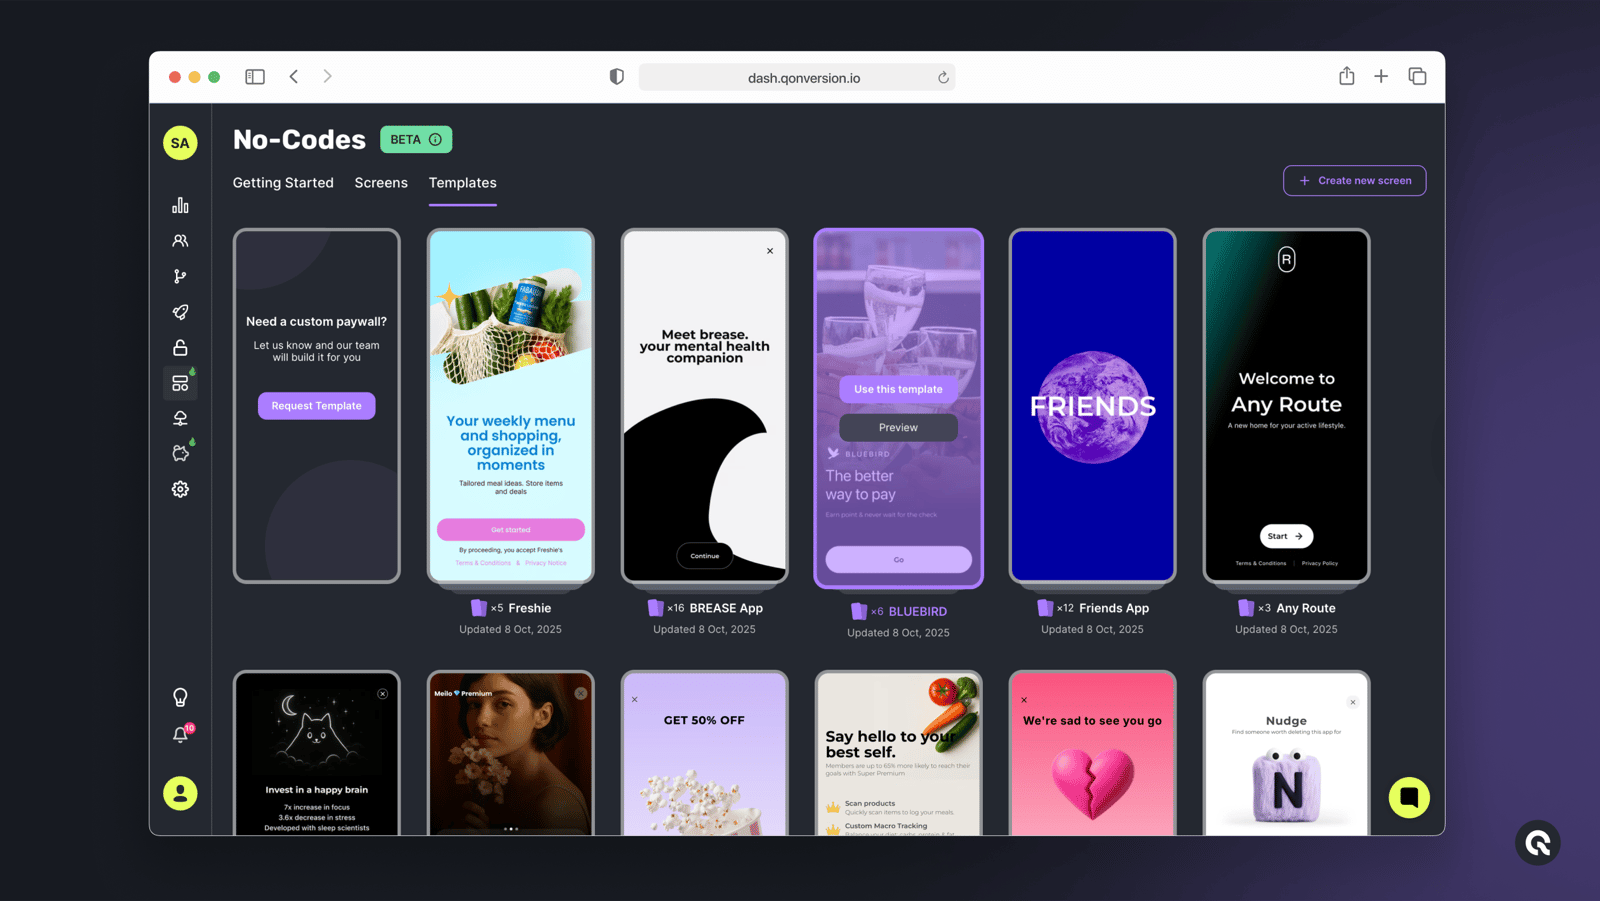
Template Types
- Single-Page Templates — ideal for paywalls, feature highlights, or promotional screens.
- Multi-Page Templates — designed for onboarding or connected screen flows, such as tutorials or multi-step funnels.
Multi-Page Templates
Multi-page templates contain several connected screens within one flow. Each multi-page template in the gallery shows a page count indicator and a preview button. Hover over a template to open a modal preview and browse through all included pages before adding it to your project. When you create a new screen and select Mobile Onboarding, the gallery automatically filters to show only multi-page templates — helping you find relevant layouts faster.How to Use Templates
- Open the Builder → Template Gallery or tap Create Screen and choose a screen type (e.g., Mobile Paywall or Mobile Onboarding).
- Browse available templates and use the Preview button to view details.
- Click Use Template to add it to your project and start customizing.
Custom Proxy Server Installation