- Auto-sync your in-app purchase catalog so you don’t have to mirror every product change in Qonversion by hand.
- Read your subscription grace period configuration so revenue and proceeds are attributed correctly when subscribers fall into a grace period.
- Auto-detect your Bundle ID and App Store ID during the onboarding wizard.
This is a different key from the In-App Purchase API Key, which Qonversion uses for runtime transaction validation, refund detection, and subscription status. They’re generated under different tabs in App Store Connect and they are not interchangeable.
1. Make sure you have the right role
To generate an App Store Connect API key, your App Store Connect user must have one of these roles:- Account Holder
- Admin
- App Manager — with access to every app you want Qonversion to manage
2. Open the App Store Connect API tab
- Log in to App Store Connect.
- Click Users and Access in the top navigation.
- Open the Integrations tab.
- Make sure the App Store Connect API sub-tab is selected (not “In-App Purchase”).
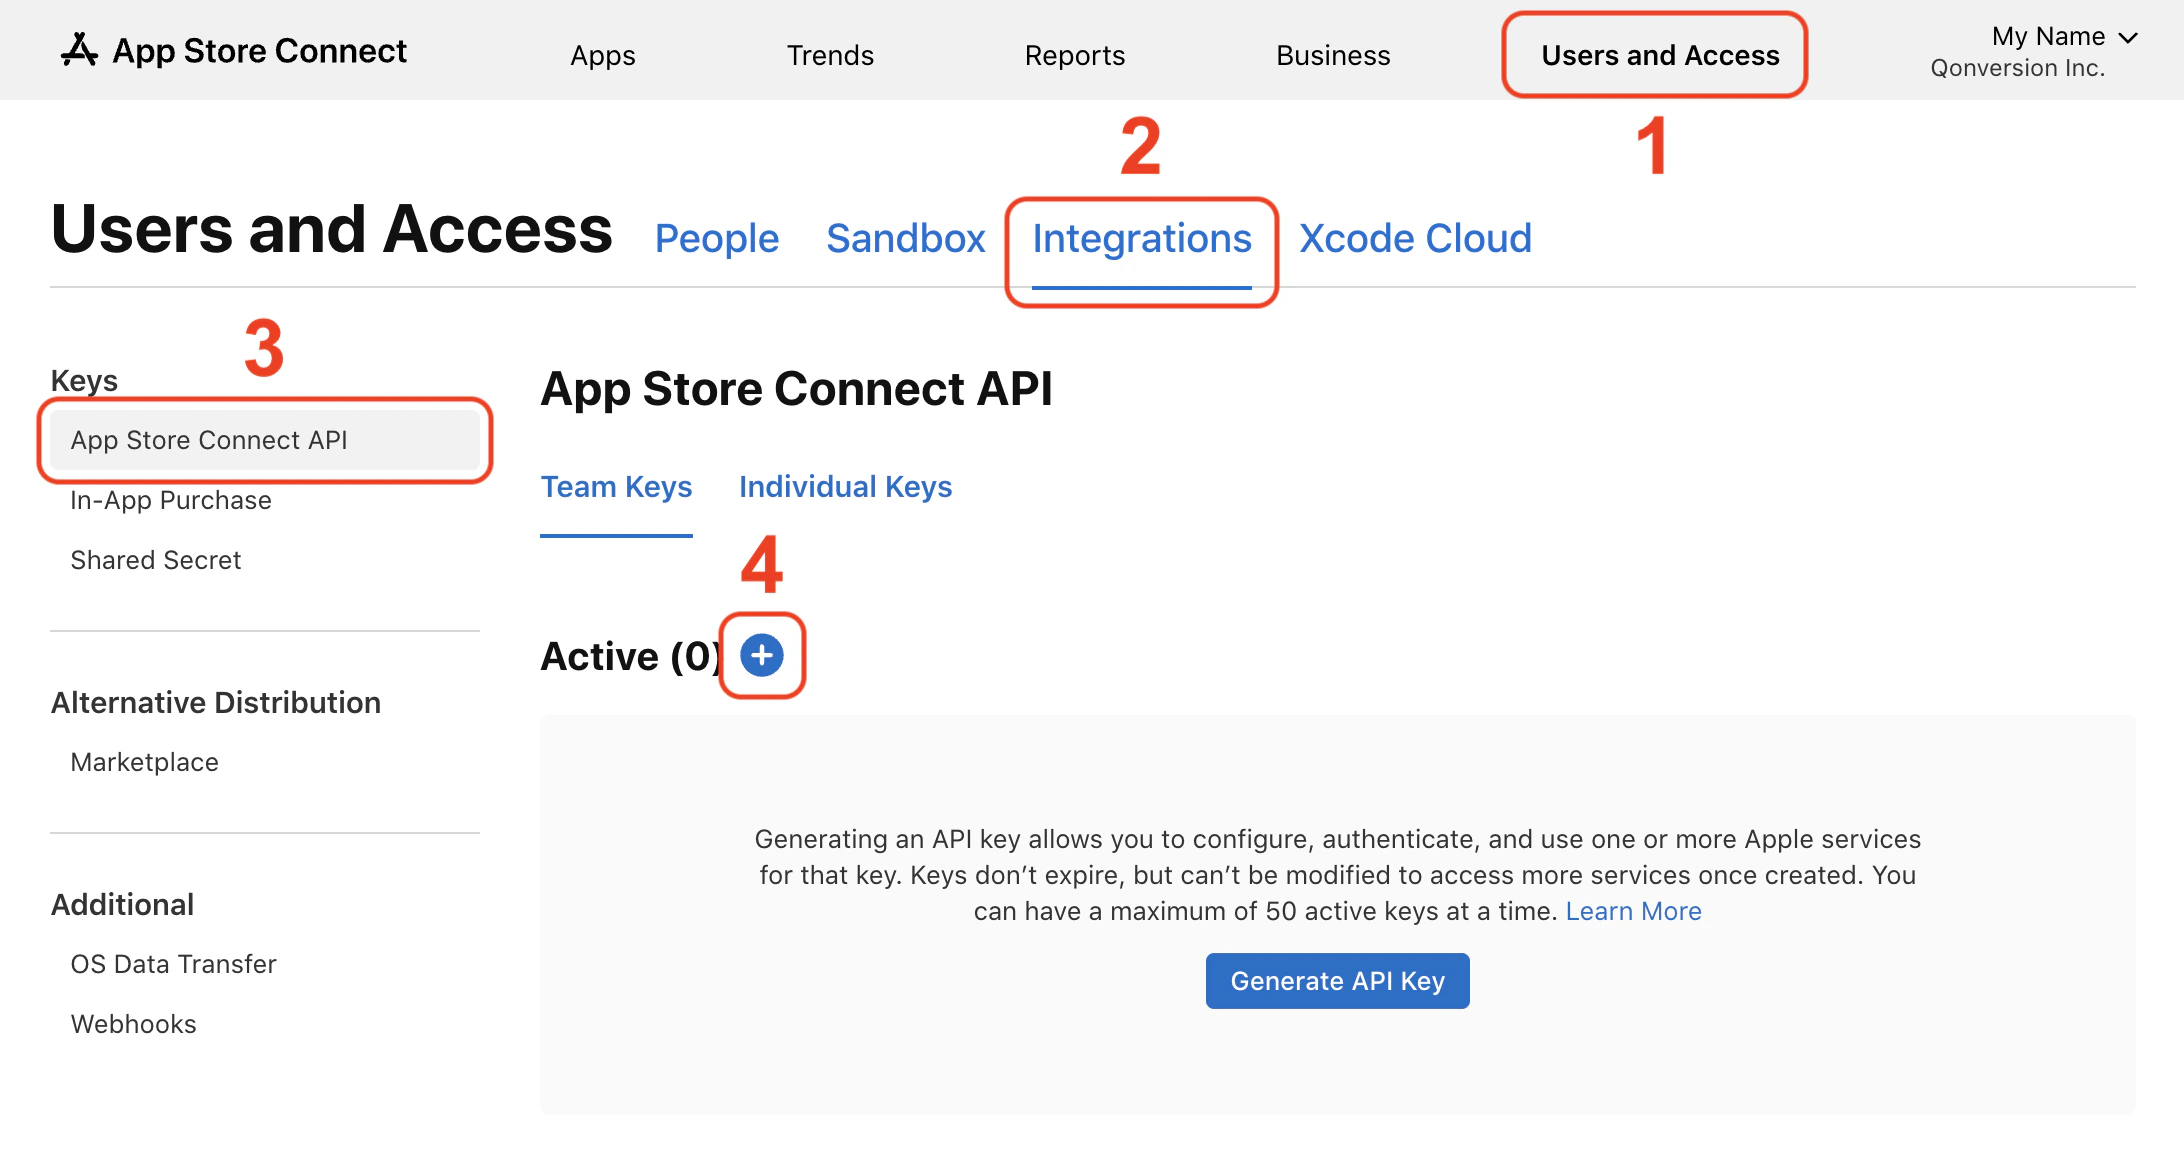
Users and Access → Integrations → App Store Connect API
3. Generate a new key
- Click Generate API Key (or + if you already have keys).
- Give it a clear name, e.g. Qonversion.
- Set Access to Admin or App Manager (App Manager is enough; Admin works too).
- Click Generate.
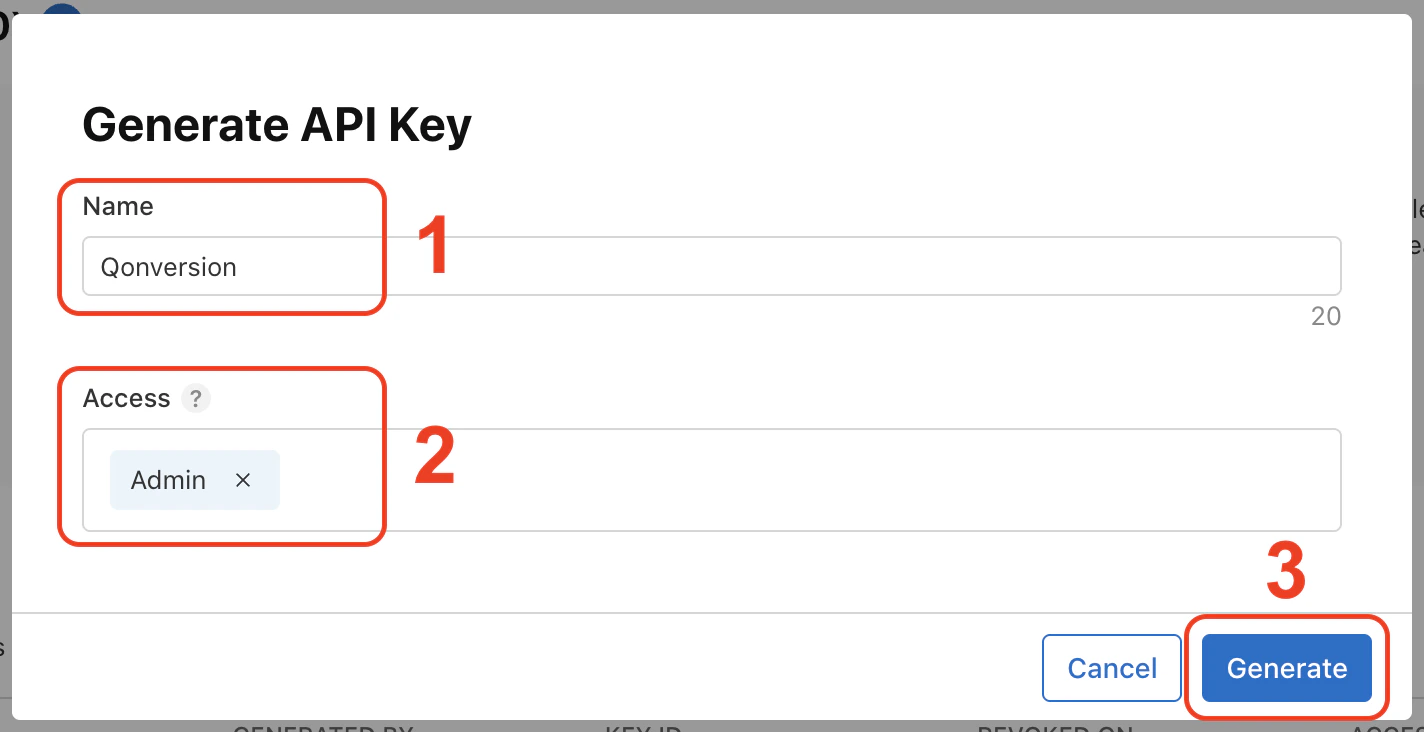
Generate API Key dialog
4. Copy the Key ID and Issuer ID, and download the .p8 private key
Everything you need lives on the same screen — copy the two identifiers and download the key file before leaving:- Copy the Key ID (10-character string in the row of your new key) — this is the Key Identifier in Qonversion.
- Above the table, copy the Issuer ID (UUID format, e.g.
57246542-96fe-1a63-e053-0824d011072a) — this is the Issuer Identifier in Qonversion. - In the same row, click Download API Key to get the .p8 file.
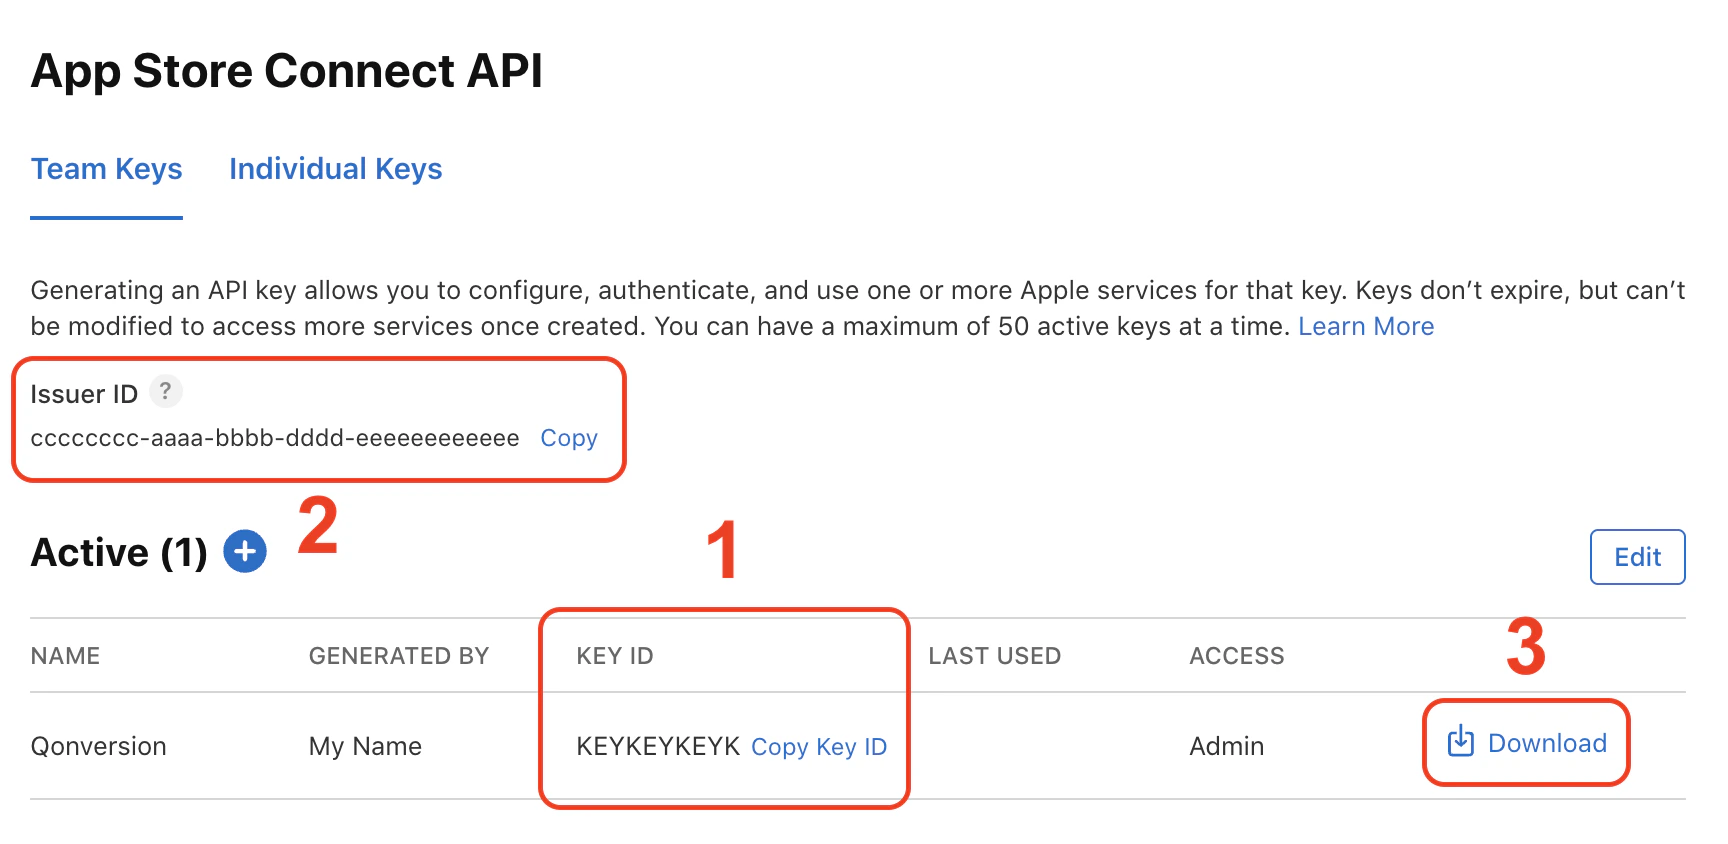
Key ID, Issuer ID, and Download API Key — all on this screen
5. Paste everything into Qonversion
- Open Qonversion Dash → Project Settings → Stores → Apple App Store.
- Click Configure App Store (or Edit configuration if you’ve already started).
- On Step 1 · Identify your app:
- Paste the Key ID in the Key Identifier field.
- Upload the
.p8file in the Private Key field. - Paste the Issuer ID in the Issuer Identifier field.
- Click Verify & Fetch Apps.
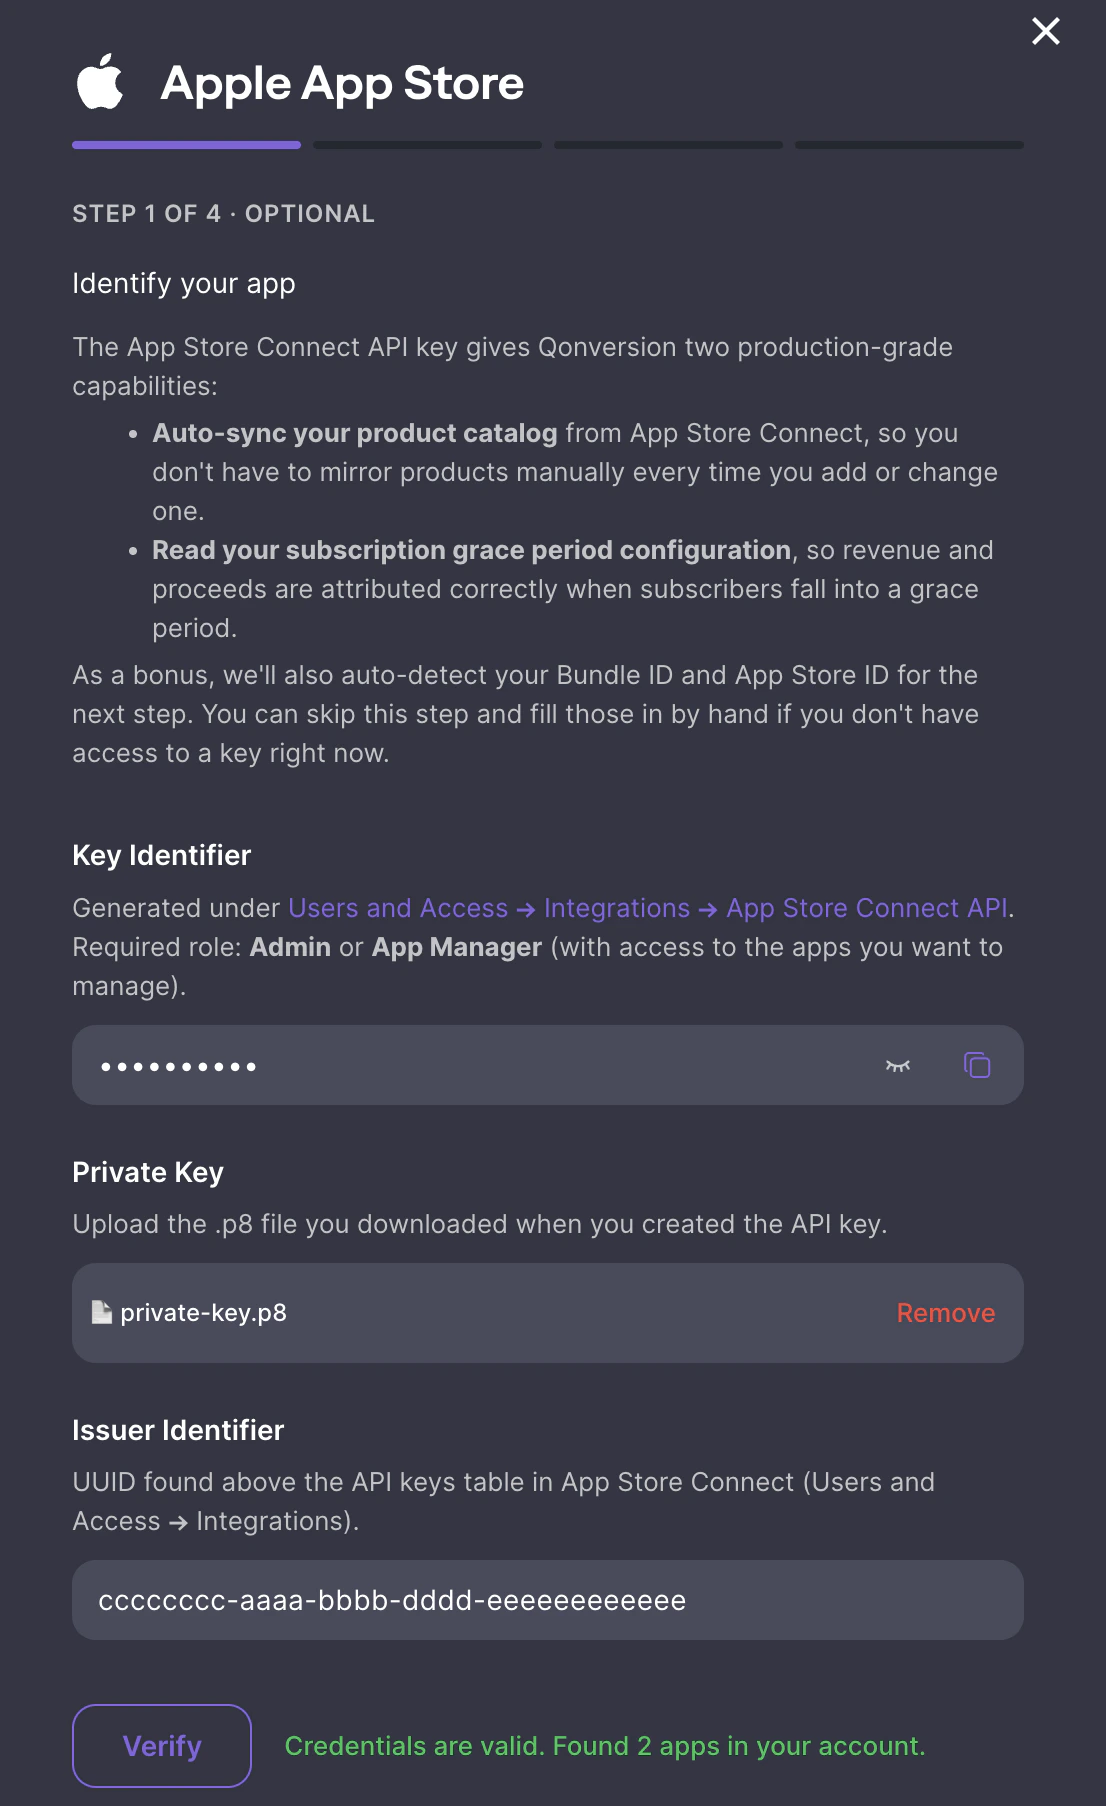
Step 1 in Qonversion Dash
Troubleshooting
”Failed to verify credentials” — HTTP 401 / NOT_AUTHORIZED
- Make sure you pasted the Key ID, not the key name.
- Make sure the Issuer ID is from the App Store Connect API tab, not the In-App Purchase tab.
- Make sure the
.p8file matches the Key ID you pasted.
”No apps are linked to this API key”
The credentials are valid, but the API key role doesn’t have access to any apps. If you’re using App Manager, ask your Admin to grant the user explicit access to the apps you want to configure. Admin keys see all apps automatically.Lost the .p8 file
Apple does not let you re-download the file. Open Users and Access → Integrations → App Store Connect API, revoke the old key, then generate a new one and re-upload the new.p8.
What’s next?
After this step, finish the rest of the wizard:- Step 2 · Core setup — paste your App-Specific Shared Secret.
- Step 3 · Server API access — generate an In-App Purchase API Key (separate from this one) and upload it.
- Step 4 · Production readiness — copy the Server-to-Server Notification URL into App Store Connect.