Scheduled Reports
Schedule events data export
Scheduled reports allow you to automate raw data export. It is helpful to:
- automatically receive raw data for enriching your data infrastructure with subscription events;
- deliver reports to your team on a schedule.
Configure a Scheduled Report
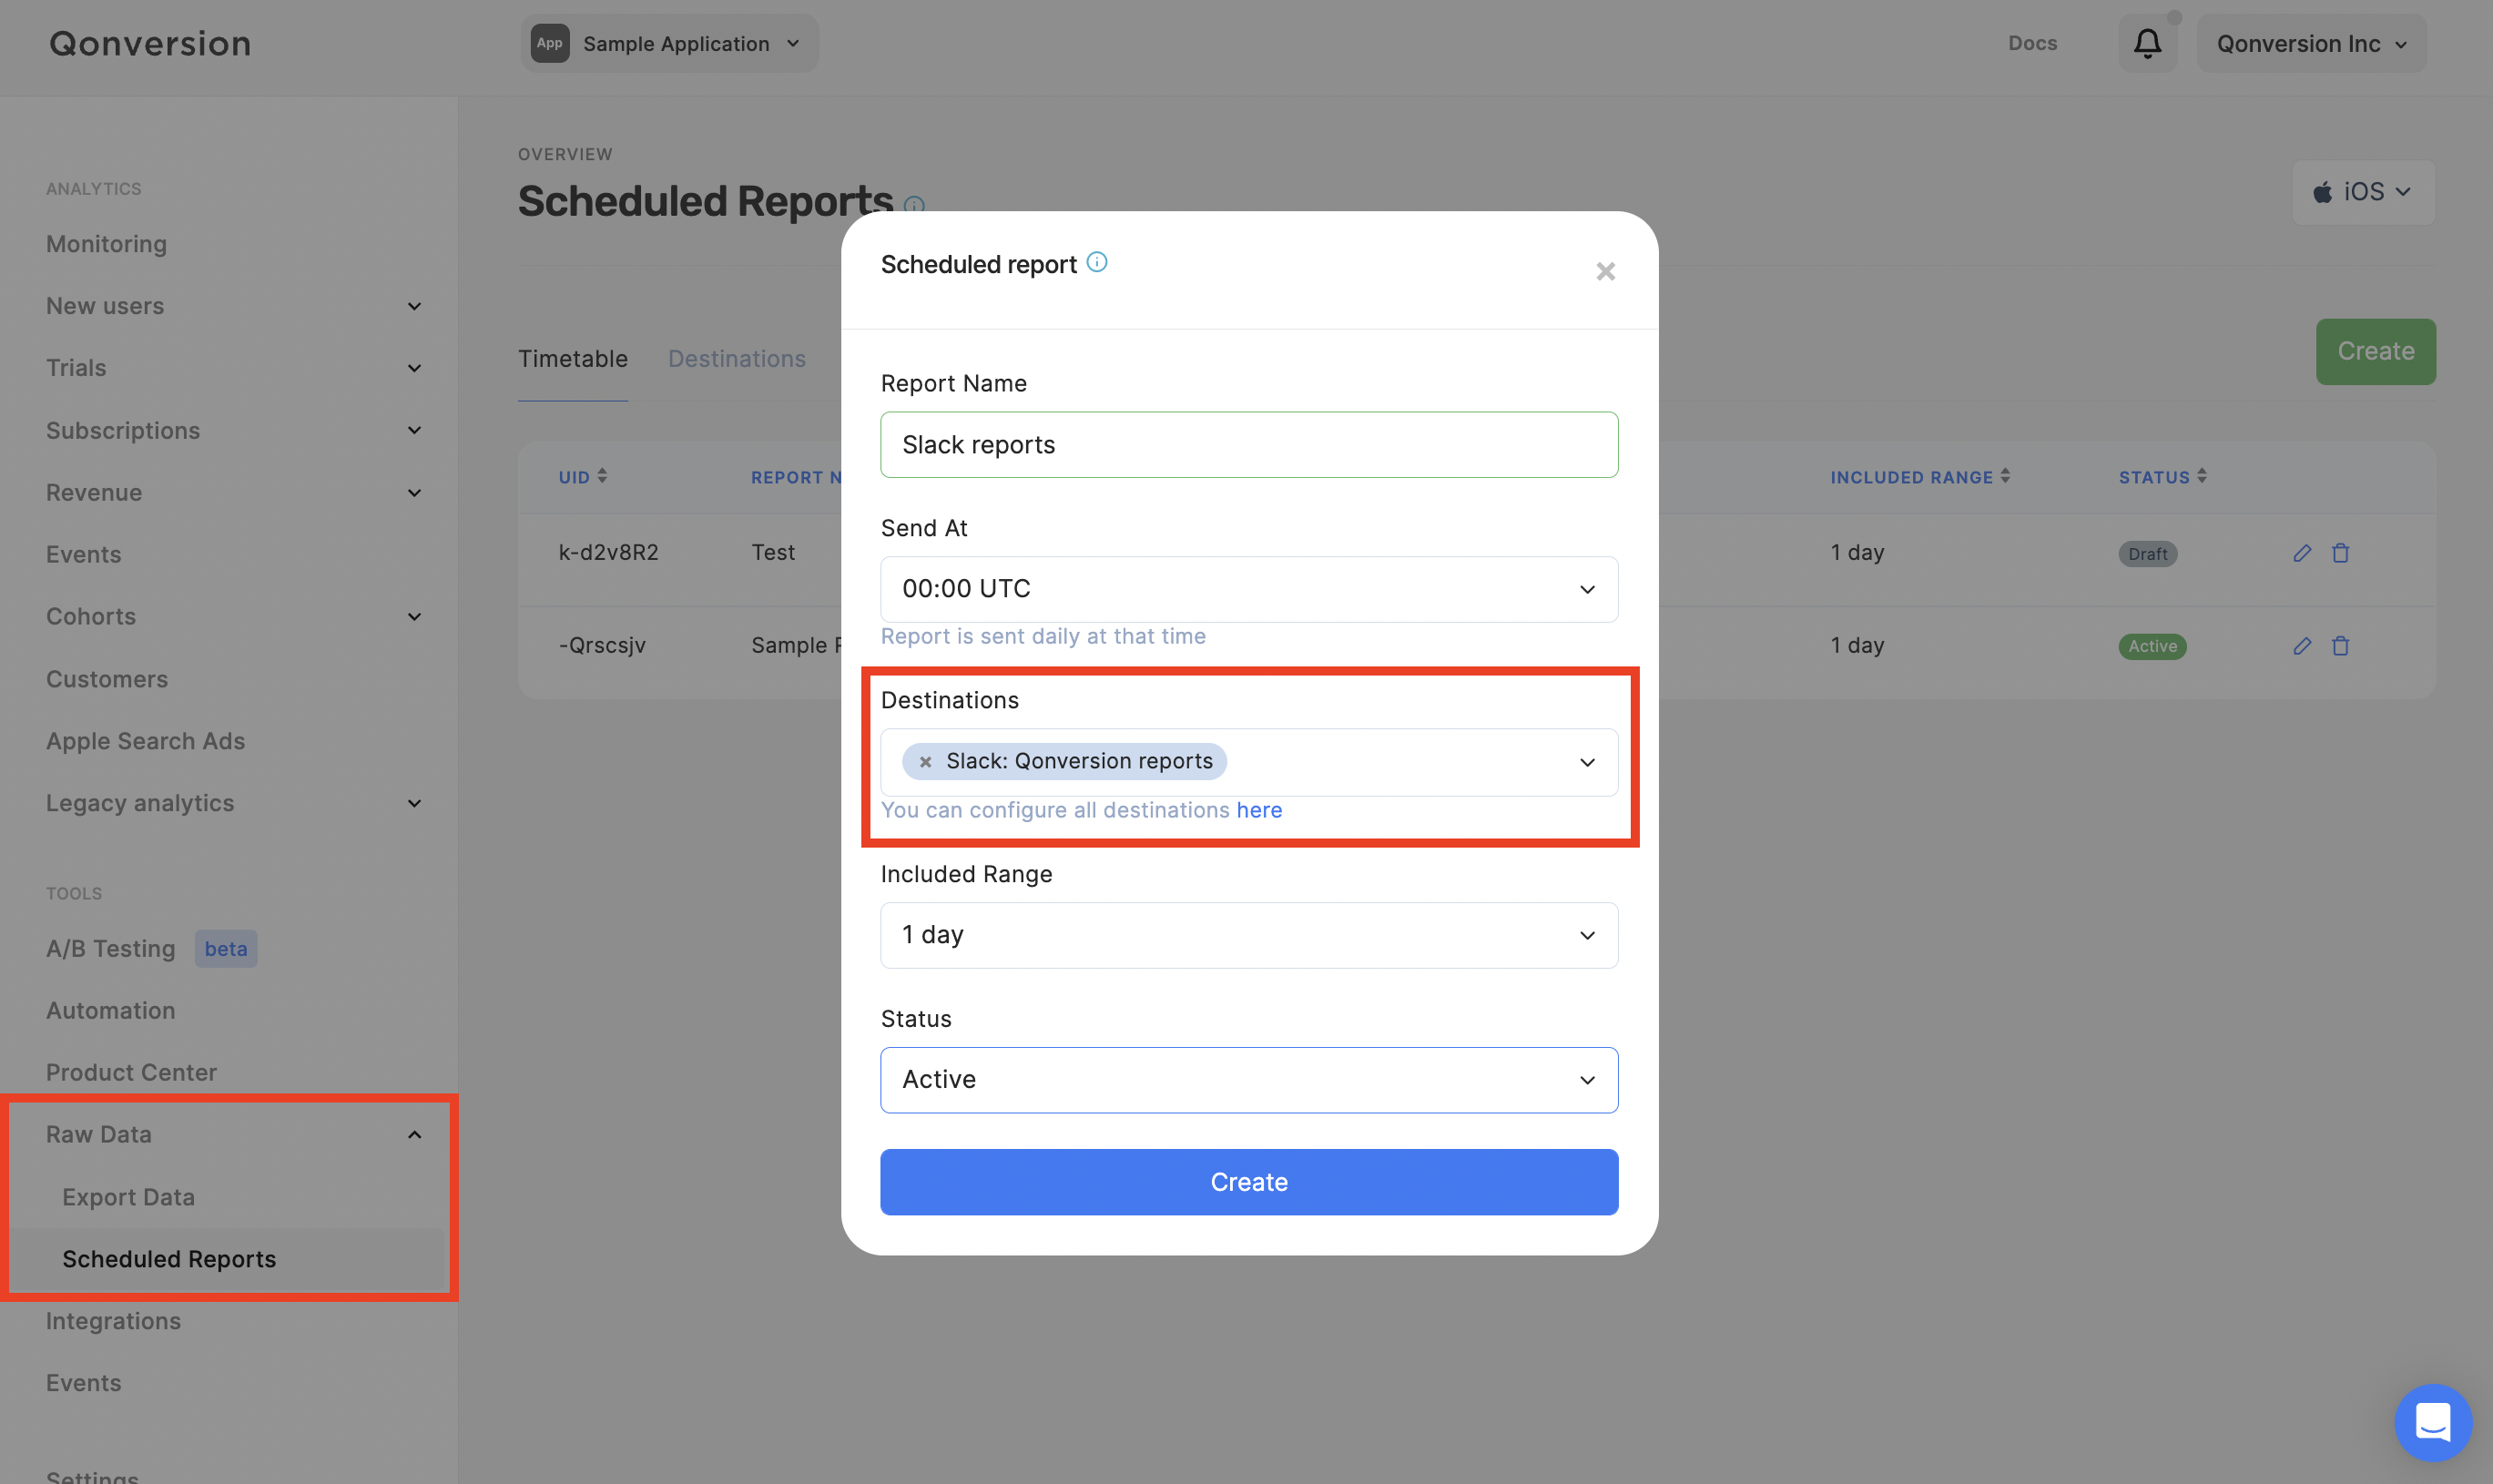
Select Scheduled Reports from the menu in your Qonversion account.

Scheduled Reports
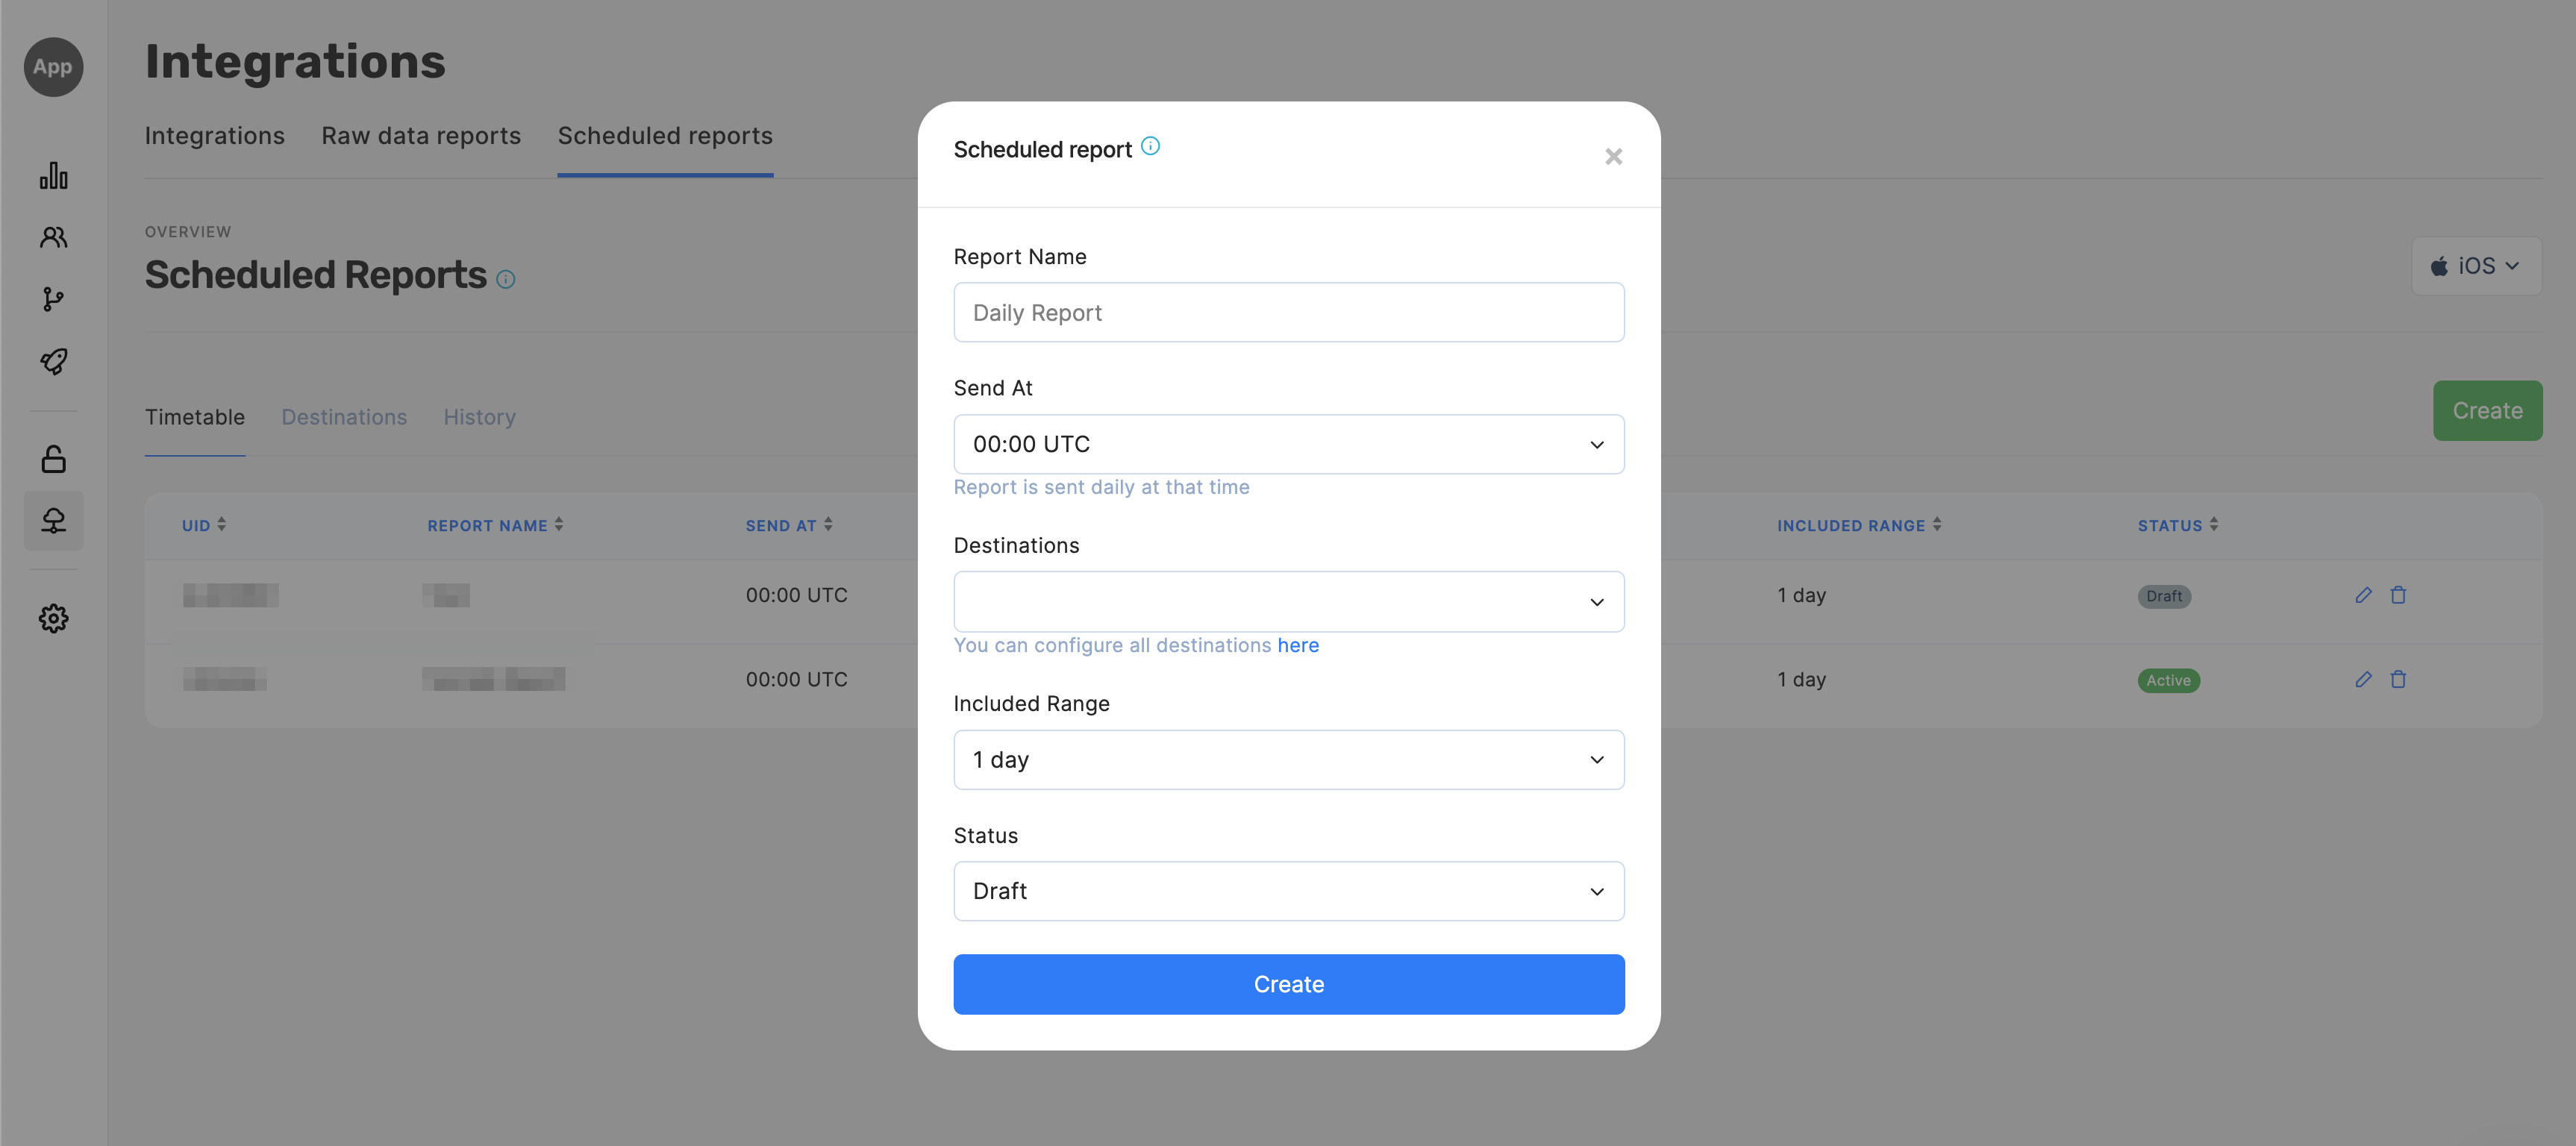
Provide the following details to set up your report:
- Report Name – an internal report name for your reference, e.g., "Morning analytics reports";
- Send At – a time when the report will be prepared and sent, 30-minute time intervals available;
- Destination – destination where your report will be sent. The following options are available: Slack, Webhook, or Email.
- Included Range – report period: 1, 3, or 7 days based on the date on which our system receives the event
- Status – draft or active.
Please note that subscription events in Scheduled Reports are being sorted by event receive date (i.e. the date when Qonversion detected the event)
Destinations
Google Cloud Storage
- Create a Google Cloud Storage destination accordingly to the integration guide
- Navigate to the Scheduled Reports tab and click the Create button.
- Fill in all the required fields, select Google Cloud Storage as the destination, and then click the Create button again.
- After the configuration is created, we will be sending Raw Data reports with the following file name structure:
- [date_YYYY_MM_DD]_[report_name]_[project_name]_[platform]_[uid_in_Qonversion].csv
Amazon S3
- Create an Amazon S3 destination accordingly to the integration guide
- Navigate to the Scheduled Reports tab and click the Create button.
- Fill in all the required fields, select Amazon S3 as the destination, and then click the Create button again.
- After the configuration is created, we will be sending Raw Data reports with the following file name structure:
- [date_YYYY_MM_DD]_[report_name]_[project_name]_[platform]_[uid_in_Qonversion].csv
Webhook
- Create a Webhook destination accordingly to the Webhook integration guide
- Navigate to the Scheduled Reports tab and click the Create button.
- Fill in all the required fields, select Webhooks as the destination, and then click the Create button again.
Done
Now your scheduled reports can be sent to your Webhook destination. Don't forget to set it as Active to activate it.
POST request to webhook destination with payload:
{
   "report_uid": "4AJ-qk3",
   "report_name": "Morning Report",
   "project_key": "project_key",
   "platform": "iOS",
   "delete_at": 1604236720,
   "link": "link",
   "send_at": 37800,
   "period": 86400,
   "environment": 1
}
| Field | Description |
|---|---|
| report_uid | Unique report ID |
| report_name | Report name |
| project_key | Your Qonversion project key |
| platform | iOS or Android |
| delete_at | Timestamp when a report will be deleted from our server |
| link | Link to your CSV report file |
| send_at | Time of a report in seconds from a day start |
| period | Period of the report |
| environment | 1 - production, 0 - sandbox; |
Slack
- Create a Slack destination accordingly to the Slack integration guide
- Navigate to the Scheduled Reports tab and click the Create button.
- Fill in all the required fields, select Slack as the destination, and then click the Create button again.

Updated 2 months ago
