> ## Documentation Index
> Fetch the complete documentation index at: https://documentation.qonversion.io/llms.txt
> Use this file to discover all available pages before exploring further.
# Scheduled Reports
> Schedule events data export
Scheduled reports allow you to automate [raw data export](raw-data-reports). It is helpful to:
* automatically receive raw data for enriching your data infrastructure with subscription events;
* deliver reports to your team on a schedule.
## Configure a Scheduled Report
Select [Scheduled Reports](https://dash.qonversion.io/scheduled-reports) from the menu in your Qonversion account.
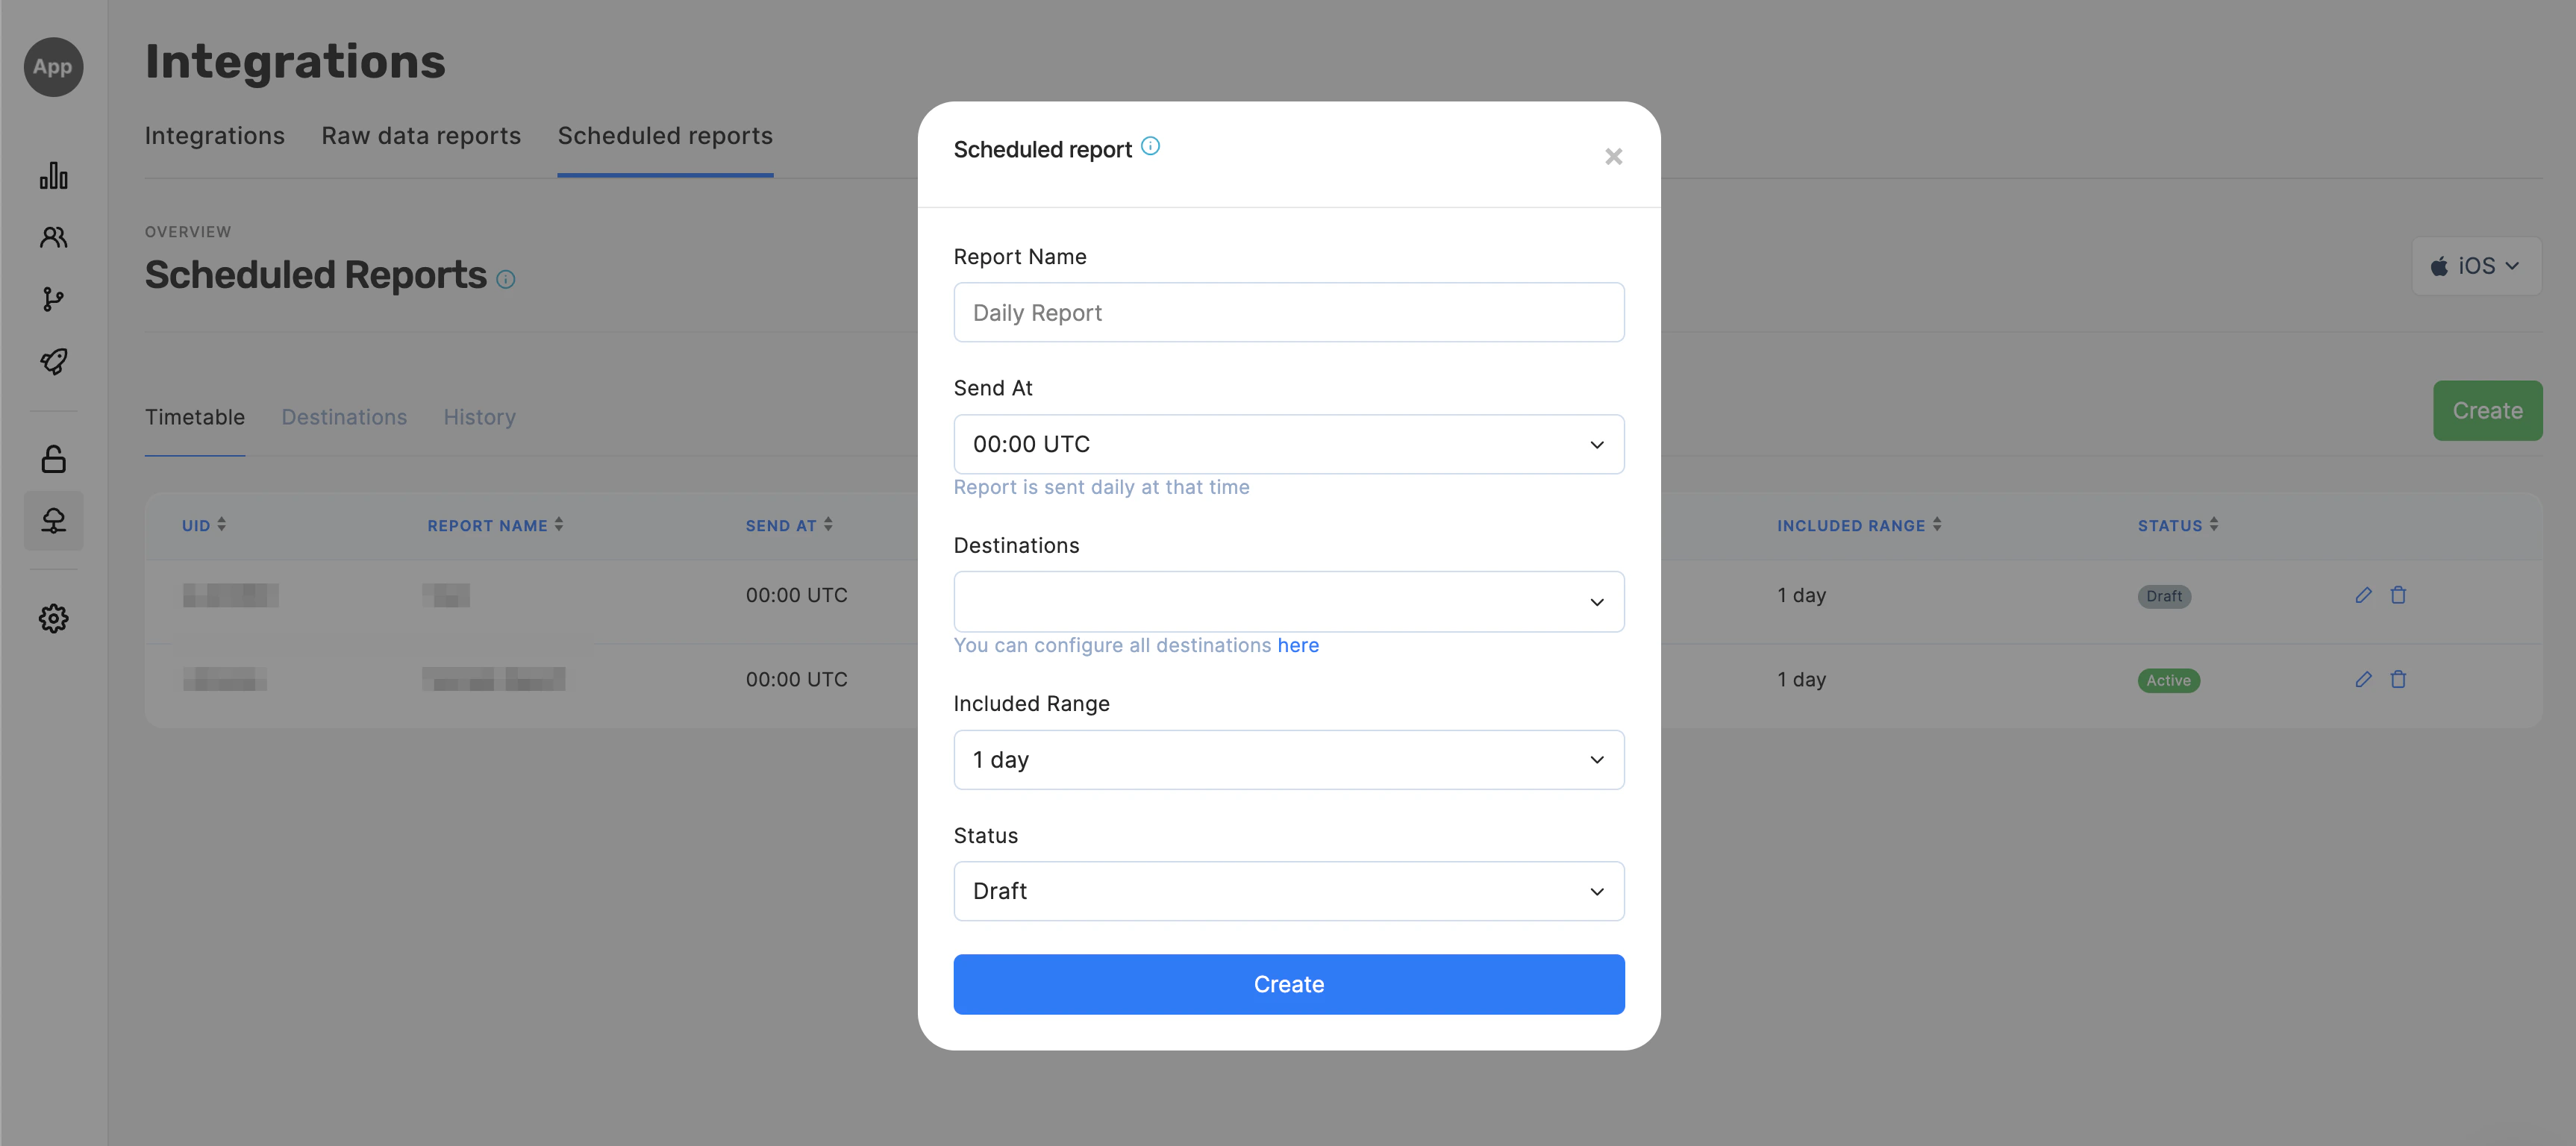 Provide the following details to set up your report:
* Report Name – an internal report name for your reference, e.g., "Morning analytics reports";
* Send At – a time when the report will be prepared and sent, 30-minute time intervals available;
* Destination – destination where your report will be sent. The following options are available: Google Cloud Storage, Amazon S3, Webhook, Email, Slack.
* Included Range – report period: 1, 3, or 7 days based on the date on which our system receives the event
* Status – draft or active.
Events of what period we will send
* From (Send At - Included Range) to (Send At).
* Example:
* you set up: Send At: 02:00 UTC, Included range: 3 days
* on Feb 15 shortly after 02:00 we send you events from Feb 12 02:00 to Feb 15 02:00
Please note that subscription events in Scheduled Reports are being sorted by event receive date (i.e. the date when Qonversion detected the event)
## Destinations
### Google Cloud Storage
1. Create a Google Cloud Storage destination accordingly to the [integration guide](google-cloud-storage)
2. Navigate to the [Scheduled Reports tab](https://dash.qonversion.io/scheduled-reports) and click the **Create** button.
3. Fill in all the required fields, select **Google Cloud Storage** as the destination, and then click the **Create** button again.
4. After the configuration is created, we will be sending Raw Data reports with the following file name structure:
* `[YYYY_MM_DD]_[report_name]_[project_name]_[platform]_[uid_in_qonversion].` (extension depends on the underlying file format - typically `.gzip`)
### Amazon S3
1. Create an Amazon S3 destination accordingly to the [integration guide](amazon-s3)
2. Navigate to the [Scheduled Reports tab](https://dash.qonversion.io/scheduled-reports) and click the **Create** button.
3. Fill in all the required fields, select **Amazon S3** as the destination, and then click the **Create** button again.
4. After the configuration is created, we will be sending Raw Data reports with the following file name structure:
* `[YYYY_MM_DD]_[report_name]_[project_name]_[platform]_[uid_in_qonversion].` (extension depends on the underlying file format - typically `.gzip`)
### Webhook
1. Create a Webhook destination accordingly to the [Webhook integration guide](webhooks). You can optionally provide a header token in the integration settings - it will be sent as a `Bearer` authorization header on each delivery.
2. Navigate to the [Scheduled Reports tab](https://dash.qonversion.io/scheduled-reports) and click the **Create** button.
3. Fill in all the required fields, select *Webhooks* as the destination, and then click the **Create** button again.
### Done
Now your scheduled reports can be sent to your Webhook destination. Don't forget to set it as **Active** to activate it.
POST request to webhook destination with payload:
```json theme={null}
{
"report_uid": "4AJ-qk3",
"report_name": "Morning Report",
"project_key": "project_key",
"platform": "iOS",
"delete_at": 1604236720,
"link": "link",
"send_at": 37800,
"period": 86400,
"environment": 1
}
```
| Field | Description |
| ------------ | ------------------------------------------------------- |
| report\_uid | Unique report ID |
| report\_name | Report name |
| project\_key | Your Qonversion [project key](getting-started) |
| platform | iOS or Android |
| delete\_at | Timestamp when a report will be deleted from our server |
| link | Link to your CSV report file |
| send\_at | Time of a report in seconds from a day start |
| period | Period of the report |
| environment | 1 - production, 0 - sandbox; |
### Email
1. Navigate to the [Scheduled Reports tab](https://dash.qonversion.io/scheduled-reports) and click the **Create** button.
2. Fill in all the required fields, select **Email** as the destination, and pick the recipient(s) from the project members list. Click the **Create** button again.
3. Recipients will receive each scheduled report at the configured time.
### Slack
1. Create a Slack destination accordingly to the [Slack integration guide](slack)
2. Navigate to the [Scheduled Reports tab](https://dash.qonversion.io/scheduled-reports) and click the **Create** button.
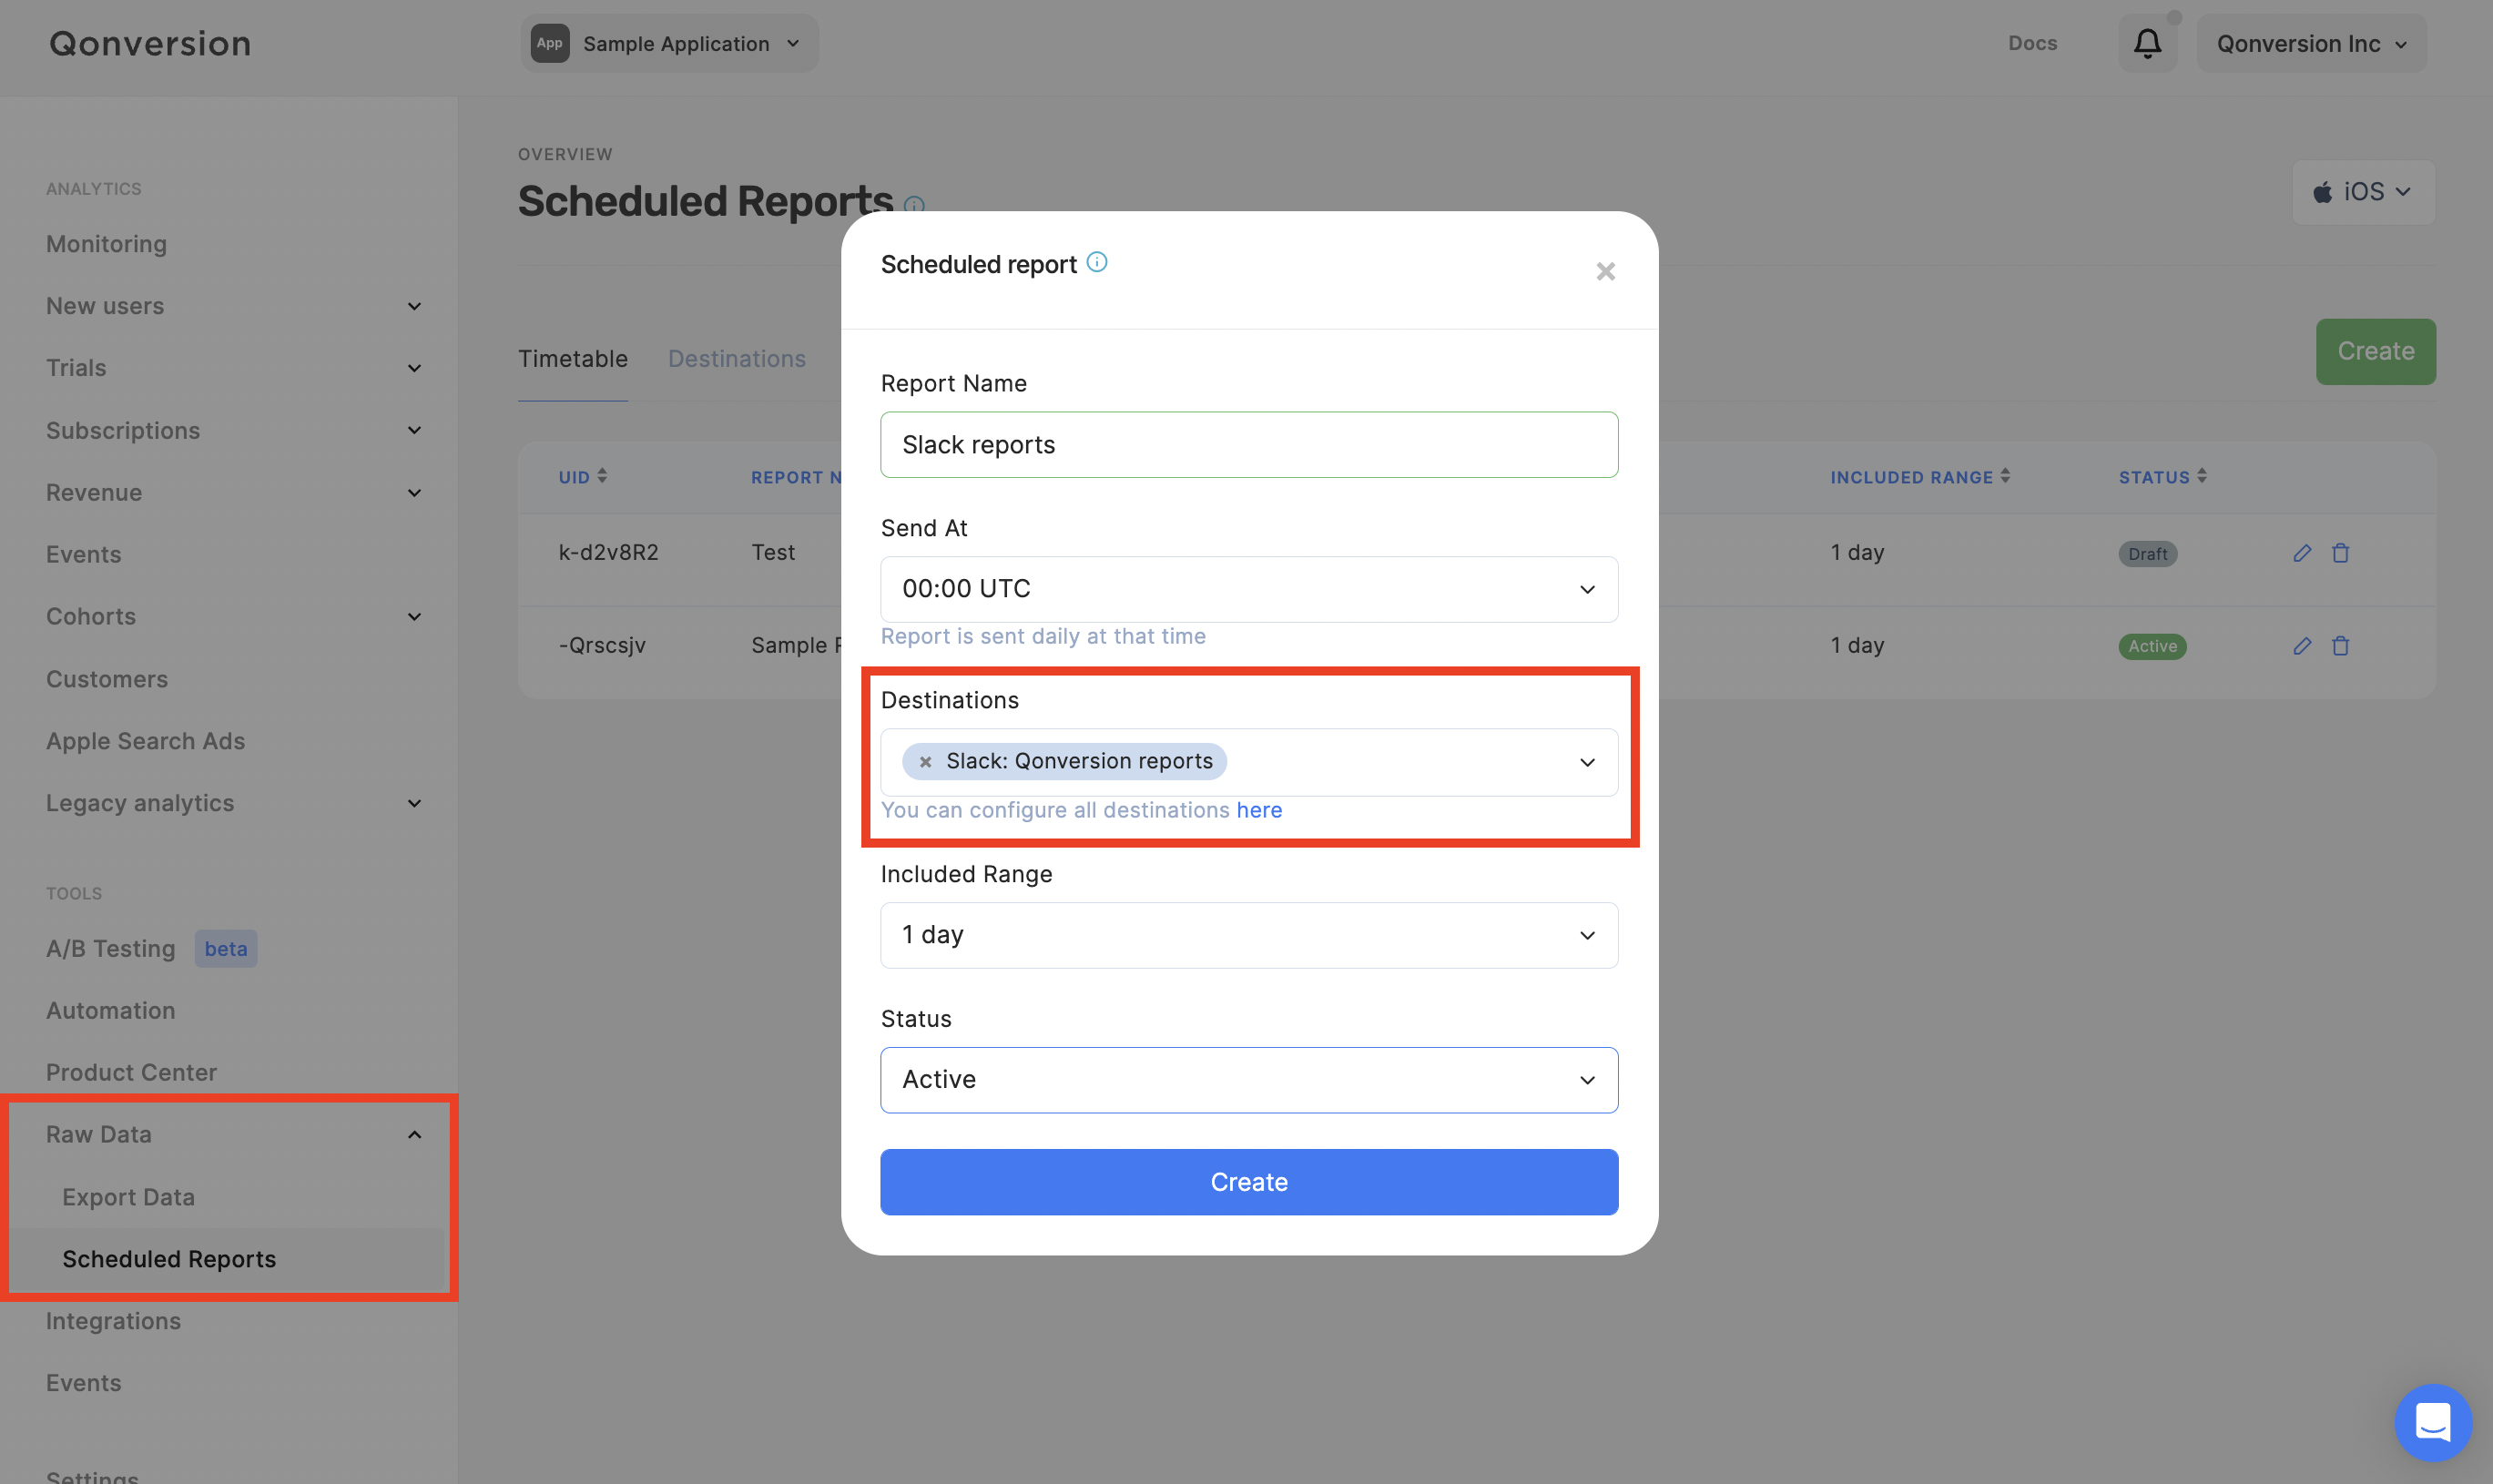
3. Fill in all the required fields, select Slack as the destination, and then click the **Create** button again.
Provide the following details to set up your report:
* Report Name – an internal report name for your reference, e.g., "Morning analytics reports";
* Send At – a time when the report will be prepared and sent, 30-minute time intervals available;
* Destination – destination where your report will be sent. The following options are available: Google Cloud Storage, Amazon S3, Webhook, Email, Slack.
* Included Range – report period: 1, 3, or 7 days based on the date on which our system receives the event
* Status – draft or active.
Events of what period we will send
* From (Send At - Included Range) to (Send At).
* Example:
* you set up: Send At: 02:00 UTC, Included range: 3 days
* on Feb 15 shortly after 02:00 we send you events from Feb 12 02:00 to Feb 15 02:00
Please note that subscription events in Scheduled Reports are being sorted by event receive date (i.e. the date when Qonversion detected the event)
## Destinations
### Google Cloud Storage
1. Create a Google Cloud Storage destination accordingly to the [integration guide](google-cloud-storage)
2. Navigate to the [Scheduled Reports tab](https://dash.qonversion.io/scheduled-reports) and click the **Create** button.
3. Fill in all the required fields, select **Google Cloud Storage** as the destination, and then click the **Create** button again.
4. After the configuration is created, we will be sending Raw Data reports with the following file name structure:
* `[YYYY_MM_DD]_[report_name]_[project_name]_[platform]_[uid_in_qonversion].` (extension depends on the underlying file format - typically `.gzip`)
### Amazon S3
1. Create an Amazon S3 destination accordingly to the [integration guide](amazon-s3)
2. Navigate to the [Scheduled Reports tab](https://dash.qonversion.io/scheduled-reports) and click the **Create** button.
3. Fill in all the required fields, select **Amazon S3** as the destination, and then click the **Create** button again.
4. After the configuration is created, we will be sending Raw Data reports with the following file name structure:
* `[YYYY_MM_DD]_[report_name]_[project_name]_[platform]_[uid_in_qonversion].` (extension depends on the underlying file format - typically `.gzip`)
### Webhook
1. Create a Webhook destination accordingly to the [Webhook integration guide](webhooks). You can optionally provide a header token in the integration settings - it will be sent as a `Bearer` authorization header on each delivery.
2. Navigate to the [Scheduled Reports tab](https://dash.qonversion.io/scheduled-reports) and click the **Create** button.
3. Fill in all the required fields, select *Webhooks* as the destination, and then click the **Create** button again.
### Done
Now your scheduled reports can be sent to your Webhook destination. Don't forget to set it as **Active** to activate it.
POST request to webhook destination with payload:
```json theme={null}
{
"report_uid": "4AJ-qk3",
"report_name": "Morning Report",
"project_key": "project_key",
"platform": "iOS",
"delete_at": 1604236720,
"link": "link",
"send_at": 37800,
"period": 86400,
"environment": 1
}
```
| Field | Description |
| ------------ | ------------------------------------------------------- |
| report\_uid | Unique report ID |
| report\_name | Report name |
| project\_key | Your Qonversion [project key](getting-started) |
| platform | iOS or Android |
| delete\_at | Timestamp when a report will be deleted from our server |
| link | Link to your CSV report file |
| send\_at | Time of a report in seconds from a day start |
| period | Period of the report |
| environment | 1 - production, 0 - sandbox; |
### Email
1. Navigate to the [Scheduled Reports tab](https://dash.qonversion.io/scheduled-reports) and click the **Create** button.
2. Fill in all the required fields, select **Email** as the destination, and pick the recipient(s) from the project members list. Click the **Create** button again.
3. Recipients will receive each scheduled report at the configured time.
### Slack
1. Create a Slack destination accordingly to the [Slack integration guide](slack)
2. Navigate to the [Scheduled Reports tab](https://dash.qonversion.io/scheduled-reports) and click the **Create** button.
3. Fill in all the required fields, select Slack as the destination, and then click the **Create** button again.
 ***
[Raw Data Export](raw-data-reports)
[Custom Proxy Server](custom-proxy-server-for-sdks)
***
[Raw Data Export](raw-data-reports)
[Custom Proxy Server](custom-proxy-server-for-sdks)