> ## Documentation Index
> Fetch the complete documentation index at: https://documentation.qonversion.io/llms.txt
> Use this file to discover all available pages before exploring further.
# Product Setup & Store Connection
> Connect your in-app products from App Store, Google Play, Stripe, or Paddle so they can be used in the No-Code Builder.
## 1. Add Products
*(Optional, but recommended for paywalls)*
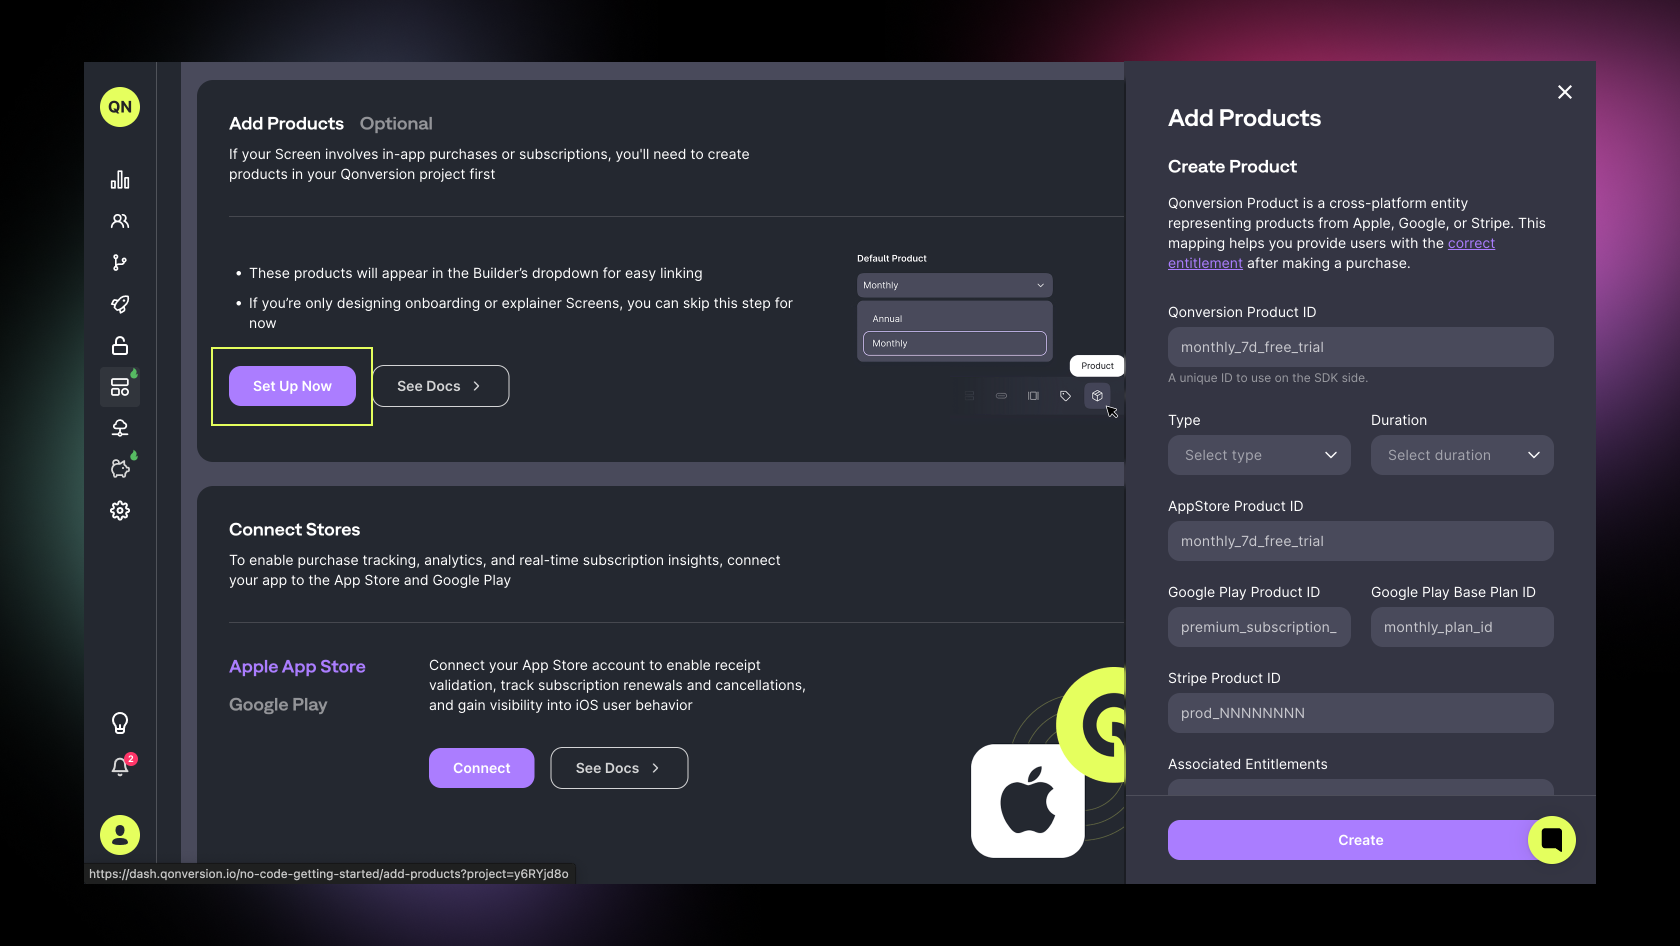
If your screen involves in-app purchases or subscriptions, you'll need to create products in your Qonversion project first.
* These products will appear in the Builder’s dropdown for easy linking.
* If you’re only designing onboarding or feature-explainer screens, you can skip this step for now.
You can create products directly from the No-Codes section in your dashboard or from the [Entitlements Section](create-products).
To add products for your screen:
1. Go to **Dashboard** → **No-Codes** → **Getting Started**
2. Scroll to the **Add Products** section
3. Click **Add Product** and fill in the details (Product ID, Store, Type, Duration, Price)
> Learn more about [Entitlements](create-products)
 ***
## 2. Connect Stores
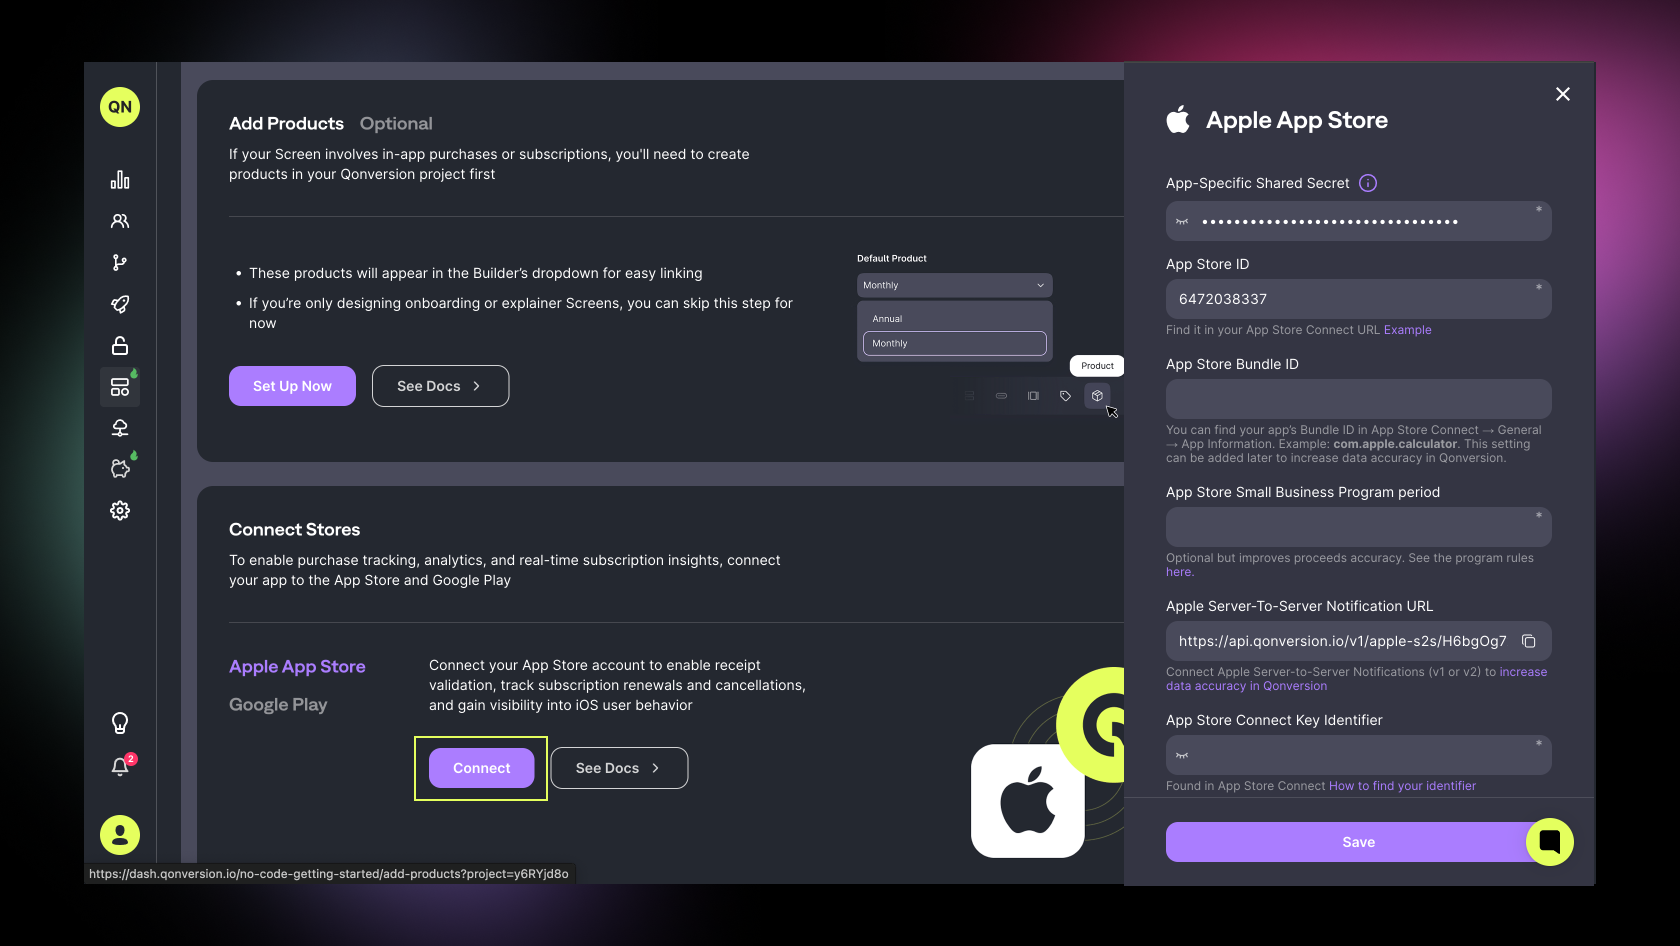
Connecting your Apple App Store and Google Play accounts enables:
* Real-time subscription status tracking
* Purchase validation and fraud protection
* In-depth analytics on conversion, revenue, and retention
Setup typically takes under 10 minutes with our step-by-step guides.
You can connect your store in two ways:
From **No-Codes Section**
1. Go to **Dashboard** → **No-Codes** → **Getting Started**
2. Scroll to **Store Connection**
3. Choose your store (App Store or Google Play)
4. Follow the setup prompts to authorize the connection
Or [follow this guide](quickstart#2-create-a-project-and-register-your-app) to connect stores from **Settings** and learn more.
***
## 2. Connect Stores
Connecting your Apple App Store and Google Play accounts enables:
* Real-time subscription status tracking
* Purchase validation and fraud protection
* In-depth analytics on conversion, revenue, and retention
Setup typically takes under 10 minutes with our step-by-step guides.
You can connect your store in two ways:
From **No-Codes Section**
1. Go to **Dashboard** → **No-Codes** → **Getting Started**
2. Scroll to **Store Connection**
3. Choose your store (App Store or Google Play)
4. Follow the setup prompts to authorize the connection
Or [follow this guide](quickstart#2-create-a-project-and-register-your-app) to connect stores from **Settings** and learn more.
 ***
## 3. Using Products in the Builder
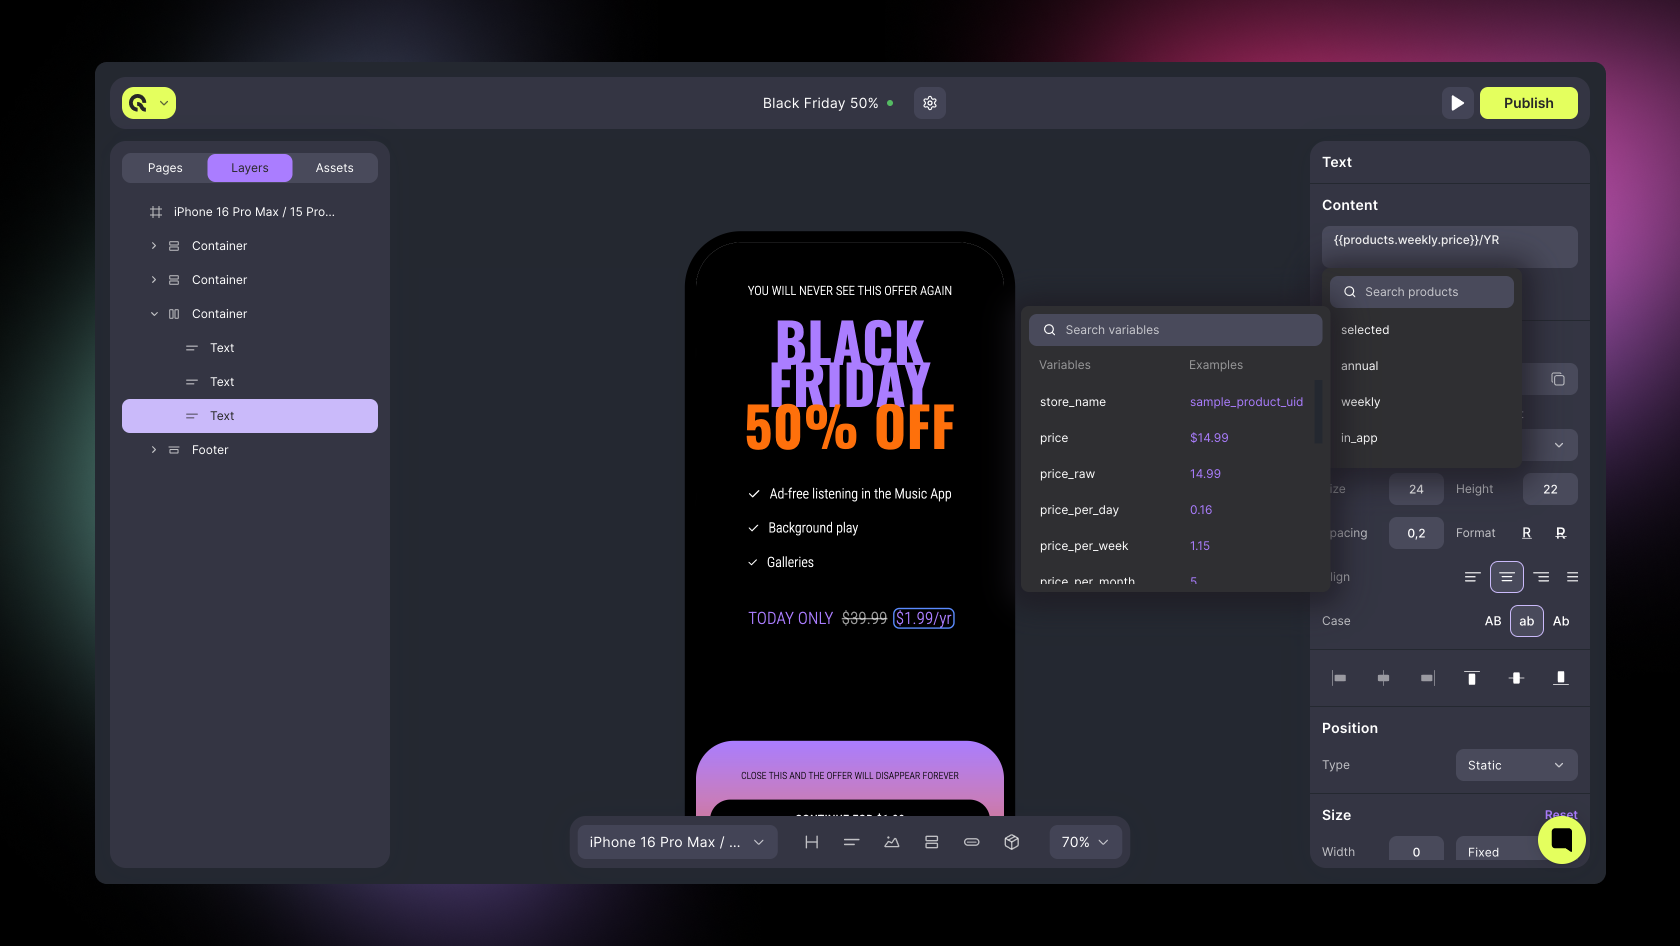
In the No-Code Builder, you can use products in several ways:
* **Canvas Settings** – Set a **Default Product** that’s automatically selected when the screen is displayed.
* **Actions** – Components like Containers and Buttons include action settings such as *Make a Purchase* or *Select Product*.
* **Text Variables** – Dynamically insert product **names**, **prices**, or other attributes.
Products will appear automatically in the dropdown, ready to bind:
* Display name
* Price *products.weekly.price*
* Trial duration or period
* Currency
You can use multiple products in a single paywall (e.g., monthly and annual options).
> Learn more about [Variables](variables-1)
***
## 3. Using Products in the Builder
In the No-Code Builder, you can use products in several ways:
* **Canvas Settings** – Set a **Default Product** that’s automatically selected when the screen is displayed.
* **Actions** – Components like Containers and Buttons include action settings such as *Make a Purchase* or *Select Product*.
* **Text Variables** – Dynamically insert product **names**, **prices**, or other attributes.
Products will appear automatically in the dropdown, ready to bind:
* Display name
* Price *products.weekly.price*
* Trial duration or period
* Currency
You can use multiple products in a single paywall (e.g., monthly and annual options).
> Learn more about [Variables](variables-1)
 ***
## Sync Updates
Whenever you change product prices or configurations in your store, Qonversion automatically syncs them. No need to republish screens — product data updates dynamically.
***
[Installation](installation)
[Creating Screens](getting-started)
***
## Sync Updates
Whenever you change product prices or configurations in your store, Qonversion automatically syncs them. No need to republish screens — product data updates dynamically.
***
[Installation](installation)
[Creating Screens](getting-started)