> ## Documentation Index
> Fetch the complete documentation index at: https://documentation.qonversion.io/llms.txt
> Use this file to discover all available pages before exploring further.
# OneSignal
> Send in-app subscription events to OneSignal to win back your subscribers
Qonversion sends mobile subscription events to OneSignal to automate push notifications with special offers to users who cancel a trial or a subscription. A personalized push notification with a special offer to a user who just canceled his trial or subscription can significantly uplift your app's revenue.
## 1. Set up the SDKs
1. Make sure you have OneSignal SDK installed. If you do not have OneSignal integration yet, please use [this documentation](https://documentation.onesignal.com/docs#sdk-guides).
2. Set Qonversion SDKs following [installing the SDKs](install-sdk) guides.
3. Additionally, to attribute events sent from Qonversion, you need to set the same user ID at `_q_custom_user_id` key using the `Qonversion.shared().setProperty` method. Follow the [documentation](user-properties) to learn more about this method.
4. Set the same user ID by using OneSignal SDK:
```swift Swift theme={null}
OneSignal.setExternalUserId("yourSideUserID")
```
```objectivec Objective-C theme={null}
[OneSignal setExternalUserId:@"yourSideUserID"];
```
```java Java theme={null}
OneSignal.setExternalUserId("yourSideUserID");
```
```kotlin Kotlin theme={null}
OneSignal.setExternalUserId("yourSideUserID")
```
The `setExternalUserId` method is deprecated in version 5+ of Onesignal SDKs. Instead, the External User ID will now be called External ID and will be used as the default alias for the new `OneSignal.login method`
See the [User Model Migration Guide](https://documentation.onesignal.com/docs/user-model-migration-guide) for more details.
## 2. Configure the OneSignal Integration
1. Get your **OneSignal App ID** following [this documentation](https://documentation.onesignal.com/docs/accounts-and-keys).
2. Navigate to the Integrations section in your Qonversion project, select [OneSignal](https://dash.qonversion.io/app/integration/onesignal), and provide the **App ID** and Save.
### Done
Now Qonversion will start sending in-app purchases and subscriptions data to your OneSignal account.
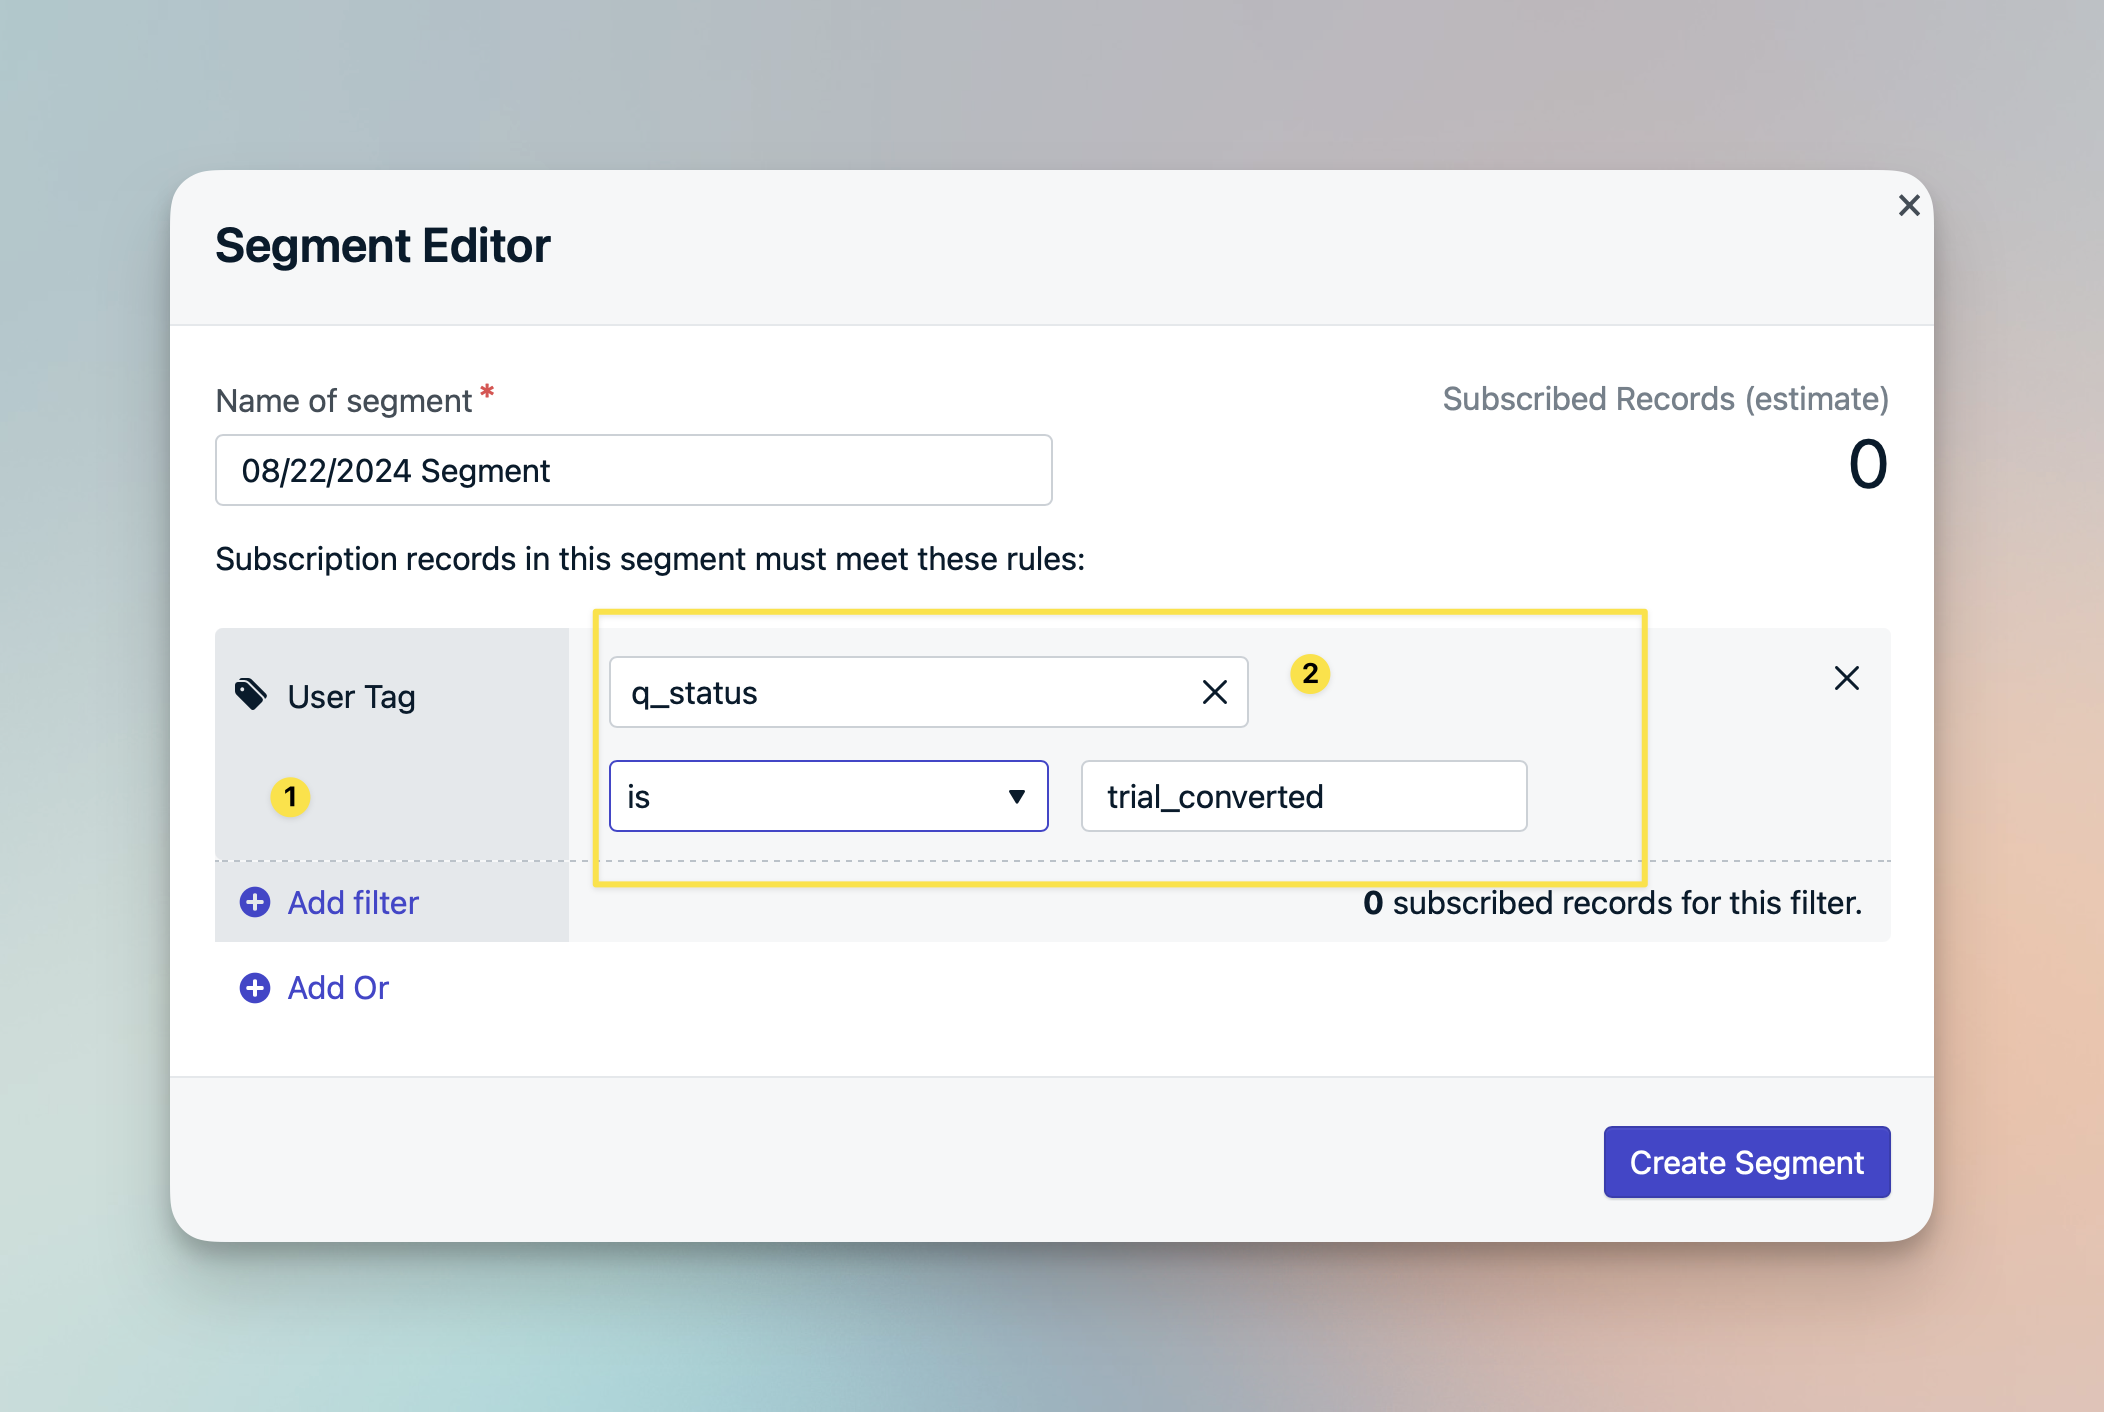
## How to Test
To test the integration, create a custom segment using a user tag labeled `q_status` with the desired value. Qonversion sets up a custom tag for users based on their most recent subscription status.
 ## Event Payload
The event names correspond to the OneSignal Tag Values.
Qonversion uses the **q\_status** tag with the event names to add data attributes to your OneSignal users. For example:
```json theme={null}
{
"tags":{
"q_status":"trial_converted"
}
}
```
***
[Mixpanel](mixpanel)
[Pushwoosh](pushwoosh)
## Event Payload
The event names correspond to the OneSignal Tag Values.
Qonversion uses the **q\_status** tag with the event names to add data attributes to your OneSignal users. For example:
```json theme={null}
{
"tags":{
"q_status":"trial_converted"
}
}
```
***
[Mixpanel](mixpanel)
[Pushwoosh](pushwoosh)