> ## Documentation Index
> Fetch the complete documentation index at: https://documentation.qonversion.io/llms.txt
> Use this file to discover all available pages before exploring further.
# Configuring Platforms
**Deprecated.** This guide configures the Qonversion side of the legacy `Automations` push
pipeline. The matching client SDK API (`Qonversion.Automations.shared().setNotificationsToken`
/ `QONAutomations setNotificationsToken:` / `Automations.getSharedInstance().setNotificationsToken`)
has been removed from the current iOS and Android SDKs (replaced by the `NoCodes` module, which
does not expose push APIs). Configuring the keys below will not lead to delivered pushes until
the SDK surface is reintroduced.
## Apple Push Notifications
Qonversion uses Apple Push Notifications service (APNs) with the .p8 certificate to send push notifications on the iOS platform. It is the unified key to send push notifications in sandbox and production. To set up push notifications with Qonversion using APNs you need the following data:
* APNs Key;
* Key ID;
* Bundle ID;
* Team ID.
### 1. Generate APNs key
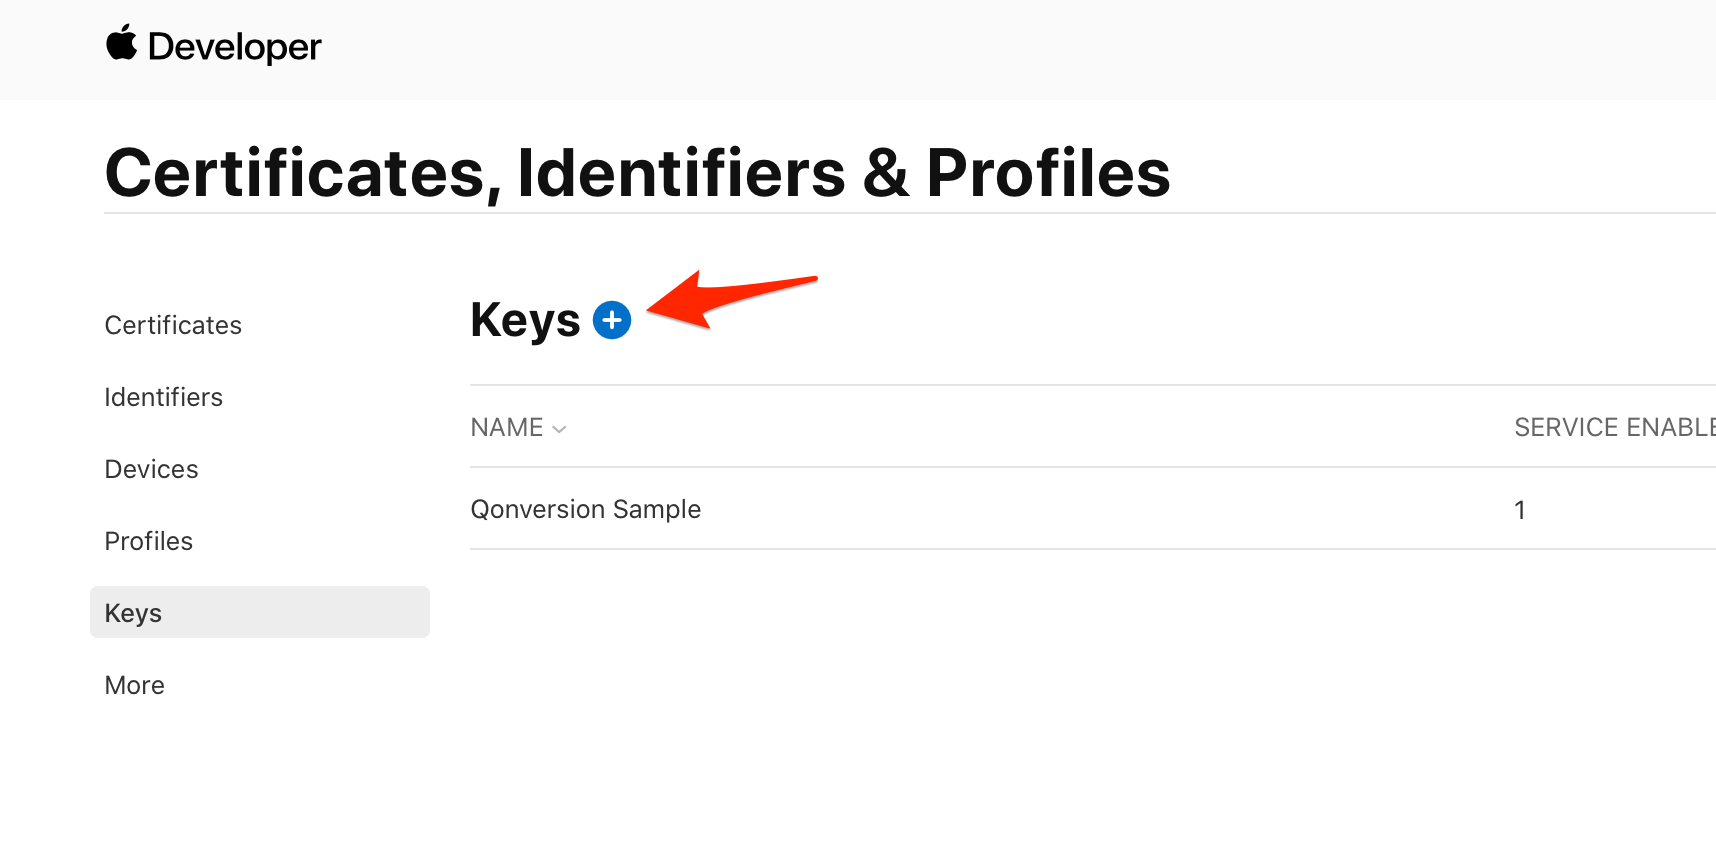
Navigate to Certificates, Identifiers & Profiles in your Developer Center. Click the "plus" button.
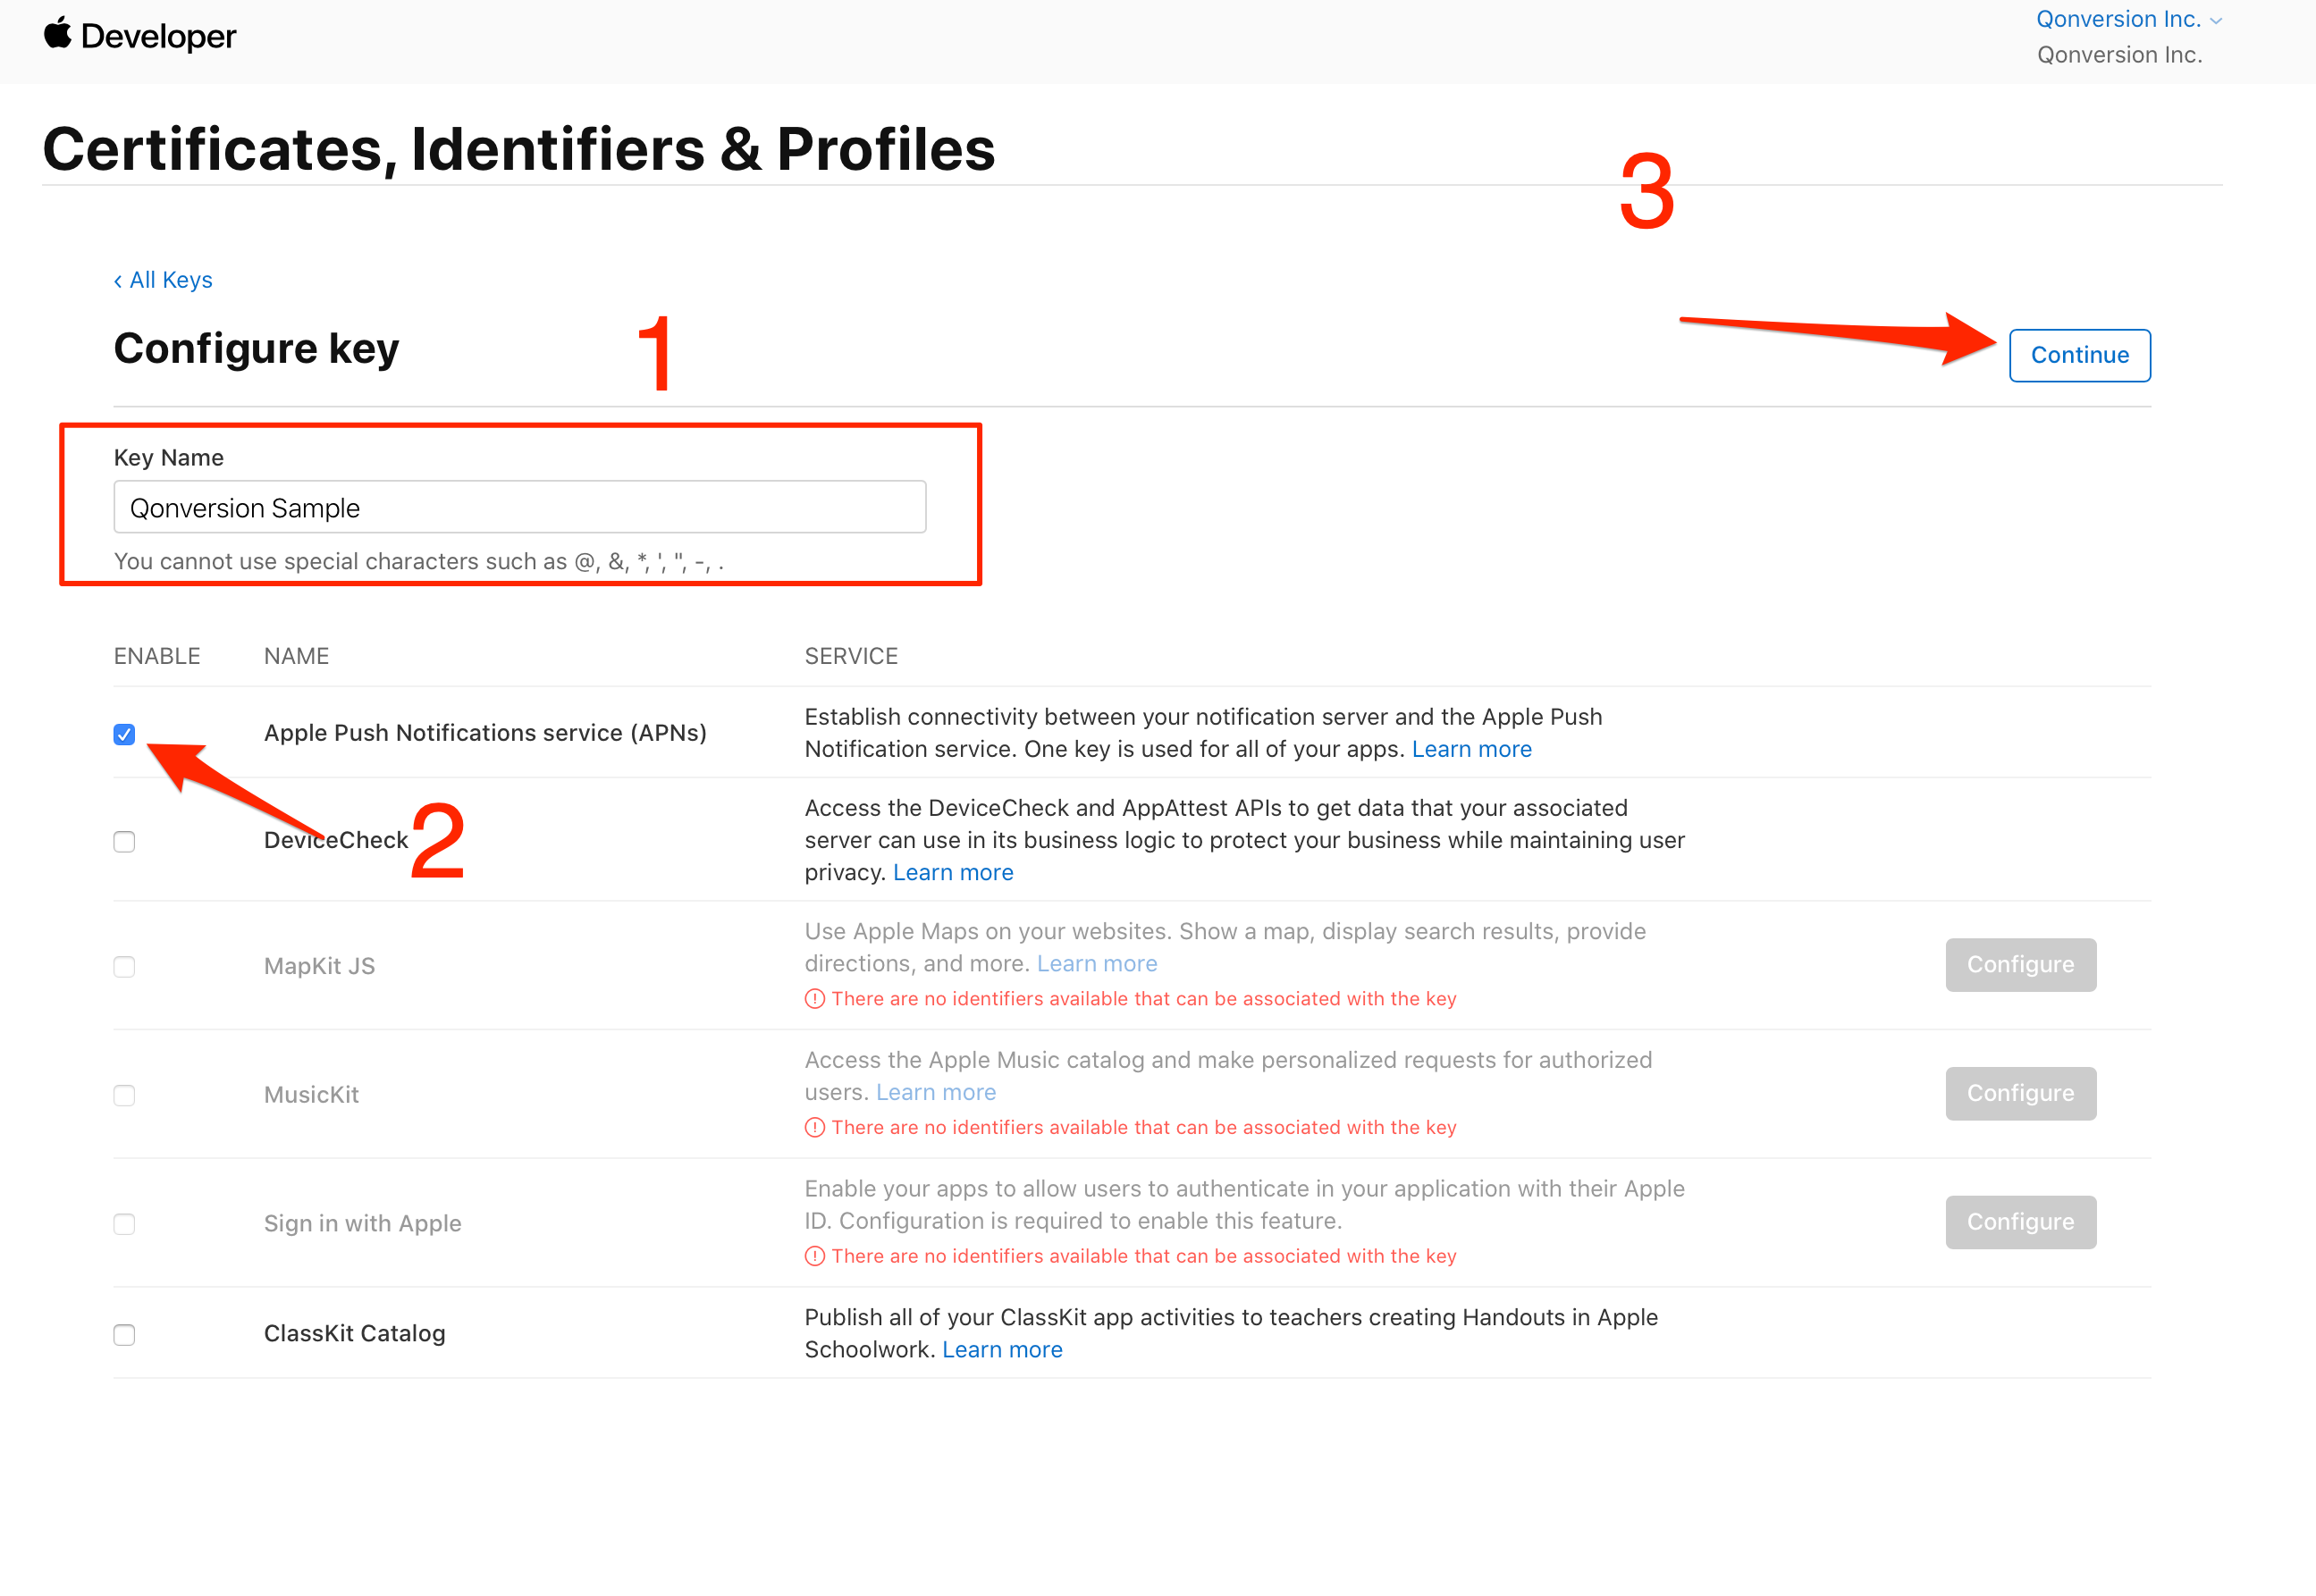
 Chose the key name and select Apple Push Notifications service (APNs) from the list.\
Click **Continue**.
Chose the key name and select Apple Push Notifications service (APNs) from the list.\
Click **Continue**.
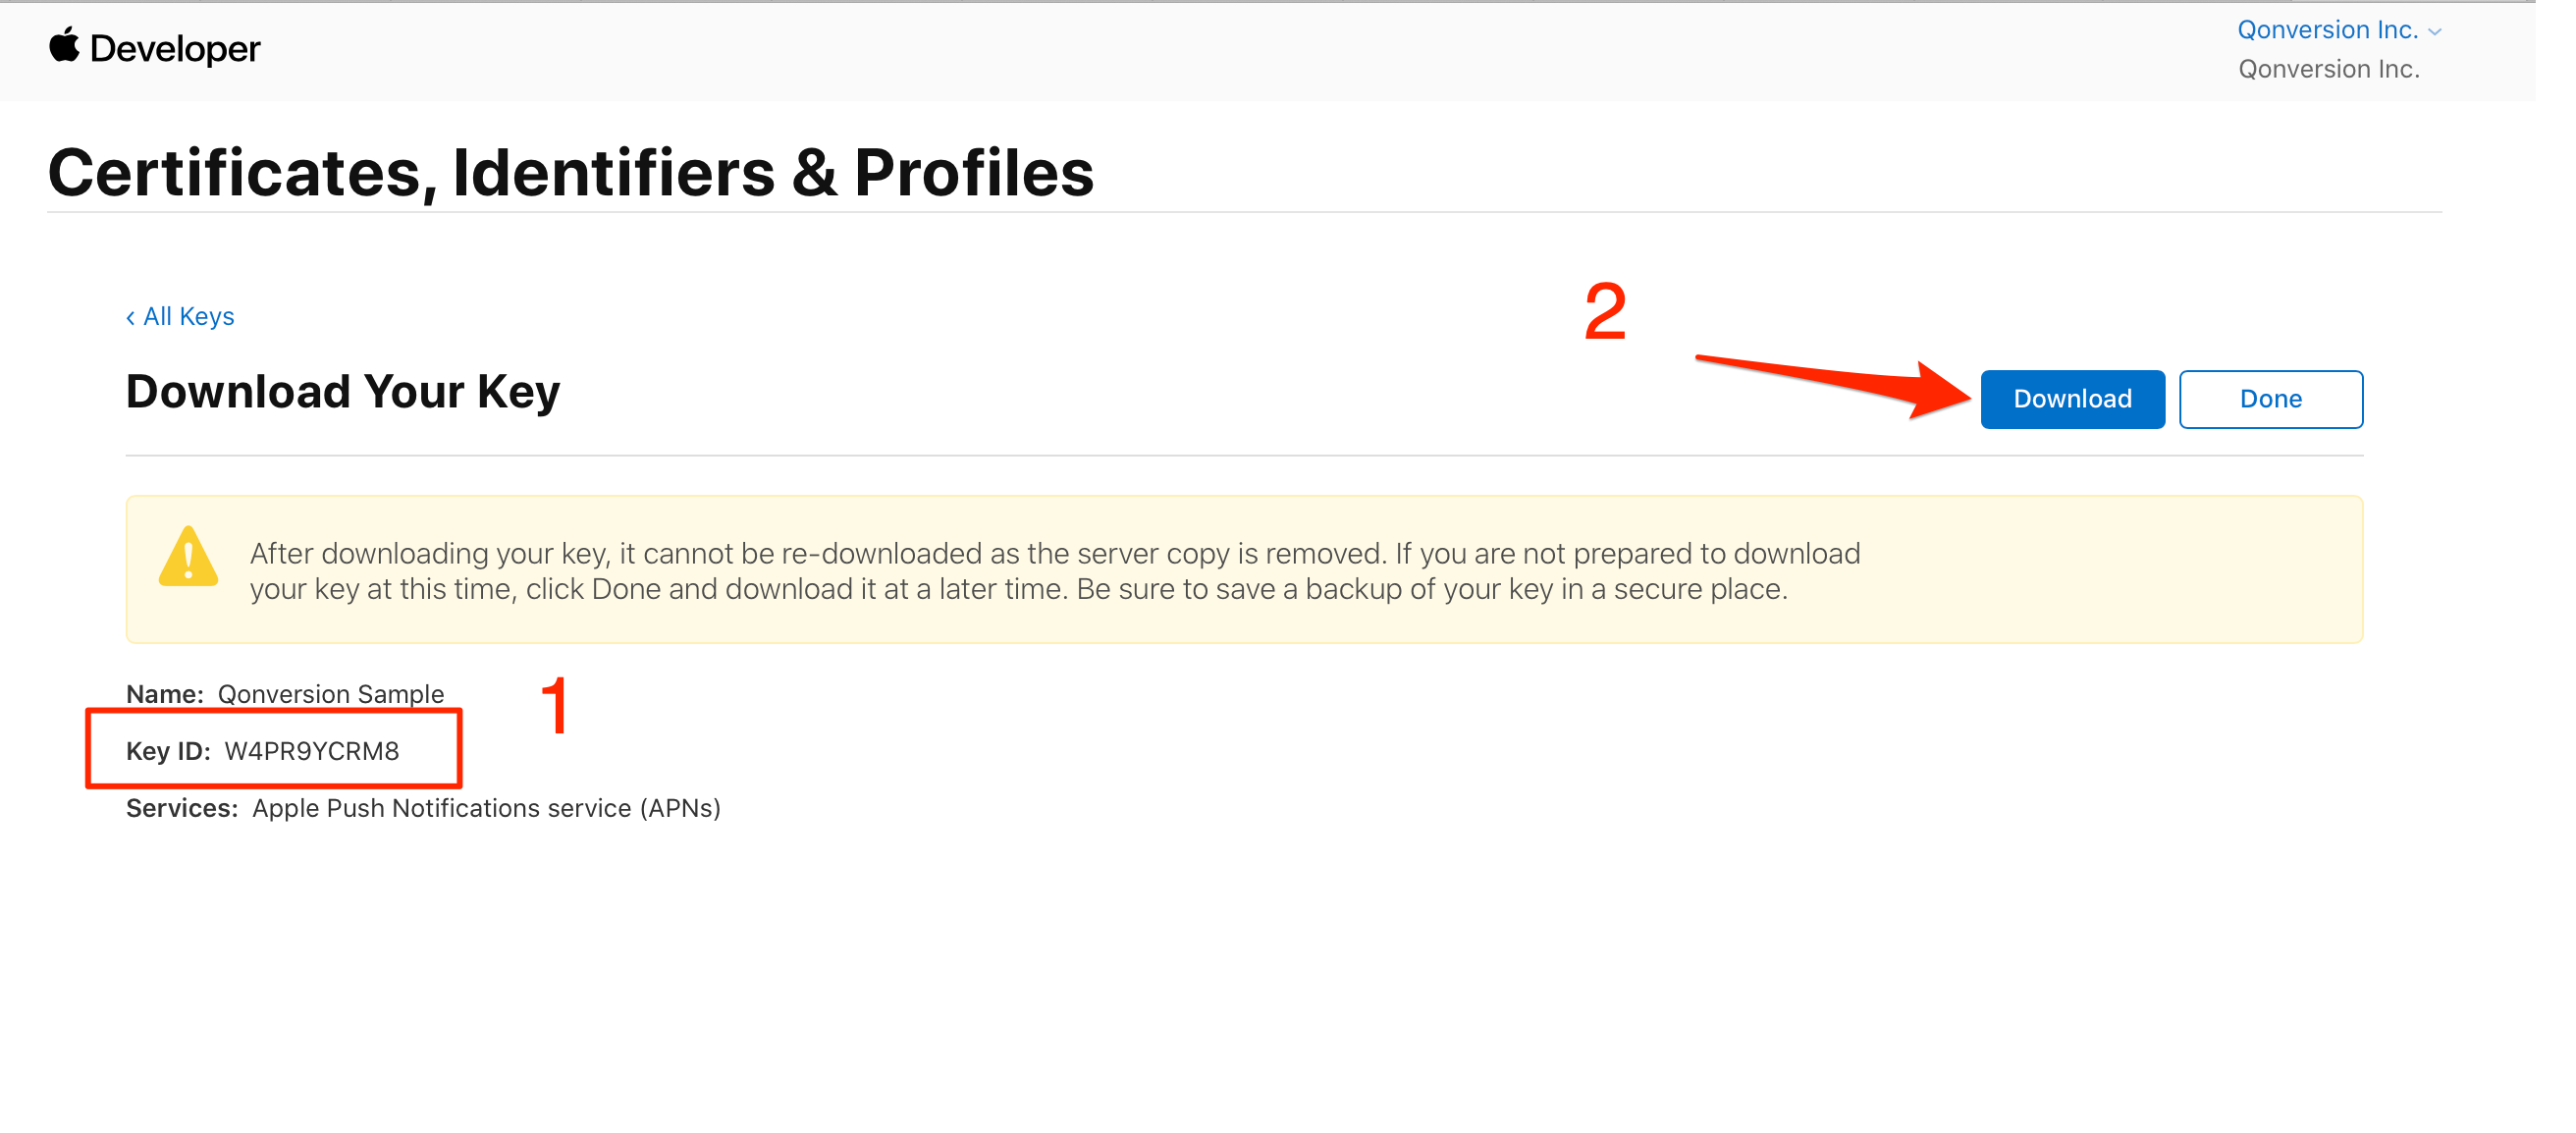
 ### 2. Copy the Key ID and download your key
Copy the key ID and save the downloaded key securely.
### 2. Copy the Key ID and download your key
Copy the key ID and save the downloaded key securely.
 > 🚧 Download Your Key
>
> Save your key securely. After downloading the key, it cannot be re-downloaded as the server copy is removed.
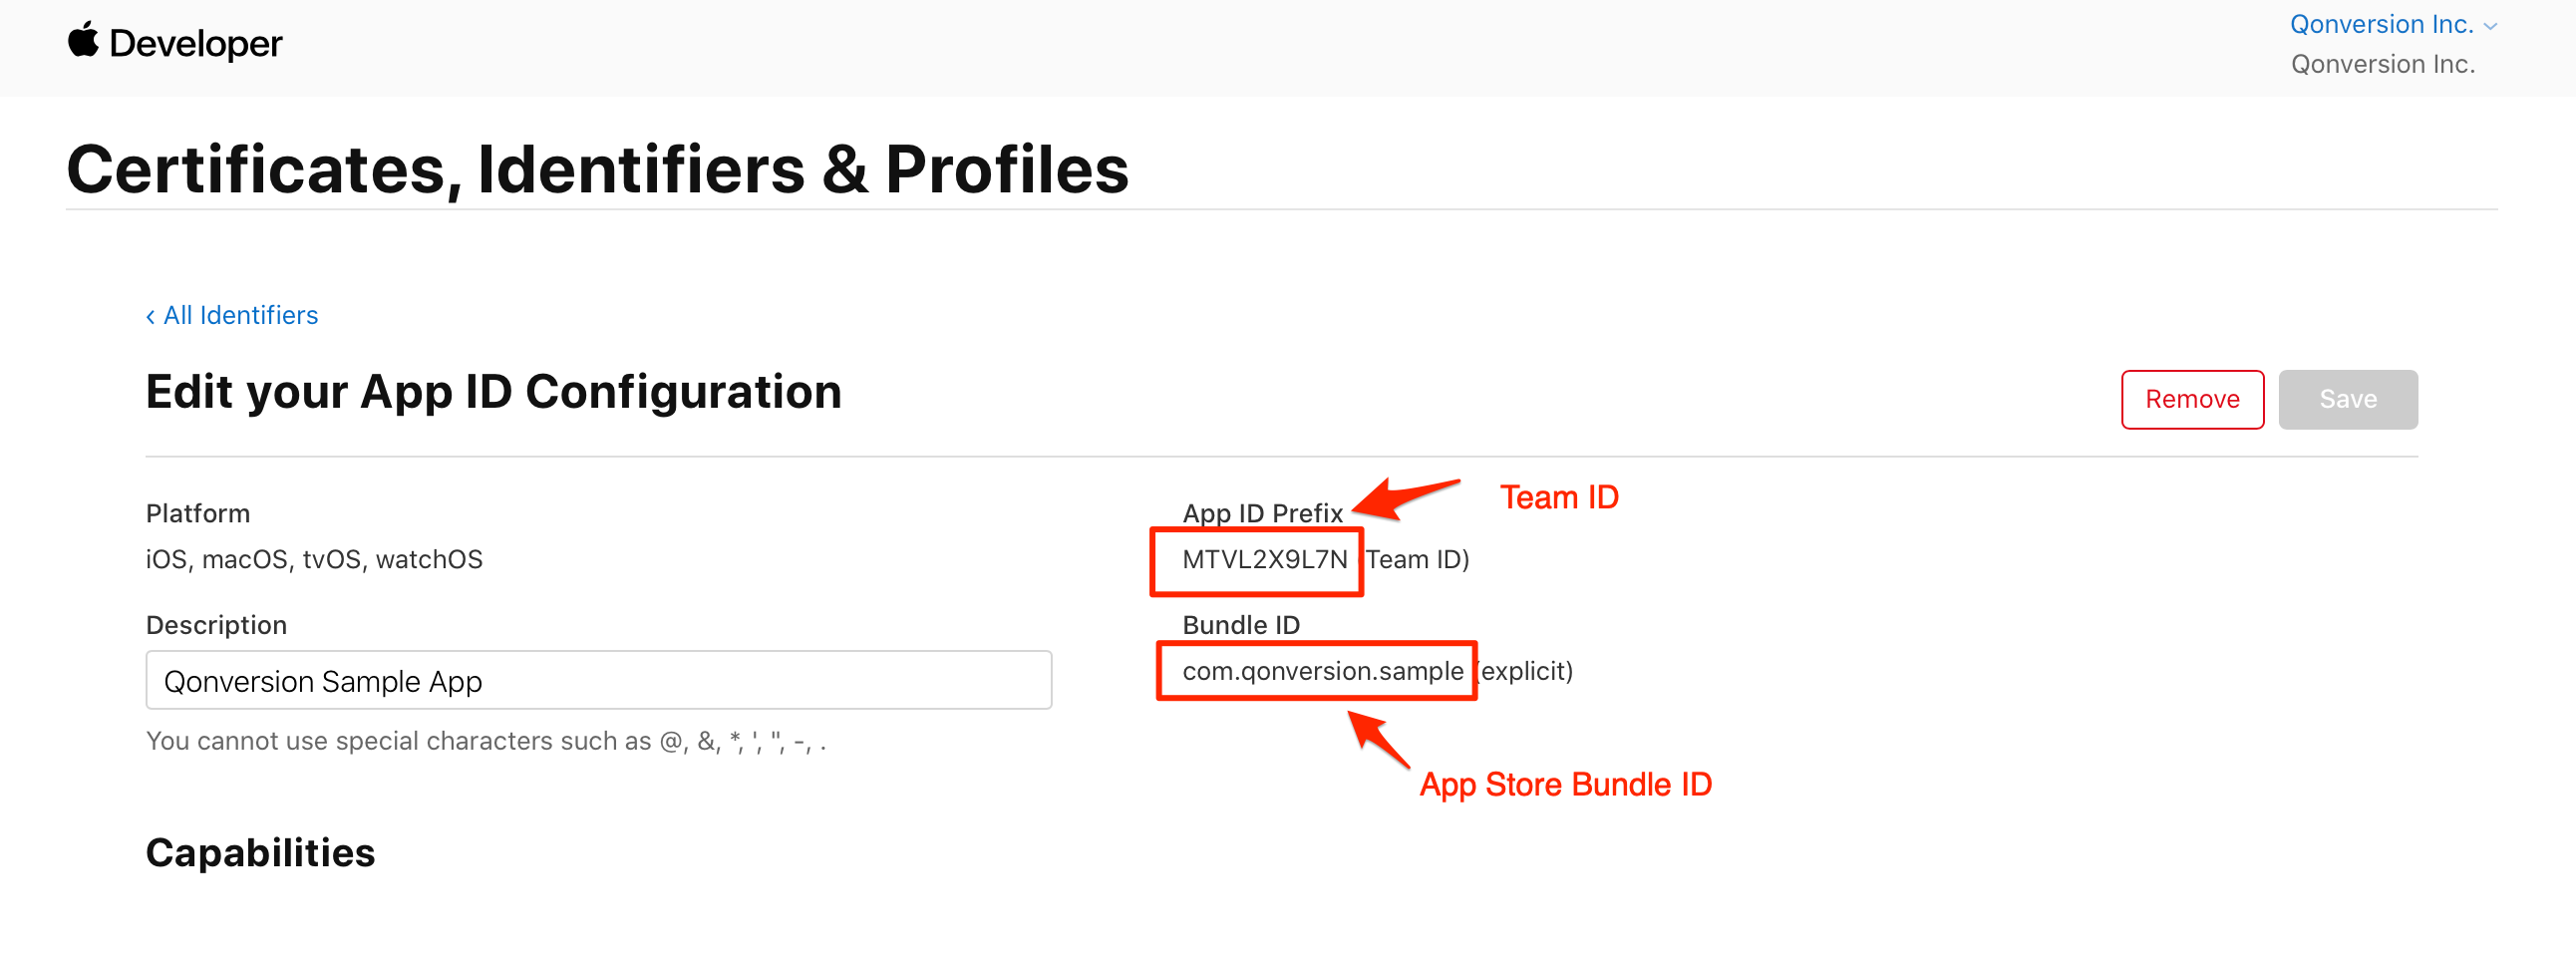
### 3. Copy your Team ID and Bundle ID
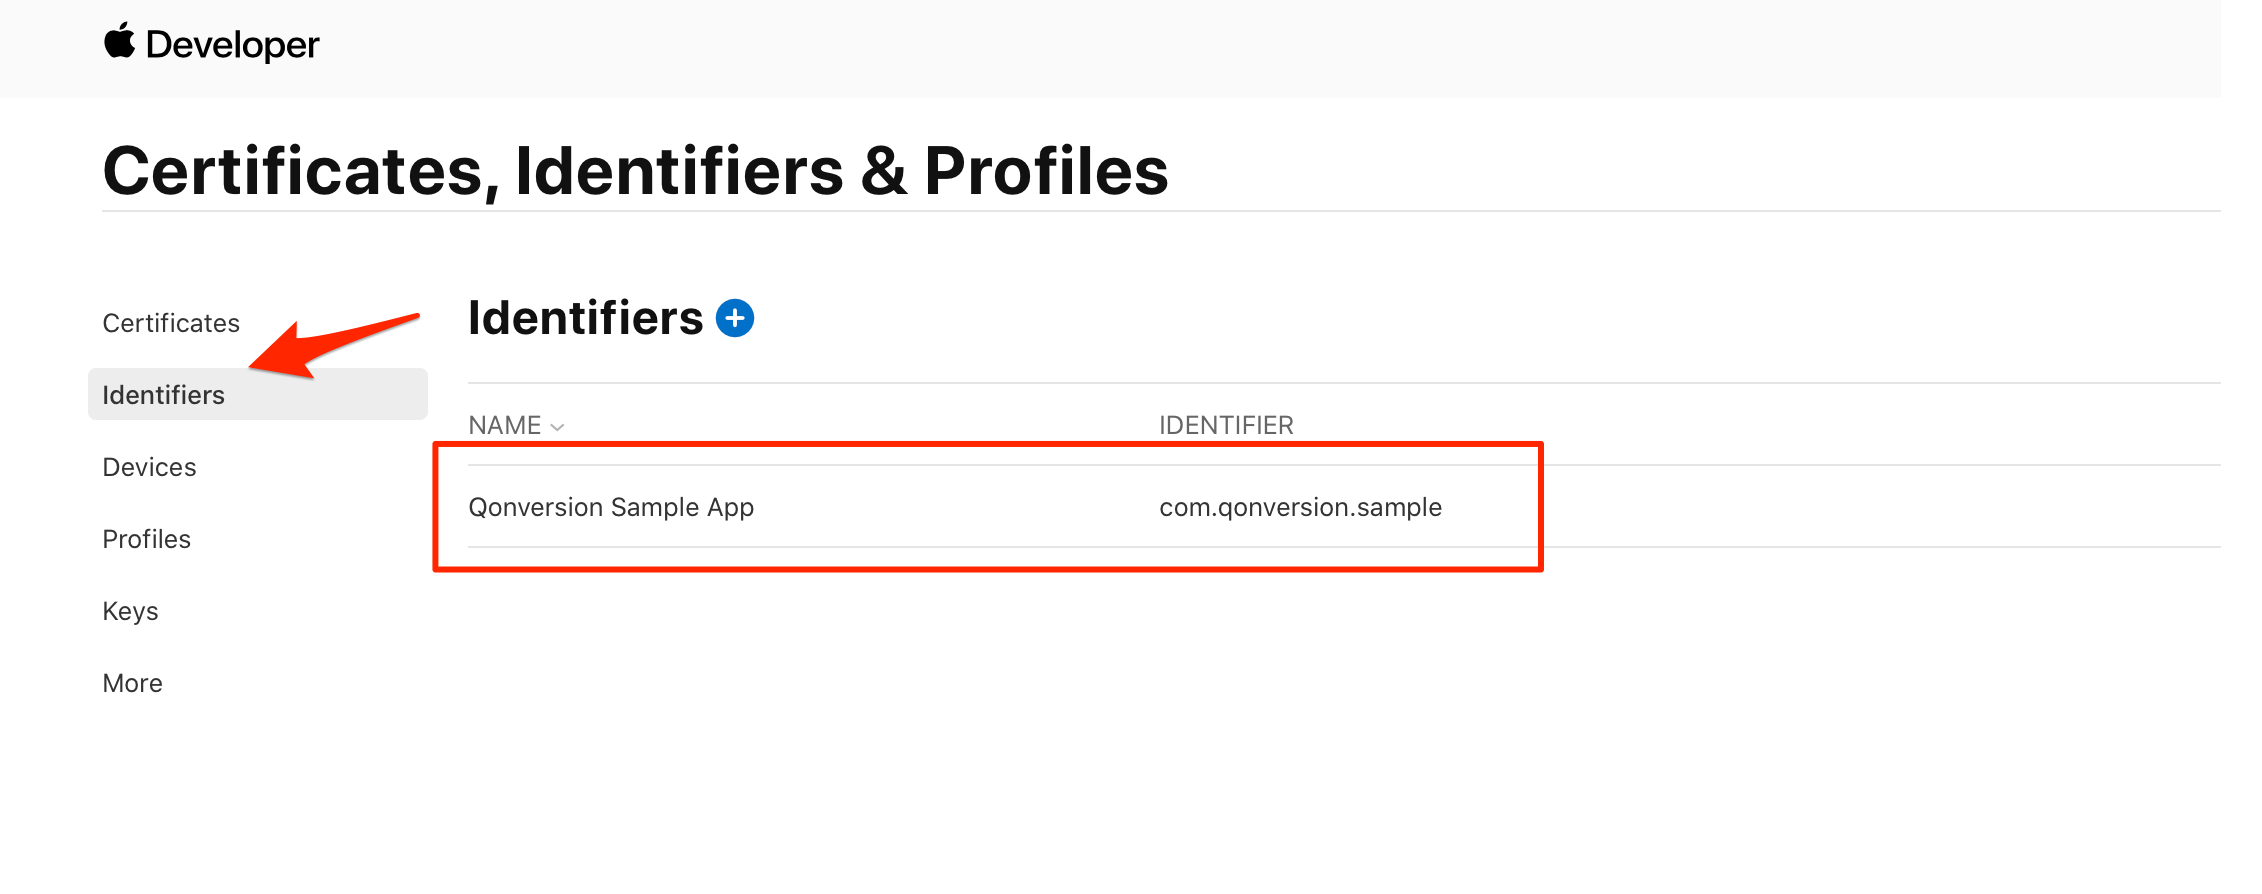
Navigate to Apple Developer and select Identifiers:
> 🚧 Download Your Key
>
> Save your key securely. After downloading the key, it cannot be re-downloaded as the server copy is removed.
### 3. Copy your Team ID and Bundle ID
Navigate to Apple Developer and select Identifiers:
 Copy your Bundle ID and Team ID on this page. You will need this data for the following steps:
 ### 4. Configure your Qonversion project with the APNs settings:
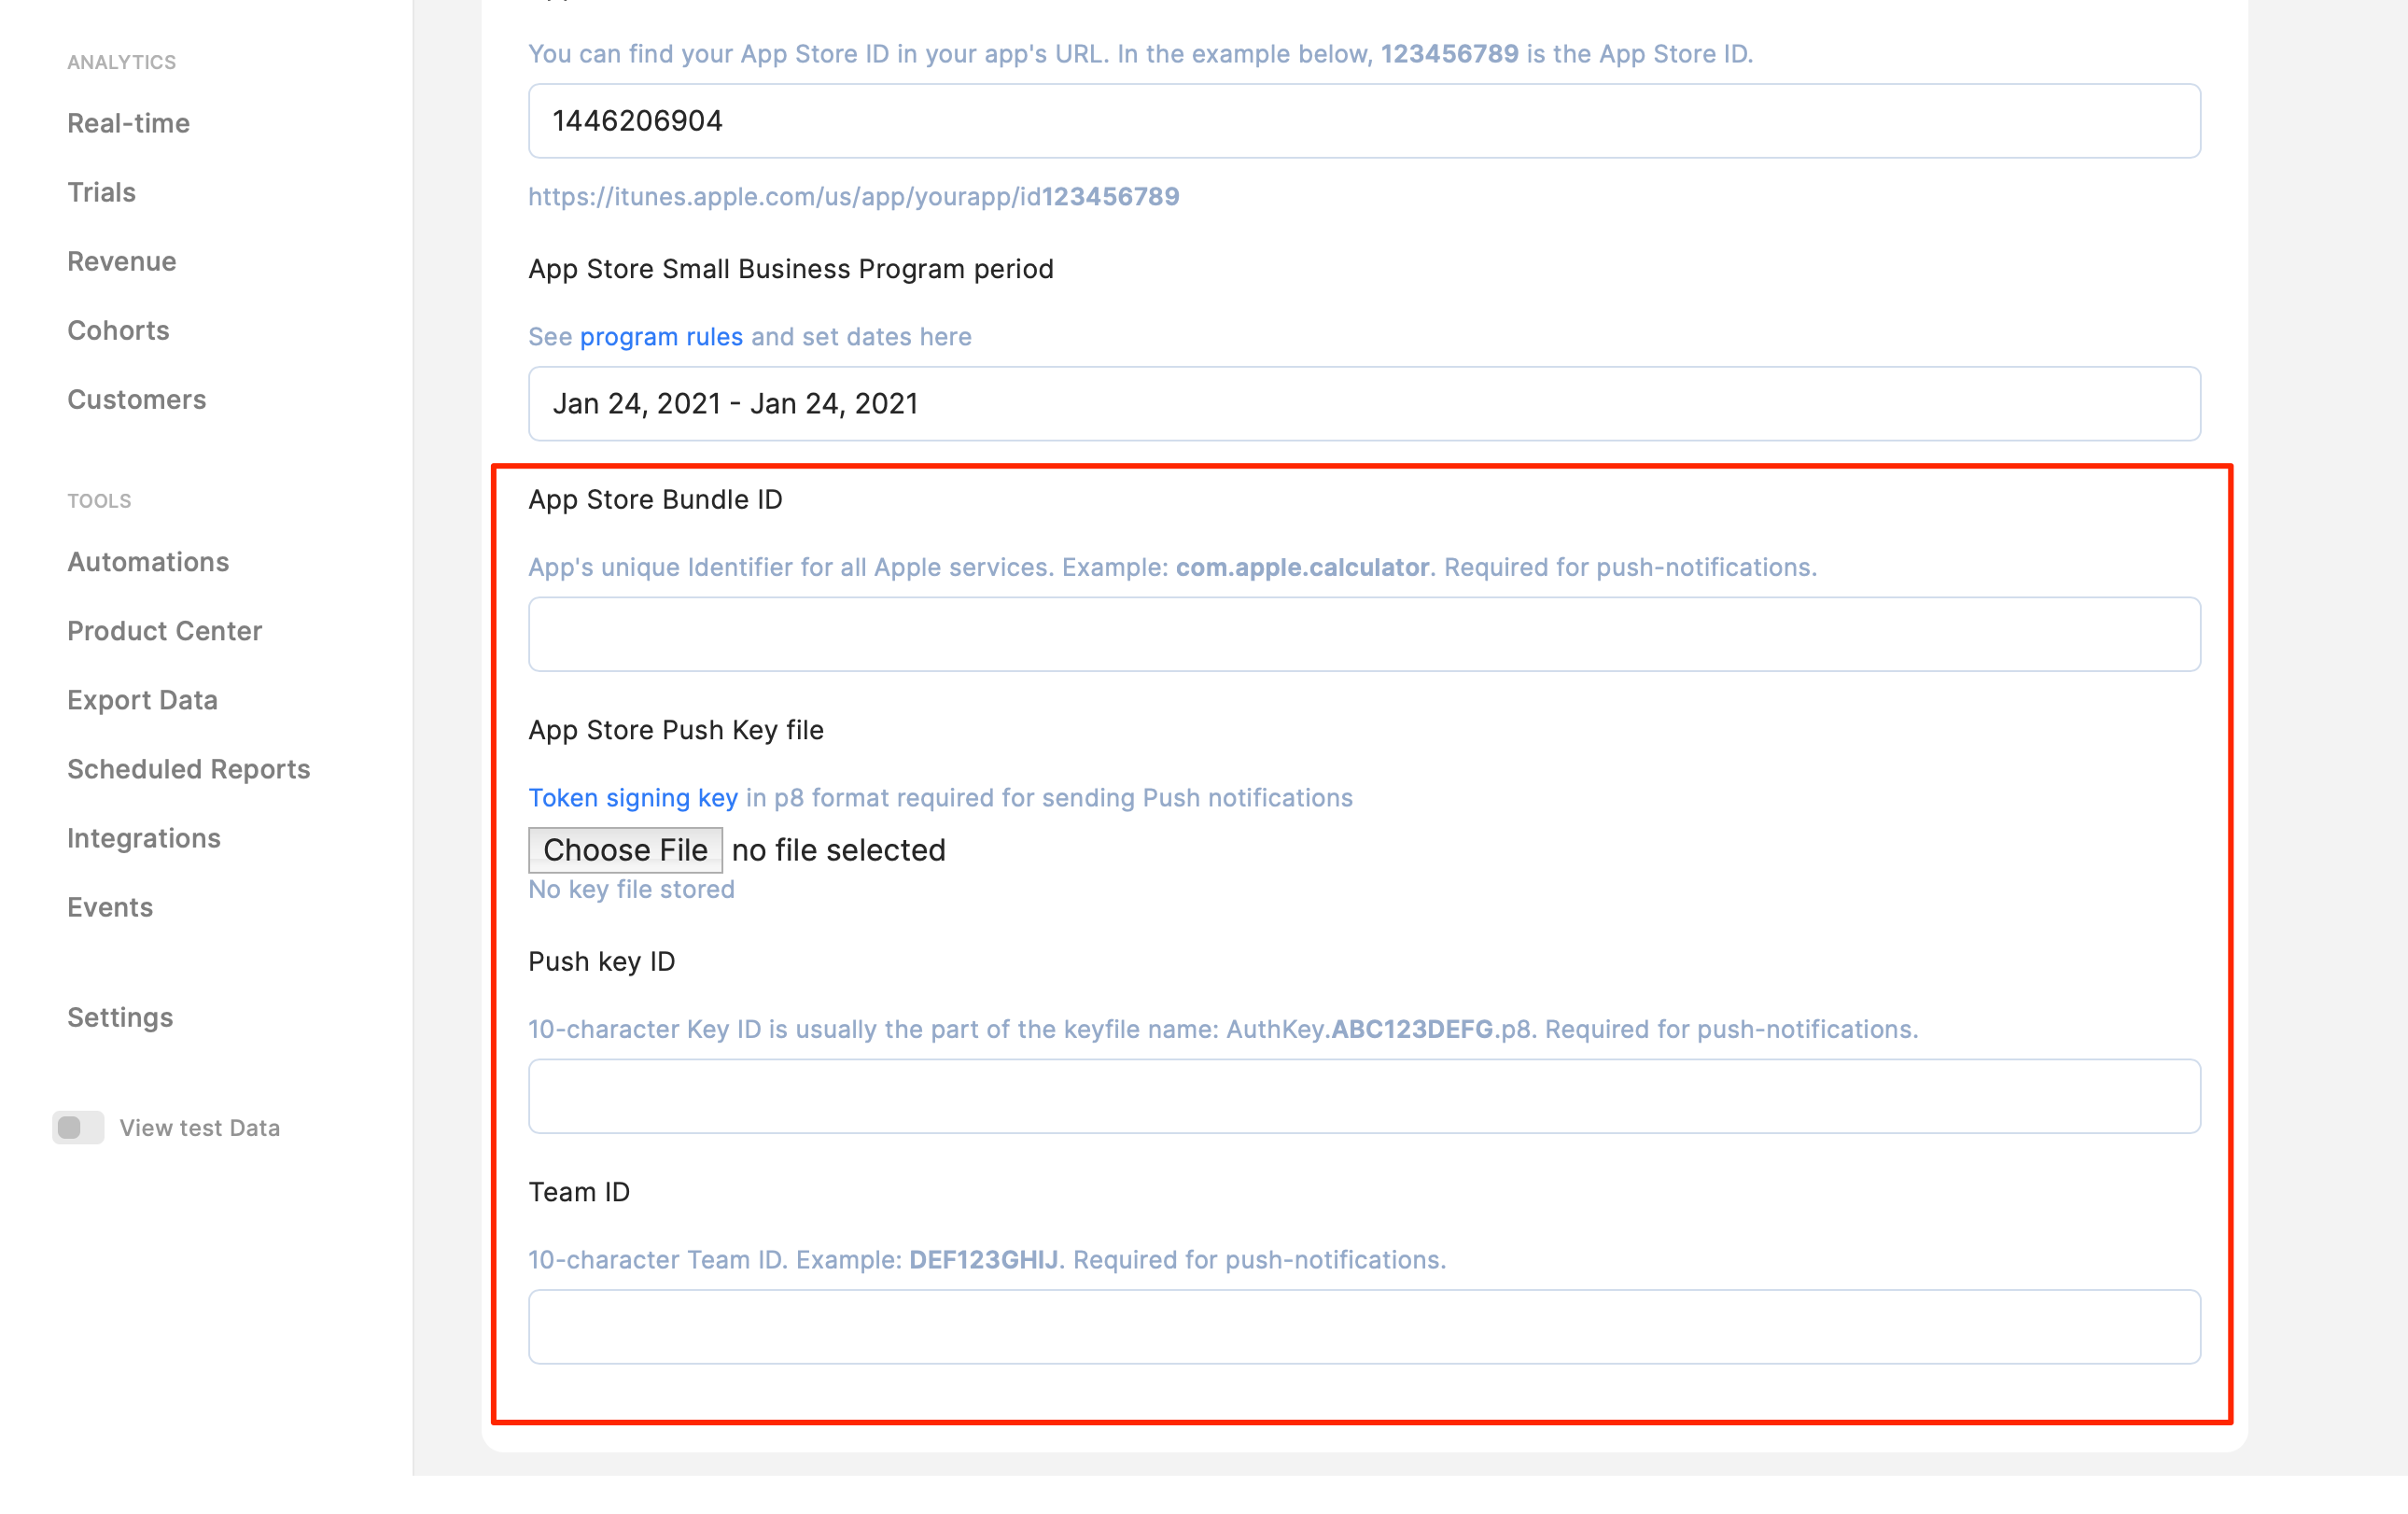
Navigate to your Qonversion project's settings page and provide the values in the following fields:
* App Store Bundle ID;
* App Store Push Key File;
* Push Key ID;
* Team ID.
### 4. Configure your Qonversion project with the APNs settings:
Navigate to your Qonversion project's settings page and provide the values in the following fields:
* App Store Bundle ID;
* App Store Push Key File;
* Push Key ID;
* Team ID.
 > 🚧 Make sure to use server-to-server notification
>
> Activate server-to-server notifications so Qonversion gets events immediately as they happen. Otherwise, there might be a delay between an event and the time Qonversion receives the event and sends a push notification.
## Google Firebase Push Notifications
You have to add Firebase to your Android project before starting with the push notifications set up. After you have added Firebase to your app, you can follow the steps below.
### 1. Create a Service Account JSON key
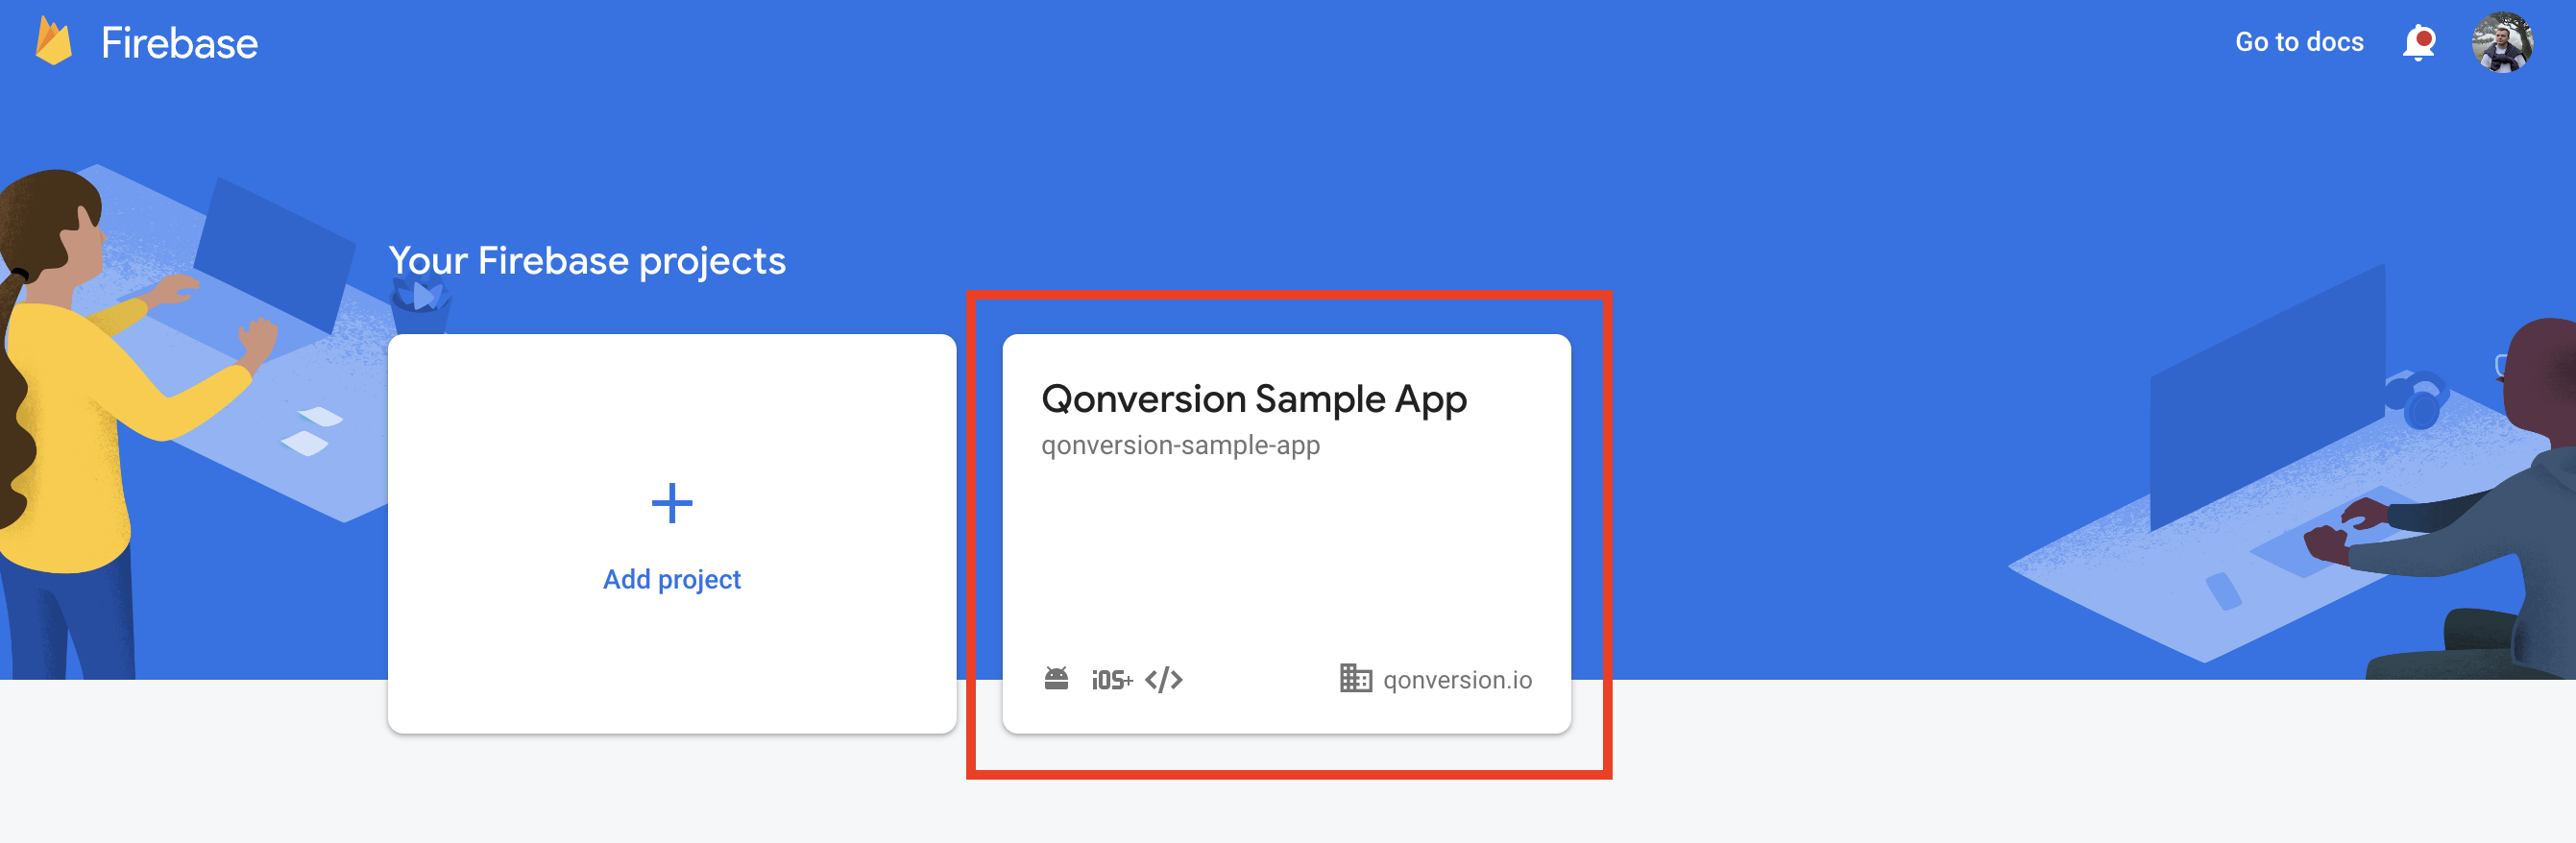
Navigate to your Firebase projects page and select your project.
> 🚧 Make sure to use server-to-server notification
>
> Activate server-to-server notifications so Qonversion gets events immediately as they happen. Otherwise, there might be a delay between an event and the time Qonversion receives the event and sends a push notification.
## Google Firebase Push Notifications
You have to add Firebase to your Android project before starting with the push notifications set up. After you have added Firebase to your app, you can follow the steps below.
### 1. Create a Service Account JSON key
Navigate to your Firebase projects page and select your project.
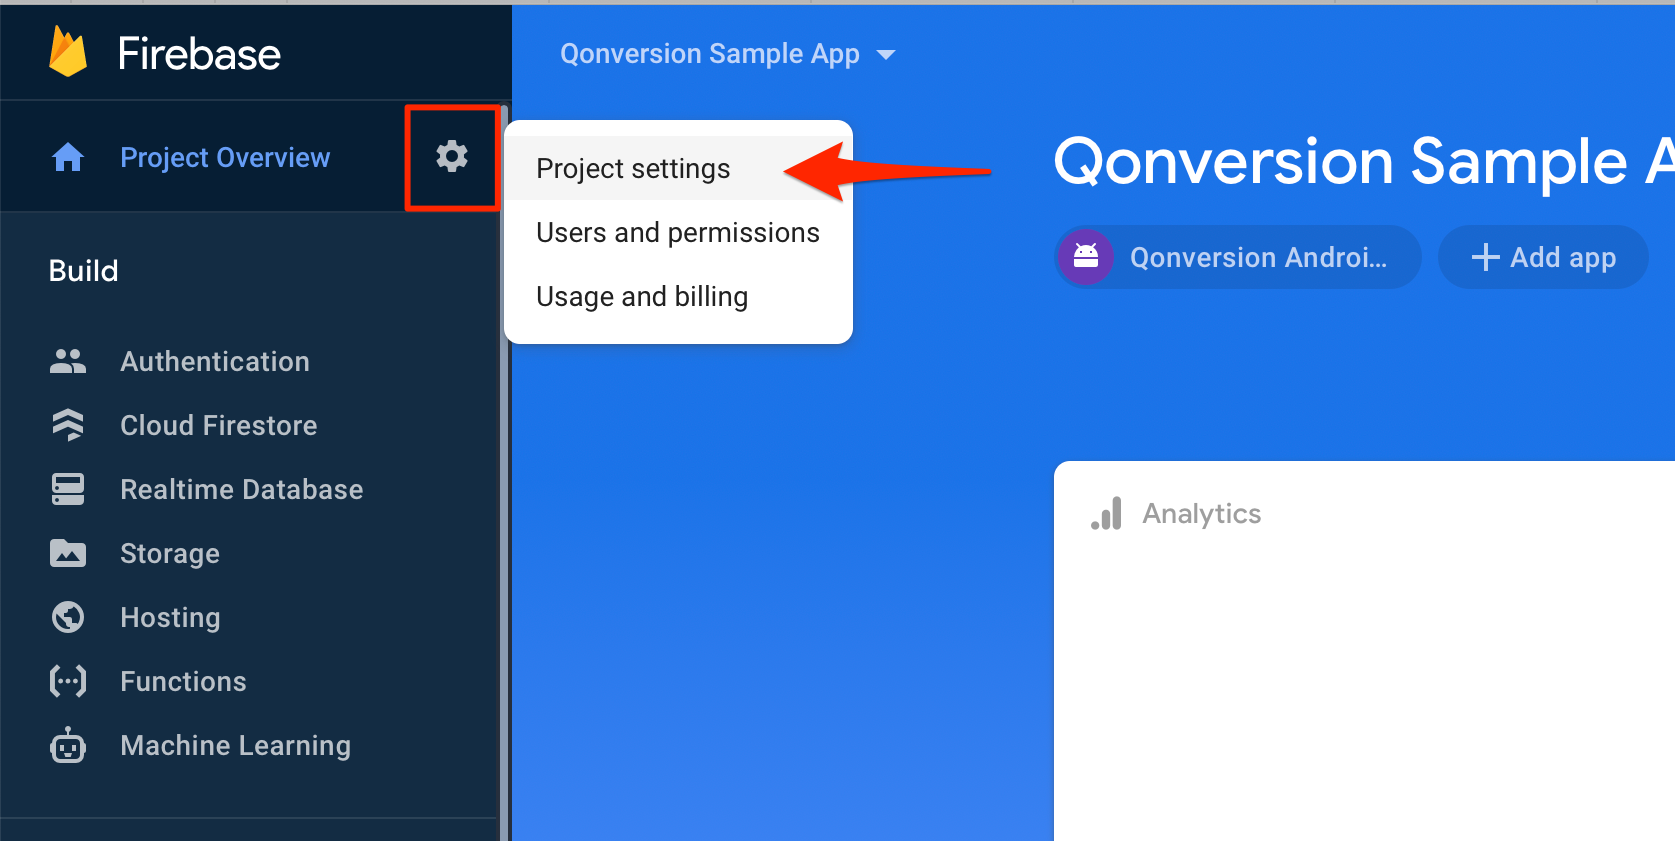
 Click the Settings icon on the left menu and select **Project Settings**.
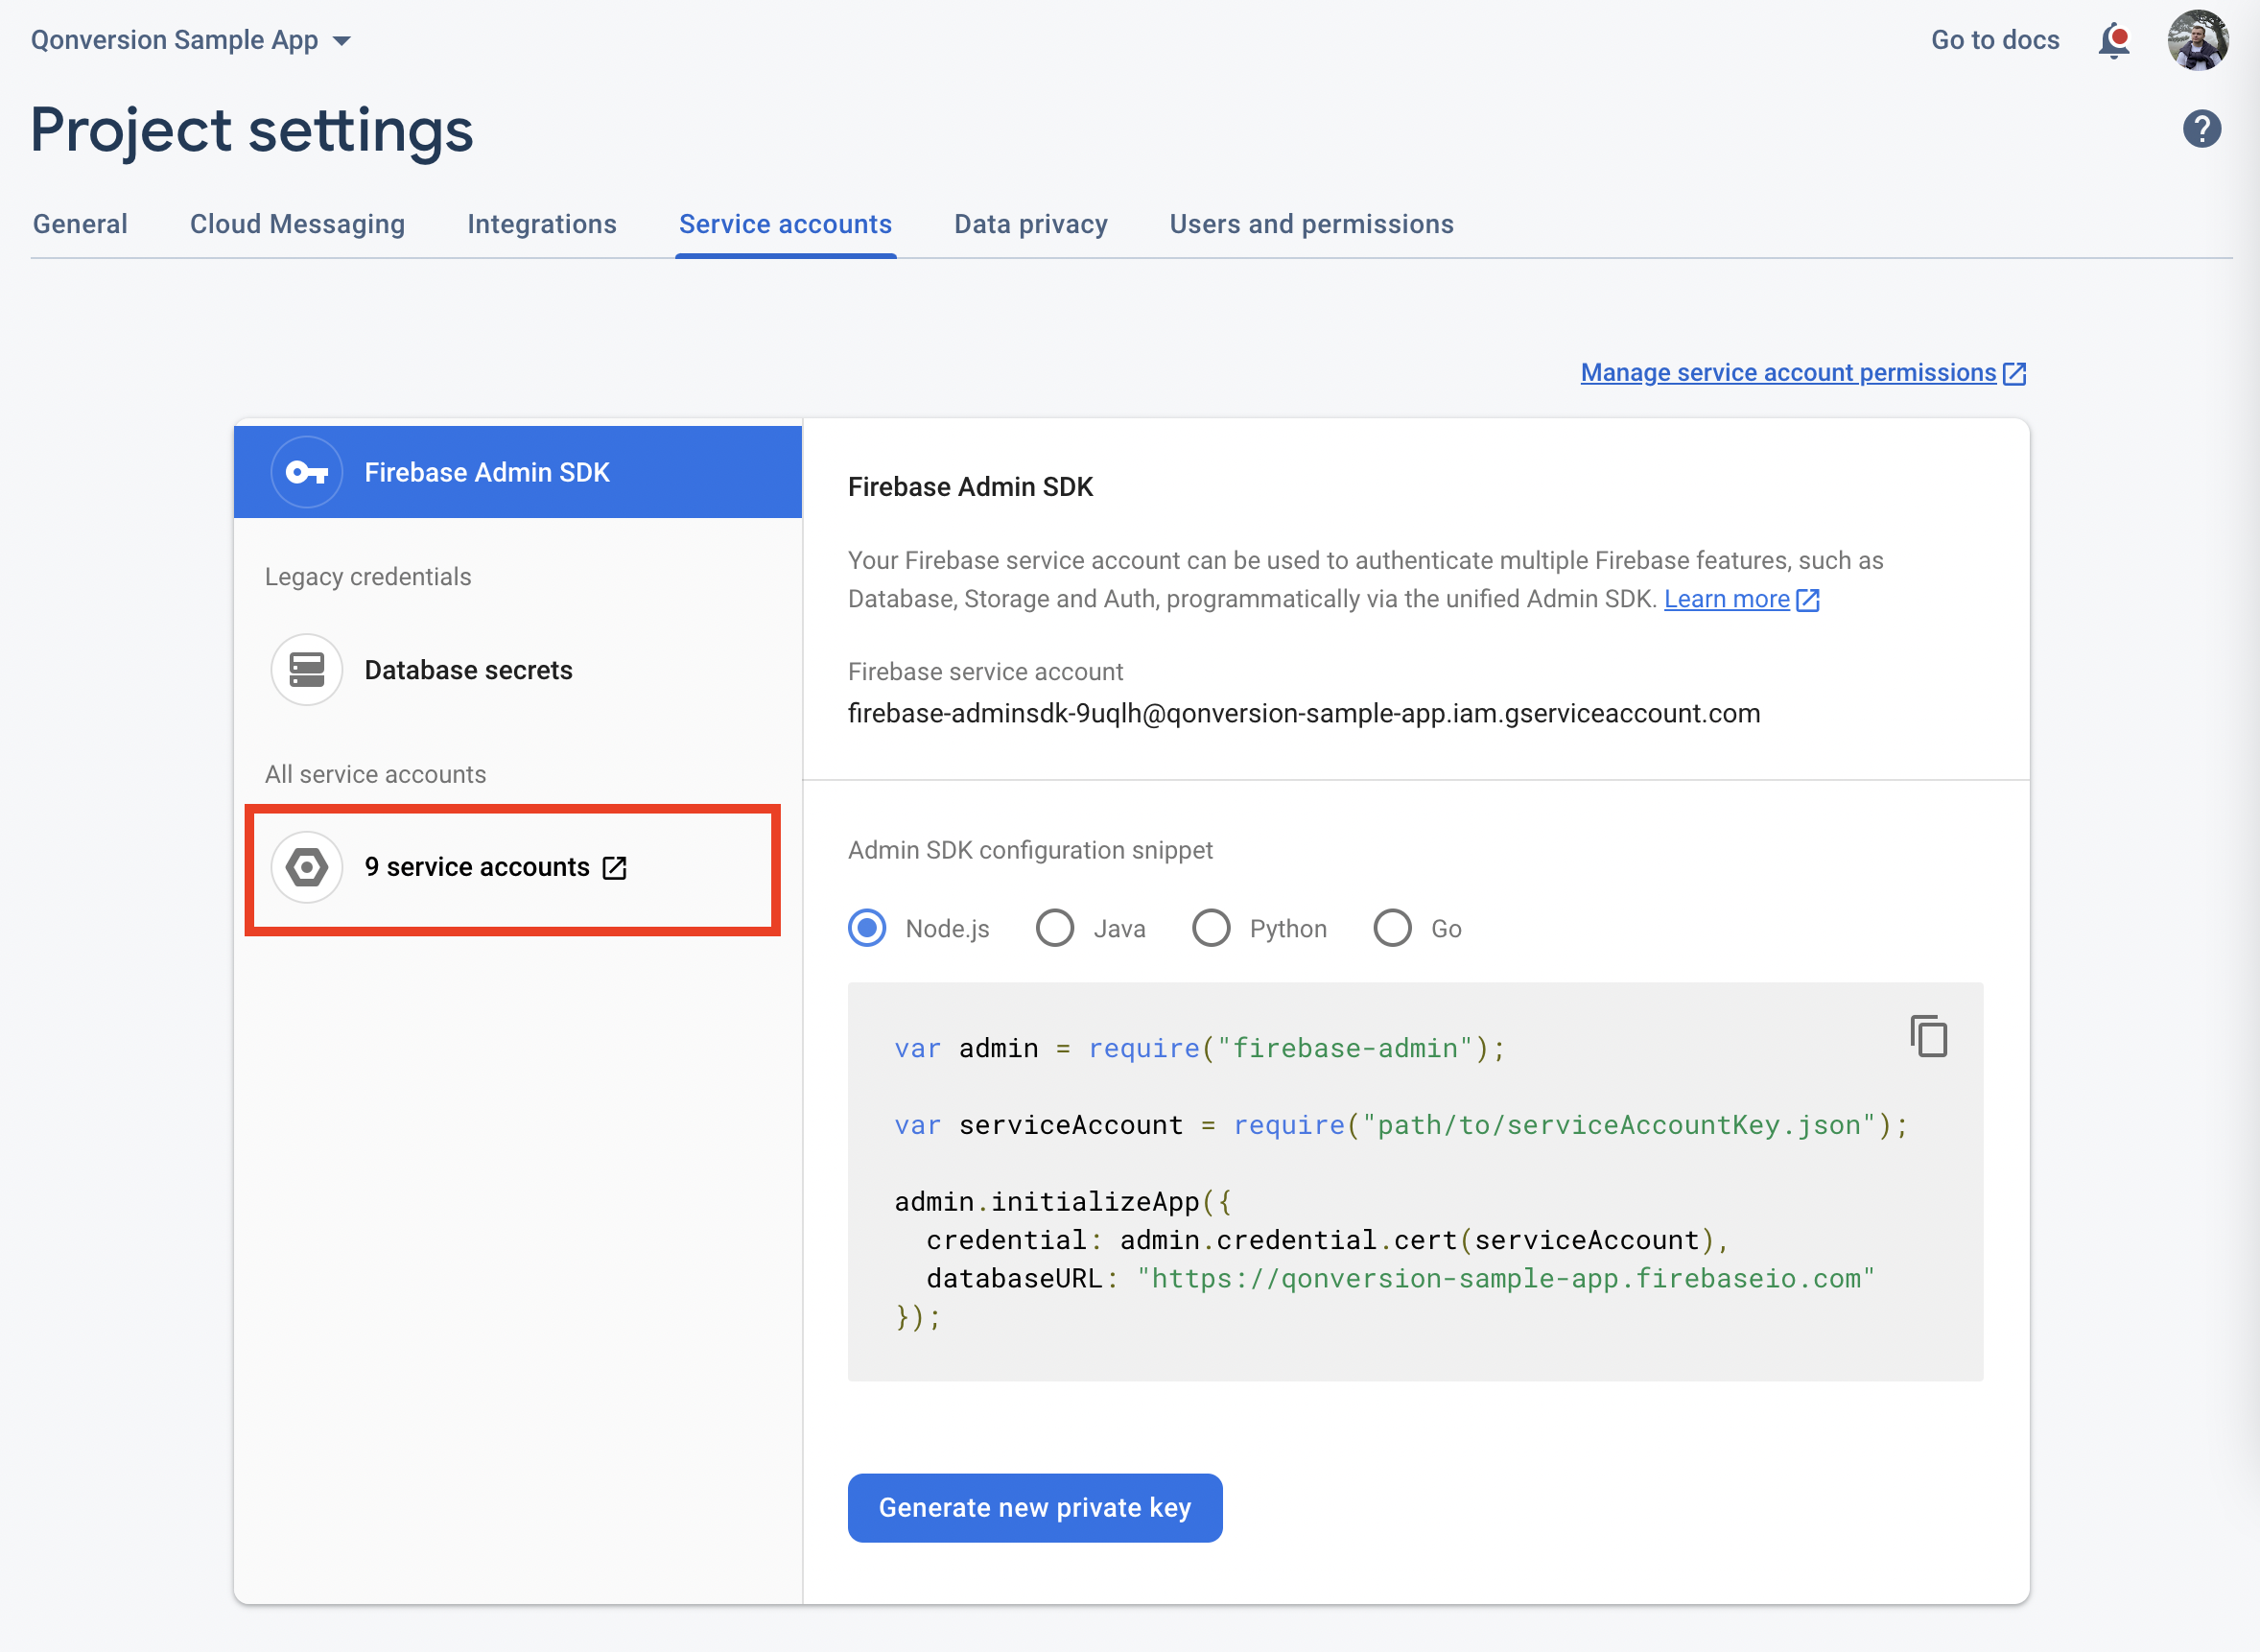
 Switch to the **Service accounts** tab and open your service accounts page in Google Cloud Console. You will be redirected to the Google Cloud Console IAM section.
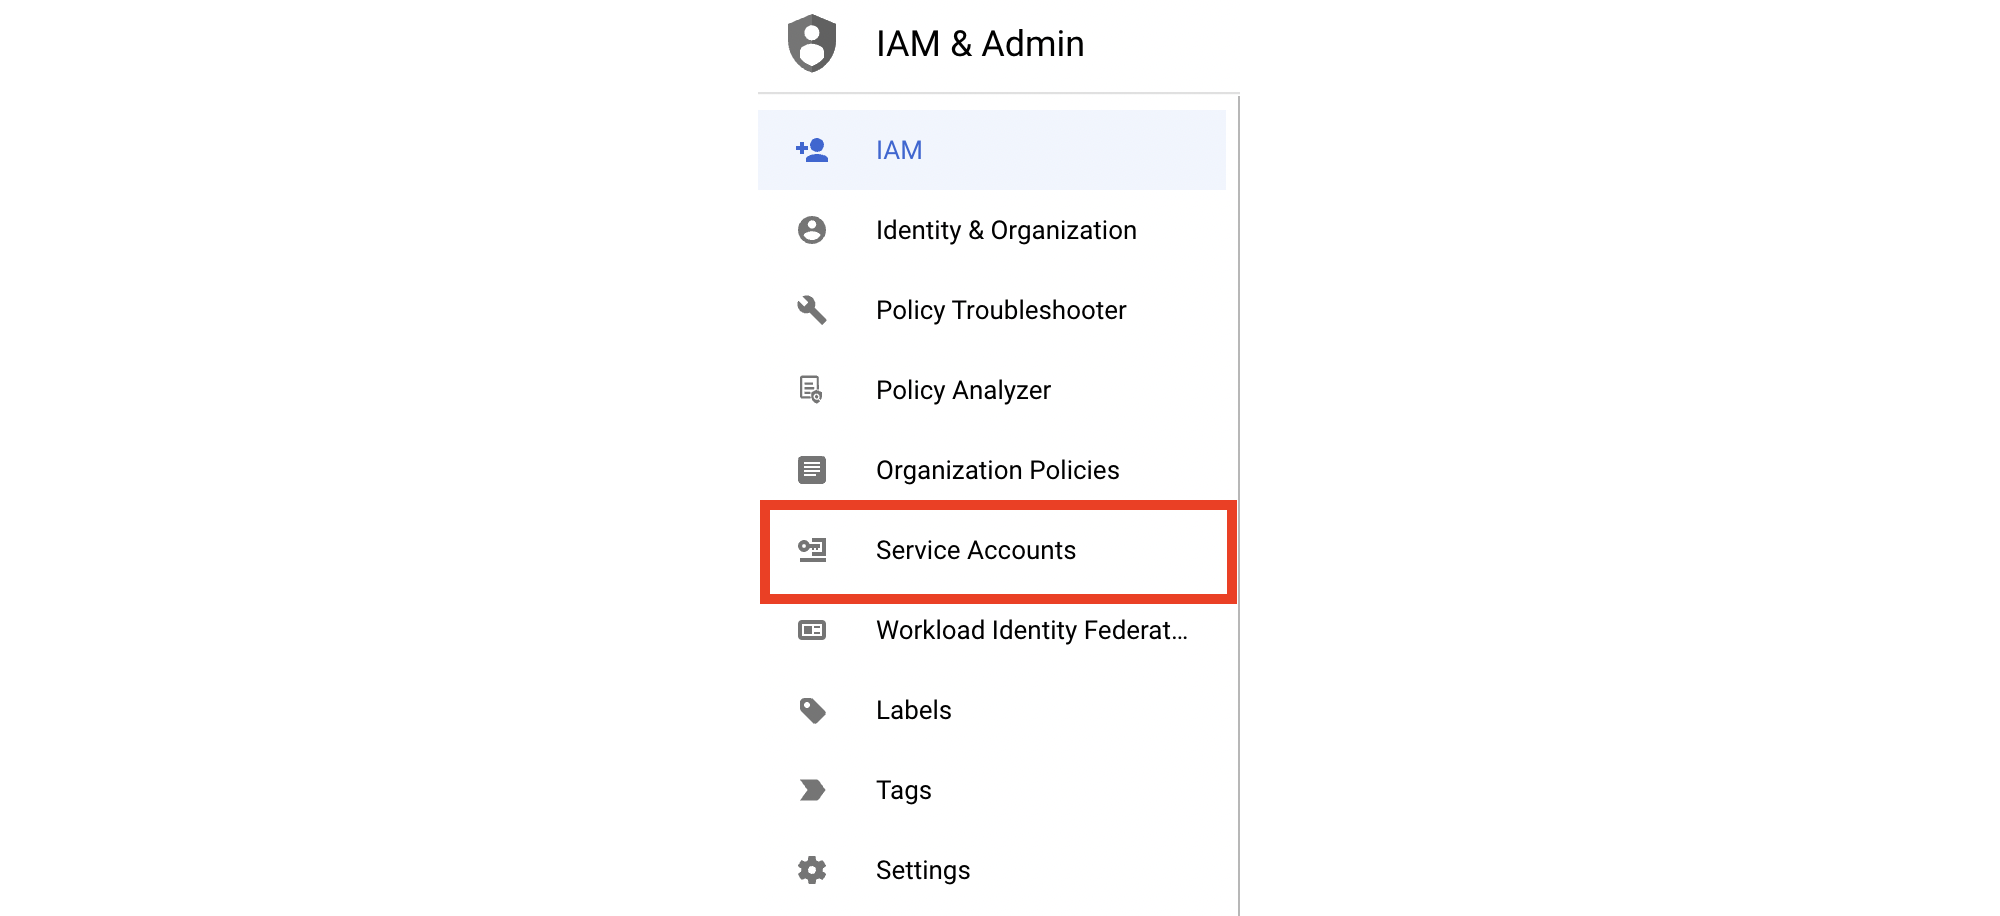
 After having in Google Cloud Console project linked to your Firebase account project selected, navigate to the **Service Accounts** section.
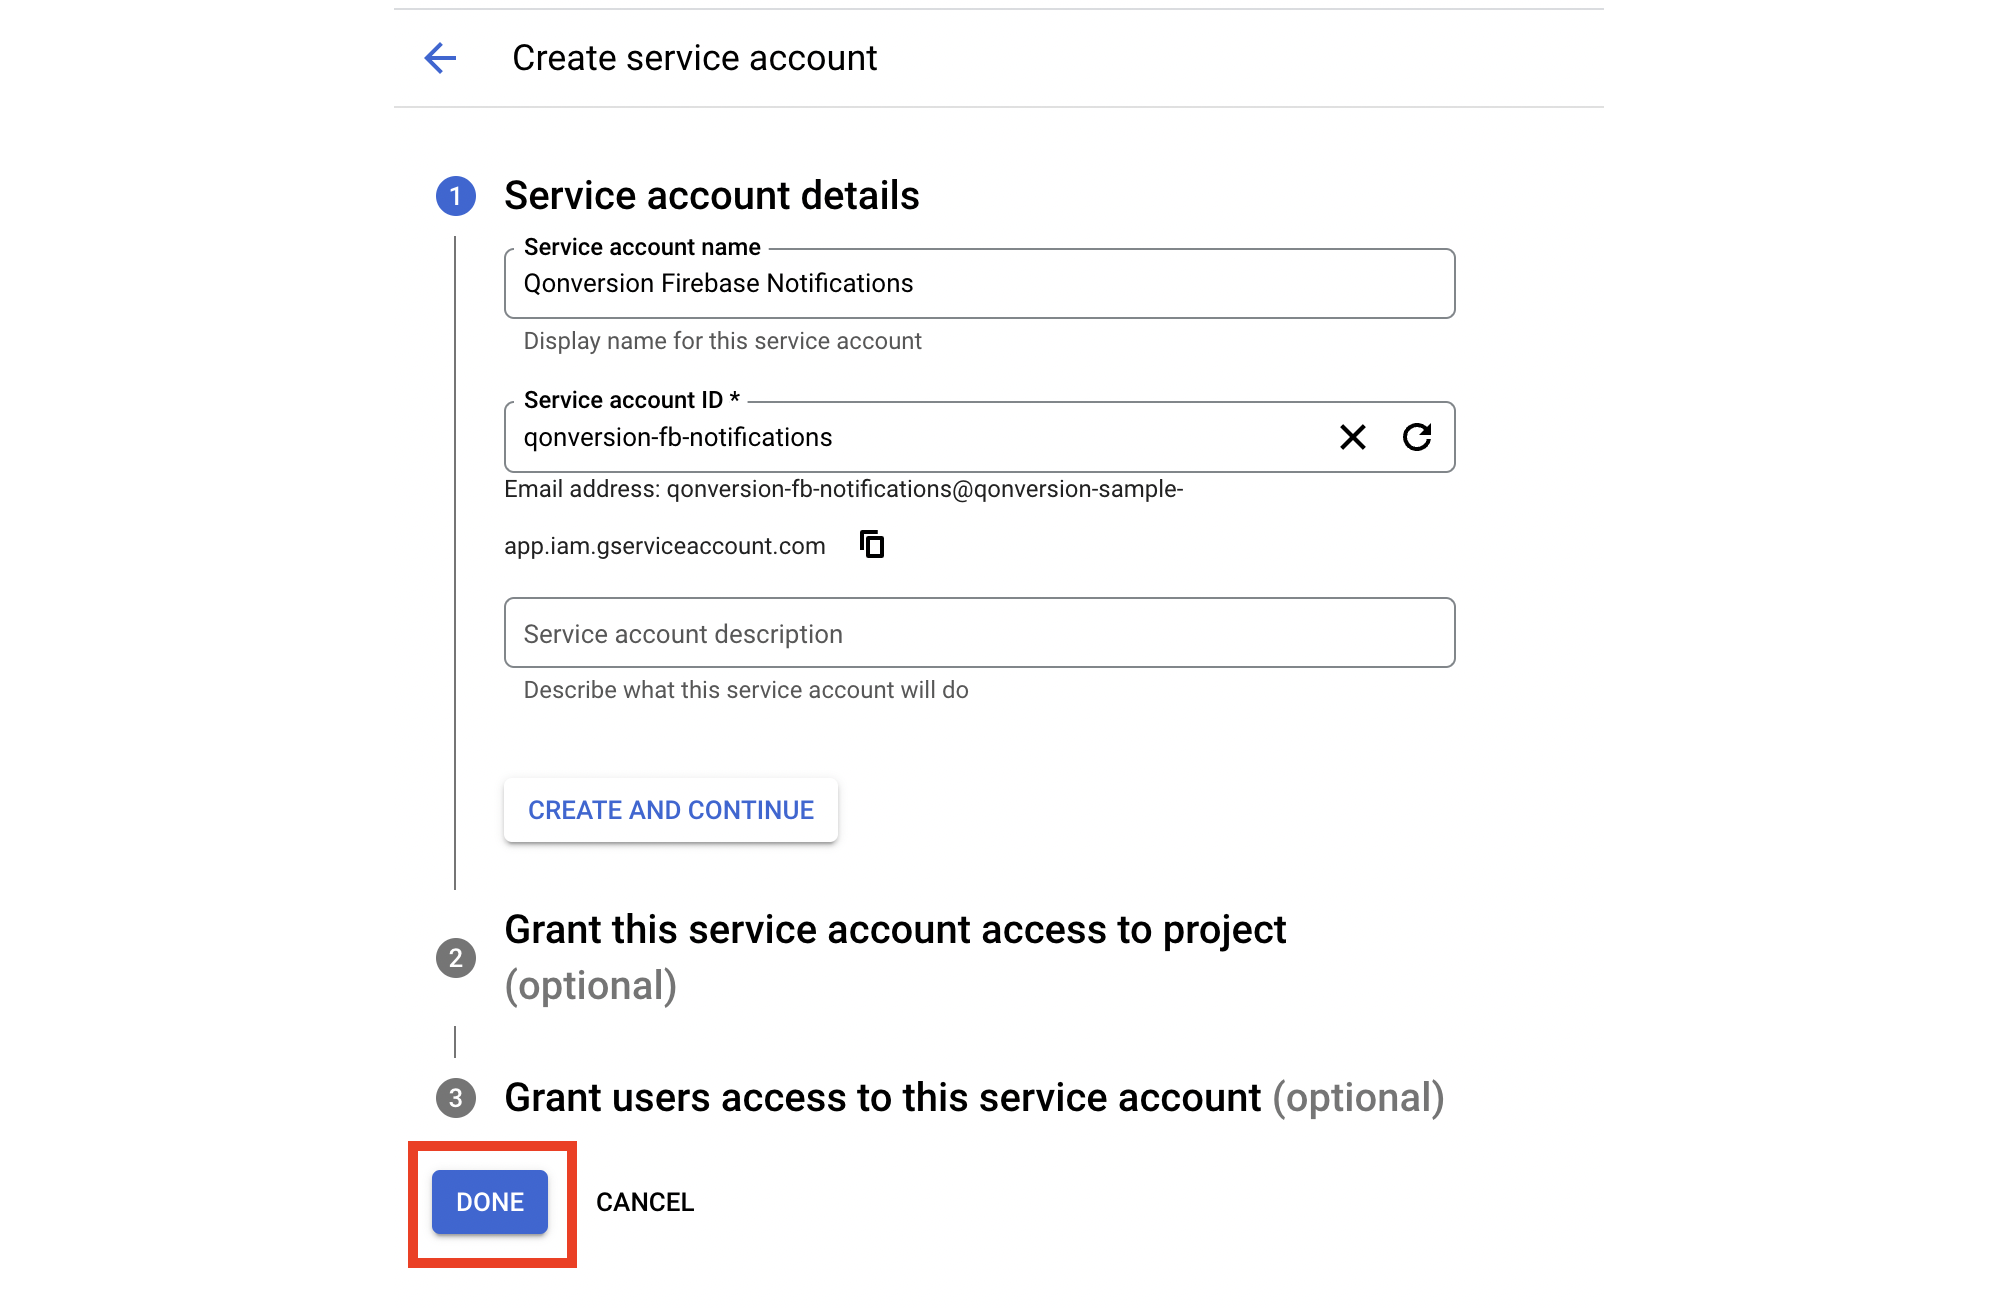
 Click the *+ CREATE SERVICE ACCOUNT* button to create an account, allowing Qonversion to send notifications using Firebase Cloud Messaging API.
 Fill in the Service account name fields and click *DONE*.
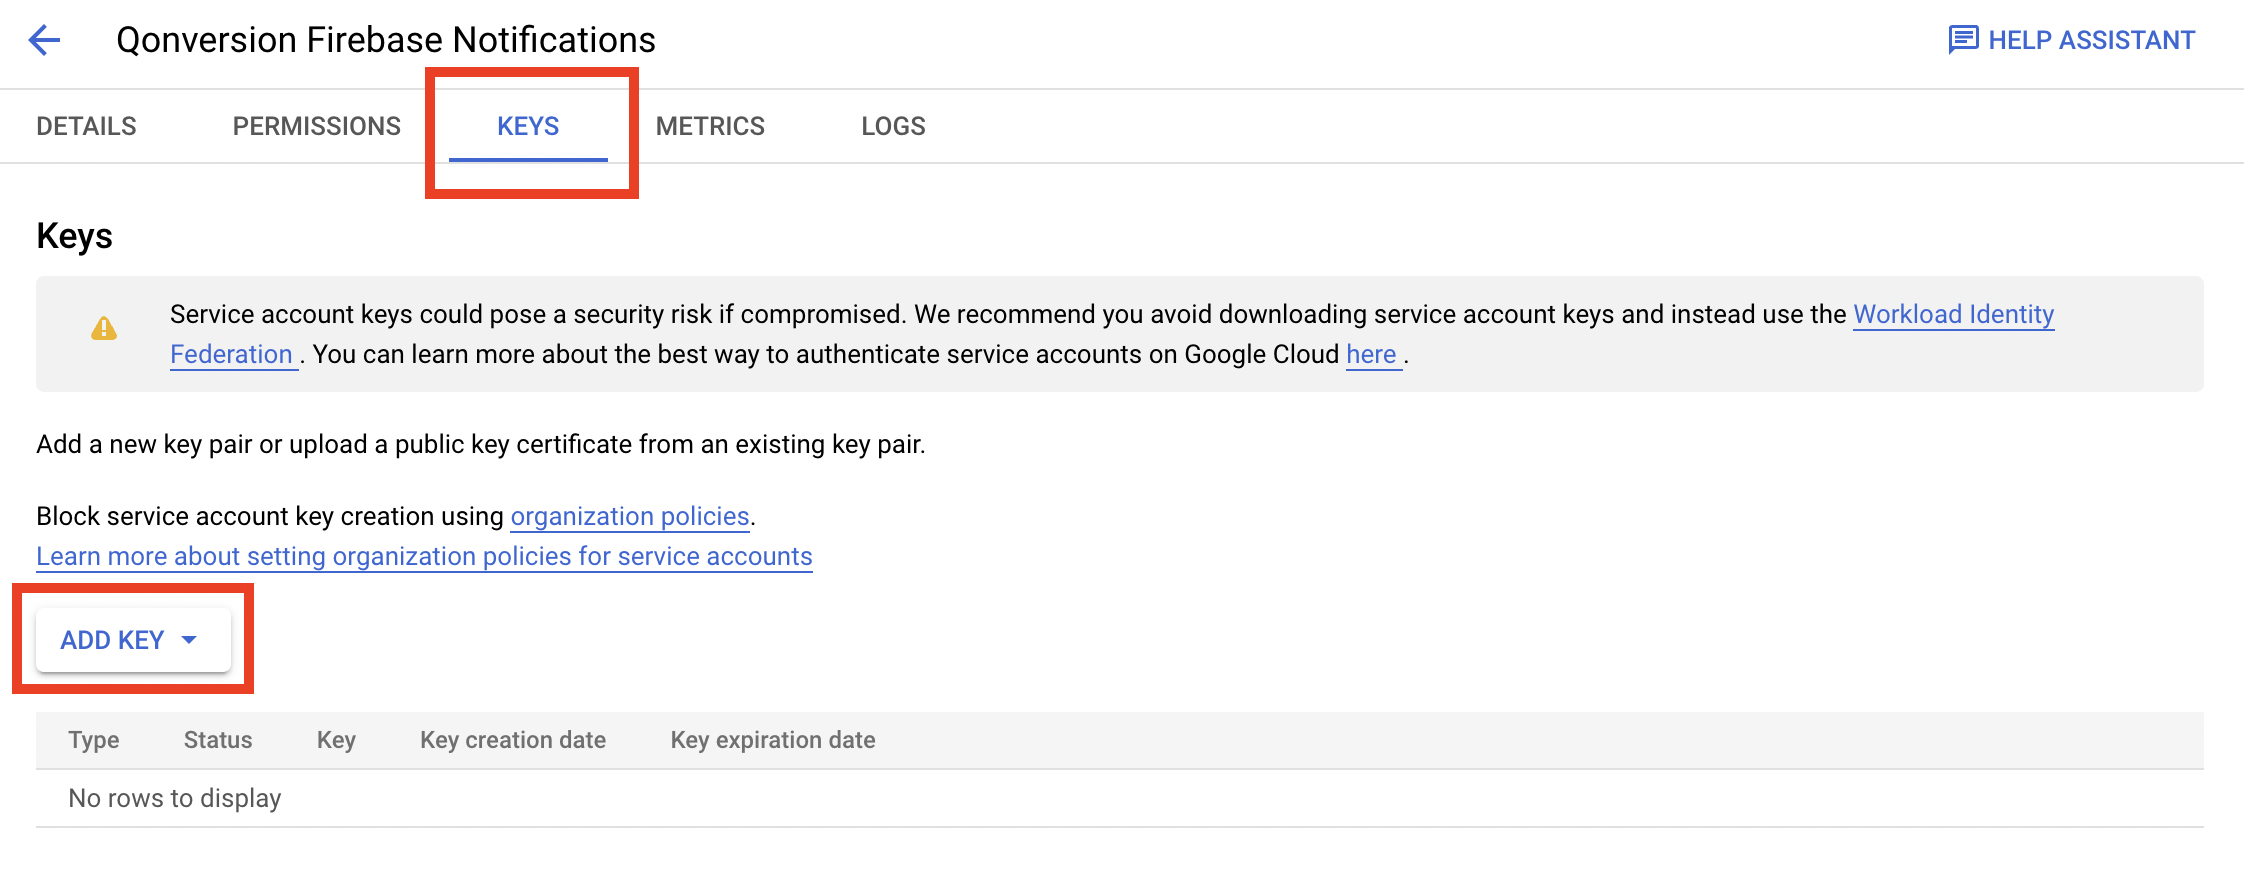
 Please navigate to the recently created service accounts and open its *KEYS* section. Click the *ADD KEY* button.
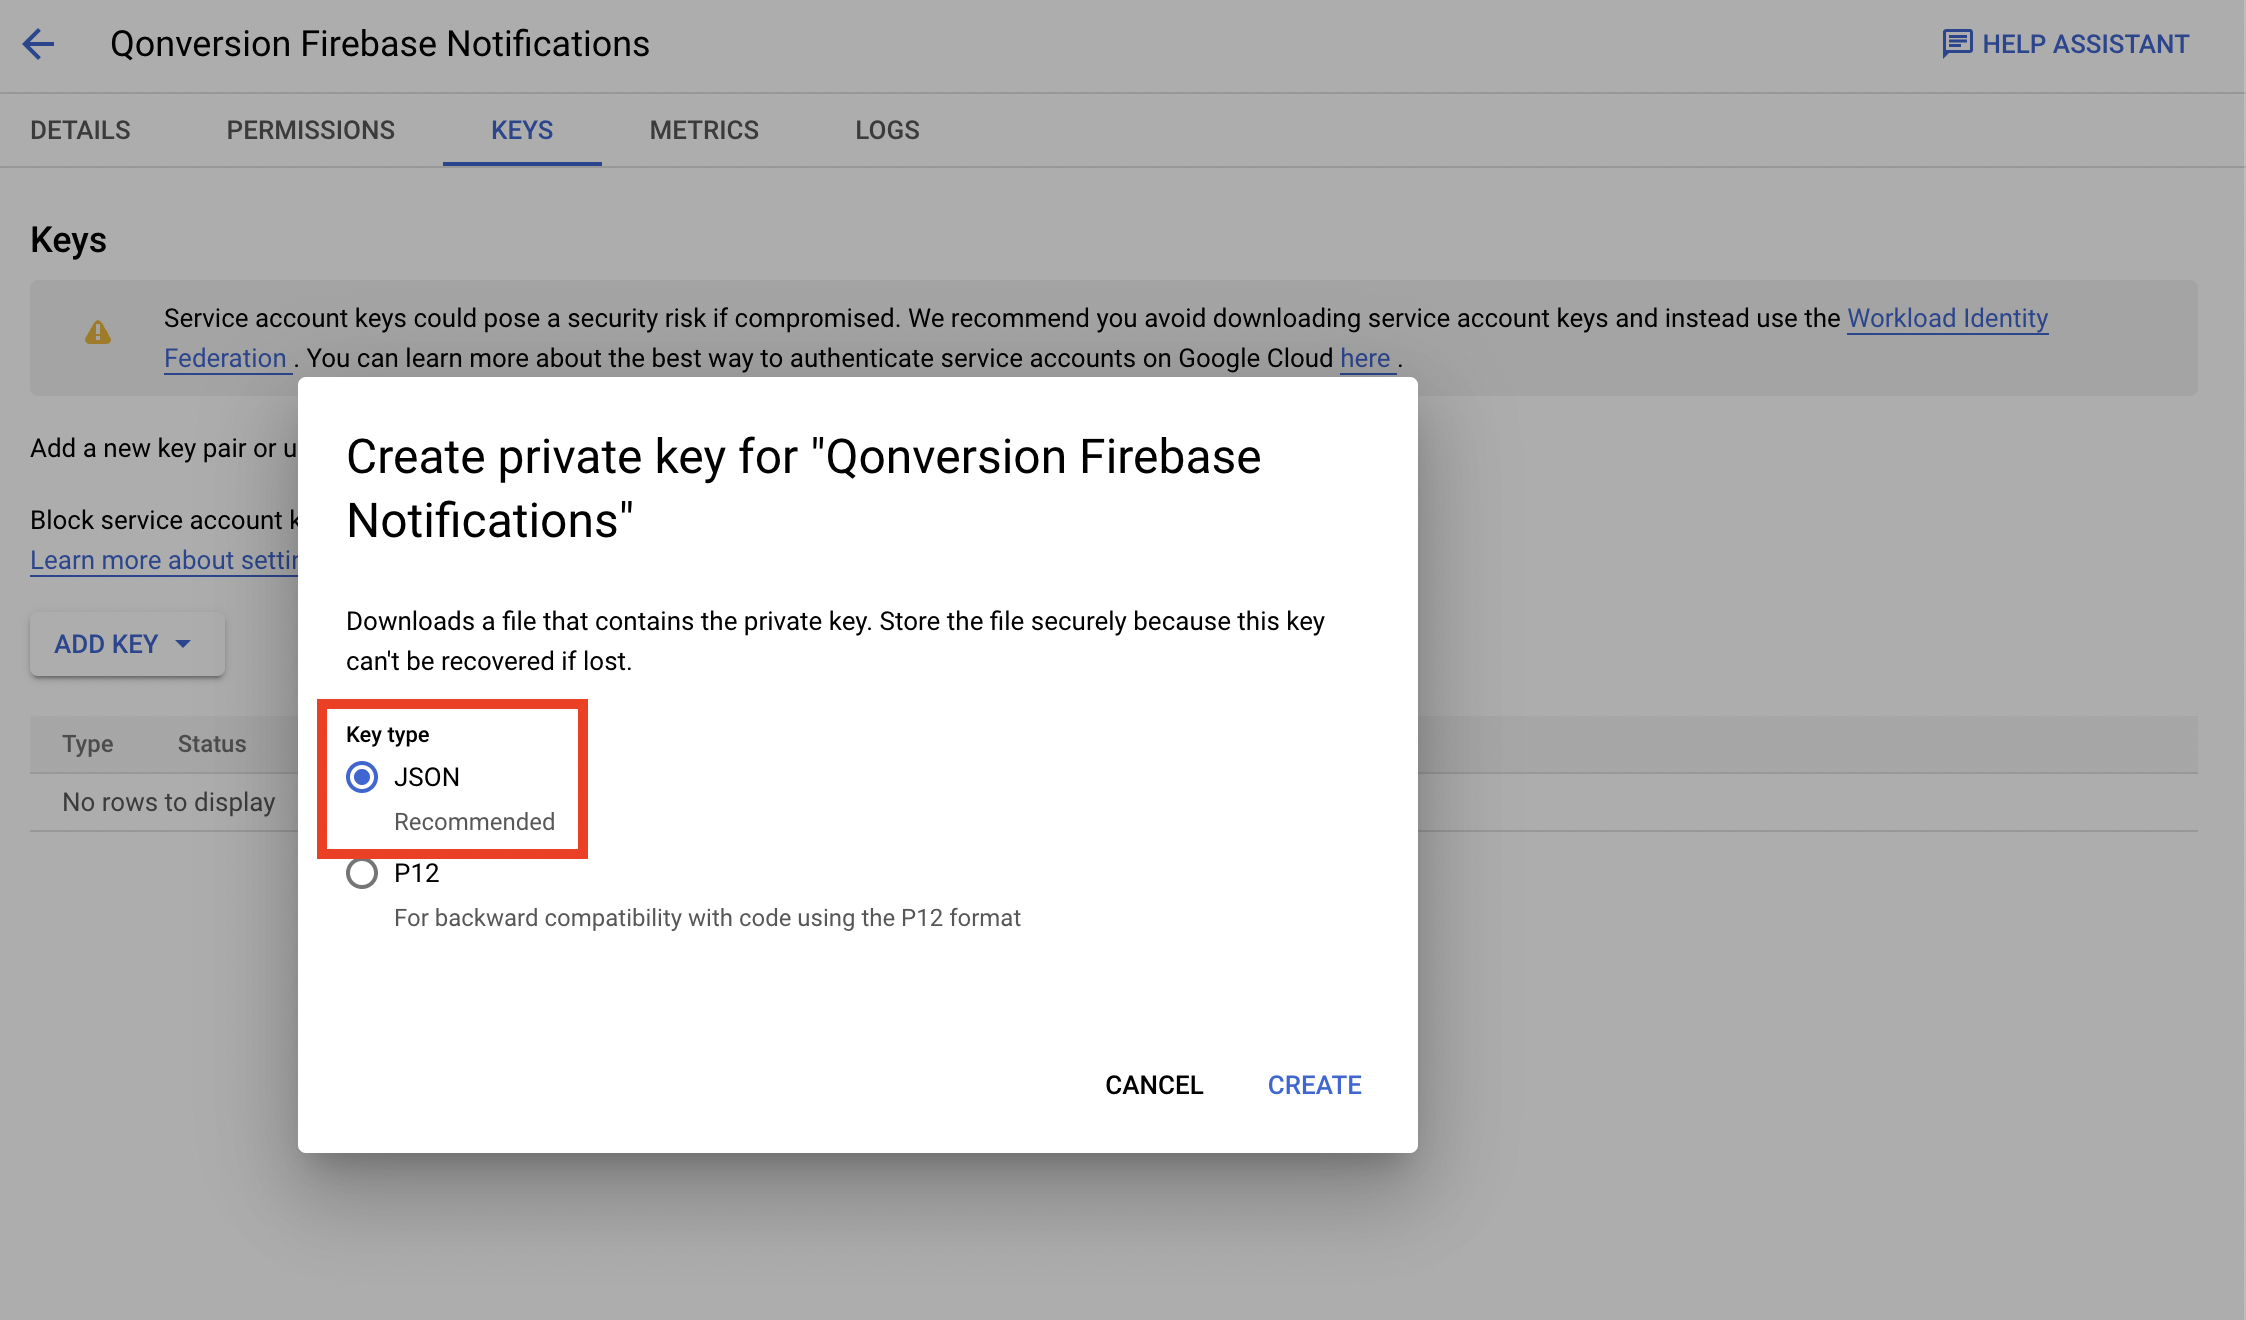
 Select the *JSON* key. After clicking *CREATE*, the JSON key will be automatically downloaded. Please keep it for further steps.
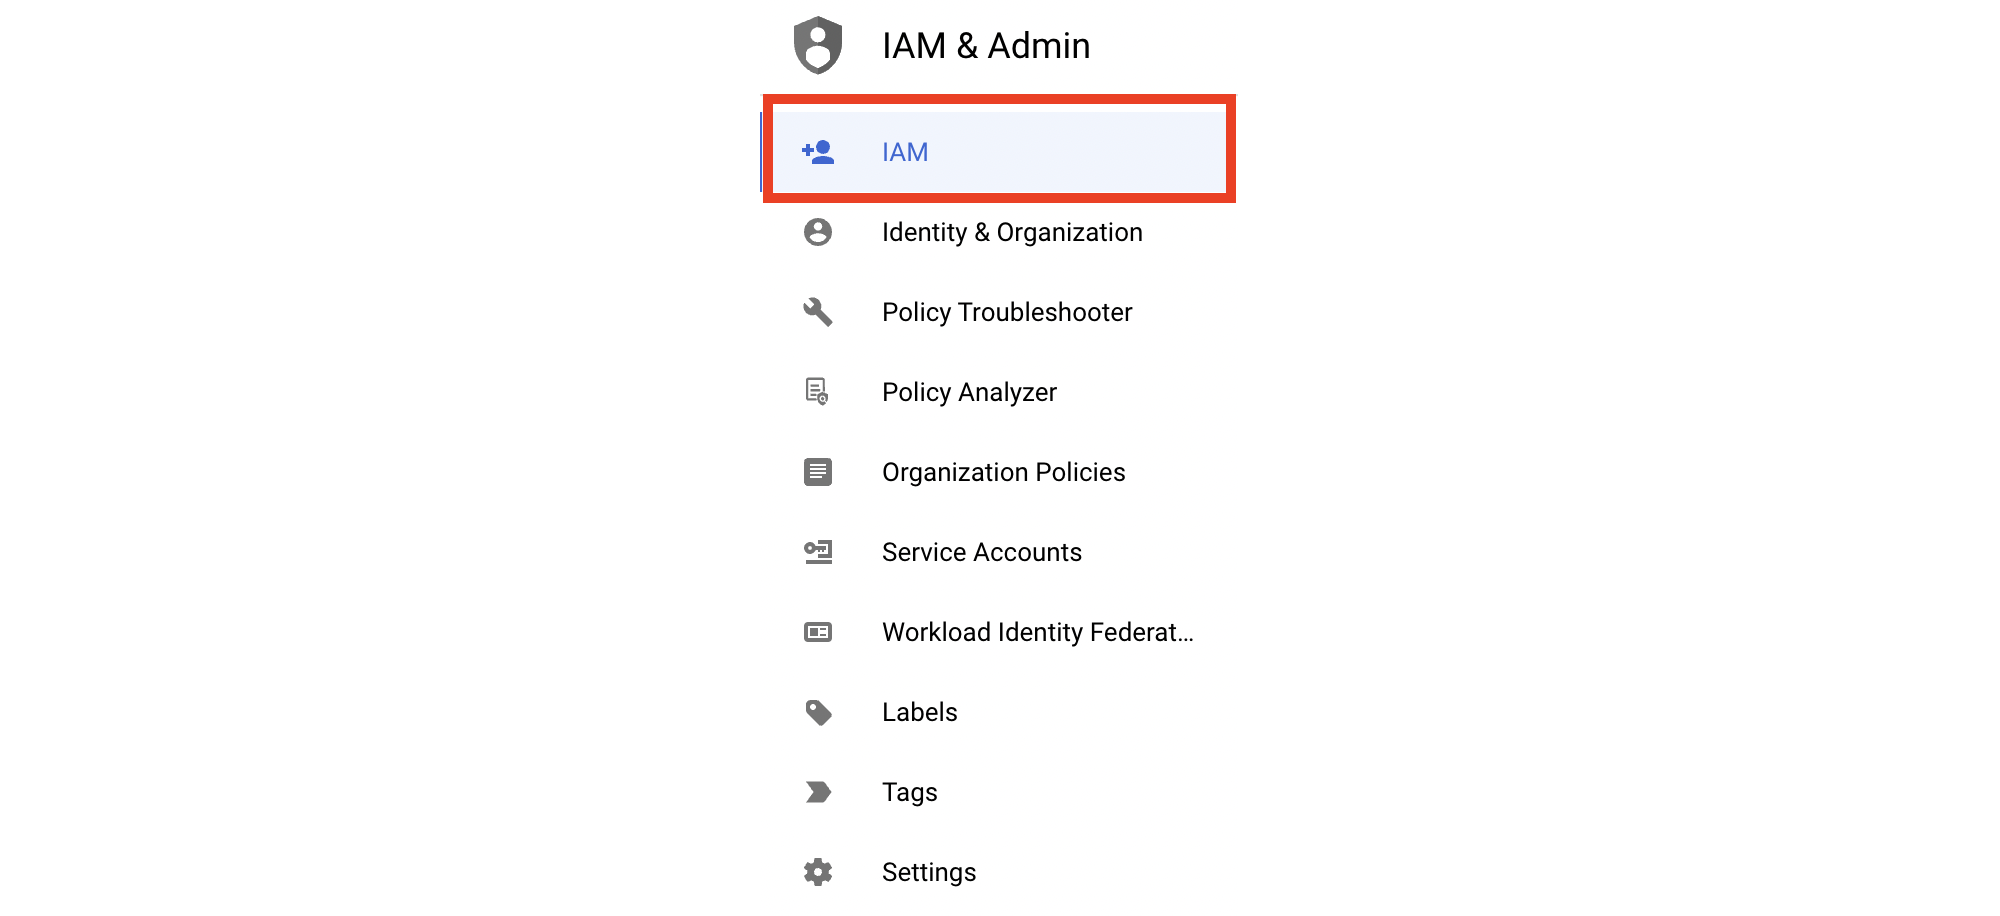
 Navigate to the IAM section.
 And click the *GRANT ACCESS* button
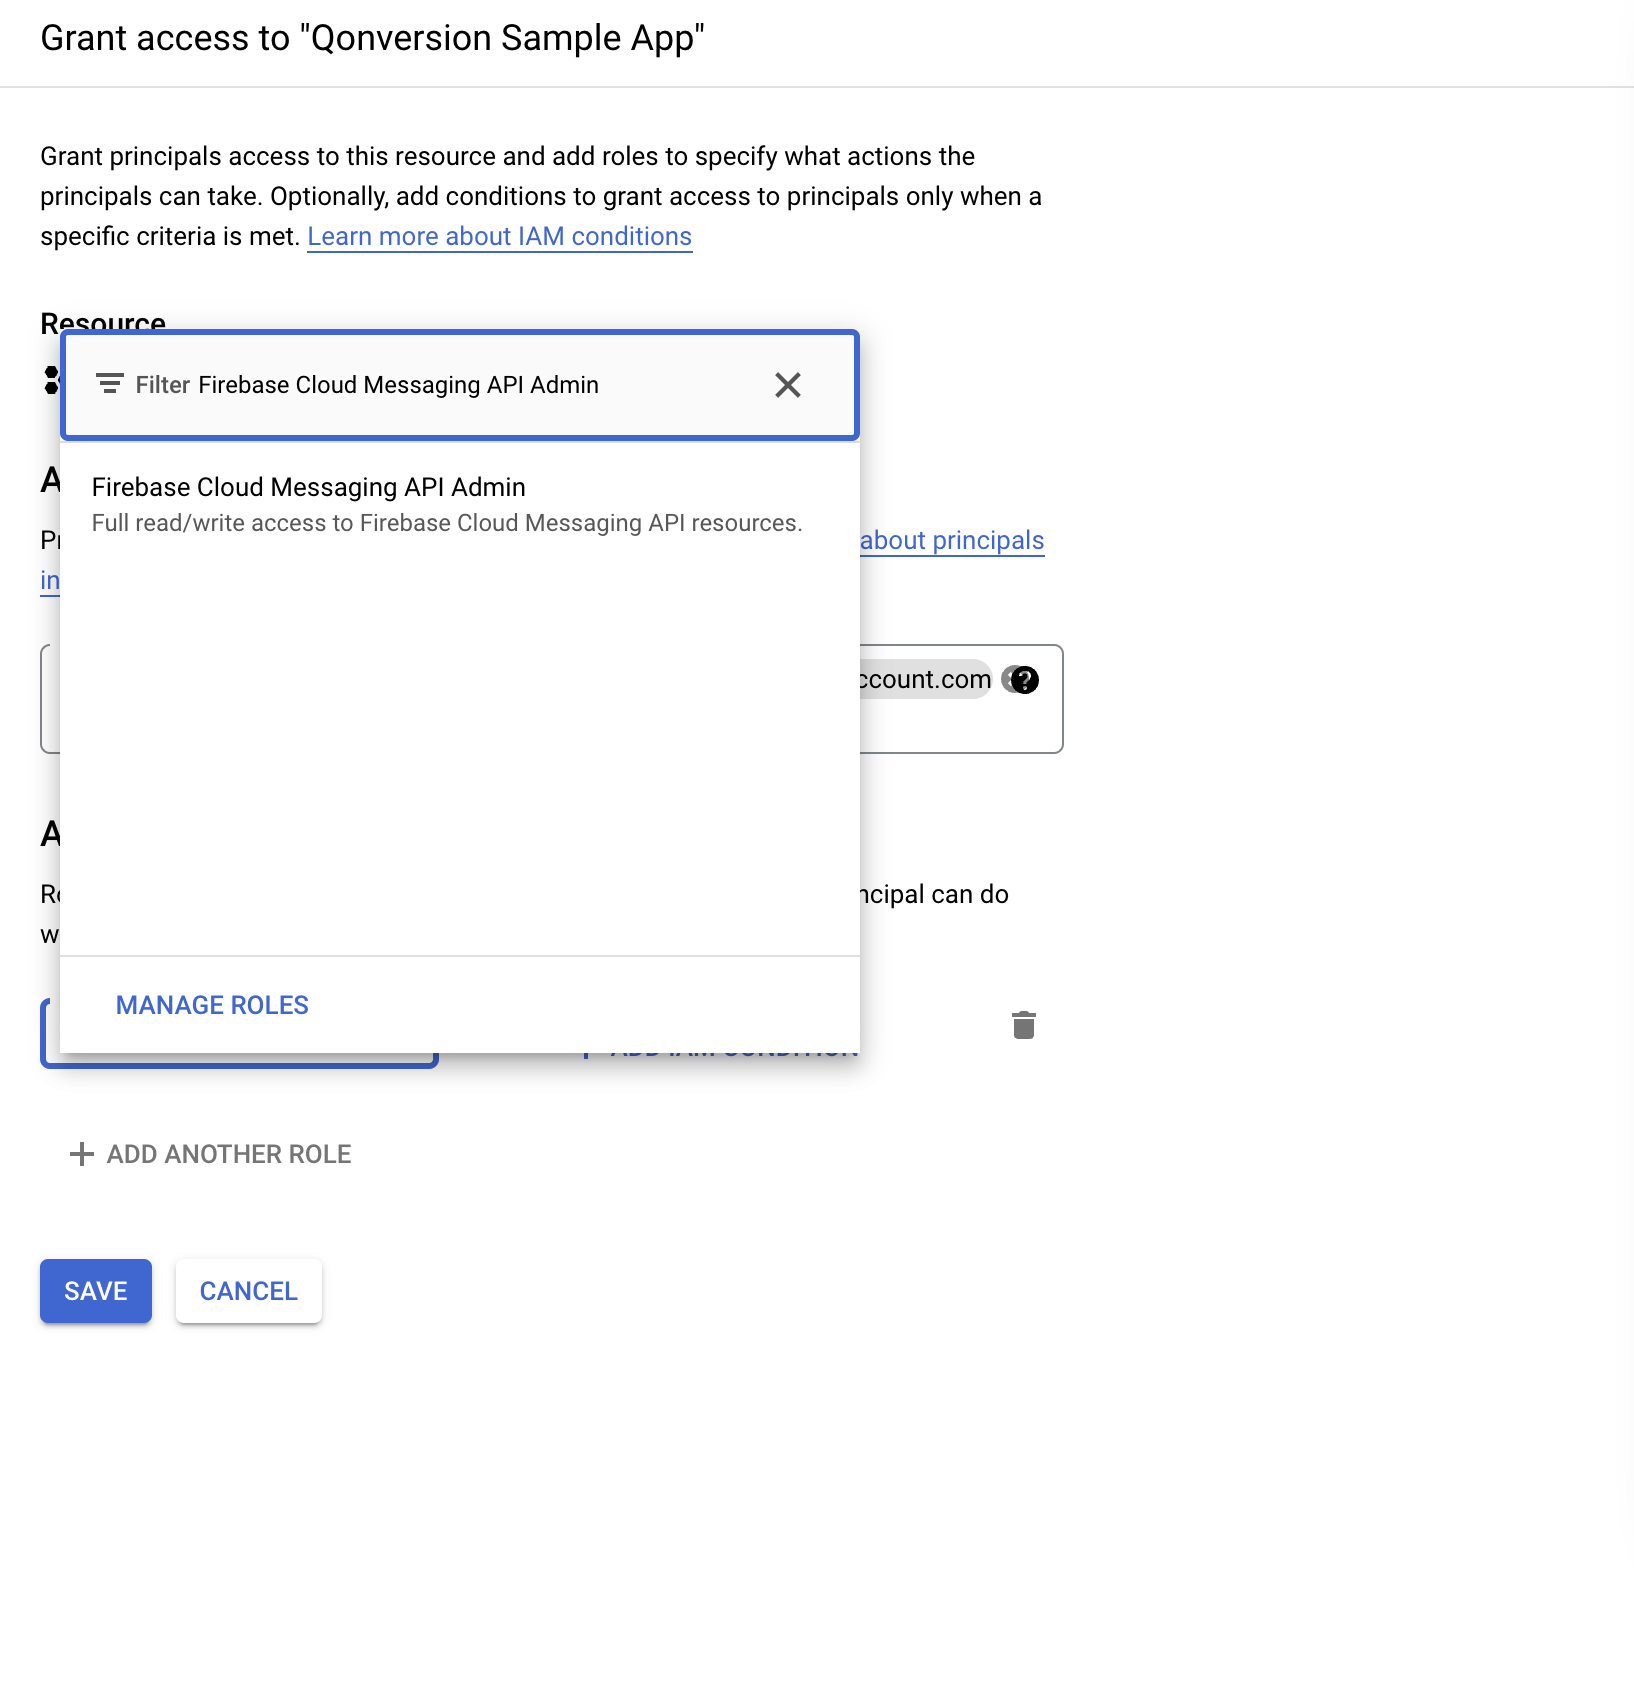
 In the opened screen, enter the ID of the recently created service account in the New principals section.
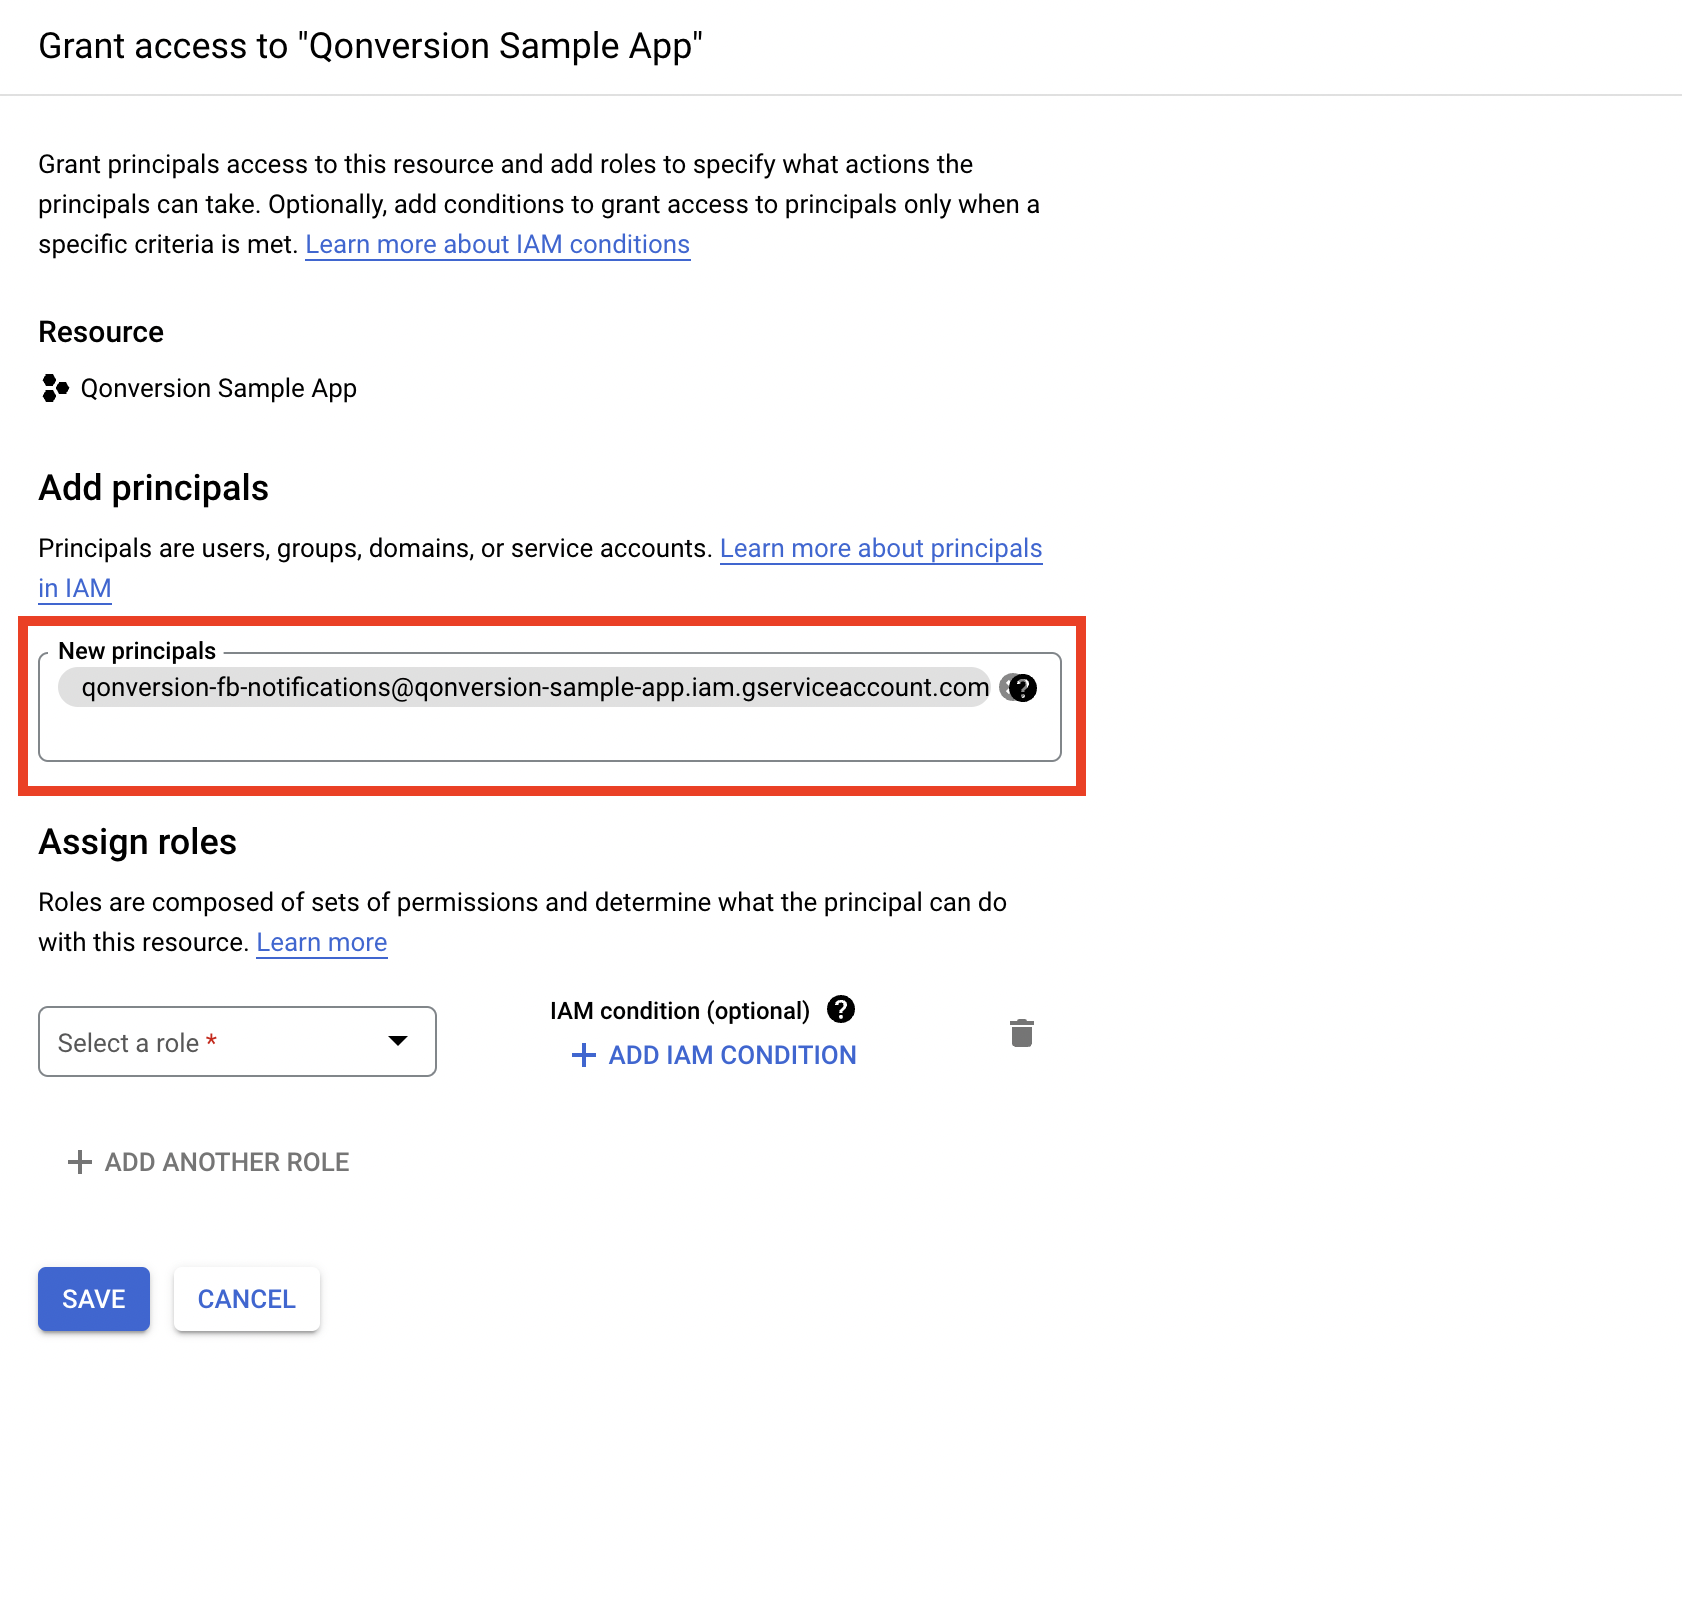 Then select the **Firebase Cloud Messaging API Admin** role in the Assign roles section and click *SAVE*.
 ### 2. Copy your Firebase project ID
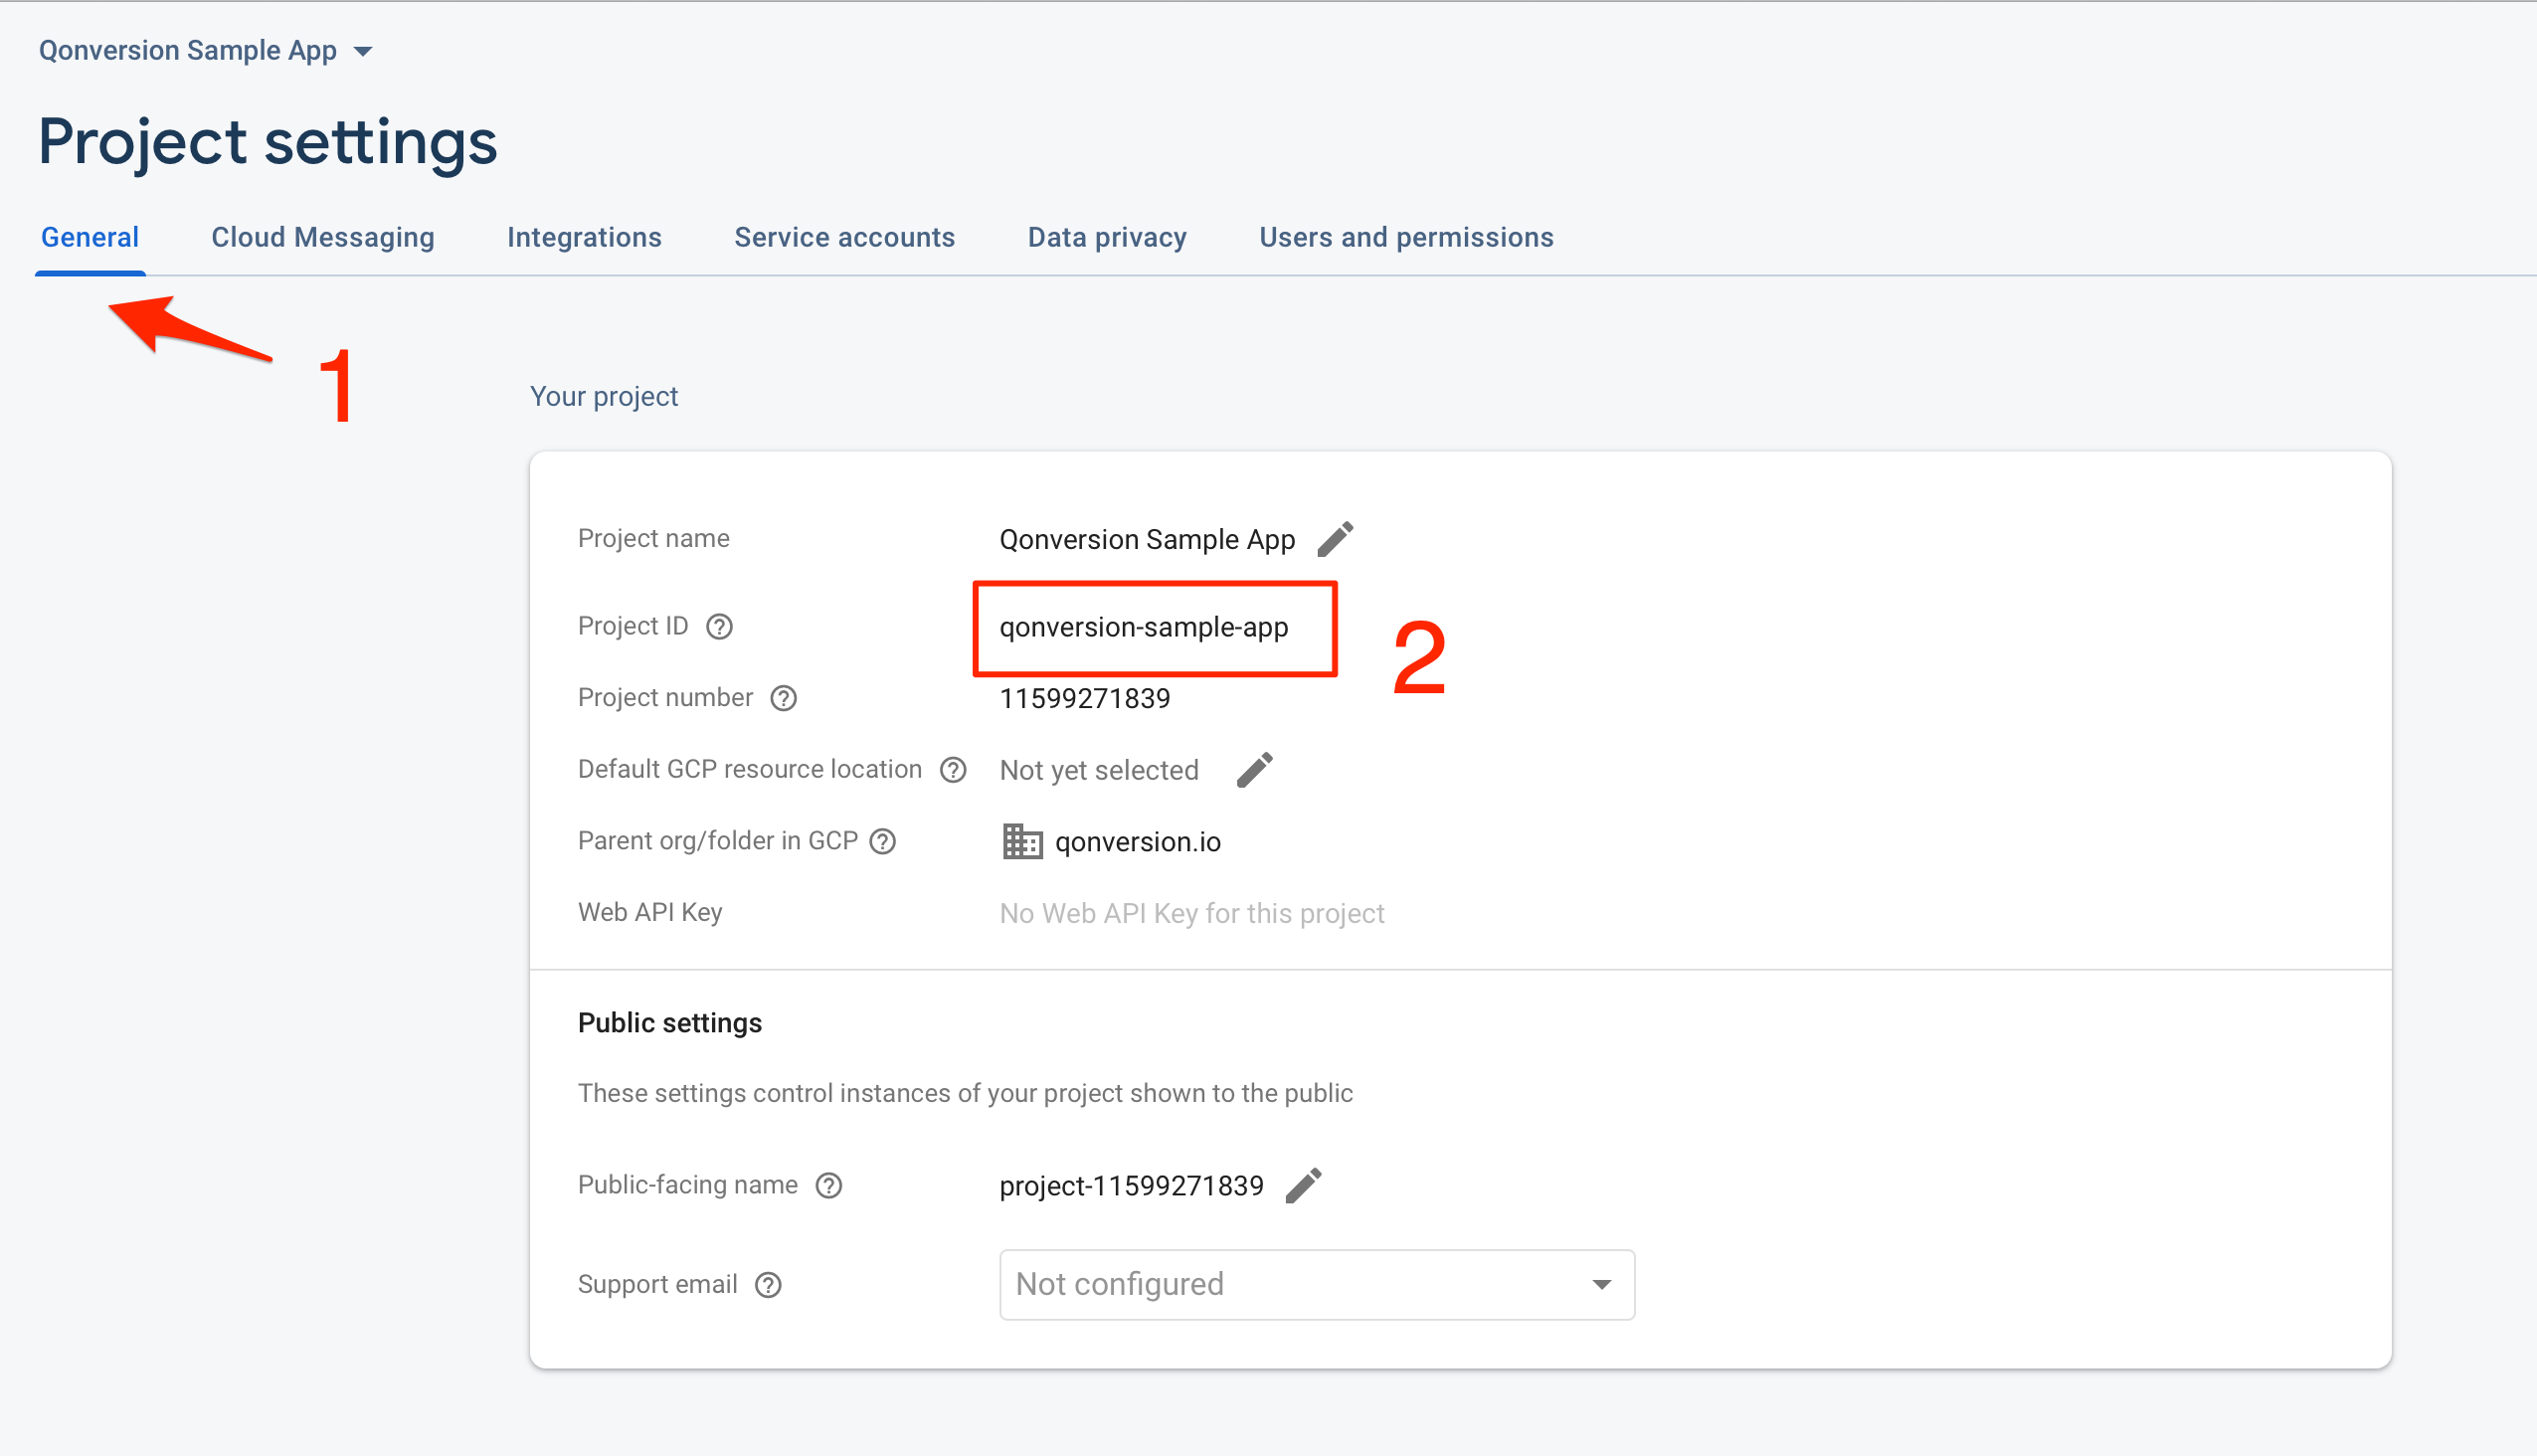
Navigate back to the **General** tab in Firebase Console and copy your Firebase Project ID:
### 2. Copy your Firebase project ID
Navigate back to the **General** tab in Firebase Console and copy your Firebase Project ID:
 ### 3. Configure Qonversion project with the Firebase settings:
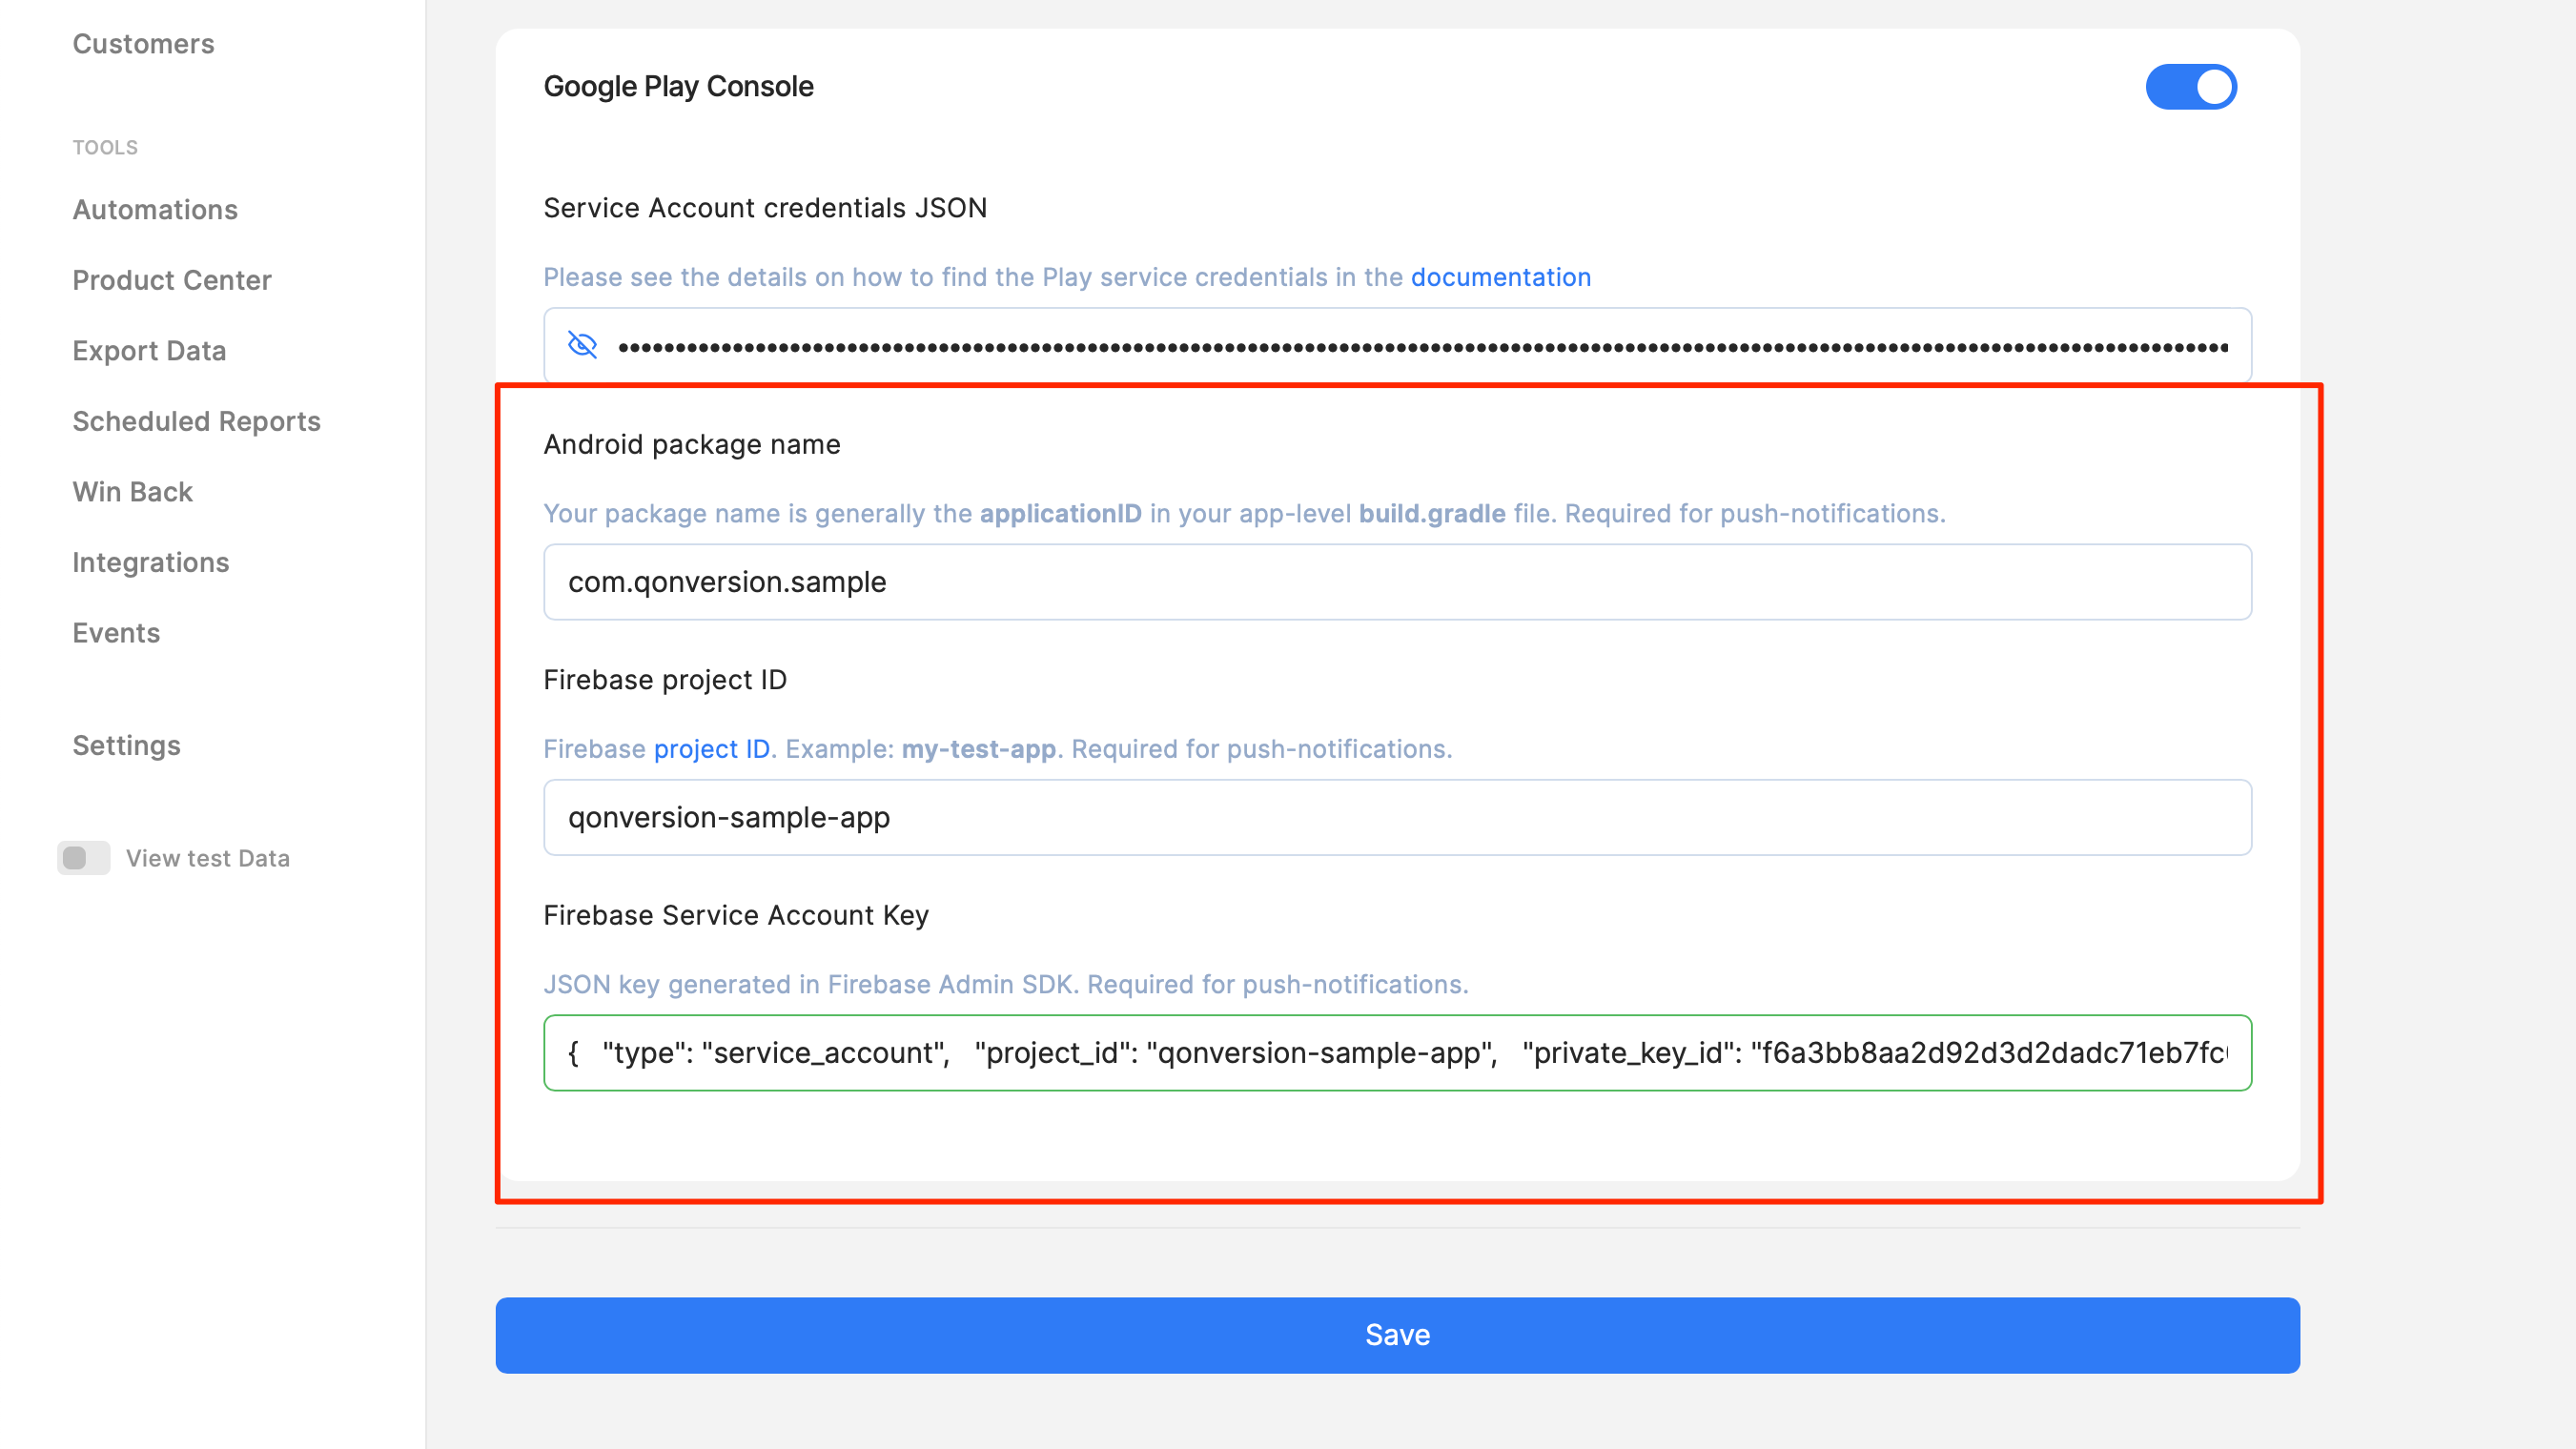
Navigate to your Qonversion project's settings page and provide the values for the following fields:
* Android package name;
* Firebase project ID that you have copied [at the previous step](/docs/mobile-pushes#2-copy-your-firebase-project-id);
* Firebase Service Account JSON key that you have downloaded during [the first step](/docs/mobile-pushes#1-create-a-service-account-json-key).
### 3. Configure Qonversion project with the Firebase settings:
Navigate to your Qonversion project's settings page and provide the values for the following fields:
* Android package name;
* Firebase project ID that you have copied [at the previous step](/docs/mobile-pushes#2-copy-your-firebase-project-id);
* Firebase Service Account JSON key that you have downloaded during [the first step](/docs/mobile-pushes#1-create-a-service-account-json-key).