> ## Documentation Index
> Fetch the complete documentation index at: https://documentation.qonversion.io/llms.txt
> Use this file to discover all available pages before exploring further.
# iOS App Store Info Fields
> How to find your Bundle ID, App Store ID, and App-Specific Shared Secret in App Store Connect — the three required fields for connecting your iOS app to Qonversion.
The Core setup step in the Qonversion iOS configuration wizard asks for three identifiers that Apple uses to recognize your app and authorize receipt validation:
* **Bundle ID** — the reverse-DNS identifier of the app (e.g. `com.example.app`).
* **App Store ID** — the numeric ID Apple assigns to a published app (e.g. `1234567890`).
* **App-Specific Shared Secret** — a 32-character secret used to validate auto-renewable subscription receipts.
All three live on the **App Information** screen of a single app in App Store Connect, so you can grab them in one trip.
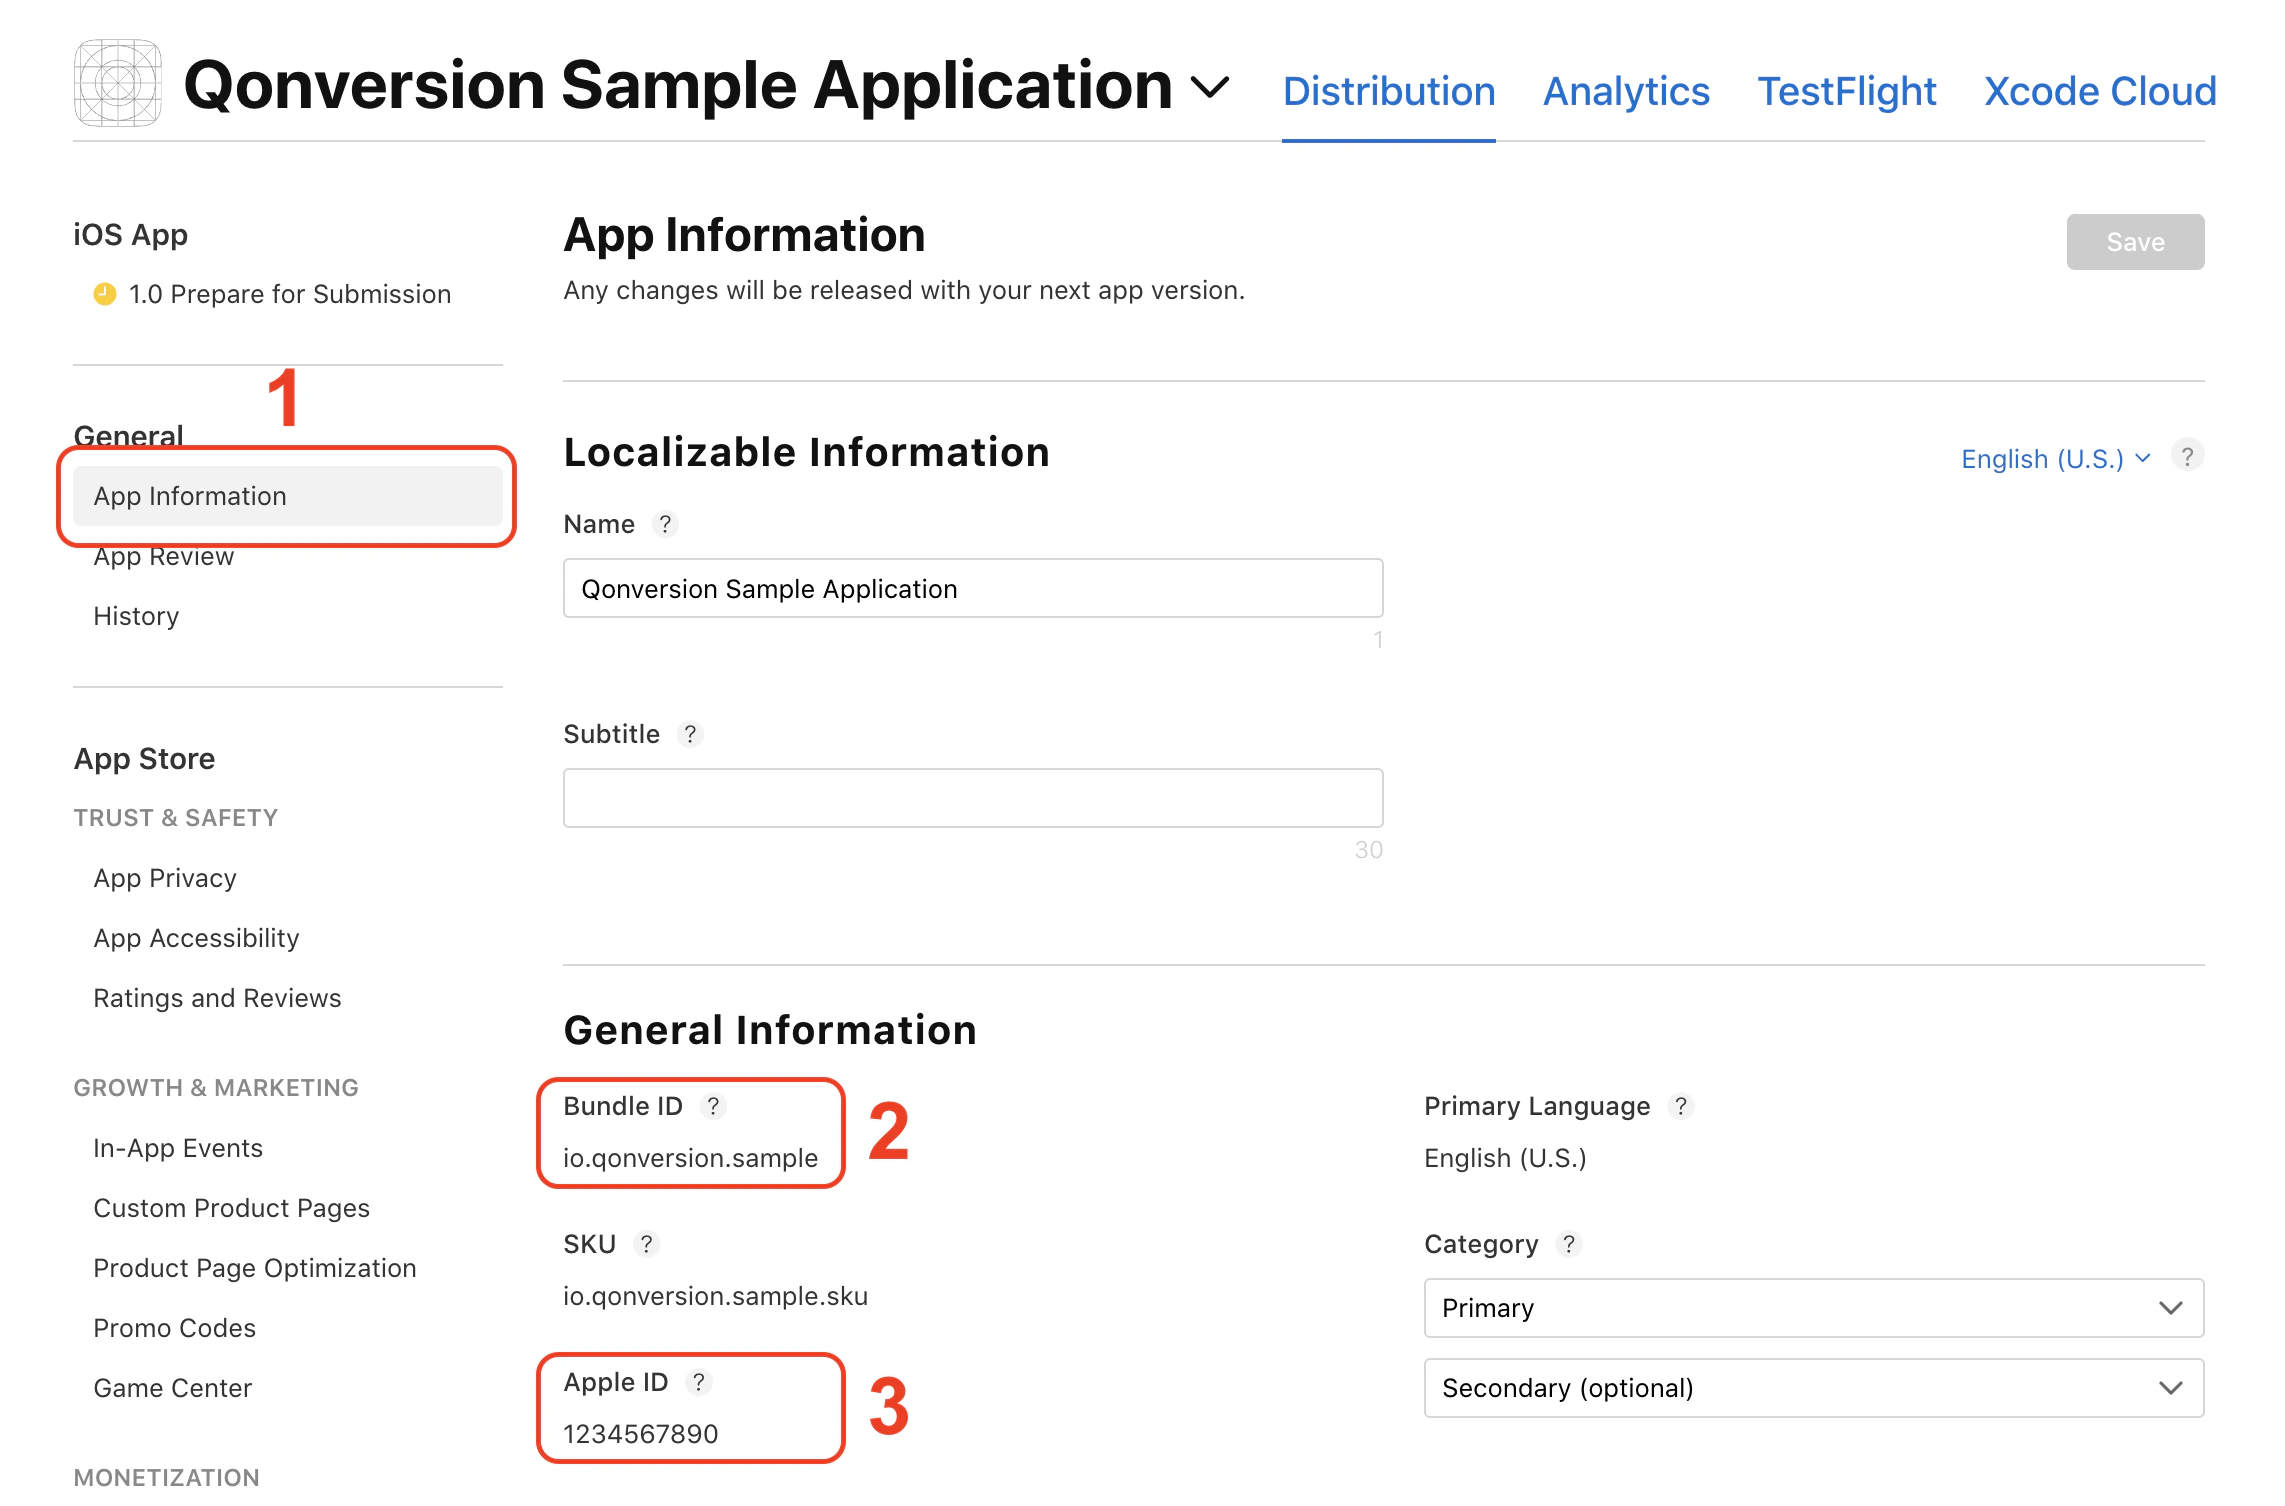
## 1. Copy the Bundle ID and App Store ID
1. [Log in](https://appstoreconnect.apple.com/login) to App Store Connect.
2. Open **My Apps**, click your app, and choose **App Information** in the left sidebar.
3. Under **General Information**, copy:
* **Bundle ID** (looks like `com.example.app`) — paste into Qonversion's **Bundle ID** field.
* **Apple ID** (numeric, e.g. `1234567890`) — this is what Qonversion calls the **App Store ID**.
You can also read the App Store ID from the URL bar while the app is open: `https://appstoreconnect.apple.com/apps//...`
 ## 2. Generate the App-Specific Shared Secret
Still on **App Information**, scroll down to the **App-Specific Shared Secret** card and click **Manage**. In the dialog that opens, click **Generate** if you don't have one yet, then copy the 32-character secret.
## 2. Generate the App-Specific Shared Secret
Still on **App Information**, scroll down to the **App-Specific Shared Secret** card and click **Manage**. In the dialog that opens, click **Generate** if you don't have one yet, then copy the 32-character secret.
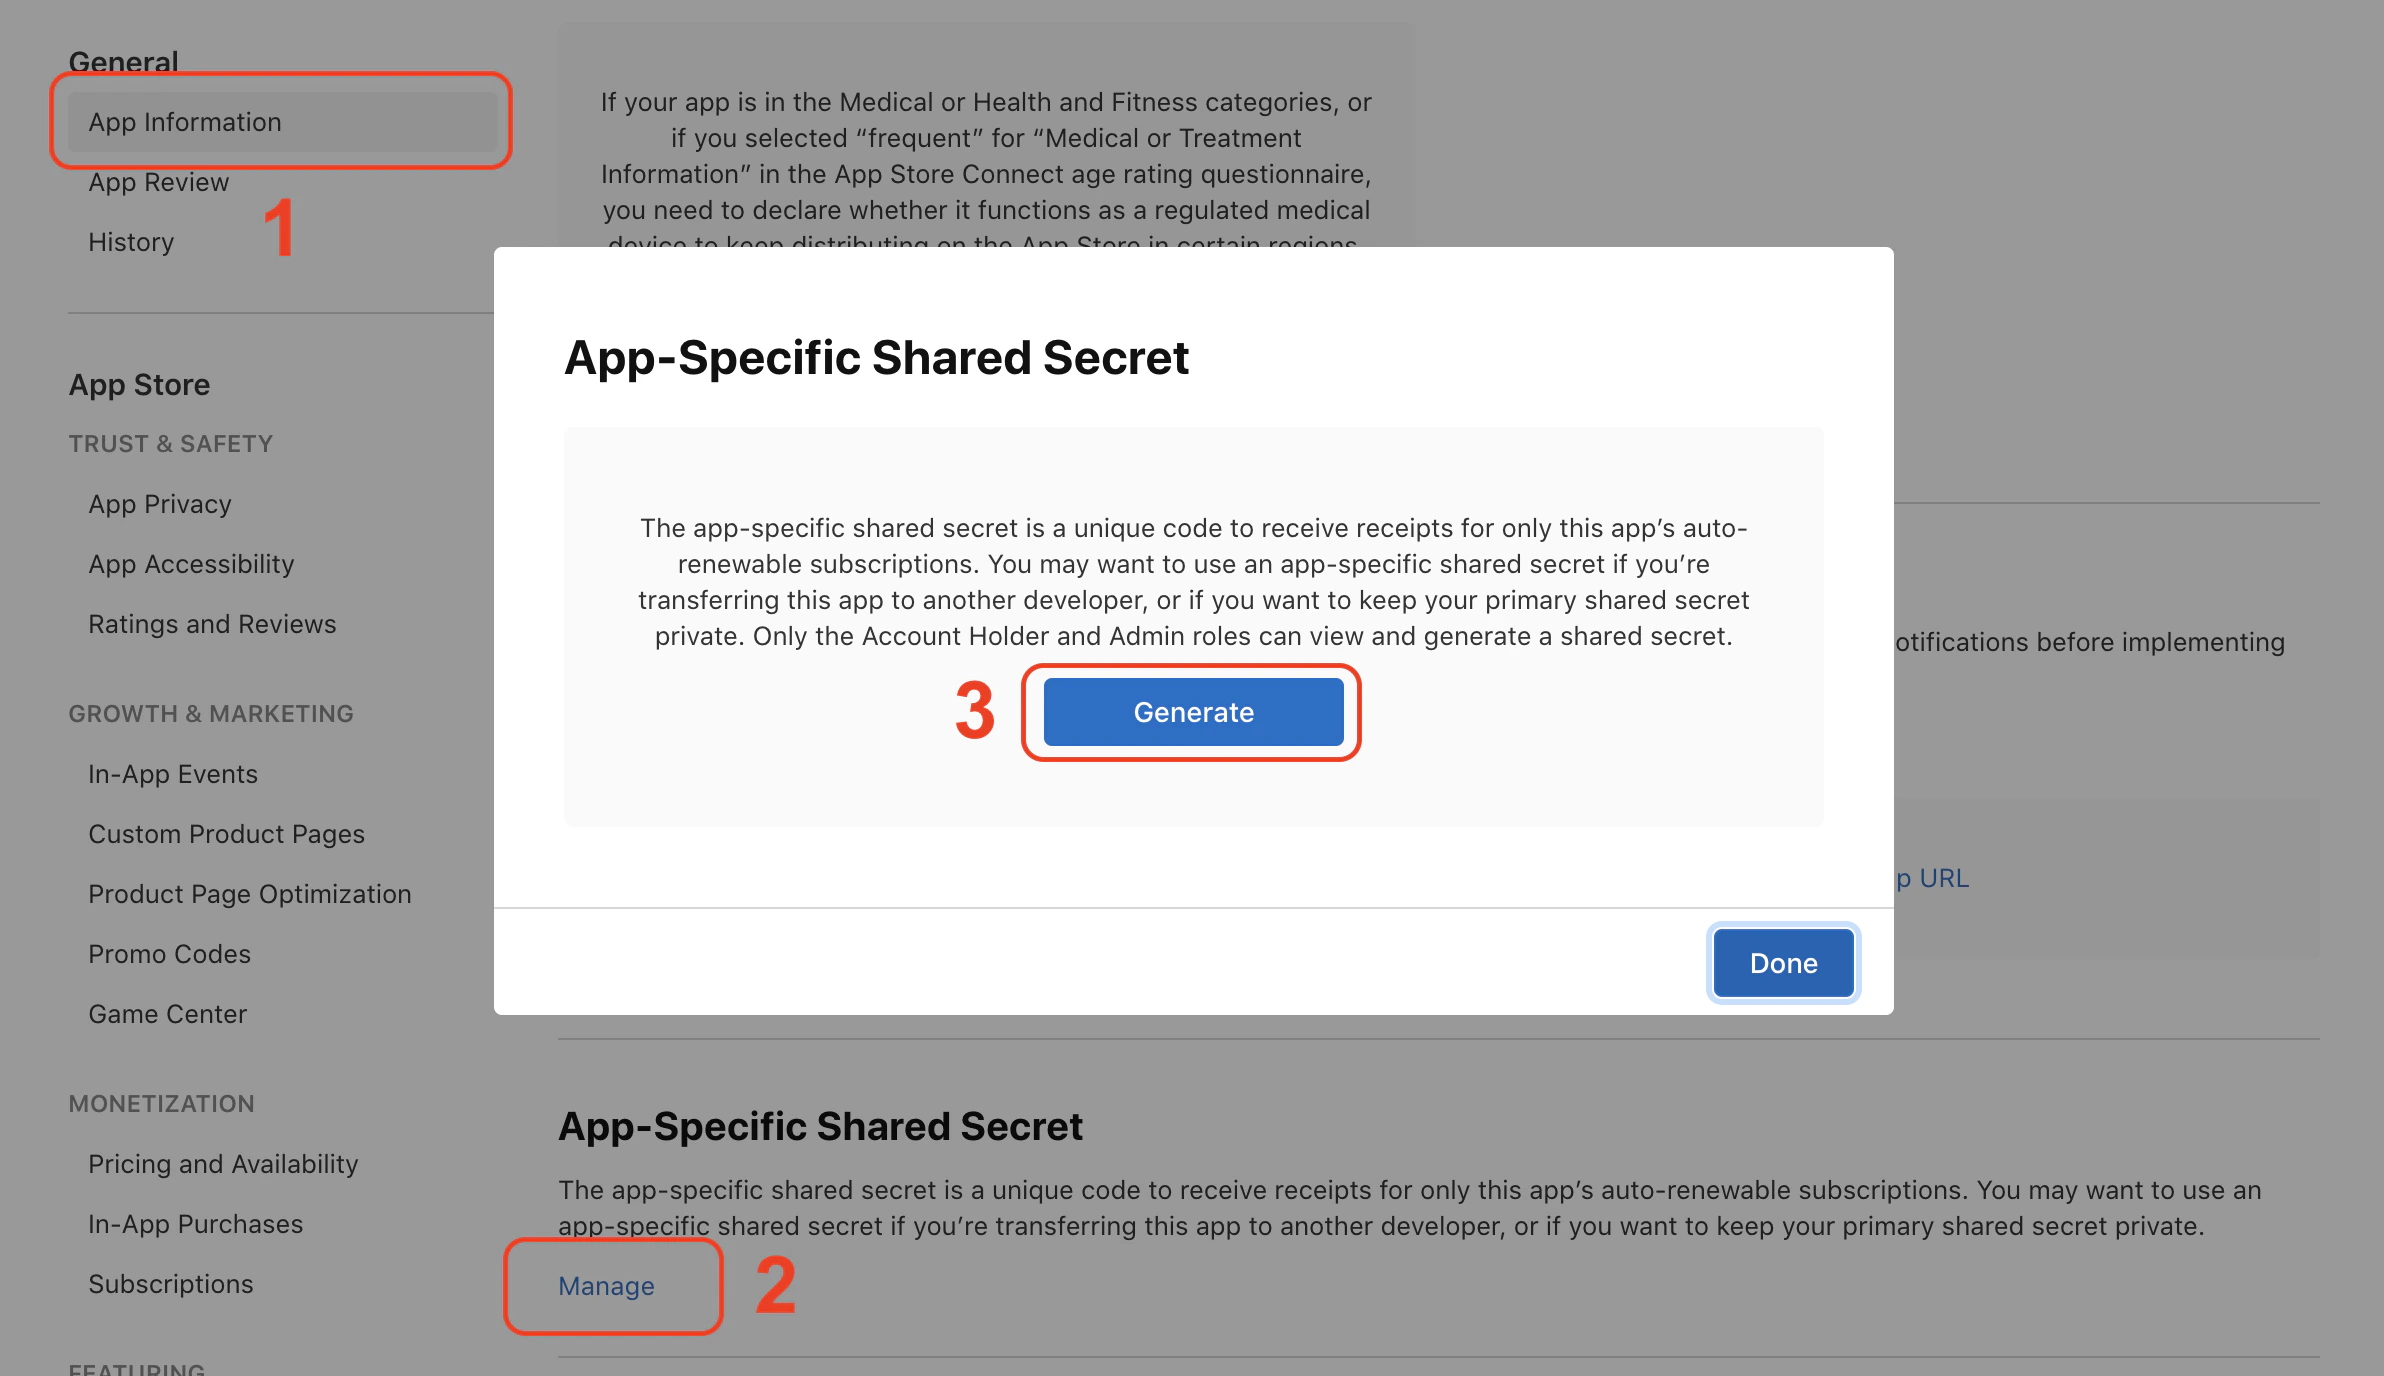 An app-specific shared secret is per-app and stays the same once generated. You can revoke and regenerate it from this dialog at any time, but doing so invalidates the previous value everywhere it's used.
## 3. Paste everything into Qonversion
1. Open Qonversion Dash → **Project Settings** → **Stores** → **Apple App Store**.
2. On **Step 2 · Core setup**:
* Paste the **App-Specific Shared Secret**.
* Paste the **Bundle ID**.
* Paste the **App Store ID**.
If you completed Step 1 (App Store Connect API key) and verified your credentials, Bundle ID and App Store ID may already be auto-filled — pick the app from the dropdown to fill them in. You can still edit either field by hand afterwards.
## Troubleshooting
### "App Store ID is invalid"
The App Store ID is purely numeric — usually 9 to 10 digits. If you accidentally copied something with letters or punctuation (the bundle id, for example), Qonversion will reject it. Double-check the **Apple ID** field on App Information, not the Bundle ID.
### "App-Specific Shared Secret is invalid"
The shared secret is exactly 32 characters, hex-style. If pasting from a manager that adds spaces, trim them; if you generated a Master Shared Secret instead (in **Users and Access → Integrations**), that's a different value and won't work for per-app receipt validation.
### Bundle ID doesn't match the one in your Xcode project
Apple ties the bundle id to the app record on App Store Connect; you can't change it after submission. Make sure the value you paste here matches the **Bundle Identifier** in your Xcode target's signing settings — they have to be identical for receipt validation to succeed.
***
## What's next?
After this step, finish the rest of the wizard:
* **Step 3 · Server API access** — generate an [In-App Purchase API Key](apple-promotional-offers) and upload it.
* **Step 4 · Production readiness** — copy the [Server-to-Server Notification URL](ios-s2s-notifications) into App Store Connect.
An app-specific shared secret is per-app and stays the same once generated. You can revoke and regenerate it from this dialog at any time, but doing so invalidates the previous value everywhere it's used.
## 3. Paste everything into Qonversion
1. Open Qonversion Dash → **Project Settings** → **Stores** → **Apple App Store**.
2. On **Step 2 · Core setup**:
* Paste the **App-Specific Shared Secret**.
* Paste the **Bundle ID**.
* Paste the **App Store ID**.
If you completed Step 1 (App Store Connect API key) and verified your credentials, Bundle ID and App Store ID may already be auto-filled — pick the app from the dropdown to fill them in. You can still edit either field by hand afterwards.
## Troubleshooting
### "App Store ID is invalid"
The App Store ID is purely numeric — usually 9 to 10 digits. If you accidentally copied something with letters or punctuation (the bundle id, for example), Qonversion will reject it. Double-check the **Apple ID** field on App Information, not the Bundle ID.
### "App-Specific Shared Secret is invalid"
The shared secret is exactly 32 characters, hex-style. If pasting from a manager that adds spaces, trim them; if you generated a Master Shared Secret instead (in **Users and Access → Integrations**), that's a different value and won't work for per-app receipt validation.
### Bundle ID doesn't match the one in your Xcode project
Apple ties the bundle id to the app record on App Store Connect; you can't change it after submission. Make sure the value you paste here matches the **Bundle Identifier** in your Xcode target's signing settings — they have to be identical for receipt validation to succeed.
***
## What's next?
After this step, finish the rest of the wizard:
* **Step 3 · Server API access** — generate an [In-App Purchase API Key](apple-promotional-offers) and upload it.
* **Step 4 · Production readiness** — copy the [Server-to-Server Notification URL](ios-s2s-notifications) into App Store Connect.