> ## Documentation Index
> Fetch the complete documentation index at: https://documentation.qonversion.io/llms.txt
> Use this file to discover all available pages before exploring further.
# Google Cloud Storage
> Send raw data reports directly to your Google Cloud storage
Qonversion allows you to upload all the raw revenue data we track to your Google Cloud Storage bucket. You can find more details about raw data reports [here](scheduled-reports).
## Prepare Google Cloud Storage credentials
To upload raw data reports to your bucket, Qonversion needs the service account's key and write access to the corresponding bucket.
1. Navigate to the [IAM](https://console.cloud.google.com/projectselector2/iam-admin/serviceaccounts) in your Google Cloud account and select your project.
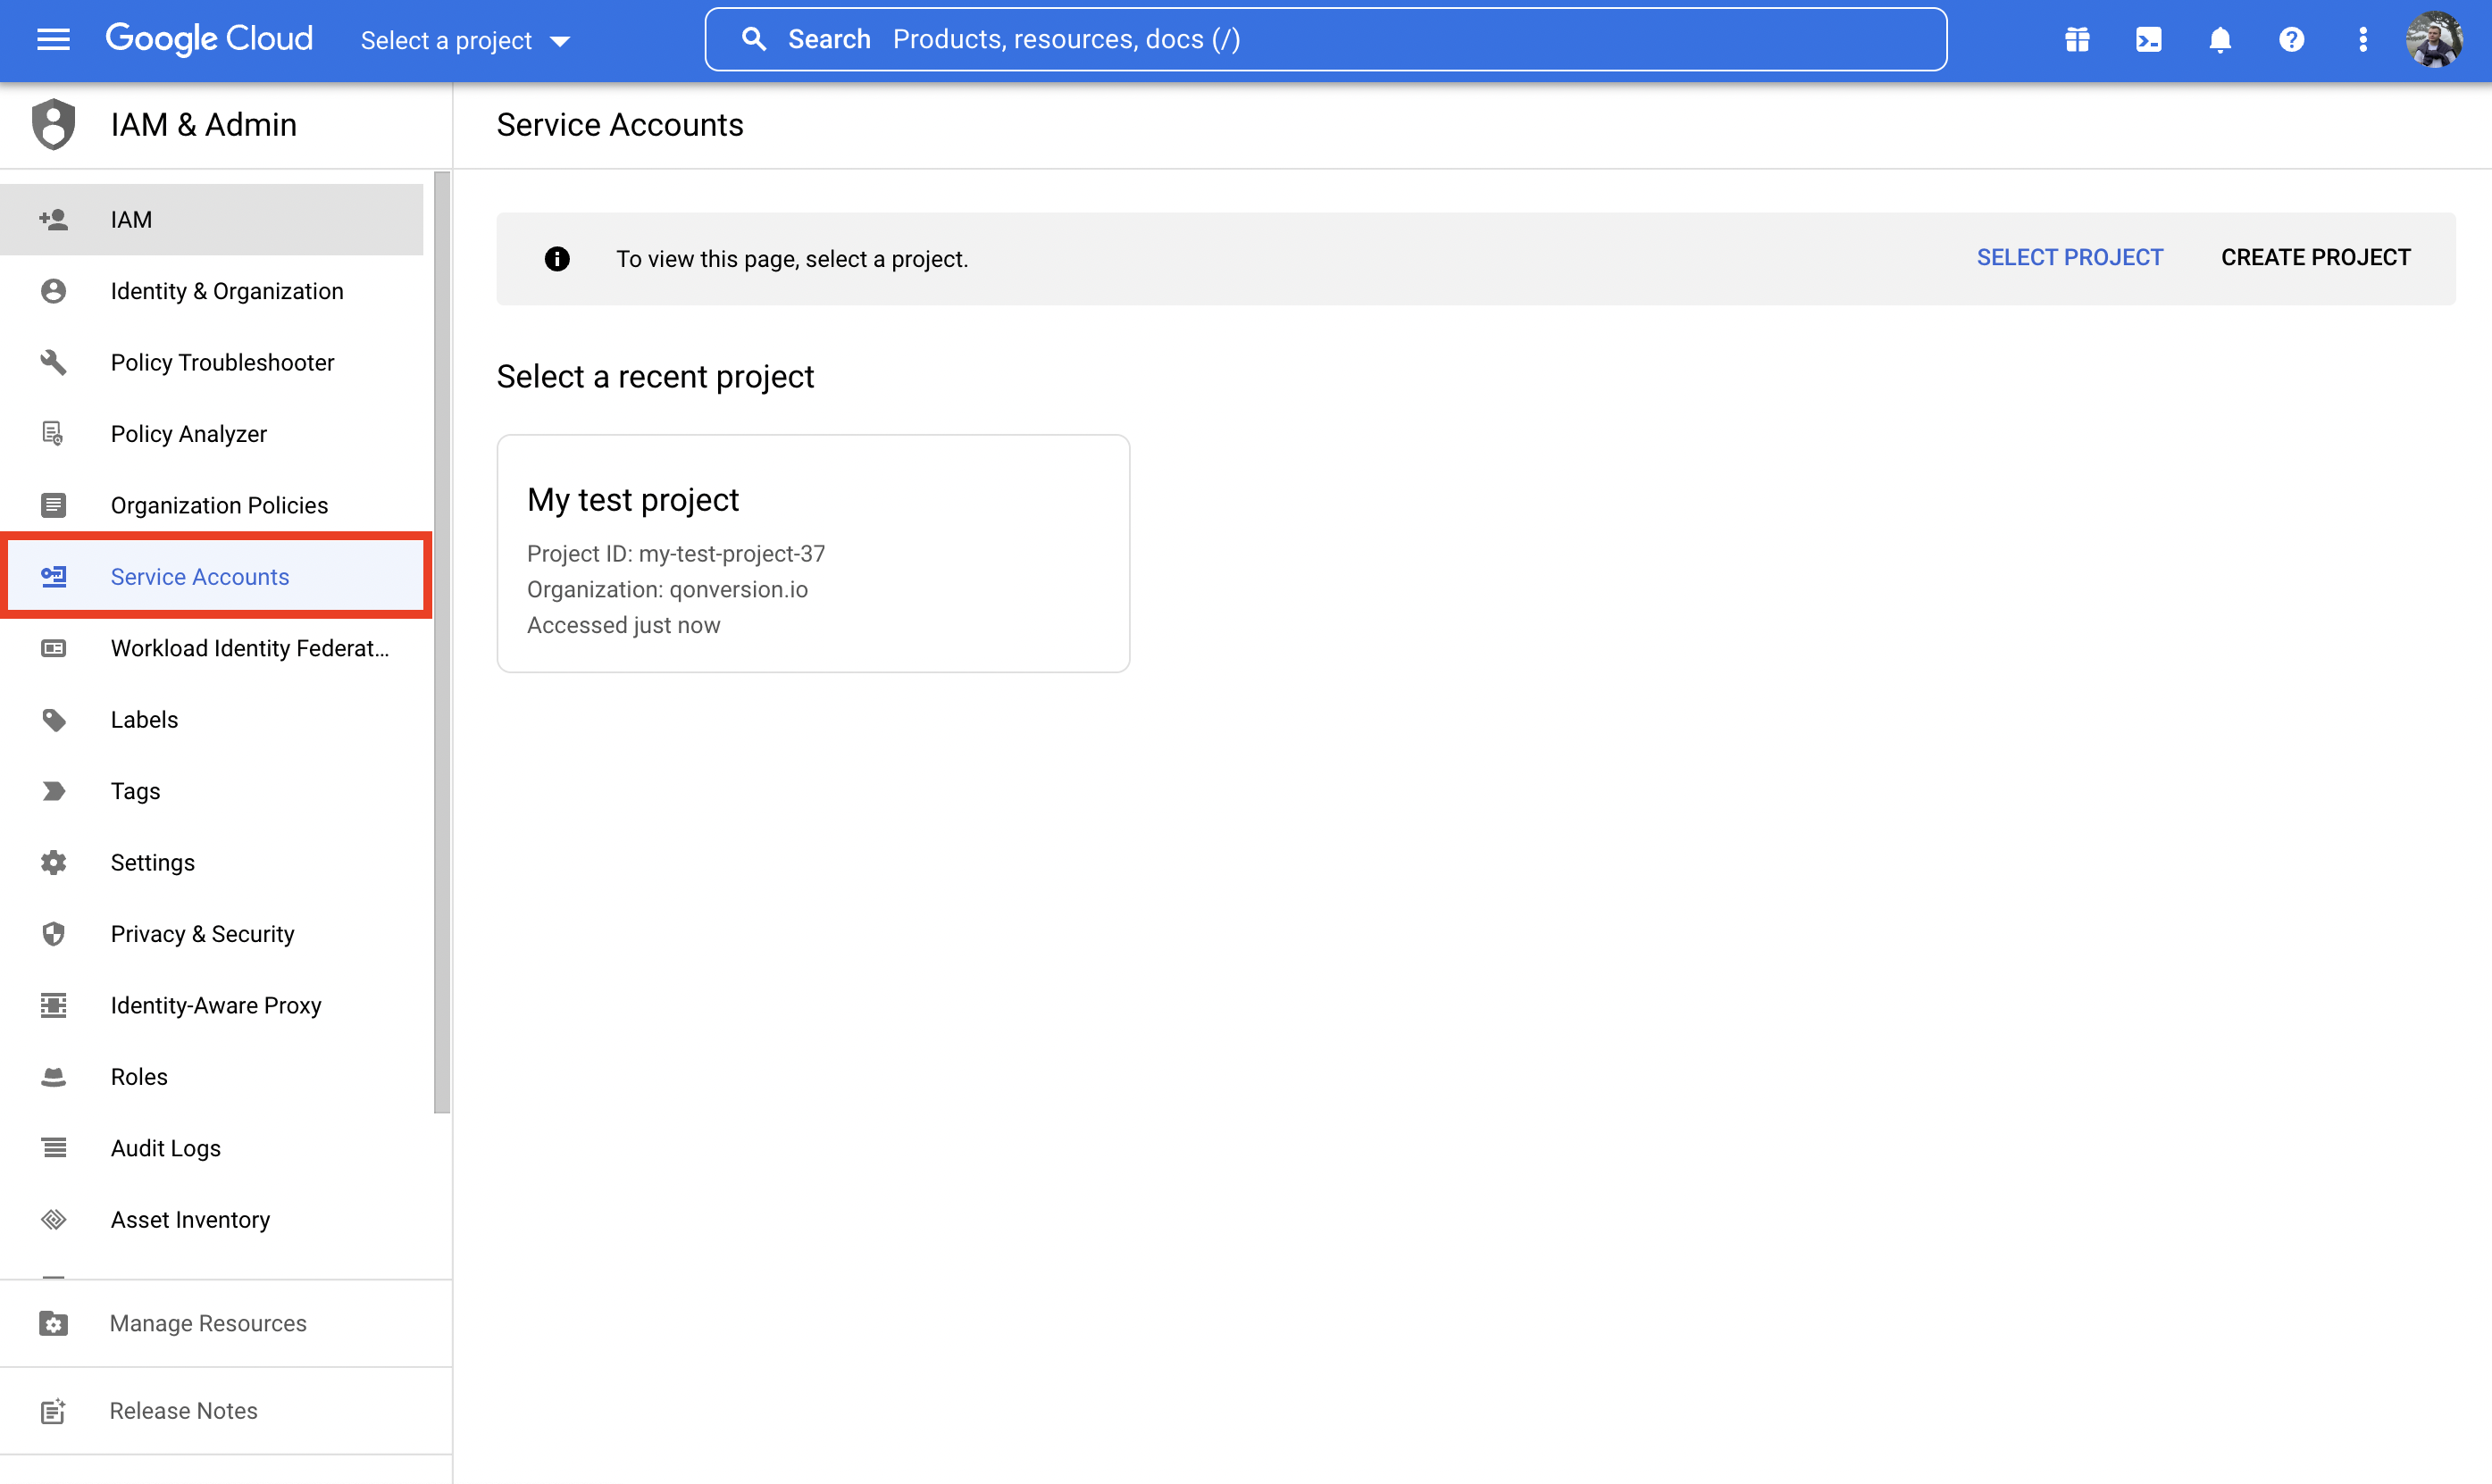 2. Create a new service account for the Qonversion file uploader using the *+ CREATE SERVICE ACCOUNT BUTTON*.
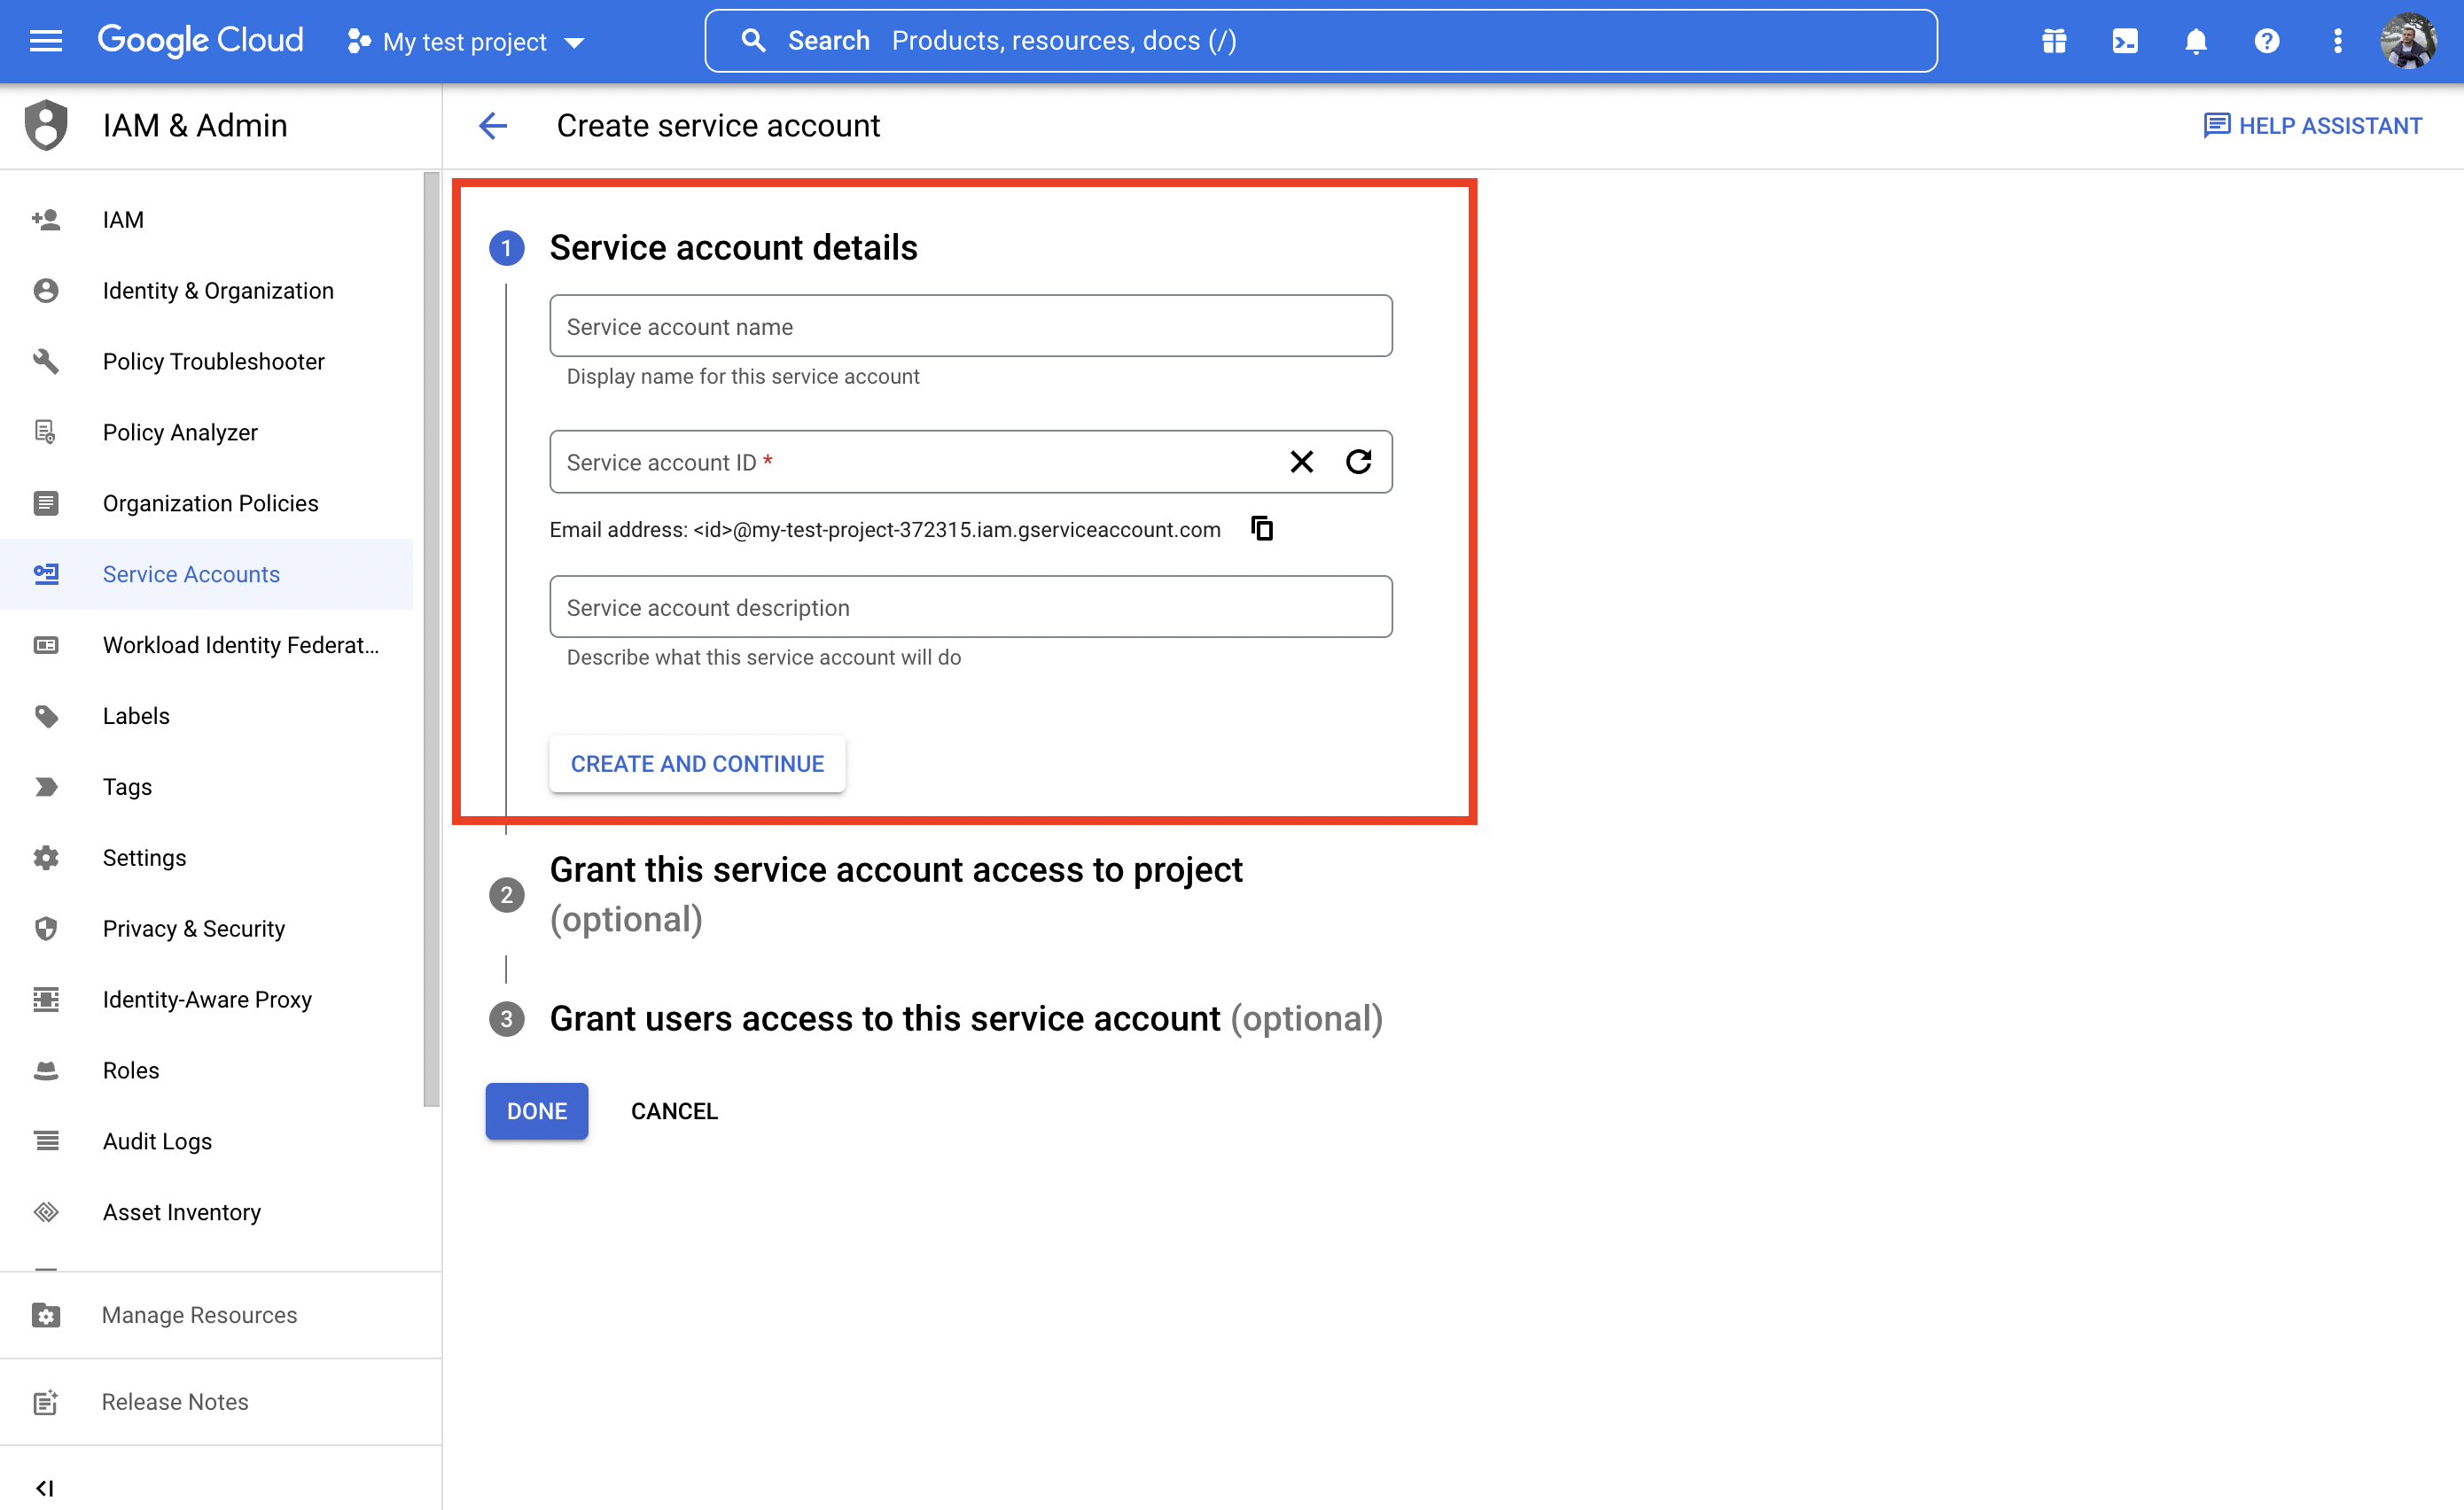
 3. Fill fields up only in the first step. Access will be granted further.
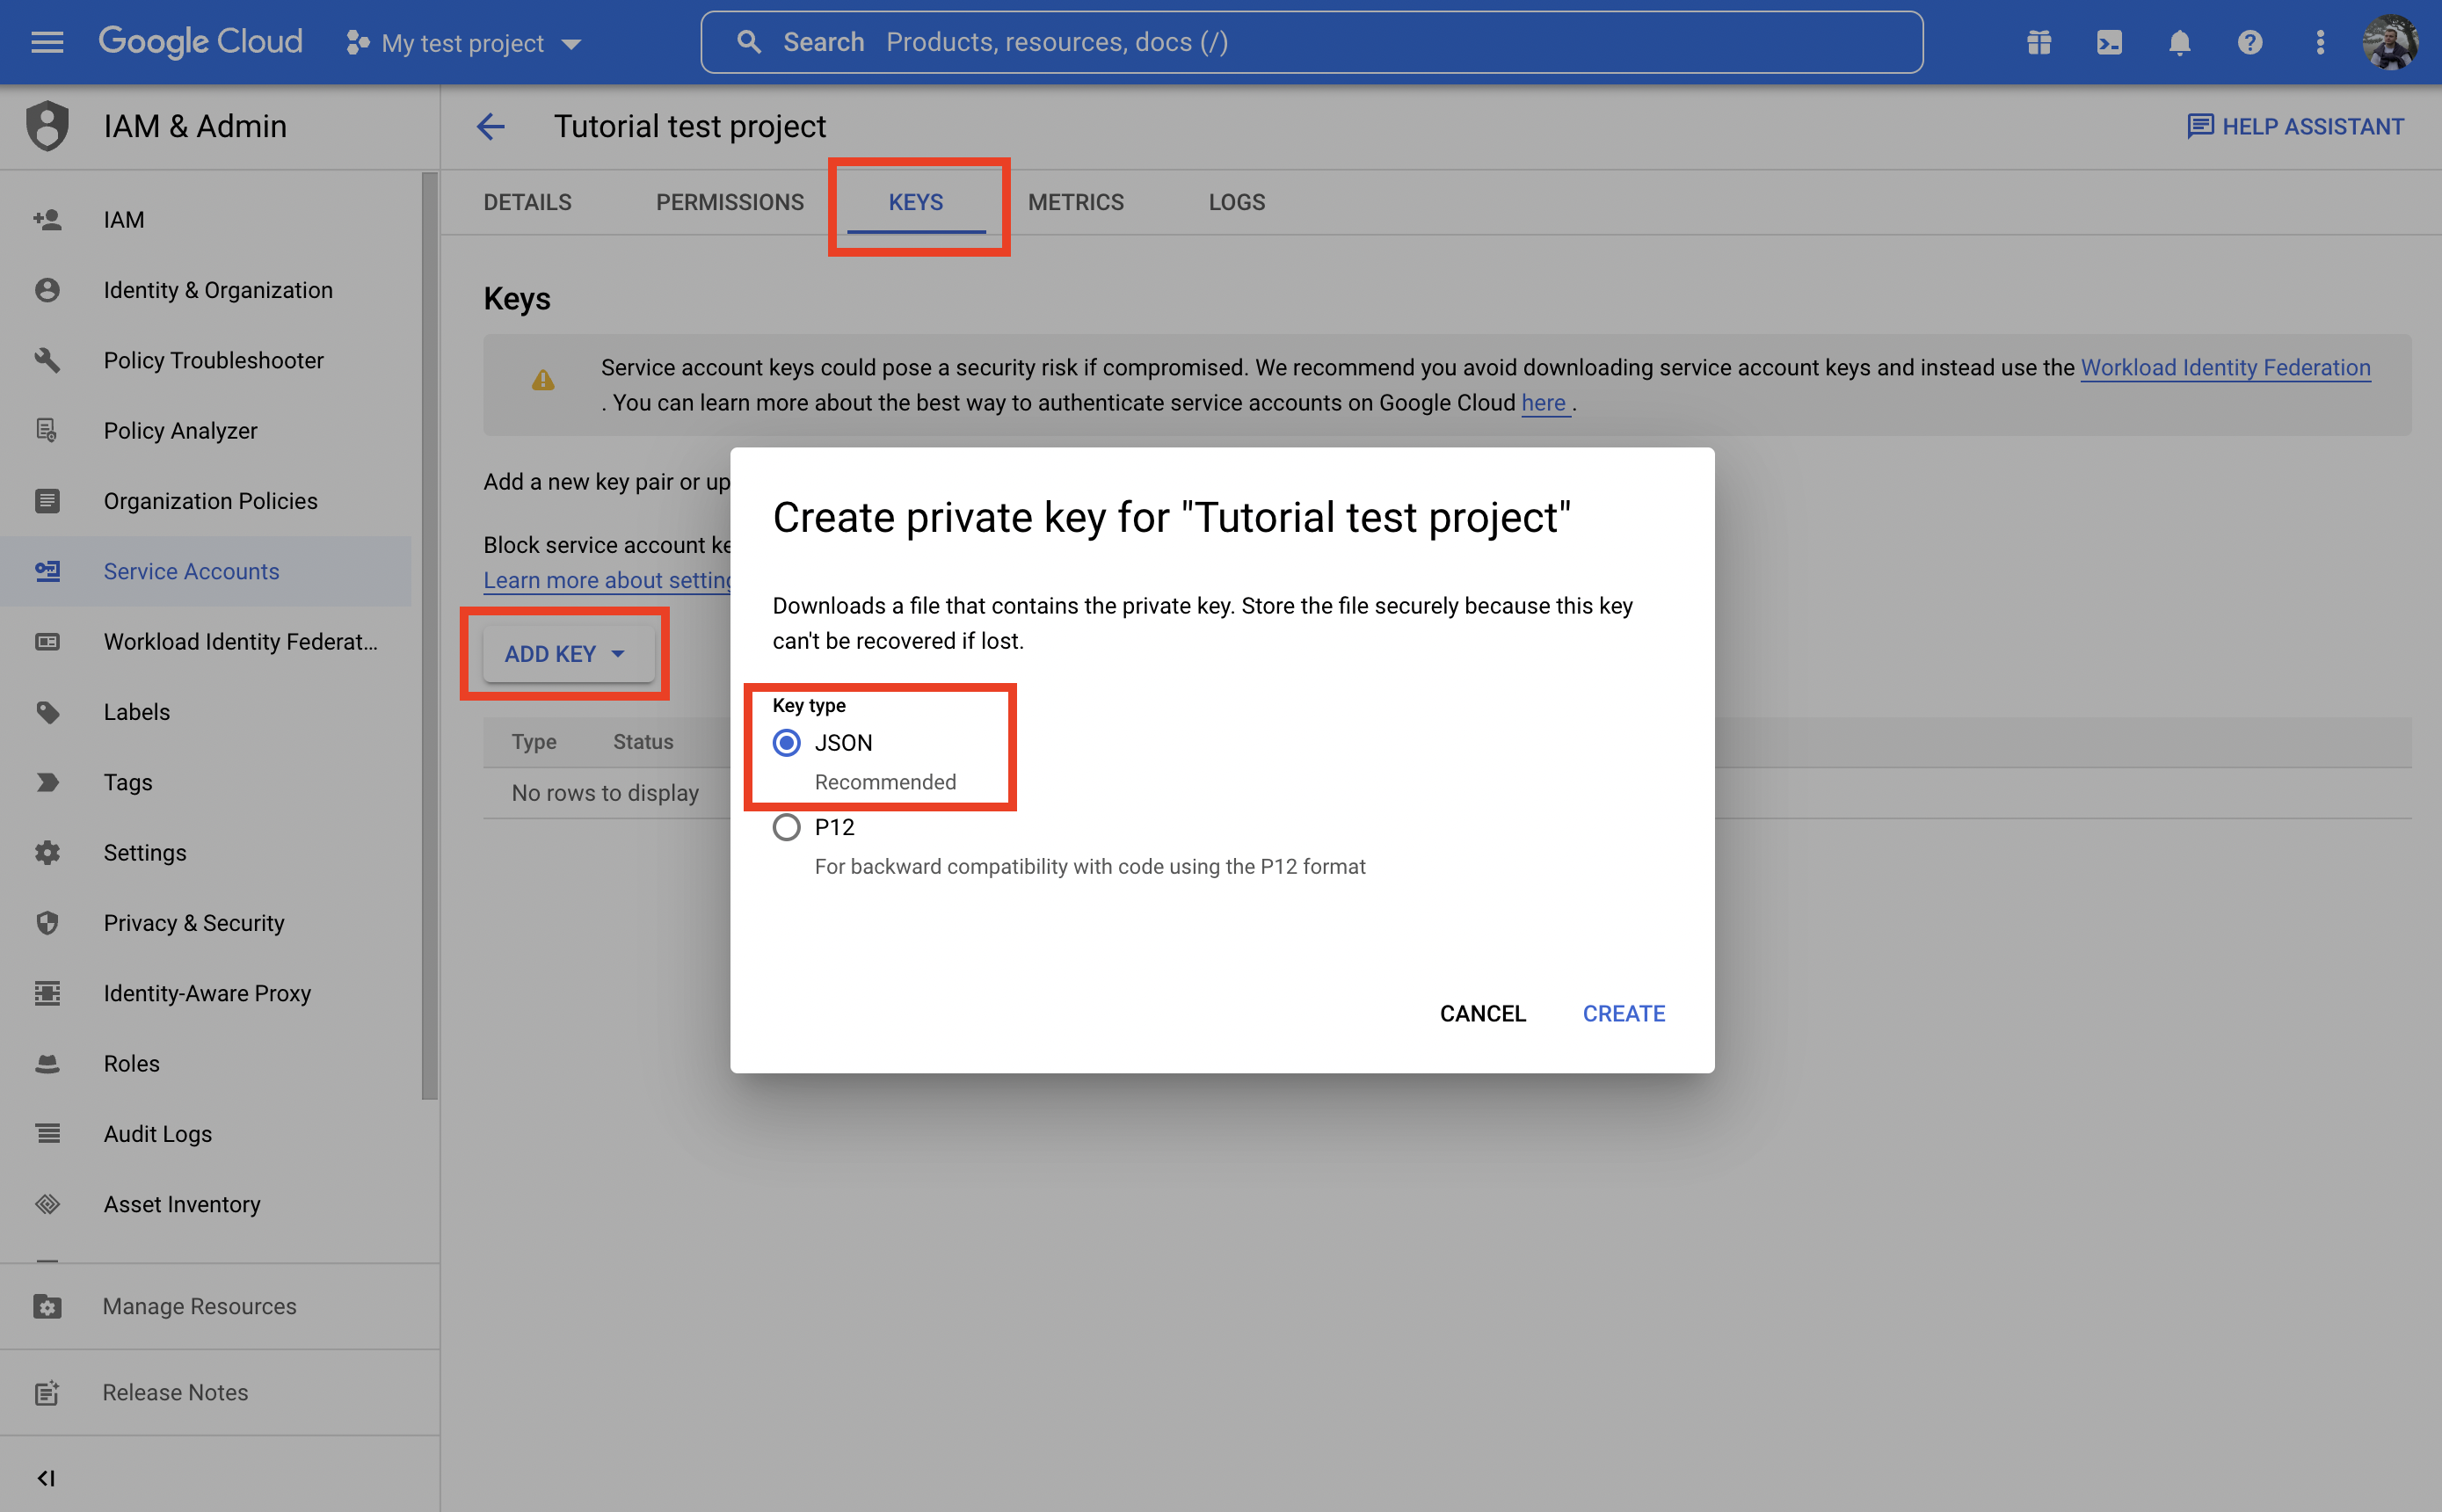
 4. Create and download a private JSON key by clicking the *ADD KEY* button in the *KEYS* section.
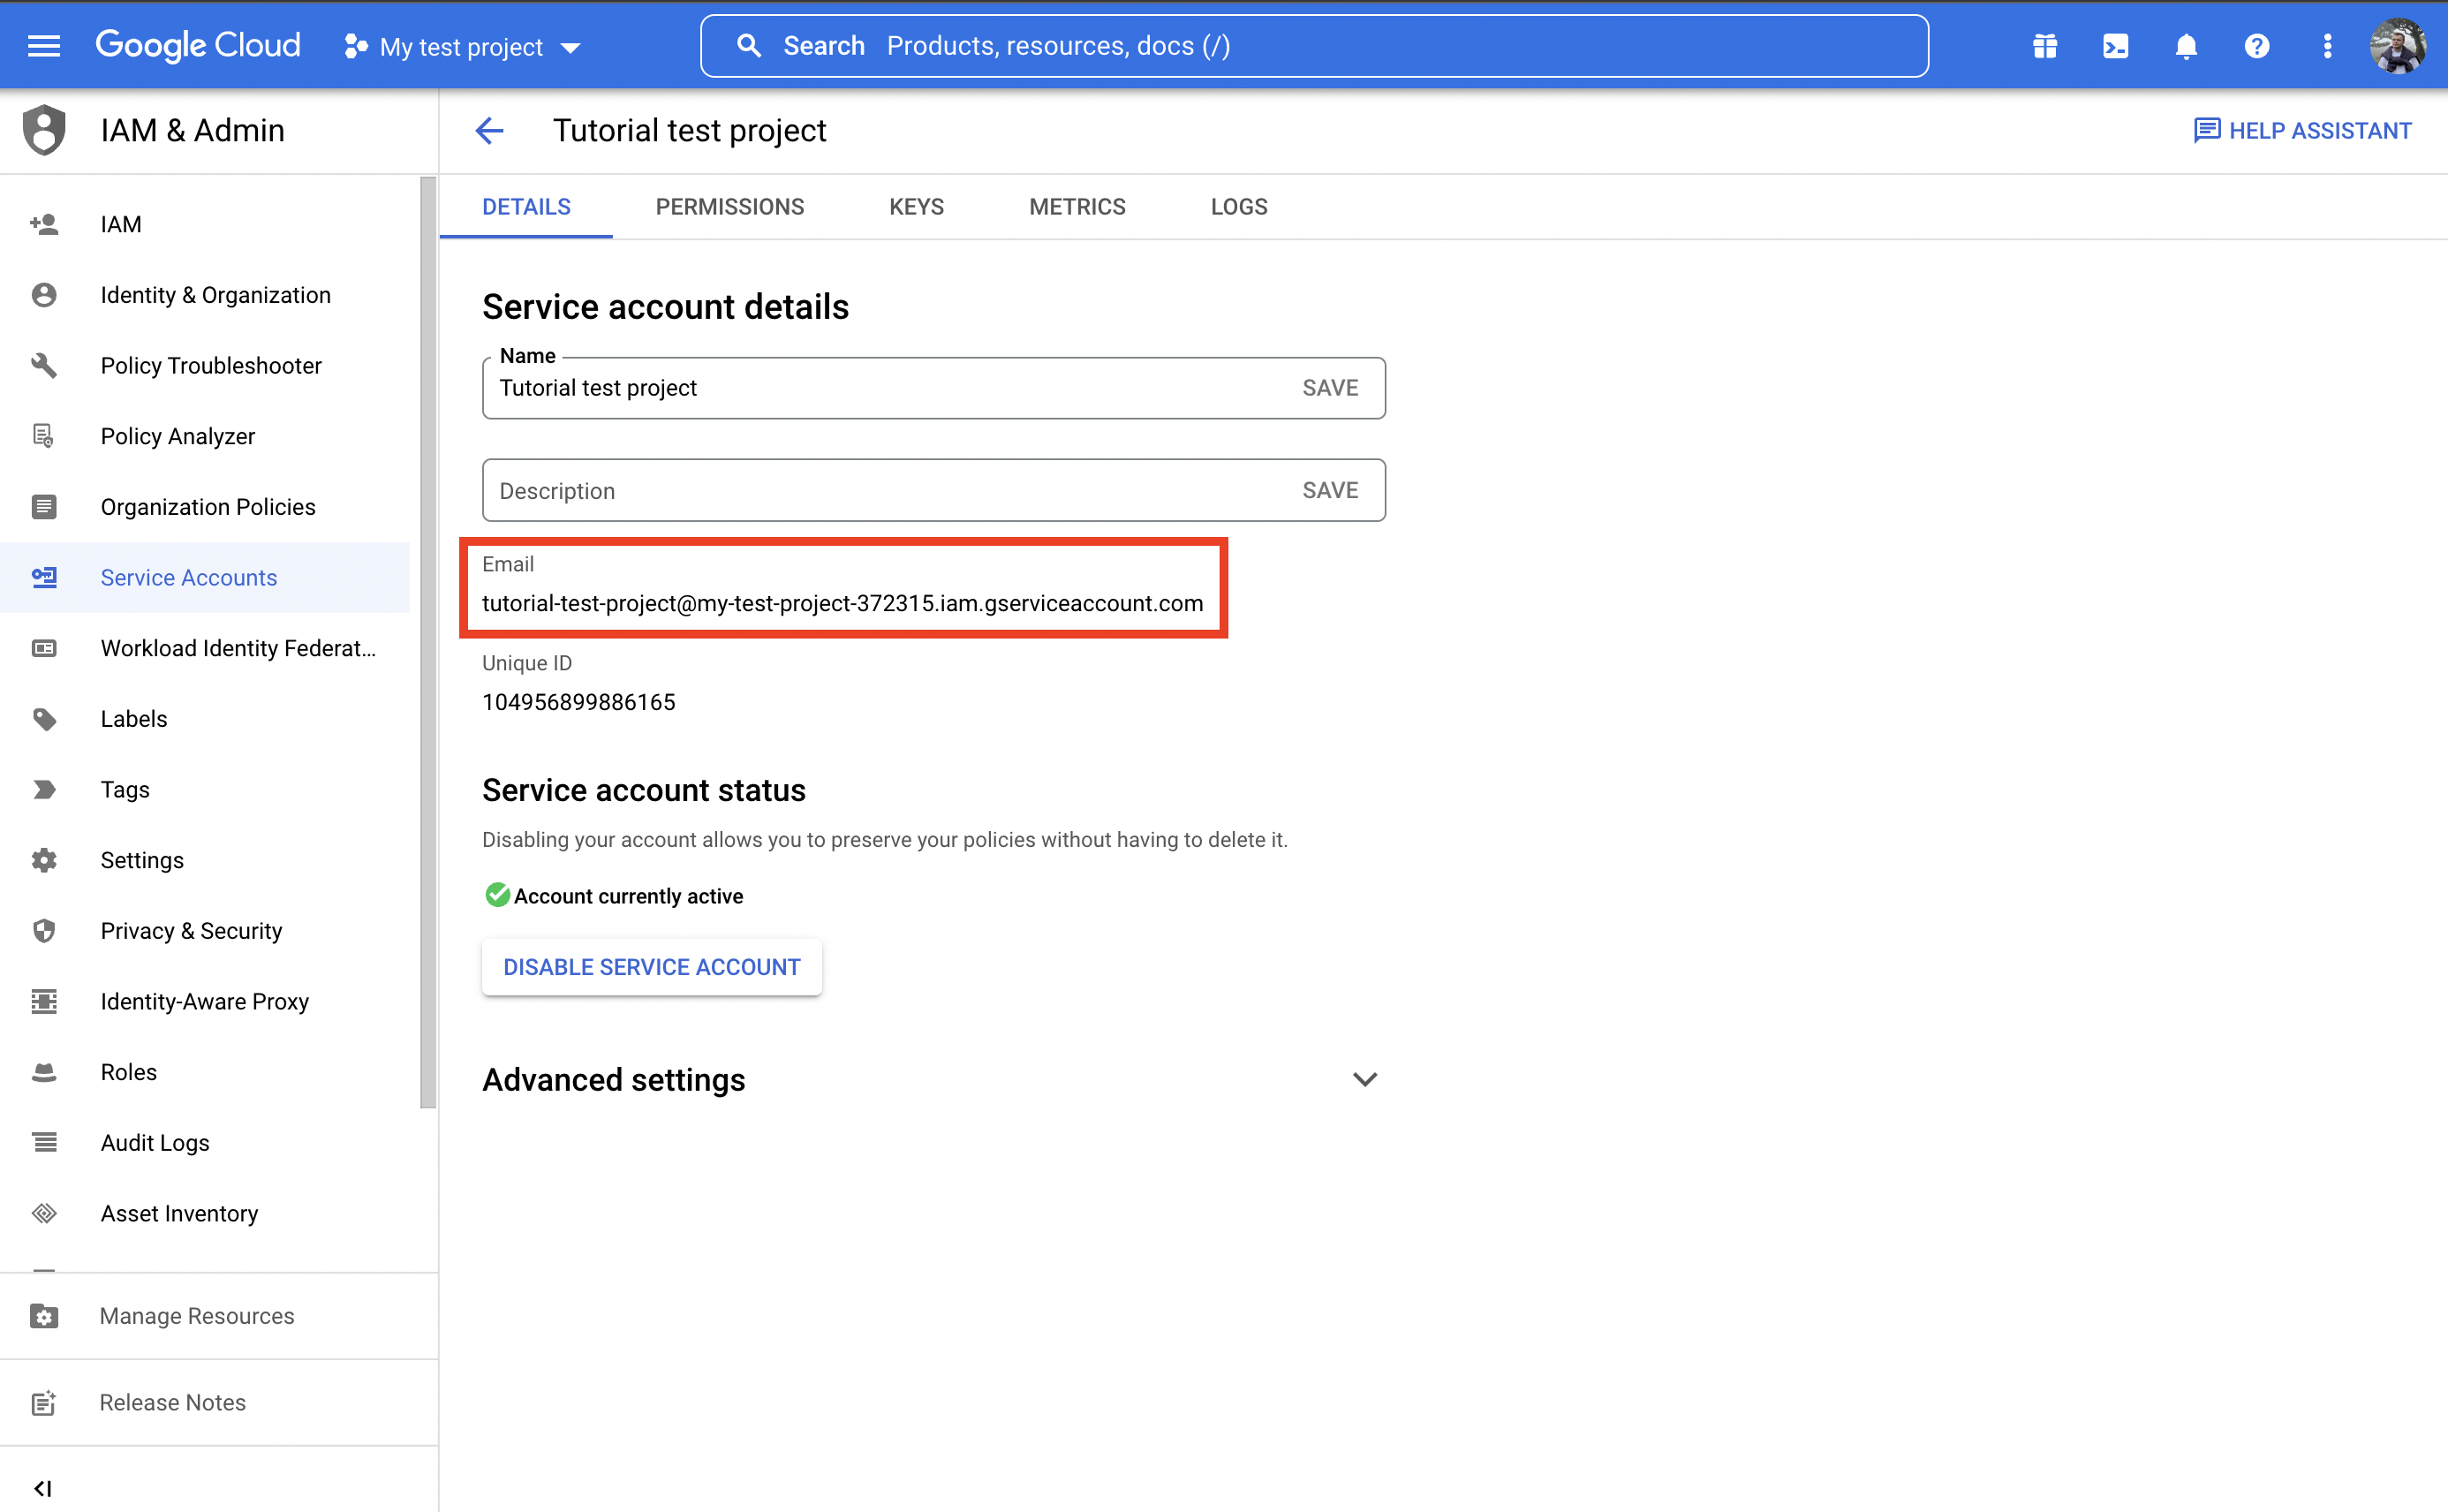
 5. Navigate to the *DETAILS* section and copy the Email value from the newly created service account. It will be needed in the following steps to grant bucket write access to the account.
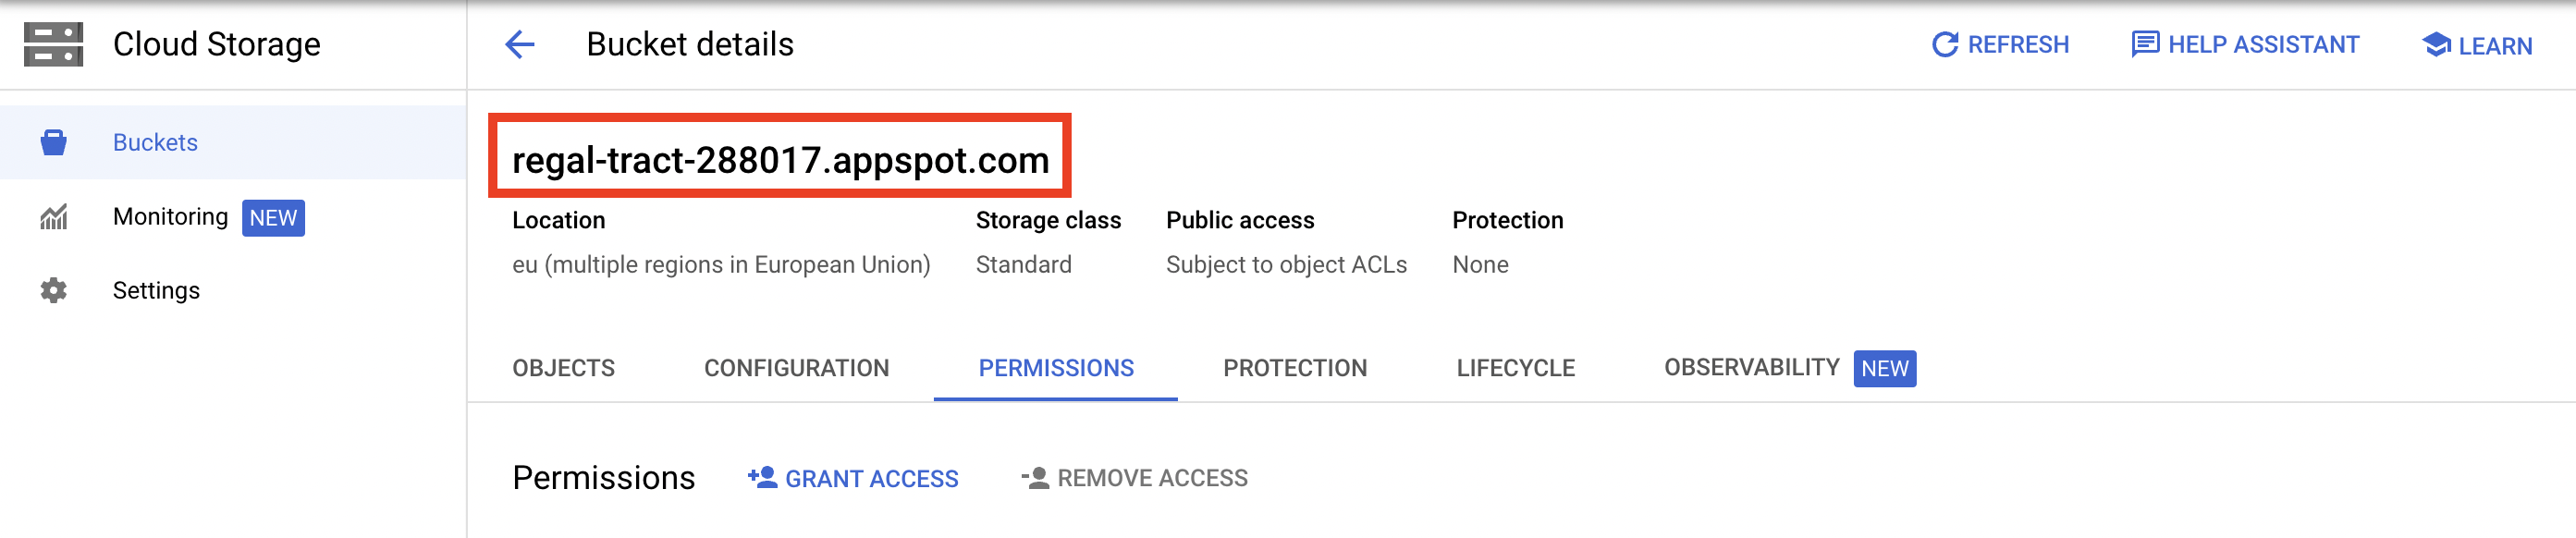
 6. Navigate to the [Buckets page](https://console.cloud.google.com/storage/browser) in the Google Cloud Storage.
7. Select existing or create a new bucket for Raw Data reports from Qonversion.
8. Navigate to the *PERMISSIONS* section and click *GRANT ACCESS*
6. Navigate to the [Buckets page](https://console.cloud.google.com/storage/browser) in the Google Cloud Storage.
7. Select existing or create a new bucket for Raw Data reports from Qonversion.
8. Navigate to the *PERMISSIONS* section and click *GRANT ACCESS*
 9. Enter the service account's Email from the 5th step above and select the *Storage Object Creator* role. Click *SAVE*.
 10. Save the bucket's name for further steps.
 11. Congratulations! Now you have finished the preparation steps in the Google Cloud console. The only thing left is to enter the bucket's name and provide previously downloaded private key JSON to Qonversion.
## Enter Google Cloud Storage credentials to Qonversion
1. Navigate to the [Google Cloud Storage](https://dash.qonversion.io/app/integration/create?name=google_cloud_storage) integration creation page.
11. Congratulations! Now you have finished the preparation steps in the Google Cloud console. The only thing left is to enter the bucket's name and provide previously downloaded private key JSON to Qonversion.
## Enter Google Cloud Storage credentials to Qonversion
1. Navigate to the [Google Cloud Storage](https://dash.qonversion.io/app/integration/create?name=google_cloud_storage) integration creation page.
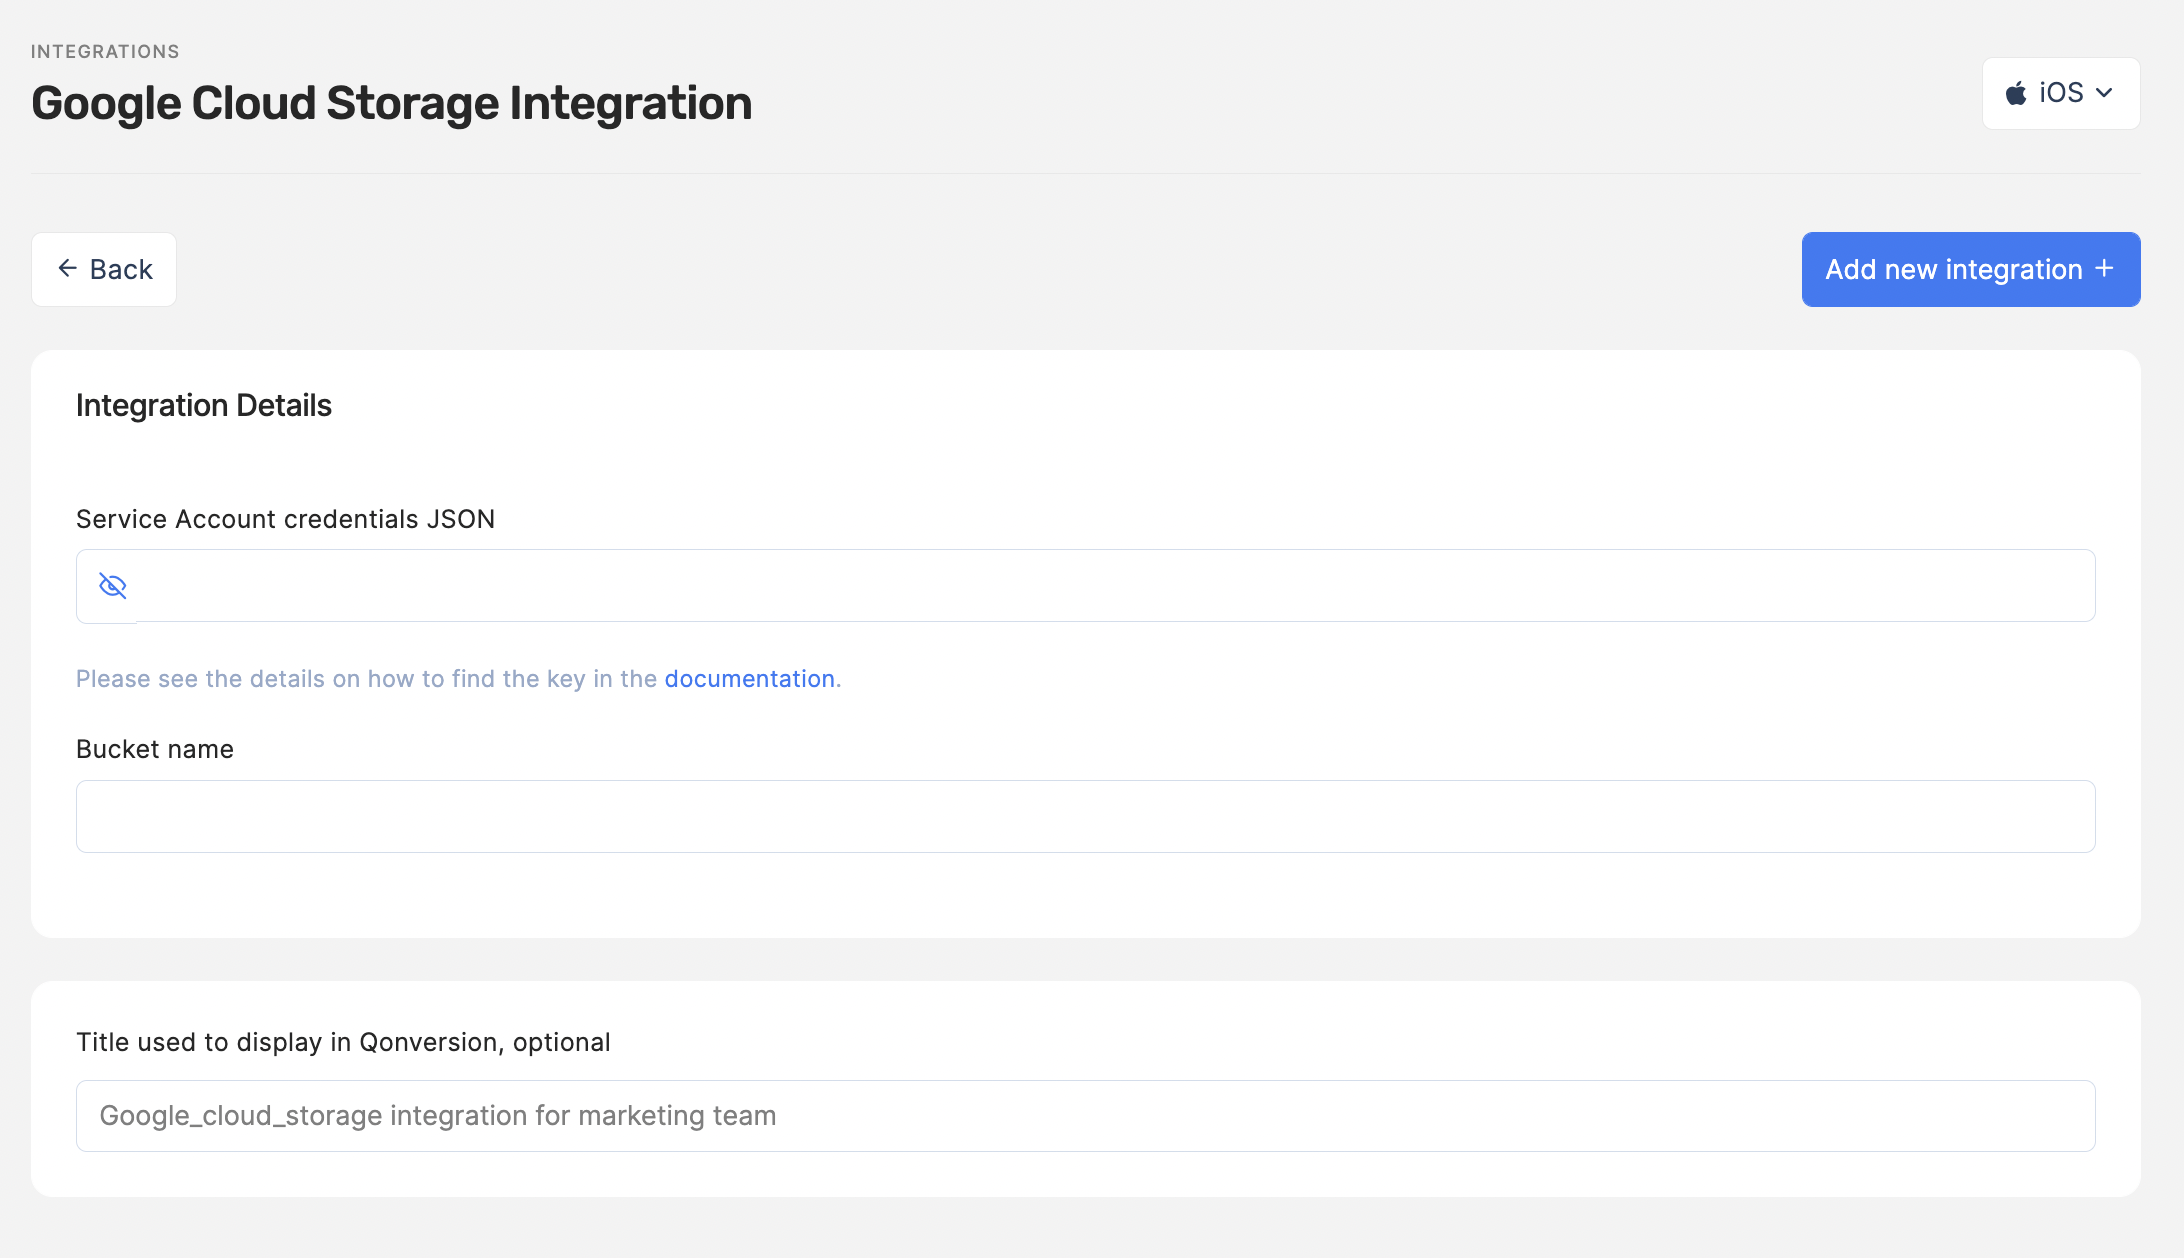 2. Enter data from the private key JSON and the bucket's name to the *Service Account credentials JSON* and *Bucket name* fields, respectively.
* You have gotten the private key JSON during the 4th step in the *Prepare Google Cloud Storage credentials* above.
* You have gotten the bucket's name during the 9th step in the *Prepare Google Cloud Storage credentials* above.
3. Click *the Add new integration +* button
4. Congratulation! Now you have successfully connected the Google Cloud Storage bucket to Qonversion. Navigate to the [Scheduled reports section](scheduled-reports#google-cloud-storage) to launch report uploading to the bucket.
***
What’s Next
* [Scheduled Reports](scheduled-reports)
2. Enter data from the private key JSON and the bucket's name to the *Service Account credentials JSON* and *Bucket name* fields, respectively.
* You have gotten the private key JSON during the 4th step in the *Prepare Google Cloud Storage credentials* above.
* You have gotten the bucket's name during the 9th step in the *Prepare Google Cloud Storage credentials* above.
3. Click *the Add new integration +* button
4. Congratulation! Now you have successfully connected the Google Cloud Storage bucket to Qonversion. Navigate to the [Scheduled reports section](scheduled-reports#google-cloud-storage) to launch report uploading to the bucket.
***
What’s Next
* [Scheduled Reports](scheduled-reports)