> ## Documentation Index
> Fetch the complete documentation index at: https://documentation.qonversion.io/llms.txt
> Use this file to discover all available pages before exploring further.
# Amazon S3
> Send raw data reports directly to your Amazon S3 bucket
Qonversion allows you to upload all the raw revenue data we track to your Amazon S3 bucket. You can find more details about raw data reports [here](scheduled-reports).
## Prepare Amazon S3 credentials
To upload raw data reports to your bucket, Qonversion needs Access Key ID and Secret access key for the user with write access to the corresponding bucket.
1. Navigate to the [IAM Console](https://console.aws.amazon.com/iam/), select the *Users* section and click the *Add users* button
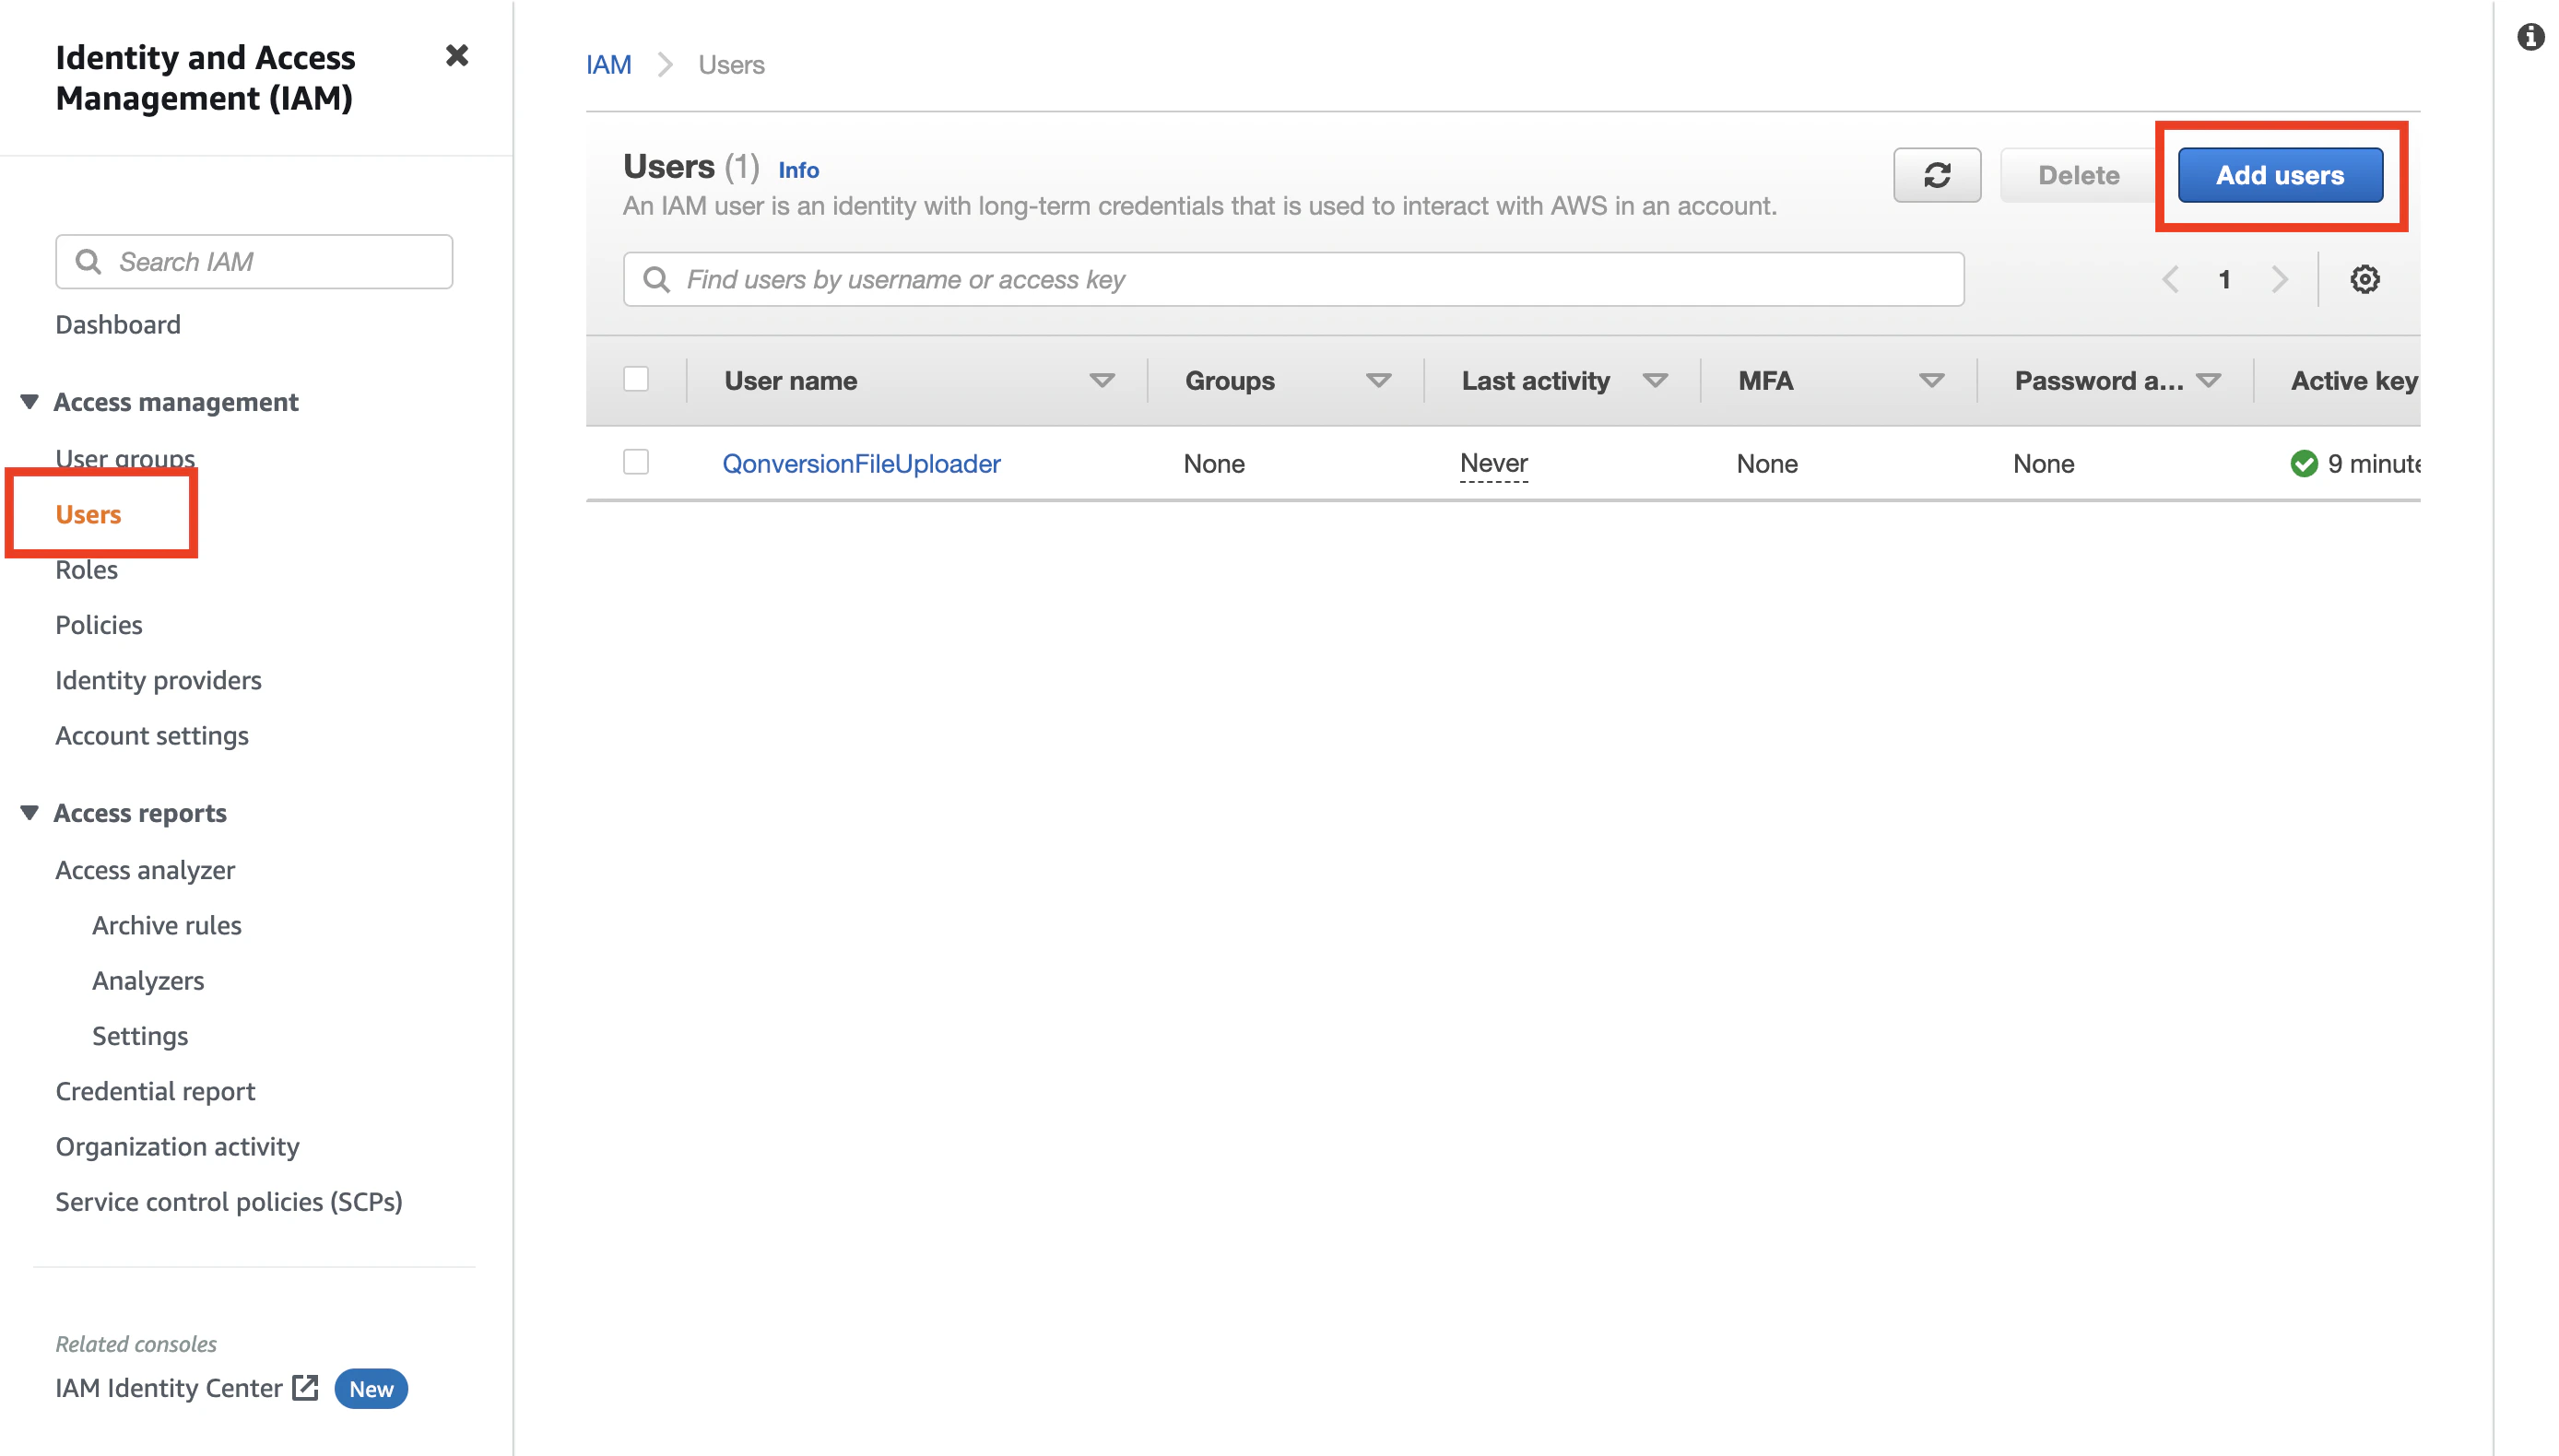 2. Select *Access key - Programmatic access* on the first step.
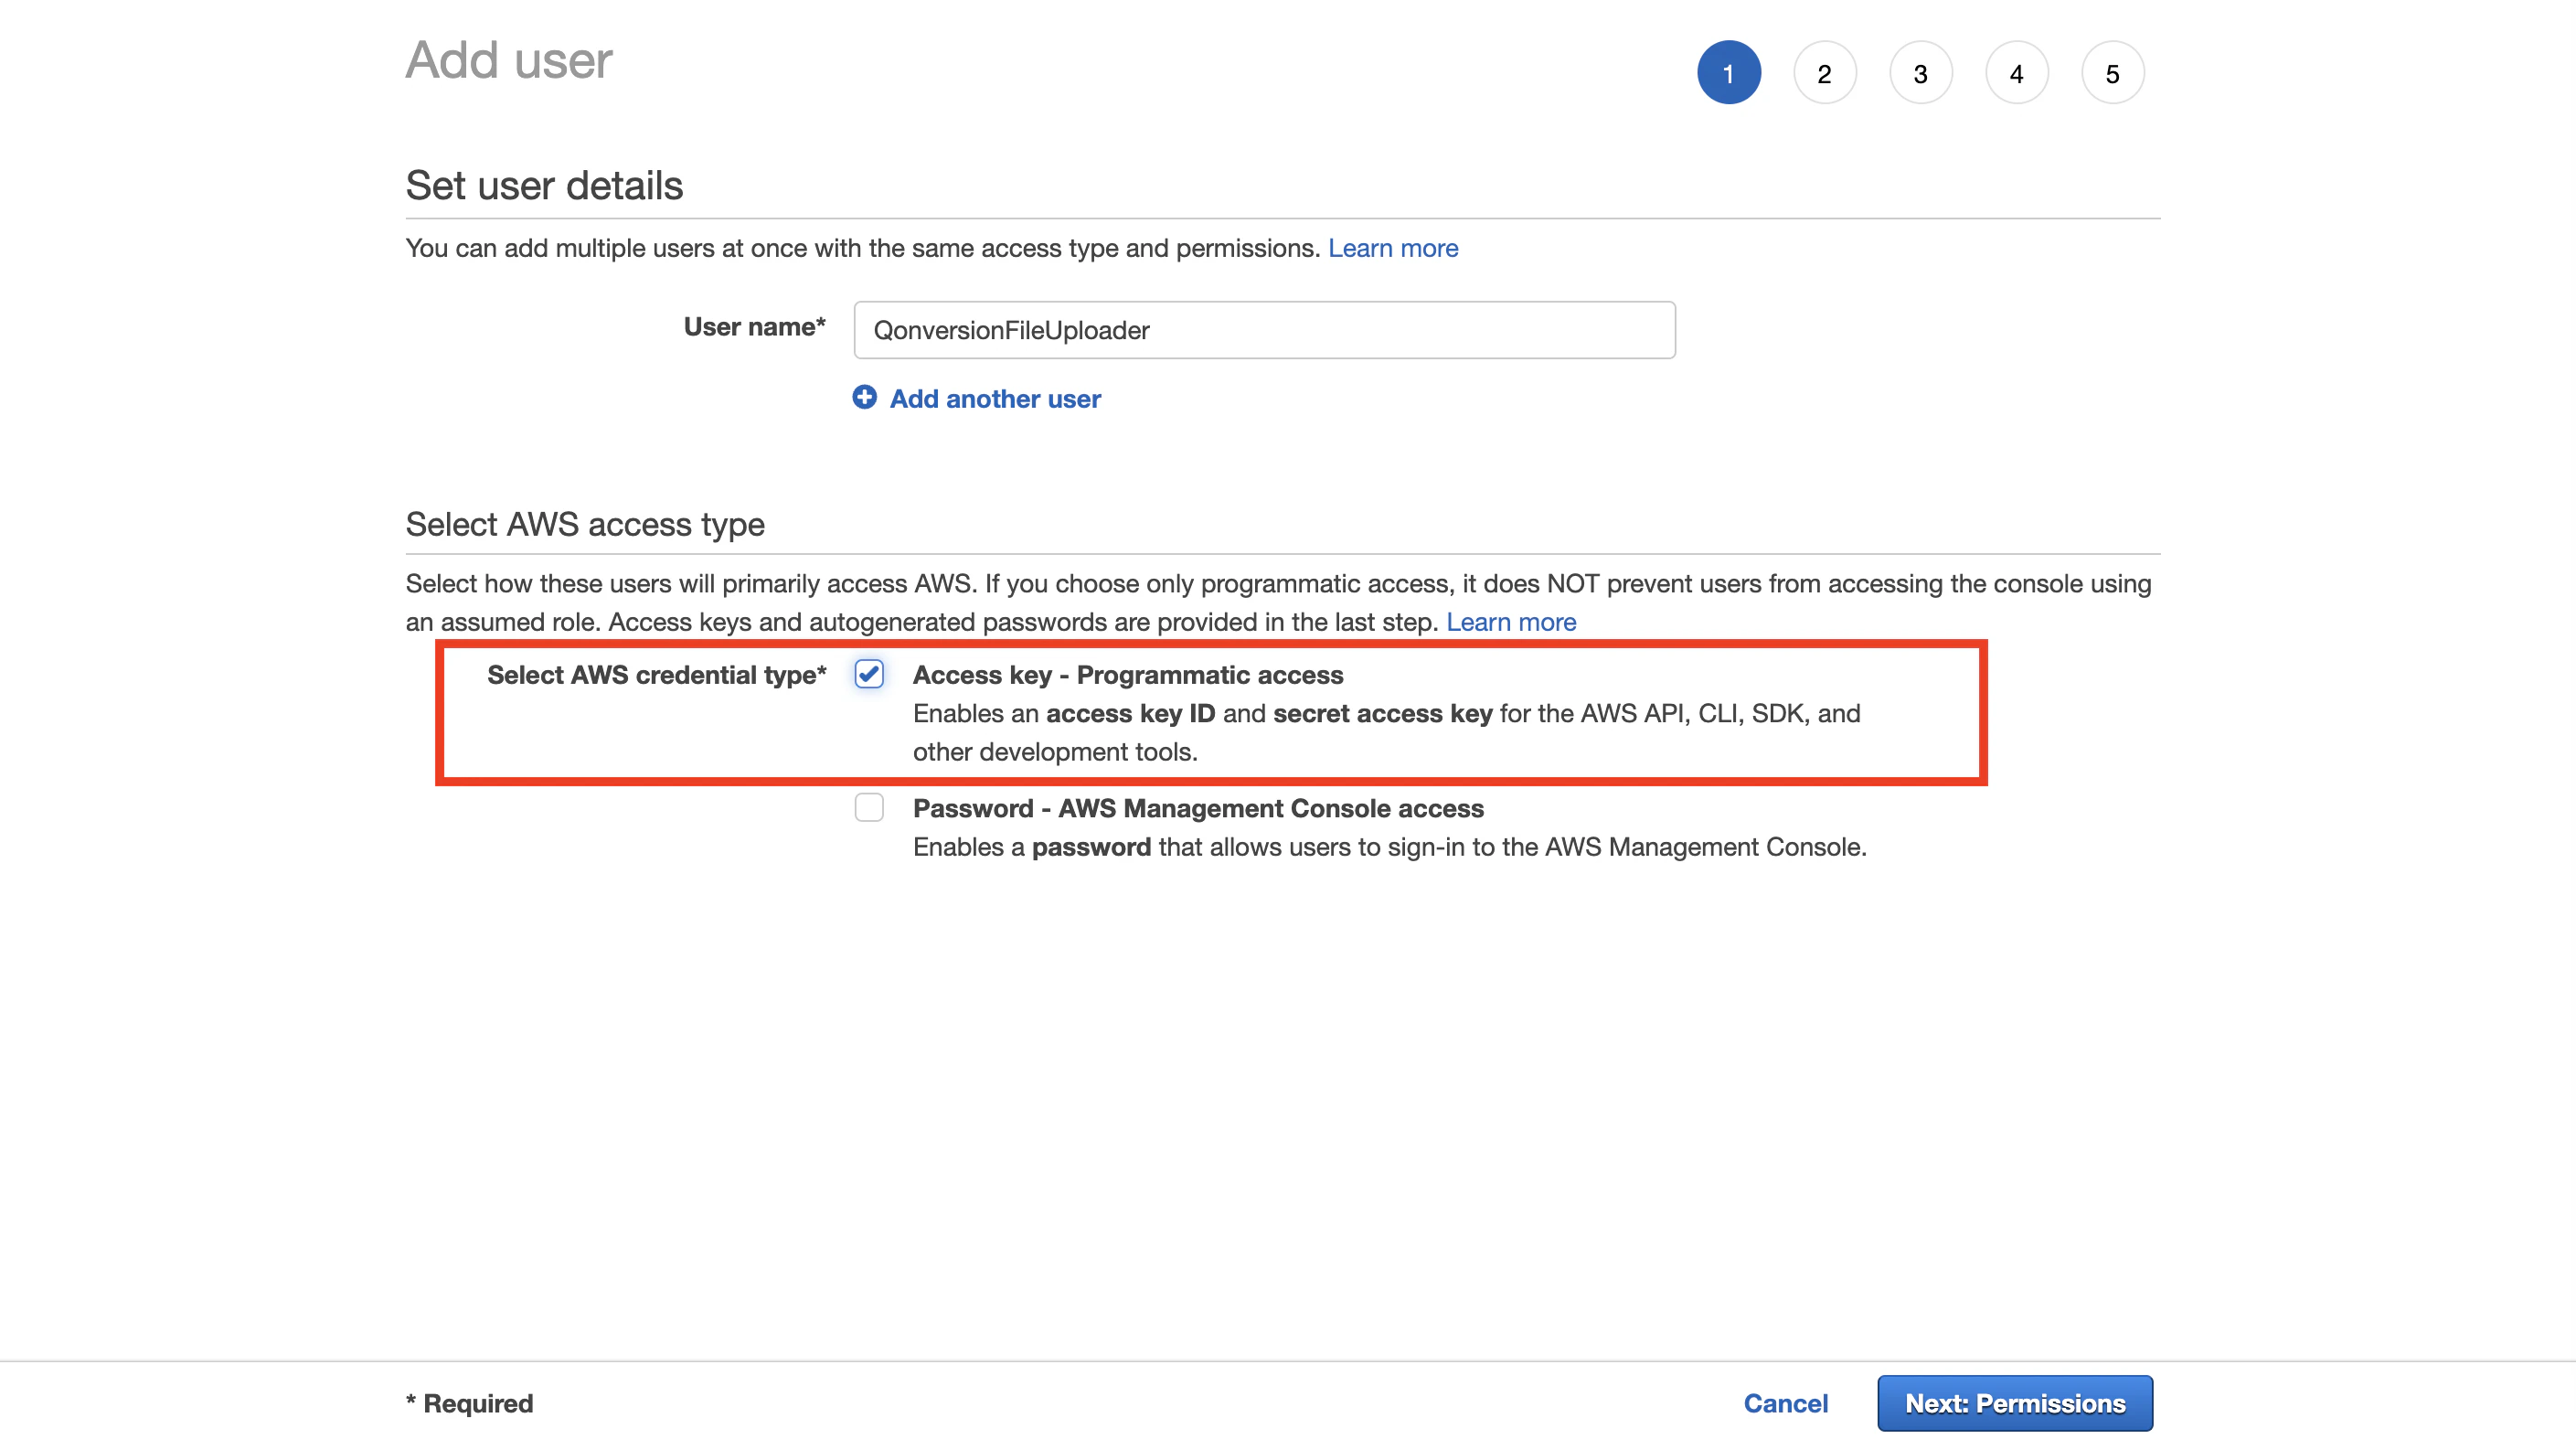 3. There is no need to add any permissions during the user creation; navigate to the final step.
4. Download the .csv file with the user's credentials; you will need them later.
3. There is no need to add any permissions during the user creation; navigate to the final step.
4. Download the .csv file with the user's credentials; you will need them later.
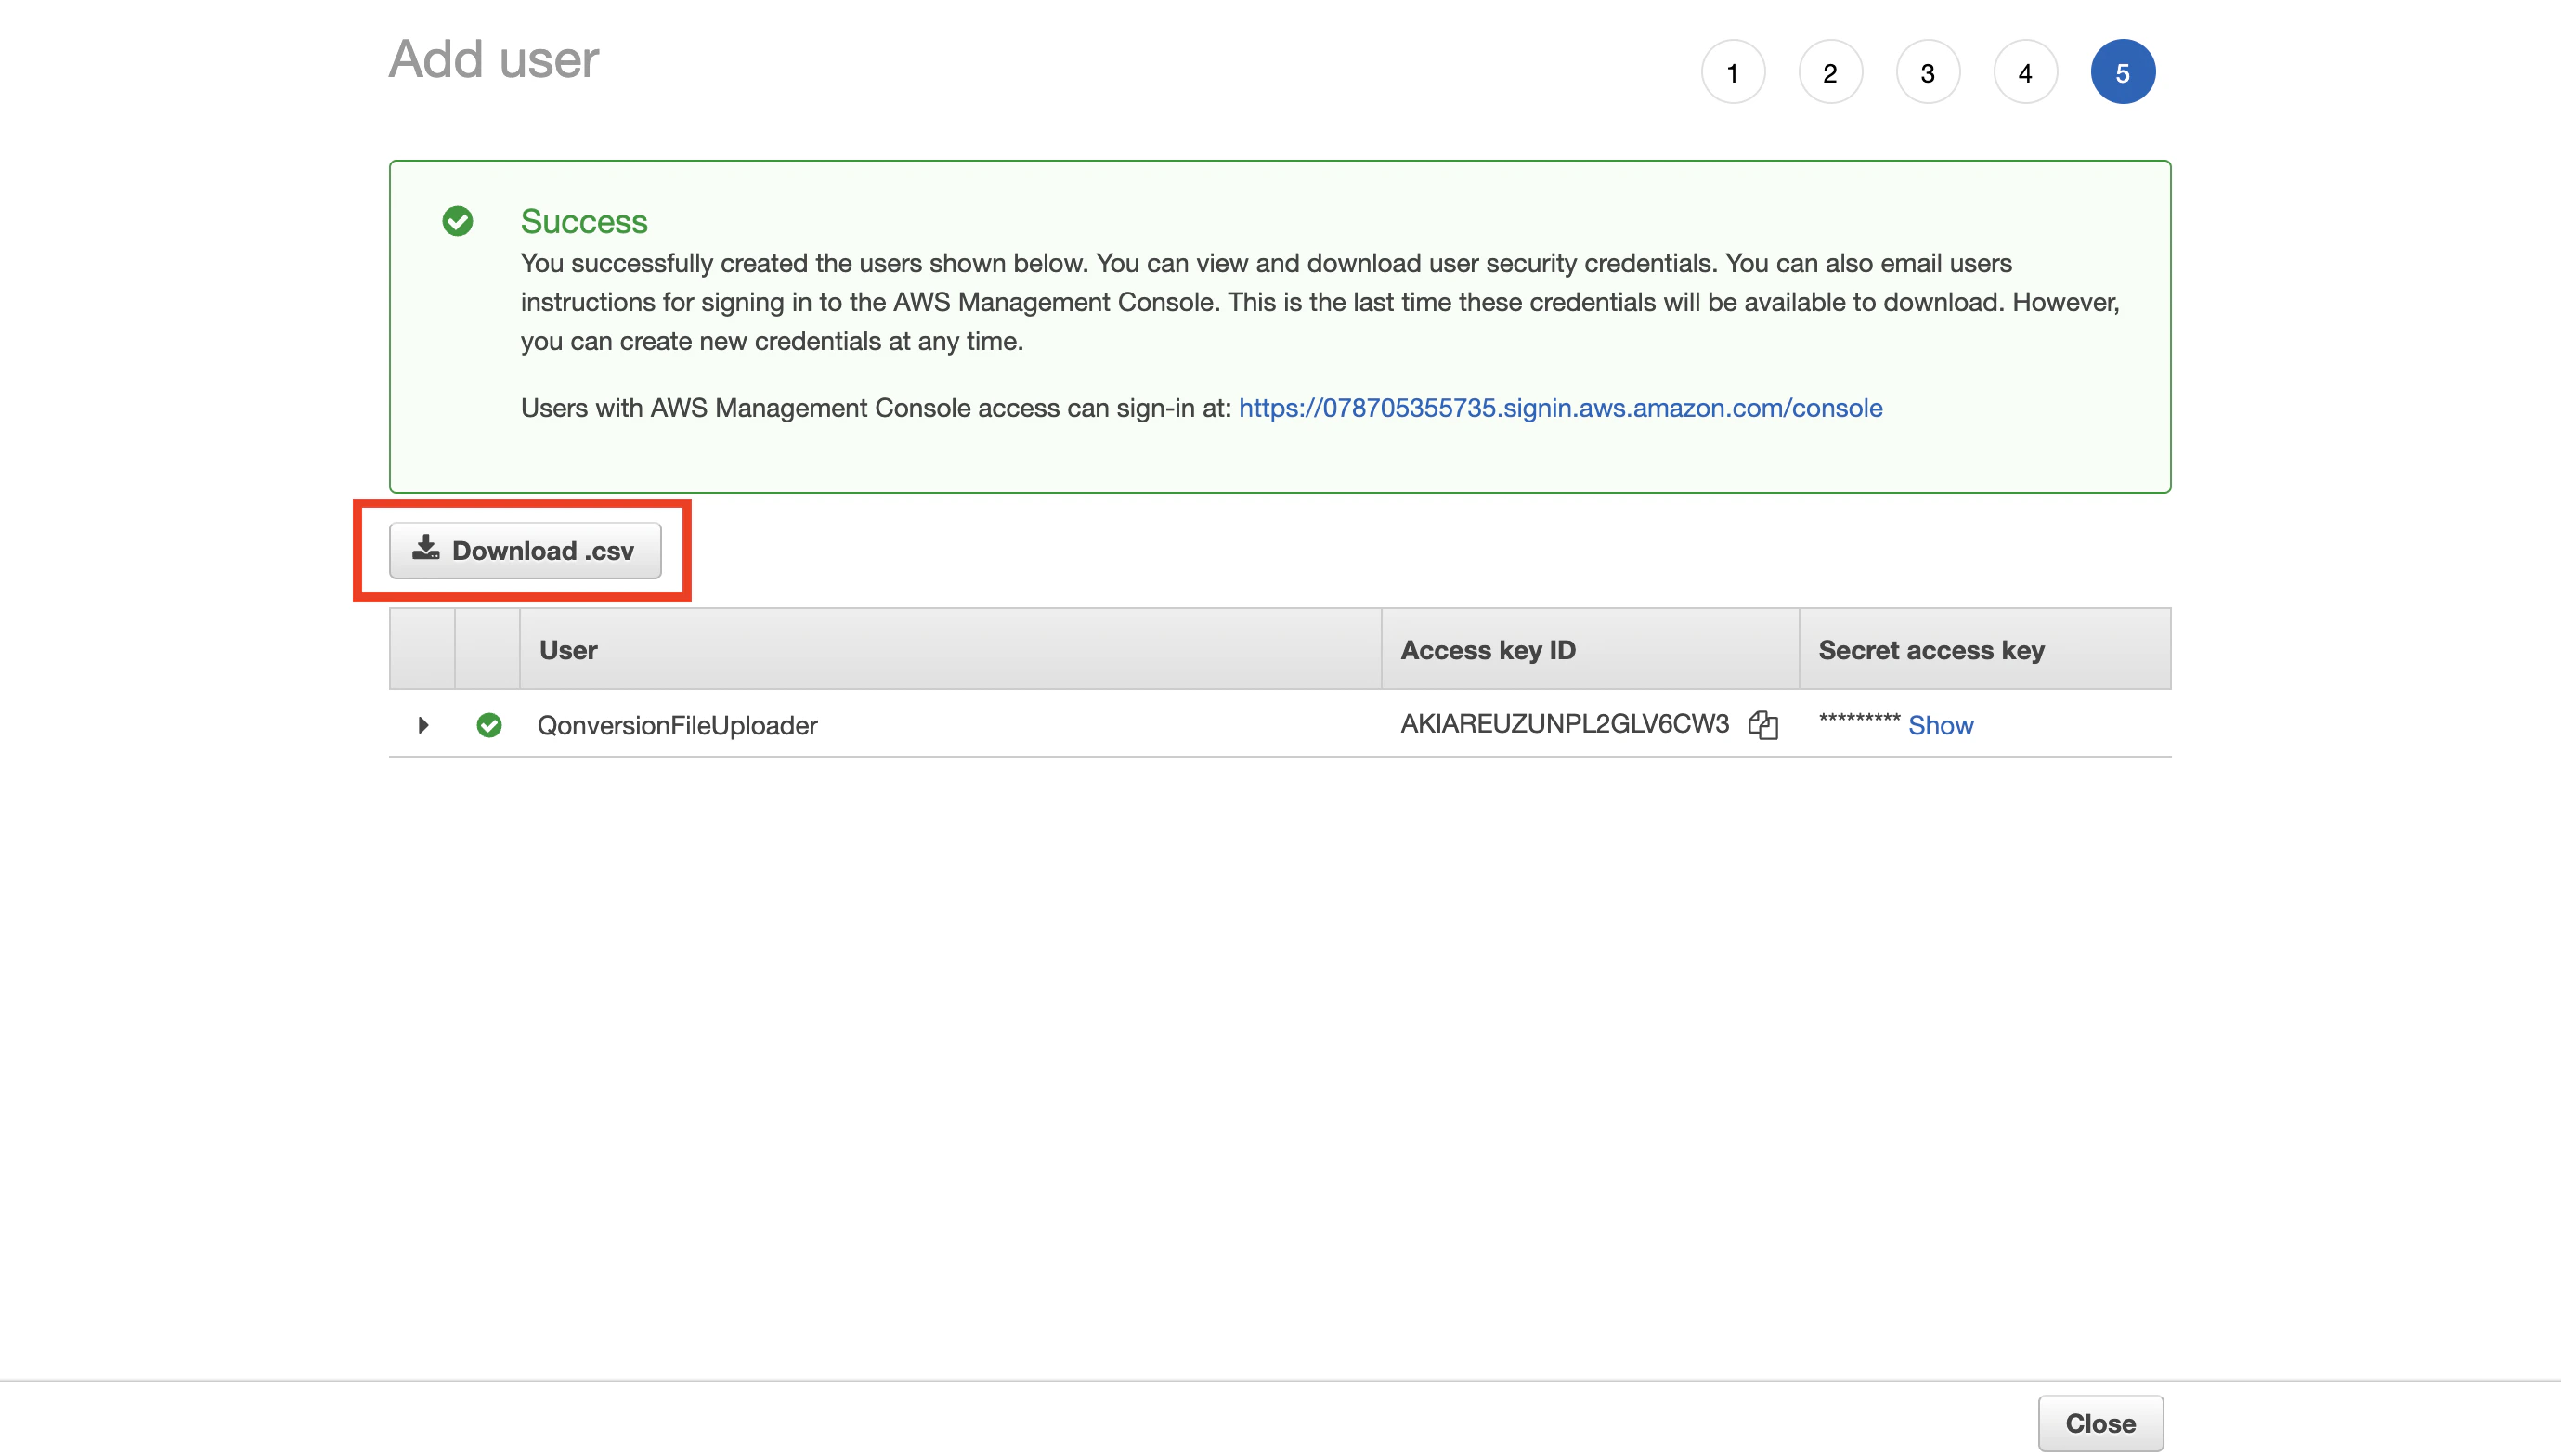 5. Navigate to the recently created user and save the *User ARN* value; you will need it later.
 6. [Navigate to your bucket list](https://console.aws.amazon.com/s3/), and create a new bucket or select an existing one.
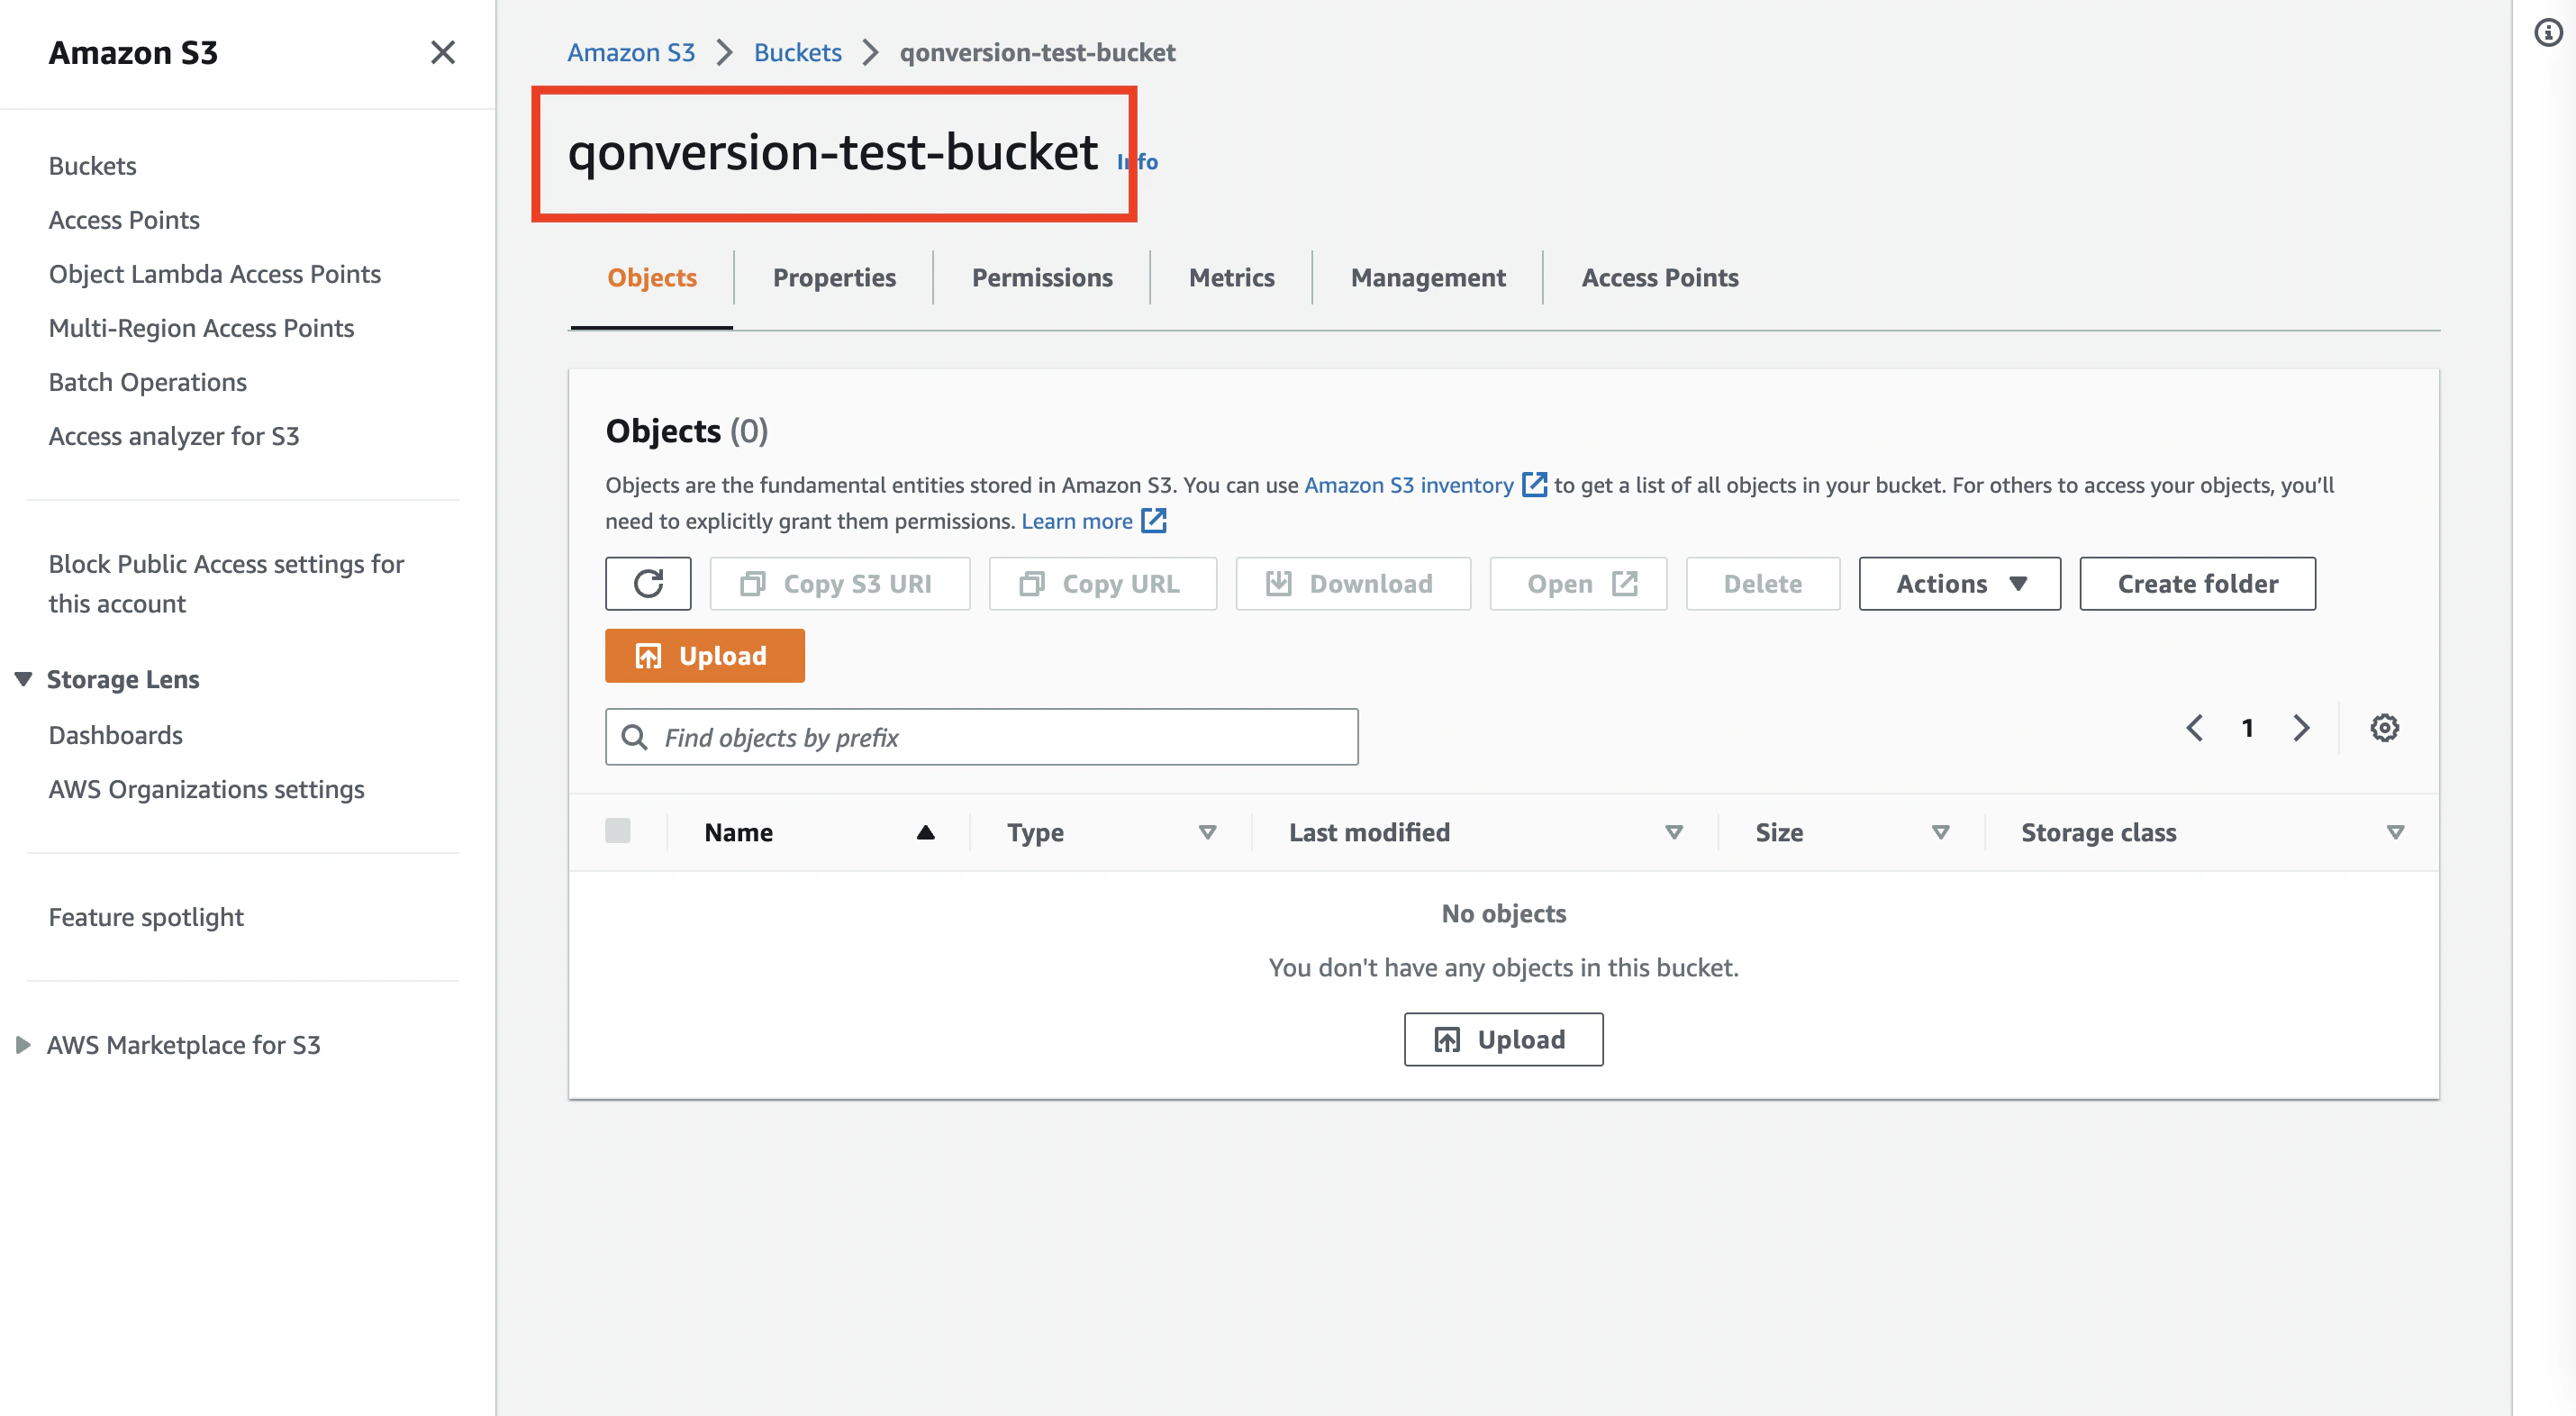
7. Copy your bucket name.
6. [Navigate to your bucket list](https://console.aws.amazon.com/s3/), and create a new bucket or select an existing one.
7. Copy your bucket name.
 8. Create a policy to allow the User ARN from the 5th step to get *PutObject* action access to the bucket from the 7th step.
* For example, you can use [AWS Policy Generator](https://awspolicygen.s3.amazonaws.com/policygen.html), where *Principal = User ARN* and *Amazon Resource Name (ARN) = arn:aws:s3:::\[your bucket name from the 7th step]/\**
* Or copy the JSON below after replacing *qonversion-test-bucket* and *arn:aws:iam::078705355735:user/QonversionFileUploader* in the *Resource* and *AWS* field, respectively, with your values.
```json theme={null}
{
"Id": "Policy1672076420793",
"Version": "2012-10-17",
"Statement": [
{
"Sid": "Stmt1672070877286",
"Action": [
"s3:PutObject"
],
"Effect": "Allow",
"Resource": "arn:aws:s3:::qonversion-test-bucket/*",
"Principal": {
"AWS": [
"arn:aws:iam::078705355735:user/QonversionFileUploader"
]
}
}
]
}
```
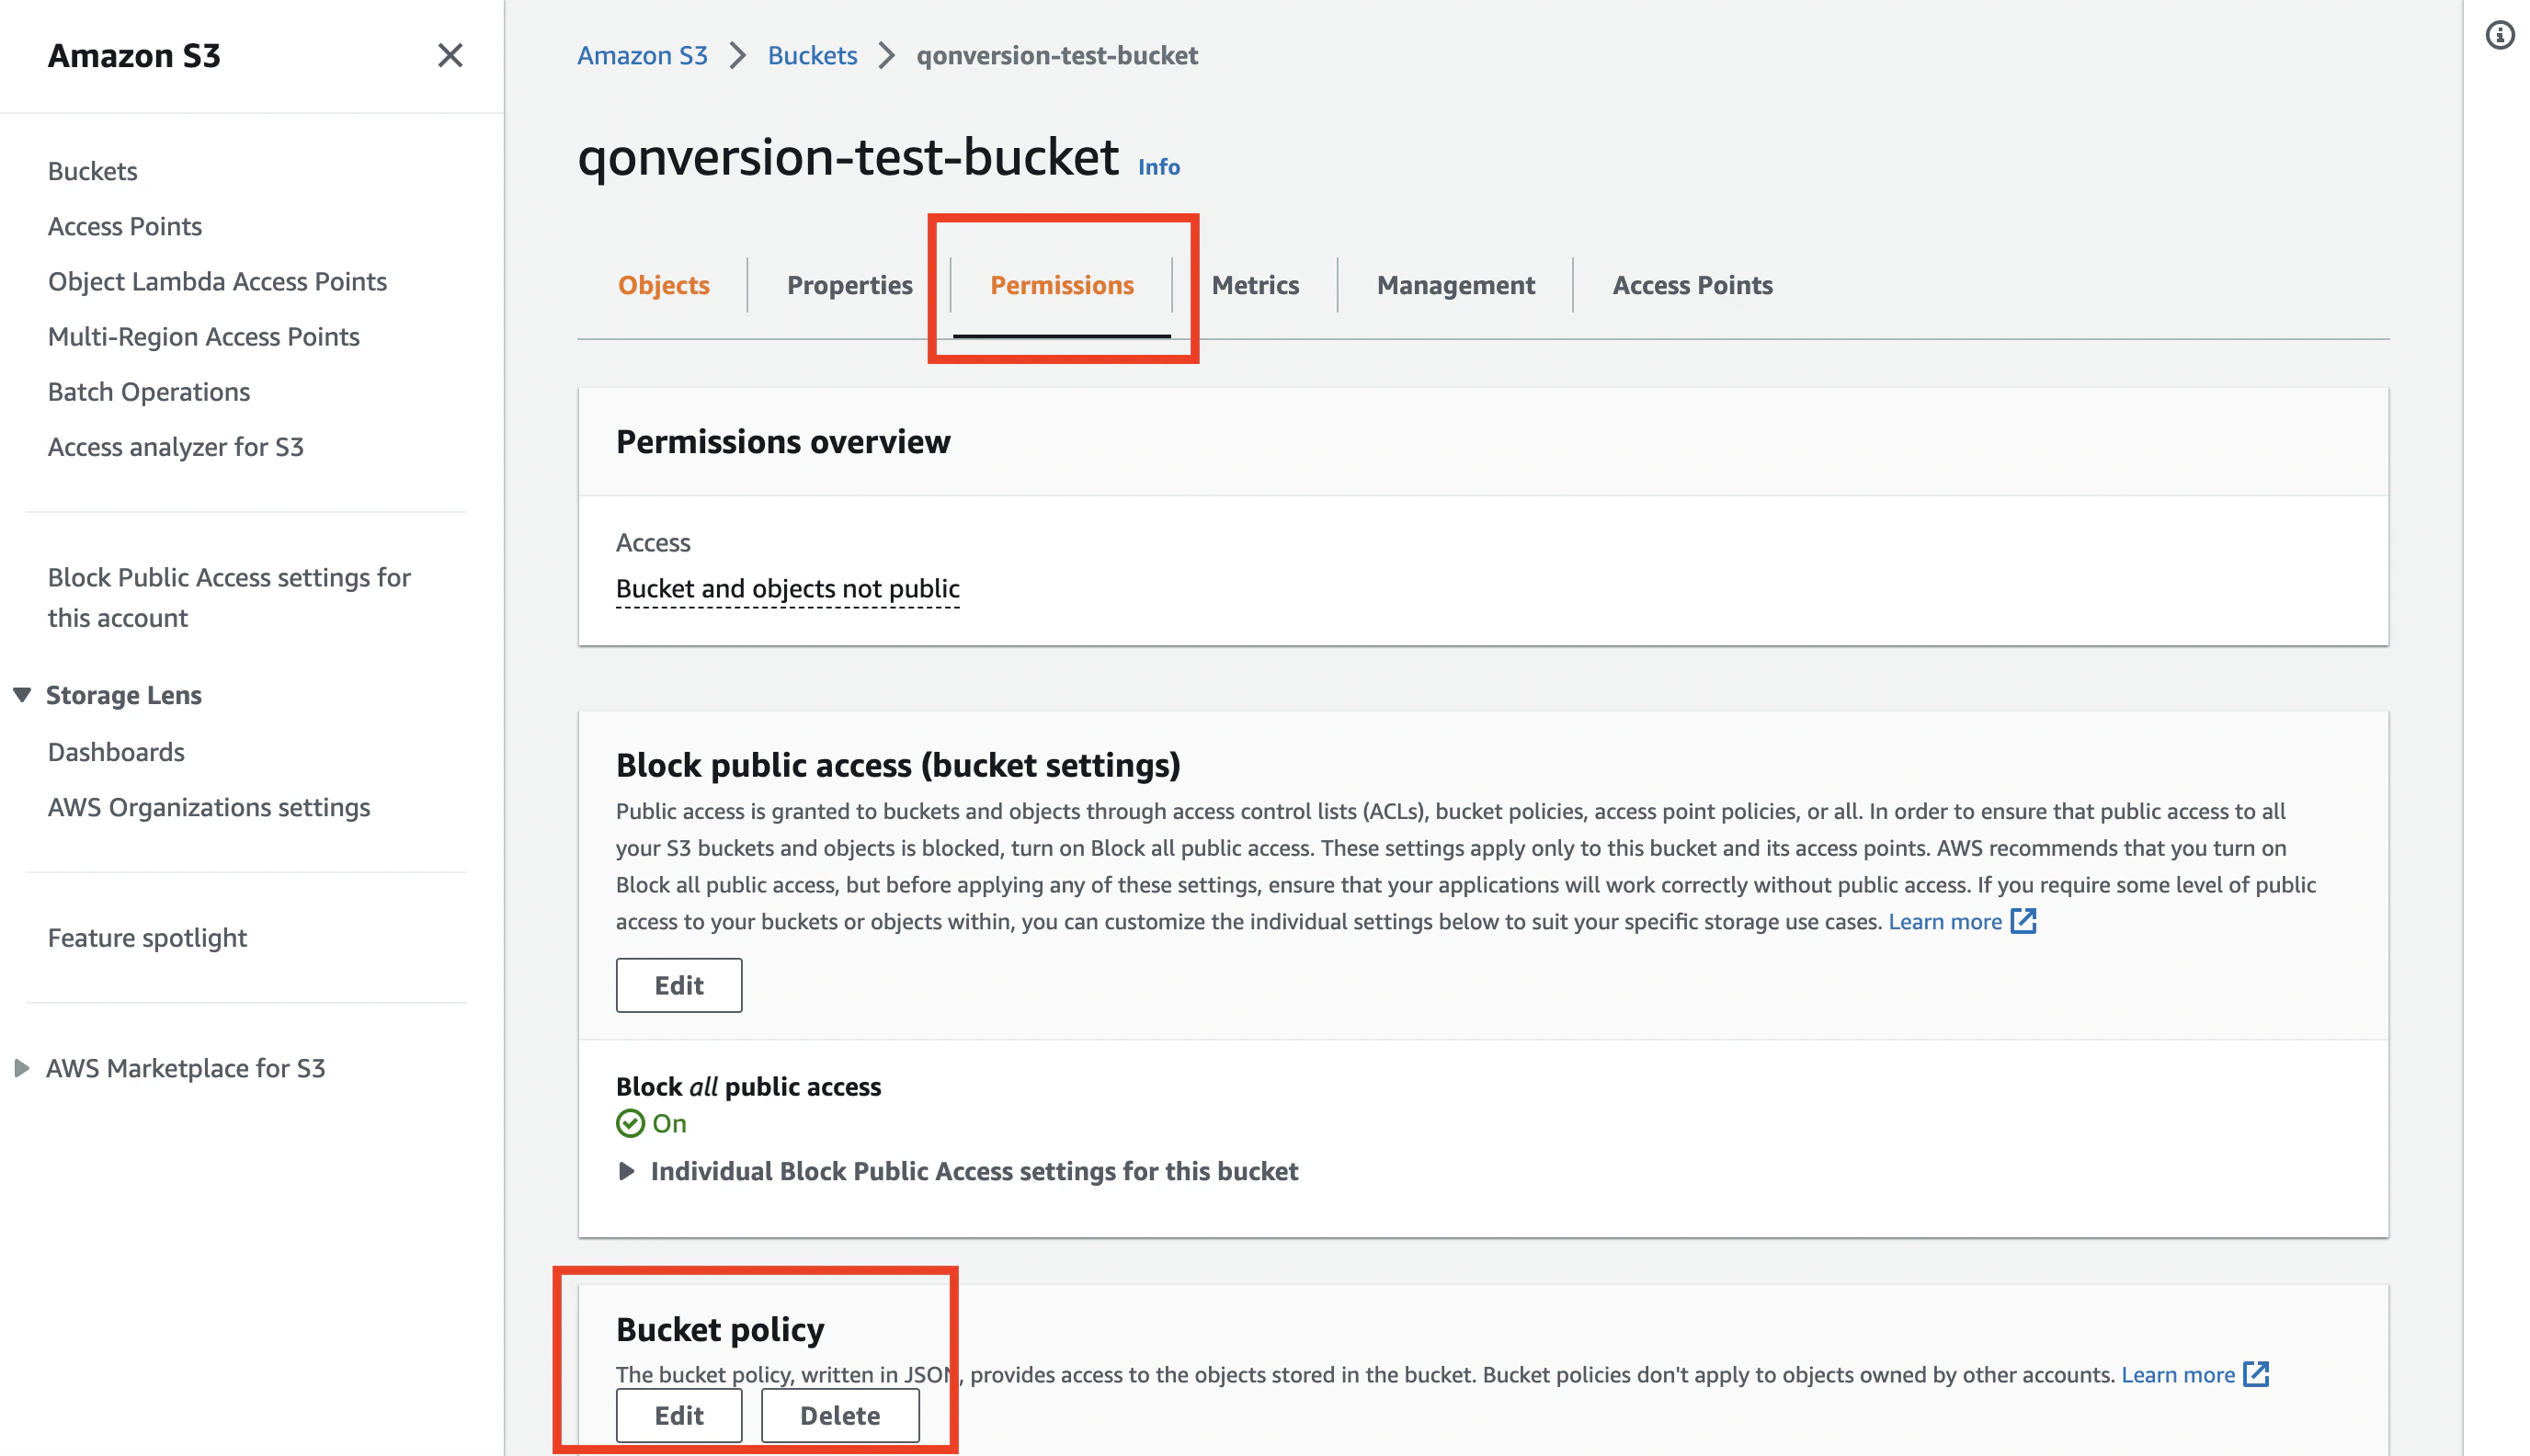
9. Final step to prepare Amazon S3 credentials. Navigate to the *Permissions* section in your bucket, click the *Edit* button in the *Bucket policy* field and paste the JSON from the previous step. Congratulations, after saving the changes, your configuration is ready to use!
8. Create a policy to allow the User ARN from the 5th step to get *PutObject* action access to the bucket from the 7th step.
* For example, you can use [AWS Policy Generator](https://awspolicygen.s3.amazonaws.com/policygen.html), where *Principal = User ARN* and *Amazon Resource Name (ARN) = arn:aws:s3:::\[your bucket name from the 7th step]/\**
* Or copy the JSON below after replacing *qonversion-test-bucket* and *arn:aws:iam::078705355735:user/QonversionFileUploader* in the *Resource* and *AWS* field, respectively, with your values.
```json theme={null}
{
"Id": "Policy1672076420793",
"Version": "2012-10-17",
"Statement": [
{
"Sid": "Stmt1672070877286",
"Action": [
"s3:PutObject"
],
"Effect": "Allow",
"Resource": "arn:aws:s3:::qonversion-test-bucket/*",
"Principal": {
"AWS": [
"arn:aws:iam::078705355735:user/QonversionFileUploader"
]
}
}
]
}
```
9. Final step to prepare Amazon S3 credentials. Navigate to the *Permissions* section in your bucket, click the *Edit* button in the *Bucket policy* field and paste the JSON from the previous step. Congratulations, after saving the changes, your configuration is ready to use!
 ## Enter Amazon S3 credentials to Qonversion
1. Navigate to the [Amazon S3](https://dash.qonversion.io/app/integration/create?name=amazon_s3) integration creation page.
## Enter Amazon S3 credentials to Qonversion
1. Navigate to the [Amazon S3](https://dash.qonversion.io/app/integration/create?name=amazon_s3) integration creation page.
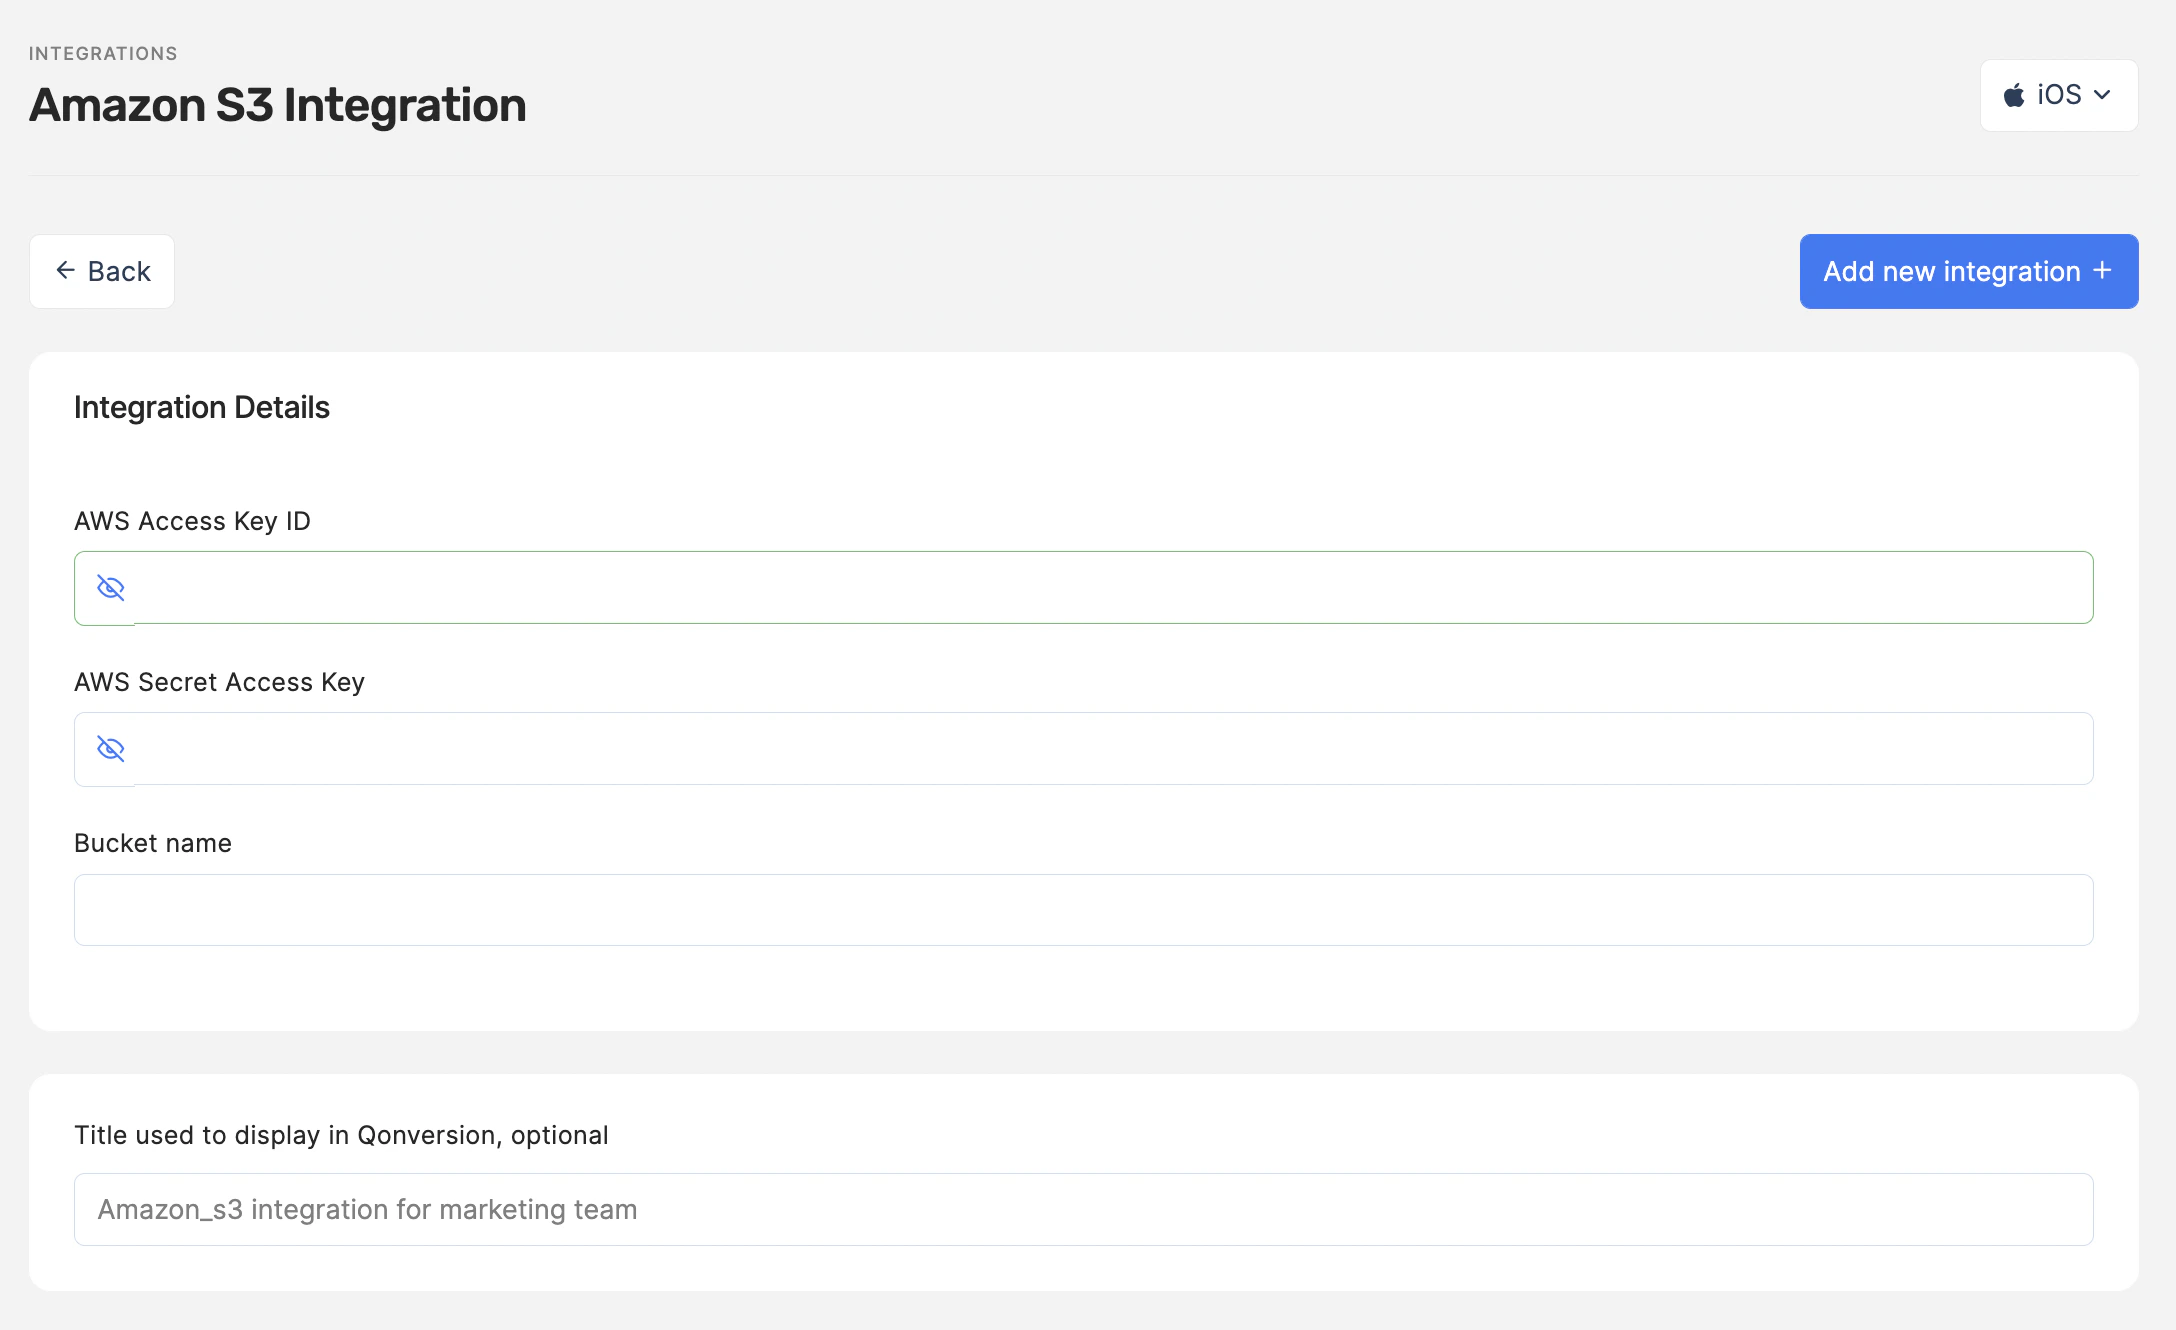 2. Enter *AWS Access Key ID*, *AWS Secret Access Key* and *Bucket name* to the corresponding fields
* You have gotten the *AWS Access Key ID* and *AWS Secret Access Key* values with the .csv file, downloaded during the 4th step in the *Prepare Amazon S3 credentials* section above.
* You have gotten the bucket's name during the 7th step in the *Prepare Amazon S3 credentials* section above.
3. Click *the Add new integration +* button
4. Congratulations! Now you have successfully connected the Amazon S3 bucket to Qonversion. Navigate to the [Scheduled reports section](scheduled-reports#amazon-s3) to launch report uploading to the bucket.
***
What’s Next
* [Scheduled Reports](scheduled-reports)
2. Enter *AWS Access Key ID*, *AWS Secret Access Key* and *Bucket name* to the corresponding fields
* You have gotten the *AWS Access Key ID* and *AWS Secret Access Key* values with the .csv file, downloaded during the 4th step in the *Prepare Amazon S3 credentials* section above.
* You have gotten the bucket's name during the 7th step in the *Prepare Amazon S3 credentials* section above.
3. Click *the Add new integration +* button
4. Congratulations! Now you have successfully connected the Amazon S3 bucket to Qonversion. Navigate to the [Scheduled reports section](scheduled-reports#amazon-s3) to launch report uploading to the bucket.
***
What’s Next
* [Scheduled Reports](scheduled-reports)